EBS-TechnologyEN
Installation, Architecture & Customization
Entersoft Business Suite® | Entersoft Expert® | Entersoft CRM®
Technical Reference Manual
Περιεχόμενα
- 1 Identity
- 2 Copyright
- 3 Aim
- 4
- 5 Installation & Architecture
- 5.1 Architectural model
- 5.2 SYSTEM INSTALLATION
- 5.2.1 MAIN STEPS
- 5.2.2 Entersoft Server and SQL Server installation
- 5.2.3 Application Server Installation
- 5.2.4 Client Installation
- 5.2.5 Database Installation (SQL Server Only Installation)
- 5.2.6 Full Uninstallation of the Application
- 5.2.7 CRM Standard Configuration Installation
- 5.2.8 Printer Installation
- 5.2.9 Tax Mechanism installation
- 5.2.10 Proposed infrastructure
- 5.2.11 Installation Folders - Shadowing
- 5.3 Software Activation
- 5.4 Version Upgrade
- 5.5 Entersoft Control Panel
- 6 Windows Forms Designer
- 7 User Privileges
- 8 Data Import Tools
- 8.1 Copy-Paste From Clipboard
- 8.2 Import From Excel Or Scroller
- 8.3 Advanced Import (ΕΜΙ)
- 8.3.1 Import Scenario Steps
- 8.3.2 Import from Any Source to a New (Temporary) Table
- 8.3.3 Import from Query to an Existing ES Table
- 8.3.4 Import from a Temporary Table to an Entity
- 8.3.5 Link to External Sources
- 8.3.6 Saving Temporary Files
- 8.3.7 Read Dbase Files
- 8.3.8 Recall a Scenario
- 8.3.9 Time Scheduling
- 8.4 Ready to Run Migration Scenarios From Other Systems
- 8.5 Import Documents From XML
- 8.6 Import From ‘Entersoft XML’
- 8.7 Copy Data from Company to Company
- 8.8 Import Stock Item Images
- 8.9 Import Attachments
- 8.10 Install Entersoft Packages
- 9 Synchronizing Branches
- 9.1 Head Office-Branch Customization
- 9.2 Synchronization Process
- 9.3 Retail Implementation Scenario Example
- 9.4 Automate Procedure
- 9.5 Troubleshooting
- 10 Systems Communication Management (Data Interchange)
- 11 Additional Functionality Customization
- 12 Management Tools (Administrator)
- 13 Technical & Programming Tools
Identity
Document version 1.0.2
Software version 3.8.x.x
Last Update May 2012
Copyright
© Copyright 2011 Entersoft S.A. All rights reserved.
No part of this work may be reproduced, transmitted, stored, or used in any form or by any means, without the prior written permission of the publisher.
Regarding the present content …
- It may be altered at any time.
- It serves exclusively informative goals.
- No guarantee whatsoever is handed out for the possible existence of mistakes or the wrongful use or non-wanted results produced by the use of processes hereby followed and recommended.
Aim
This manual aims at:
- understanding the architectural model and technical infrastructure of the system
- learning the installation, upgrade and maintenance procedures
- guiding through the definition of access rights procedure for the application’s users
- learning the tools for importing data from other systems
- providing technical information for the use of all auxiliary, technical, programming and other tools the system provides, in order to facilitate the development of further functionalities than those already being provided, for the independent configuration of each installation by technicians and implementation consultants.
- pointing out methods for expanding the system’s performance and providing references for optimizing functionality
Installation & Architecture
Architectural model
Entersoft Business Suite is a multi-tier architecture system.

Regardless of how the system is installed, there are always 3 unique levels which can coexist to one or located on different computers.
- Database level includes the SQL Server, where the relational database exists, which is used by the Entersoft system for managing data (Store-Retrieve Data).
- The next level is the Entersoft Application Server (EAS). It is responsible for providing the business functionality and services to any client application. Only EAS can communicate with the SQL Server to draw or store data. No other system application is allowed to have direct access to the SQL Server, besides EAS, for only it knows the functionality and rules governing the system in order to provide both the proper services as well as the correct and safe management of the database.
Entersoft Application server is launched in two ways:
Either as a Windows NT service which is installed and configured automatically by the Setup procedure (cd, msi).
Or as a Windows console application (ESSessionSrvConsole.EXE). The console option is very important, because it allows the activation of multiple EASs, even of different versions on the same computer (different ports). It is also a convenient way for the system’s configuration, for it can start and stop easily.
- Note that…
In a live installation, the service, not the console must be used.
This level includes the Entersoft E-Commerce Server (ECS), which manages and provides services for the Entersoft E-Commerce. This server doesn’t communicate directly with the database but with the EAS, in order to retrieve and store data like any other terminal station. Its installation is done separately from the original setup.
- The Entersoft Smart Client (ESC) is a usual client which connects and has access to all the services and functionalities the EAS provides. This client is the known Windows Form application (ESMainApp.EXE), which provides to the end-user, advanced technology forms and other components in order to interact with the system and perform daily procedures.
The ESC is connected with the EAS via a local TCP/IP connection or via Ethernet, Internet. Sending and receiving data is accomplished with the use of Binary format, with a highly efficient and compressed algorithm, designed by Entersoft especially for the client’s needs.
This allows the clients to communicate with the EAS even via low bandwidth communication channels (such as dialup, PSTN or GPS/3G) or via medium speed DSL connection.The ESC is connected with the EAS via a local TCP/IP connection or via Ethernet, Internet. Sending and receiving data is accomplished with the use of Binary format, with a highly efficient and compressed algorithm, designed by Entersoft especially for the client’s needs.
This allows the clients to communicate with the EAS even via low bandwidth communication channels (such as dialup, PSTN or GPS/3G) or via medium speed DSL connection.
This method of communication is more efficient than the use of a Terminal Server/Terminal client model and at least 10 to 20 times faster.
Any 3rd party application can connect to the EAS, using the same techniques and objects the Entersoft client uses. This is easily accomplished with the use of ESLightSession object, through which it can connect and gain access to all EAS’s functionality.
An Entersoft Application Server can connect to one or more SQL Servers and to one or more databases. This architecture is related to the Multi-Company, Multi Database functionality of the system. To connect each client to the Application Server, a Database, Company, Site and User credentials must be applied.
It should be noted that the system is tolerant to disconnections with the application server, since the connection is done only when required (disconnected model).
SYSTEM INSTALLATION
MAIN STEPS
The setup will start automatically when the DVD media is inserted in the drive. If “Windows Autorun” is disabled or you are installing the application from a local or network drive please double-click the file named “setup.hta” located in the root directory. You can change the language of the setup by clicking the appropriate icon

(both Greek and English are supported).
STEP 1 – Installation configuration
In this step, you will configure the installation of Entersoft Business Suite and Expert, specifying the operating system, the processor architecture and the product that you will install. The supported operating systems are Windows XP, Windows Server 2003, Windows Vista, Windows Server 2008 and Windows 7.
The DVD that you received may contain more than one product (for instance Business Suite EL02, Expert EL02), so you have to select the product that you want to install.

When you are deploying Entersoft Business Suite or Expert in your organization, you have to configure the SQL Server that your installation will use, the Entersoft Server(s) that will exist and their connectivity with the Entersoft Clients that will be installed. Therefore, you have to select the role that the computer will have in your installation. There are four different roles:


Entersoft Client (only the client software is installed)
Entersoft Server (the SQL Server is hosted in another computer)
Entersoft Server and SQL Server (the SQL Server is hosted in the same computer)
SQL Server Only (the Entersoft Server will be hosted in another computer and you want to restore the Startup - Zero and the Demo databases in a local SQL Server)
 ATTENTION!
If SQL Server is hosted in this workstation you can choose if you want to install Microsoft SQL Server Express Edition (in the DVD media you will find both 2005 and 2008 editions).
- If the SQL Server and the Entersoft Server will be hosted in different computers, then you will have to:
- Perform a SQL Server Only installation to the database server.
- Perform an Entersoft Server installation to your server(s).
- Perform an Entersoft Client installation to each of your workstations.
- If the SQL Server and the Entersoft Server will be hosted in the same computer, then you will have to:
- Perform an Entersoft Server and SQL Server installation to the server.
- Perform an Entersoft Client installation to each of your workstations.
STEP 2 – Installation prerequisites
In this step, you will install all the prerequisites needed for the installation of Entersoft Business Suite and Expert, depending on the selected configuration. You have to install every prerequisite in the proposed list (you can install it by clicking on the link). If a green checkmark appears next to a prerequisite, then this prerequisite has been installed and you do not have to install it again. If a prerequisite installation requires restart, then please restart your computer and return to the setup form. Your configuration will be saved so the next time you start your computer you will not have to configure your installation again.

If you chose to install Microsoft SQL Server Express Edition then a gray link “Configure SA Account” will appear next to the “Microsoft SQL Server” installation link. This link enables the user to specify a password for the SQL Server SA account (System Administrator). The default password is “esP@ssw0rd”. Entersoft STRONGLY recommends that you change the password of the SA account for security purposes. The password that you will enter may not be empty or contain the character ‘“’ (double quote). If you specify an invalid password then the password boxes will become red and you will not be able to install Microsoft SQL Server Express (you can reset the password by clicking “Reset”).

If you are installing SQL Server Express 2008 then you will have to install Windows PowerShell 1.0. Windows PowerShell 1.0 is preinstalled in Windows 7, included in Windows Server 2008 as an additional feature and is available as a separate download from Microsoft for the other operating systems (the Windows PowerShell 1.0 link points to the download page).


- How to Enable Windows PowerSh'ell in Windows Server 2008
The link “Windows PowerShell 1.0” will open Server Manager, and then you have to select the link “Features” that appears on the left. If Windows PowerShell does not appear in the installed features list, you can add it by selecting “Add Features”. In the list that opens, scroll down, select Windows PowerShell and then click “Next”. If you then click “Install” Windows PowerShell will be enabled.

STEP 3 – Entersoft Business Suite / Expert Installation
Before you proceed in this step, please make sure that you have installed all the proposed prerequisites. In this step, you will either install Entersoft Business Suite – Expert or restore the Zero-Startup and Demo databases of the selected product (if you selected SQL Server Only in the first step).

You can install the selected product by clicking the link on the bottom of the installation form. By clicking “Next”, you can start the installation of Entersoft Business Suite - Expert. During the setup, you will be requested to configure the application, depending on the computer role that you chose in the first step. If a UAC (User Account Control) message is shown, please accept it.
If you are reinstalling Entersoft Business Suite or Expert and all of the configuration files exist then you will not be requested to configure the application, as this configuration is assumed to be valid.
If a configuration step fails then a button named “Retry” appears next to the “Next” button, enabling you to re-run the configuration step and see if it was fixed. If you want to skip the error and proceed to the next step then click “Next”. If you want to change something in the configuration, you can use the Entersoft Control Panel after the installation is completed.


Entersoft Server and SQL Server installation
At first, you will be prompted to restore the Zero – Startup and Demo databases to a local SQL Server. The SQL Server Instance field lists all the local SQL Server instances that are registered in the system. The Data File (*.mdf) and Log File (*.ldf) fields show the path that the database files will be stored (by default these paths are the paths used from the selected SQL Server).
If the SQL Instance that you want to use is not listed in this box and you are sure that this instance exists in the computer that you are installing the software, then you can type it (a warning message will appear).
Please make sure that the instance that you typed exists, belongs to this computer and that the SQL Service is enabled and running, otherwise the restore of the backups will fail.

You will be prompted for a username and password for the SQL Server only if it is not accessible with Windows Authentication.
If the database exists already, you will be prompted whether you want to replace it.
After the restore of the backups, the setup will create the ESDBDef.xml file referencing the Zero-Startup and Demo databases that were restored in the previous step (you will not be prompted for this operation).

Next, you will specify the server name (or IP address) and the port that the Entersoft Clients will use to listen for connections (these settings are stored in ESClientConnect.xml and ES00Server.config). The proposed port is depending on the product that you are installing. If you want to change the default, please make sure that you enter the same port number during the Entersoft Client setup (otherwise you will have to change it via the Entersoft Control Panel).
In the next step, the Entersoft Client Add On (Crystal Reports) is copied from the installation media. This copy may take a minute or two (depending on network delays if you are installing from a network drive).

Finally, in the next step you will enter the serial number that you received from Entersoft. If you leave the serial number as is (all zero’s) then the application will enter the demo mode. Remember to activate your software if you enter your serial number in this step. Using the copy and paste buttons next to the serial number box, you can edit the serial number in a more comfortable manner.
When the installation is completed, two shortcuts will be created in the Start menu: one that launches Entersoft Business Suite (or Expert) and one that launches Entersoft Control Panel.


Application Server Installation
This type of installation is quite similar to the above one; in this case however we do not restore any databases. Before you install the Entersoft Server, please make sure that you have already performed the SQL Server Only installation; otherwise, you will have to configure the database connections manually through Entersoft Control Panel.

First, you are prompted to select the SQL Server that you have restored previously the Zero-Startup and Demo databases. The SQL Server field displays a list of all the SQL Servers located in the network (the list might take a few seconds to show all the servers, due to network delays).
Then you can select to connect either with Windows Authentication or SQL Authentication (but you will have to provide a username and a password for the connection). You can test the connection to make sure that a connection to the specified SQL Server could be established (you can move to the next step even if a connection could not be established). These settings are stored in ESDBDef.xml.

Next, you will specify the server name (or IP address) and the port that the Entersoft Clients will use to listen for connections (these settings are stored in ESClientConnect.xml and ES00Server.config). The proposed port is depending on the product that you are installing. If you want to change the default, please make sure that you enter the same port number during the Entersoft Client setup (otherwise you will have to change it via the Entersoft Control Panel).
In the next step, the Entersoft Client Add On (Crystal Reports) is copied from the installation media. This copy may take a minute or two (depending on network delays if you are installing from a network drive).
Finally, in the next step you will enter the serial number that you received from Entersoft. If you leave the serial number as is (all zero’s) then the application will enter the demo mode. Remember to activate your software if you enter your serial number in this step. Using the copy and paste buttons next to the serial number box, you can edit the serial number in a more comfortable manner.
When the installation is completed two shortcuts will be created in the Start Menu: one that launches Entersoft Business Suite (Expert) and one that launches Entersoft Control Panel.

Client Installation
This type of installation is quite simple; you will have to specify the server name and the port that the Entersoft Server listens for connections (these settings are stored in ESClientConnect.xml). The server name box lists all network computers identified by Windows. Please choose the server name (or IP address) of the Entersoft Server and the port number that you specified during the Entersoft Server installation and press “Next”.
Finally, the Entersoft Client Add On is copied from the installation source to the application directory and the installation is completed. This copy may take a minute or two (depending on network delays if you are installing from a network drive). Once the installation is completed, two shortcuts will be created in the Start Menu, one that launches Entersoft Business Suite (Expert) and one that launches Entersoft Control Panel).

Database Installation (SQL Server Only Installation)

You can install the Zero-Startup and the Demo databases by clicking the link on the bottom of the setup screen. If a UAC (User Account Control) message is shown, please accept. In the form that appears, you will be prompted to restore the Zero – Startup and Demo databases to a local SQL Server. The SQL Server Instance field lists all the local SQL Server instances that are registered in the system. The Data File (*.mdf) and Log File (*.ldf) fields show the path that the database files will be stored (by default these paths are the paths used from the selected SQL Server).
If the SQL Instance that you want to use is not listed in this box and you are sure that this instance exists in the computer that you are installing the software, then you can type it (a warning message will appear).
You will be prompted for a username and password for the SQL Server only if it is not accessible with Windows Authentication.
As long as the database installation takes place, the following progress bars is appearing:

If the database exists already, you will be prompted whether you want to replace it.
When the database restore is completed, you can close the application.


- Microsoft Distributed Transaction Coordinator
Depending on the configuration of Microsoft Distributed Transaction Coordinator, sometimes the Entersoft Server cannot connect to the SQL Server when they are hosted in different computers. The Entersoft Knowledge Base has three articles that help you configure the Microsoft Distributed Transaction Coordinator properly. You can view these articles either by searching for ‘DTC’ in Entersoft Knowledge Base or by following these links:
- How to Restore Manually the Database Backups of Entersoft Business Suite-Expert
If you want to restore the database backups manually (within the SQL Management Studio) then you have to navigate to the root directory of the installation source, and then inside the databases folder. In this folder, you will find three folders named EL, BG and RO.
If your product is BG01 (Entersoft Business Suite or Expert) then open the BG folder.
If your product is RO01 then you should open the RO folder, else open the EL folder.
In this folder, you will find two database backups, named ESEBSDemo (Demo Database) and ESEBSZero (Zero – Startup Database).
You will have to restore these backups and change the names of the databases that will be created to ESERPDemo and ESERPZero if you are installing Entersoft Business Suite or ESEXPDemo and ESEXPZero if you are installing Entersoft Expert, otherwise you will have to configure the ESDBDef.xml file through the Entersoft Control Panel.
Full Uninstallation of the Application
For a full Uninstallation of the application (e.g. Expert), the following actions should take place:
Uninstall from Control Panel
Entersoft\Expert\CSConfig dir
Start menu: Entersoft\Expert
Delete from registry HKEY_Local_Machine\Entersoft\Expert
Delete the database files
CRM Standard Configuration Installation
The installation of CRM’s standard configuration is done by the execution of an EMI file, named CRM_ZeroMigration_VX, where X stands for the current version of the tool, which is located in the installation folder at the area ...\ESMigration\ESCRMZero.
The EMI runs through menu “Tools and Configuration ->Import/Export data ->Import data (advanced mode)”. From this screen’s menu by selecting Files->Open, you may select the file and import steps are listed.


During the first steps, the data from the Access Database are imported to temporary tables and, next, to the CRM DB tables.

It is recommended to execute the above-described process occasionally, if any new customization elements are available.


Printer Installation
ESDM installation for crystal reports prints in a dot-matrix printer.
- ESDM is specified as the printer (printer with EPSON FX-1050 driver for Windows XP & Epson FX-980 for Vista) and
- Letter is specified as the paper size (8.5 in. X 11 in.)
For EVERY installation, in the workstations that prints audited print outs, you have to specify a printer named ESDM and EPSON FX-1050 driver for Windows XP & Epson FX-980 for Vista.
Entersoft Document Printer (PDF) Installation
There is the ability to create PDF files, for sending various prints from VIEWS, BITs, documents, etc. The installation is available at Tools & Configuration / System-Database Management / Install Entersoft PDF document printer. A Wizard appears where the install area is to be defined -the Entersoft folder is the default- as well as whether any user of the computer can use it or just the current one.

After successive “Next”, the installation begins with a progress bar indicator.

With the completion of the installation, an extra printer appears in Windows Printers, named ‘Entersoft Document Printer’ and with a defined port, also new EDP (Entersoft Document Printer).
Inside any VIEW, BIT, Documents etc. and, by selecting print preview on the toolbar, 2 extra icons appear regarding the PDF file type, save, and the delivery by e-mail.
By selecting “Save in Pdf“, the save folder of the PDF file is required and next a progress bar window appears:

By selecting “Send to Pdf”, the following progress bar window appears regarding the PDF’s creation:


Tax Mechanism installation
It is essential to install a tax mechanism for the document marking.
The EBS & Expert applications are cooperating with type A tax mechanisms. Entersoft is certified and has repeatedly installed in Laser & Dot-matrix the following mechanisms:
- CASIO FP-500, FP-600 & Proline 650 (CPi)*
- FMU PUNTO (MRS)
- SYNTHEX 700 (SYNTHEX)**
There are installation instructions for the above mechanisms in the Knowledge Base at the article QUE-00040. Other compatible mechanisms:
- SAMTEC SPS-4000 (Technoran)**
- MOBiLE EUROBOX (LogicData)**
- ALGOBOX (iCS)**
- X-CODE (Tax Code)
- CITIZEN SBOX (AMY)
* Specifically for FP600 you have to install Signature processor version 1.2.2 or later.
- They use the same Micrelec driver/software.
ATTENTION! Always check the digital copies and ask your company’s accountants to verify accuracy.
Proposed infrastructure
Server: >=2GB, >=2.8GHz (for 15-20 users)
On the installation server, we propose that there is at least a 2GB RAM and a 2.8GHz processor (for 15-20 users)
Client: 512ΜΒ >=2.0GHz
On the installation terminals, we propose that there is at least 512MB RAM and a 2.0GHZ processor.
64Kbps:1 User, 128Kbps: 3 Users, 384Kbps: ~10 Users
In the case where the free MS SQL Express has been installed, the following requirements must be met:
1 CPU (even if it has been installed on a terminal with multiple CPUS and RAM > 1 GB, the database system uses only 1)
1 GB RAM
4 GB Maximum DB size
Not supported Enterprise features: Analysis Services, Reporting Services, DTS, Notification Services
Installation Folders - Shadowing
ES/CSConfig It contains files that have the basic settings of the installation as well as the basic connection data. Specifically, the most import files are:
ESServerConfig.xml: In this file, the Port number is specified for the communication with the Application Server. It regards only the Application Server.
ESDBDef.xml: This file has settings regarding SQL Server and the databases managed by the Application Server. It regards only the Application Server.
ESClientConnect.xml: In the file, the Application Servers where the Client can connect are specified. It regards only the Client.
ES/CSFilters Scrollers (VIEWs)
ES/CSCubes OLAPs
ES/CSPrintForms Document forms-print preview
ES/CSLayouts Layouts (of documents, etc)
ES/CSODSRes Field definitions (EQUC, Historicity, etc)
ESMigration Typical migration scripts
ESMasterConfig Systemic field properties profiles, Document types, Transition scripts, Book measures in xml form for input in any company.
The folders whose name begins with ES contain files provided with the product, while those whose name begins with CS contain either the respective files (with the same name) like those having modified for each installation’s needs, or new files.
A scroller (VIEW), OLAP or BIT can be modified; therefore, it will be saved in the relevant CS folder. The same will occur if a whole new View or OLAP will be created (by “save as” or with the respective design tools). The change can be done to the server or be transferred to the workstations later, by the Custom Server Version Synchronization procedure or directly to the workstation.
In the first case, after we complete the changes, we select «Upgrade Custom Server Version « from Tools and Configuration/Check versions/Release Updates. A dialog appear, where in the field «Reasoning» you can give a description of this change, which will appear at the users at their next log-in. There is the setting «Mandatory Change», which if activated, will not allow the login from workstations, unless the synchronization is complete. Once all the information above is complete and the «Accept» button is pressed, the number of custom versions is informatively appearing.
During the next login in the application of each workstation, a message will appear, informing that a new custom version exists.
| If Mandatory Change ISN’T selected, at the dialog window there is a choice for the synchronization to occur at any time the uses wishes. | If Mandatory Change is selected, the only option available is «OK» and it is mandatory to complete synchronization and login to the application. |
|---|---|

|

|
In the first case, for the start of the synchronization the exit from the application is required, whilst in the second case, it shuts down automatically and a window appears where the progress of the procedure is appearing as well as the actions that are being carried out.

Copy (BACKUP) of this custom modification (meaning all the CS folders) can be taken from Tools/System-Database Management/Application files backup.
 NOTICE! This process is executed by the server
When a VIEW, OLAP or BIT is executed, firstly the corresponding file in the CS folder is sought and if not found, then it is sought in the corresponding ES file. This search is done in the server. If there is a file ONLY in the CS folder of the workstation, only then does the application read it from the workstation. Much caution is needed in these cases since, if a custom file is created with the same name as the name in the server, then by executing the application in the workstation, the workstation’s file will be ignored.
|
|
ATTENTION! |
|---|---|
| If you change a product VIEW, OLAP or BIT, then the file is automatically copied to the corresponding CS folder with the same name. This way, the ability to use any future transformations of this element is LOST. Therefore, it is suggested that any change of a ready-made VIEW, OLAP or BIT to be saved with a different code in order for its original form to exist in parallel. |
Software Activation
After the installation, it is required to activate the application. A prerequisite for this step is the provision by Entersoft Sales Department of a Serial Number that corresponds to the selected ES App modules. The activation must be done from the application server since the procedure «ties» the server with the computer (hardware).
The direct activation requires an internet connection (one-click operation). In the case where the server does not have internet access, the activation can take place in any workstation with an internet access and with a connection to that server. If there is no internet access at all, the activation can take place in two steps by the use of special files (Send a request activation file-Activate by file).
 From menu Help->About, a screen appears in which by selecting «Product User License...», a window appears to select the activation method.
- If there is an Internet connection, select «Activation over the Internet».
- If there is no Internet connection, follow the next steps.
- Select «Create file with activation application»
- Define the save area by pressing the icon

- «Accept» and the following message will appear: «The file containing the activation application was created successfully».
- Next, you have to send the file by email to the address sales@entersoft.gr
- Entersoft will send an .ans file by the same name
- For the conclusion of the activation, you have to select this time «Activation through file» where you select this file and by «Accept», the activation is accomplished.

In case of not activating, it is still possible for temporary access to the system, but for a limited time and with certain restrictions at the amount of data.
- The activation (and the serial number issue) is done PER application server.
- For activating new modules, you have to activate again, after communicating with Entersoft’s sales department.
- After a hardware change in the server, reactivation may be required (briefing from Entersoft sales department).
Version Upgrade
The Upgrade usually includes 4 steps:
- Download: The download of the new version must be done from the computer where the Application Server is installed. You can download it either by pressing the new version information popup or by the application menu (Tools\Version/Release updates\Download_Install new version). During the download, the application server can operate (it is not affected). If the download stops for any reason, the next time it will commence from the point it stopped.
- S/W Upgrade: After the download is successfully completed, confirmation is required to begin the new version installation. After the confirmation, the application server’s service stops automatically whereas that doesn’t happen in a console type where we have to stop it otherwise we will have a file access violation error message. The procedure is designed so that the download and installation can be completed in different steps. This means that that the installation can occur in a different moment than the download. In this case, when the procedure is executed again, the installation will commence automatically.
- Database Upgrade: After the successful installation of the new version, the next step is for the database or databases to upgrade at the new form. This is done by simply logging-in the application server (application) as an Entersoft administrator and selecting “yes” at the database update message that will appear. Of course, before that you have to start the application server either by the tray icon or by the services or as a console (ESSessionSRVConsole.exe). The database upgrade is designed so that in case of upgrade’s stop, it can continue from the point it stopped.
- Client Synchronization: The synchronization of the workstations starts automatically when the client tries to connect to the application server that has the new version.
- It is possible to install a version to a client without synchronization, a process described in an article at the knowledge base with code SYS-00033.
The versioning structure is as follows:
<Release>.<Major>.<minor>.<hotfix>
- Release (major new subsystems or major platform updates) every 2 years
- Major (major changes or incremental functionality) 1-2 per year
- Minor (improvements and new features) 1-2 per trimester
- Hot fix (if required for corrections and minor improvements) 1-2 per month
Entersoft Control Panel
 The Control Panel for an easy management of the applications’ parameter functionality is executed as an external function by the name ESConfig.exe.

You can select one of the three available ways of functionality
- Client
- Application server
- Application server and Base server
Each one of the functionality ways displays a different amount of options that can be executed and are described below:
Client:
- Application server connection settings
- Workstation synchronization
- Check installation files consistency and integrity
Application server:
In addition to the options in the case of client operation the following are supported
- Server settings
- Manage databases
- Serial number registration and license activation
- Operation in server console state
- Performance Monitor
- Entersoft Query Analyzer
Application server and Base server:
In addition to the operations available at the two preceding options, the operation of a backup restore at a local database server is also supported.
Windows Forms Designer
The windows form designer you can customize several application windows forms. The system has some predefined, non-editable forms (principally for entities that are used to customize the main business entities) and “dynamic” forms (such as that of the Inventory Item’s, the Sale Opportunity’s, the Contract’s, the Client’s etc) which can be modified, depending on the user requirements and needs. The default Document forms are “static”; however, dynamic forms can be defined at the document type level.
Form Structure
For each «entity», one or more data management forms (screens) can be designed. Each data management form is autonomous. This means that it manages only the elements of the specific entity, those the user can insert or modify, as well as those related to the entity (views, statistics, etc). The screen areas are:
- The horizontal toolbar
- The entity’s «identity» fields
- The «contents» hierarchical menu with VIEWS, OLAPS, BITs connected to the entity
- the main management areas of the entity’s data

The tool allows the customization of only the last («client») areas. Of course, you can insert toolbars in it (therefore avoiding the horizontal toolbar display), as well as subpages with VIEWS and consequently eliminate the need for the presence of a hierarchical «contents» selector.
The tool can be accessed:
By the menu “Tools and Configuration / Additional development tasks / Windows forms designer”
By pressing Ctrl-Shift-F8 when a dynamic form is active
Various designer options can be used for creating content and insert fields, titles, icons, virtual buttons, tab pages, grids with VIEW display in them, and also toolbars. All these comprise the controls of a data management form.
The Designer Interface
From the horizontal toolbar dialog that is called by the Windows forms designer (Tools and Configuration/Additional development tasks), we can select «New» or «Open» to create or respectively, open for change an existing form.

Creation
By selecting «New» we must:
- Define the Entity the form is about and we wish to create. All the entities, for which a dynamic data management form is supported, are displayed for selection (alphabetically).
- Insert a Code (use of Latin characters only is required)
- Select the suffix of the (Default=DEF, Quick = QCK etc) and finally
- Give a Title to the form which will be displayed in the «tab pages»

Save
The form will be saved in the CSDynamicForms folder as follows: [Entity Name]<_Form Code>_[Suffix]
- The [Entity Name] is automatically inserted by the application
- The <_Form Code> is not mandatory and is inserted by the user
- The _[Suffix] is mandatory and we can select one of the predefined suffixes (DEF, QCK, AUX1, AUX2, NOTE) or type another suffix.
In the example, we will have the form: CSDynamicForms\ESMMStockItem_Sales_DEF.
While saving there will be created or updated (if it already exists) the dynamic forms definition file ES00DynForms.xml in the CSConfig folder.
 Information about custom dynamic forms
Product forms are stored in the ESDynamicForms folder maintaining the above described folder structure. As long as a product form is modified, according to the general principals of Shadowing, the modified form is automatically transferred with the same name at the ESDynamicForms subfolder in the CSDynamicForms folder.
When we “Open” a form, the forms being designed for the specific installation or the product ones having been modified, that is the contents of “CSDynamicForms” are displayed with different Blue letters and with a the * character before their title

Publish to the Application Server
When we create or modify a form on a client, we can «Publish» (upload) the form at the application server with the corresponding option at the horizontal toolbar, in order for it to become available to the other users.
Properties
From «Properties» we can change the form Title, define the Display frame where the basic frame is suggested (as long as the dataset is about user Interaction, do the other options have a meaning) and finally we can define the Display of the form (Tab Page, Modal window or Modeless).

Actions
From «Actions», we can create a shortcut to call the form or its design directly from the shortcut list, to recreate menu/form tree in case we need to ask test/call form for the created form, in order to test the design result.
Also from Form administrator we can view, correct or delete forms.
In this dialog, by selecting «Actions» we can export forms in «package» form to send or use by another one, as well as to install from a package we have stored.
If there is a difference between the ES00DynForms.xml file and the form in the disk, the form will display in red color.


Form Design
The form is a space for inserting various «Controls». In the design screen on the left there is a menu of available elements-control and on the right, there are panels with accessories for elements’ modification.

Entity Fields
In the left panel, at the subpage «entity fields» we have the Dataset available with the chosen Entity’s fields. The fields are displayed in an alphabetical order and at the bottom part, we can see the Latin name of each field as well as its corresponding relationship. The entity «fields» are in essence controls with a default behavior.
For instance, by selecting the field/control «Trade account» we have the ability for drop-down search, with Shift-F3 etc.
Special Fields: These are special controls with predefined behavior. For instance, in a trade document, the liquidity account lines and the note lines are «special» controls. Another example of a special control is the Bindable Label where we can add parametric labels (read only).
Controls: Other controls.
Actions: In Actions there are available the actions and automations of an entity, for their addition to the form as Control Buttons executing specific functions.
Form Structure
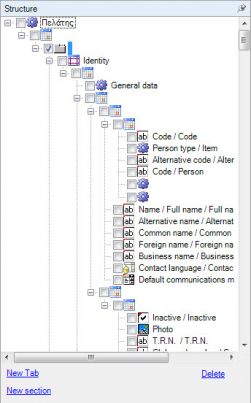
At the same panel, at the subpage «Structure» there is hierarchically displayed all the Controls already inserted in the form.

Design Logic
The form is separated in boxes/frames where the various controls are inserted (like HTML table). This way is easy to define. In essence, a grid system has been created, where in each «box» only one control can be inserted.
Initially we must underline that the same Form is the «Root» of the controls where there are defined some of its basic properties:
- If the typical horizontal toolbar will be displayed (DisplayToolbar)
 Its display position (ToolbarDocking) & ToolbarStyle.
- If the «banner» line will be displayed, with identity elements (DisplayBanner)

The default size of the form us defined by Entersoft in pixels (727; 600), a size we can change, in order to adjust the form to our preferences. The default size meets the standards for display at 1024x768 (resolution) without horizontal or vertical scrolling.
Initially, we select “New Section” from the Structure panel (container). With this action, a container is placed in the form which is consisted from a line and a column (a «box»). By selecting Add Row, Add Column in the panel Current Segment on the right, we can split this part in more boxes (lines/columns). This will result to have the necessary boxes to insert the desired fields. Each “section” we add is added at the hierarchical display of “Structure” and it is displayed as a “next level”.
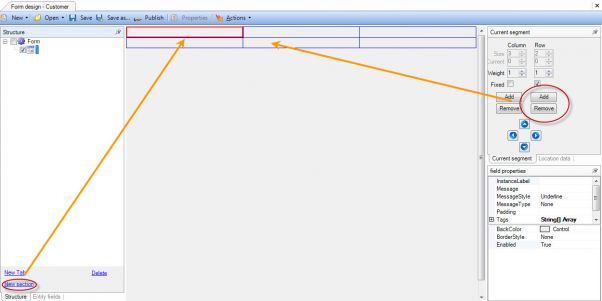
In the «Current segment» panel we see the Rows/Columns (Size) from which the section we are in is consisted and in «Current» we see the «coordinates» which are in the part of the box we are in.
The area split is done «fairly» in boxes with the same weight (size). If in some box we define that it will have different weight, then this box will have respectively different size compared to the rests of the same section.
If a Row or Column is set as «Fixed», this means that it will have a predefined size (for Row ~ 20 pixels and for Column ~ 10 pixels). If we set some Row or Column as «UnFixed», then this will take all the available form space.

Adding Controls
First, we select the «box» we wish to insert a control, then from the «Entity Fields» panel we select the control and double click to insert it in the selected «box».

Example
We split the area in 4 columns and 3 rows and we add at the 2nd row, from the Document Type special fields, the Series and in the 3rd from the entity fields, the trade account name. We Test/Call the Form to see what we have made so far.
For each control we insert in the form, we have available (in the «Location data « pane) information regarding the Control’s position in its section.

- We can resize/merge (to occupy more than one «boxes») and to move, in order to ensure the desired alignment.
- Also we can select multiple controls by selecting them (check) from the Structure Tree in order to move them all together.
- On the left side of each control, a label is displayed. By modulating or zeroing the LabelPad, the control takes corresponding space in the «box» it is contained, while the label will appear in next left «box».
Each control has properties defining its behavior, which are displayed and set in the “Field Properties” panel:
- We can change the InstanceLabel property to change or delete the label.
- We can set if a control is «ReadOnly» so we can see its contents without being able to change them
- We can set if it’s going to have drop-down search ability by changing the “VisibleContextButton” property.
- With the «Bindable Label» control, we can add in the form some text fields, by filling in the «Text» property. The text can dynamically change according to the value of another entity field, by setting the «BindingPath» Table.Field property.
- We can select a field from a related entity by filling in the «LinkFieldChild» property, the connector field (foreign key) e.g. fTradeAccountGID and in the «LinkFieldParent» property the field of the related (master) entity e.g. Name

As mentioned before, adding a Section is adding a control, therefore we can add in an existing «box» a «New Section», that is a nested section which will behave as a control (nested containers).

This way, we can manage the controls of a nested section in an «autonomous» way and set a different size or alignment for the controls of a nested section with regards to the main section.
We add to the initial section 5 rows and in a box, we add a New Section. We resize the nested section to occupy 4 rows & 5 columns. We insert controls and move the whole nested section. We Test/Call the form to see what we have made so far.

A very useful control is TAB Control, for we can add many «subpages», with every page having a different set of contents.


- First we prepare (resize, unfixed) the section we want to insert the ΤΑΒ
- We select this area («box»)
- From the form’s Structure panel we select «New Tab».
- From «Location Data» we can resize the Tab, in order to occupy the desired space.
By adding a Tab, a section is automatically added (1x1 unfixed) where the TAB is included inside of it as well as a Tab Page.
Inside the Tab page, we can now add a «New Section», split in boxes and add the desired controls.
At «Properties» for each Tab page, we can set the text shown as a page header by changing the InstanceLabel property. In addition, we can set the headers’ display position, by changing the TabStripAlignment property.


We add 2 new Rows to the initial section.
We make the last row of the initial section “Unfixed” in order to occupy the remaining rows of the form
We add a New TAB.
We add a section and make it UnFixed to occupy the whole available page space, in order to add some Control on lines/details of the document.
From special fields we add the «Cash» Control.
With Test/Call Form, we see that the «Cash» control behaves and has the same layout like the document lines (it is the same thing).
With the previously described way, we can add in a TAB new TAB Pages in order to add e.g. the Note lines control.
Parametric Search
From the «Field properties» panel, with the ShiftF3Params property, we can set the Shift-F3 search on a VIEW and the result of the search can be set on the field, where we set this ability. This is done by clicking on the ShiftF3Params property of the specific field:
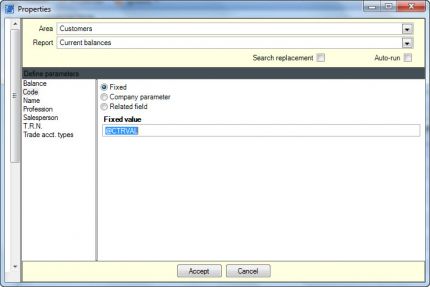
First we must select the VIEW Area and after the View that will be used for search. We can set if the report will Auto-run when we call it. Also, at the report parameters we can set proposed values. According to the options given, we can define as a proposed value:

- A «Fixed» («like»)
- A «Company parameter»
- An Entity Related Field (e.g. ADStringField1) or a Related Field based on a Relation e.g. Field: Name, Relation: FK_ESFIDocumentCash_ESFITradeAccount.
- The parameter @CTRLVAL with which we can «transfer», as a proposed criterion value, the data we have already typed on the field. E.g «Α*»
We can set a Shift-F3 search on a grid (lines) where we must initially select the line field where the search is going to take place.
Add the search ability on «Field1» of the Customer, when we enter the Customer’s name at the document’s header as a «Related Field « parameter (Name,FK_ESFIDocumentCash_ESFITradeAccount).
Related Views (Context)
It is possible to add a VIEW in a form section. For the VIEW to return results related to the Entity we are in, we have to customize the VIEW accordingly.
In the previous example, we can add a New TAB in which we can display the View “Balance Justification” for the trade account of the document.
We add an “UnFixed” New Section and from the special fields we select the «Related view» control.

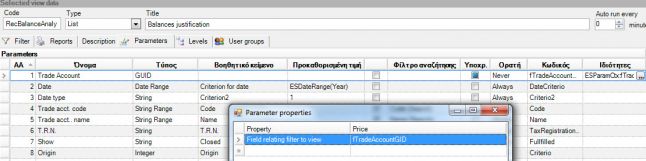
At the Control properties, we define the view area «AreaID» as well as the view code «FilterID». We can also define whether the view is executed automatically («AutoExecute») (attention at this point for performance penalty) and if the view’s toolbar will be displayed, with the property «VisibleToolbars».
The view must have as criterion the GID of the entity and in the view’s parameter, we must set for this GID a Property «Field relating filter to view» assigned with some entity field that calls the view e.g. fTradeAccountGID


Command Execution Toolbars
This toolbar is a special type of control designed in a way to lead to a group of buttons for running programmed commands. To insert such a toolbar in the form:
- First, we select the section in which we want it to appear and set the desired dimensions of this section. In this section we insert the special field «Toolbar Commands execution»
|
|
If we want the buttons’ size to remain stable whatever the screen resolution, we must take care that the section in which we insert the toolbar, to have a constant column/row «weight». |
|---|
The next step is to set the number of buttons the toolbar will have. For this setting, we select the toolbar and by right clicking, we display its actions menu. By calling the action «Add action panel», the toolbar’s setting window automatically appears. The setting of the number of buttons is done by intervening at the values of the fields number columns/rows.
At this point, we are ready to move on and insert buttons to the toolbar. The press of a button has always as a result the activation of one of the available application’s commands. Some of these commands have predefined functionality, while others are parametric and their functionality is defined while they are inserted in the toolbar. Let us see first, through an example, the process of adding a predefined functionality button.
Adding buttons of predefined functionality
Say that we want to make a toolbar containing buttons for moving and deleting lines. At the field «Actions Type» of the toolbar’s properties panel we select Actions Documents.
From the list of available actions we select «Move down», «Move up» and «Delete line» and by pressing the button «Add», we add them to the toolbar (mass selection of actions can be done with the use of Ctrl-click or Shift-click buttons). The positioning of the buttons is automatic, based on the order they appear in the list, but if we want to change a button’s position, all we have to do is select it and move it to its new position. Also, if we want to change one of its appearance properties (e.g. font) we select it and, from the toolbar’s properties panel, we make the desired alterations. For the changes to be visible, we press the «Update» button, whilst if we want the changes to apply at once to all the toolbar buttons, we press the button «Update all». Finally, if we want to change the size of a button we select it, adjust its width/height respectively and press the button «Update».
The exact same procedure is followed for any predefined functionality button. Let’s see now, through specific examples, the process of adding «parametric» buttons.
Toolbar-Items
Say we want to implement through a toolbar, a procedure of selecting items based on the following specifications.

Items ITEM 001, ITEM 002 και ITEM 003 are «popular» and there must be the ability of direct access to them by the user.
For all other items, the access must be done through a default tree based on their group/category with the exception of items of the VARIOUS group, for which the selection will be done by a list.
For GROUP 001 no categories are set, while GROUP 002 is split into CATEGORY 001 and CATEGORY 002.
For the implementation of this specific procedure of items selection, first we add 2 toolbars to the form. The 1st is for direct access items and the 2nd is for item groups.
To add direct access buttons to an item we select from «Actions type» General the action Item and by selecting «Add» 3 times, we add to the toolbar 3 new buttons. Next, and in order to connect the 1st button with the ITEM 001 item, we select the button and in the property «Action parameterization» we give the code of the item (the search ability is provided). Finally, to name the button, at the «Title» property we define a representative text (e.g. item description) and press «Update». The exact same process is followed for the next two direct access item buttons. The pressing of these buttons at the form’s operation, will result every time to the insertion of a line with the specific item. To add buttons for the item groups we select from «Actions type» All Groups the groups GROUP 001, GROUP 002 and VARIOUS and add them to the toolbar. At this point, the customization of the button regarding the VARIOUS groups is complete. Pressing this button will result to the display of a list with all the items of the group VARIOUS.
Based on specifications, the press of the button GROUP 001 should lead to a new toolbar which will contain all the group’s items. To define the display area of the new toolbar, first we type the key combination Ctrl+GROUP 001, hence the available toolbar-areas of the form are displayed and then we click at the wanted toolbar-area.
After this definition and by opening the toolbar properties actions panel, we see that 3 new action types have been added which regard exclusively GROUP 001. By selecting the value Items’ of Groups’ [GROUP 001] all the items of the specific group are displayed in the command list.
By selecting them all at once and pressing the «Add» button, we add them to the linked with button GROUP 001 toolbar. Because the adding of items’ buttons was done through selecting «named» items, there is already their connection with the relative items. At this point, we conclude the customization of the button regarding GROUP 001. Pressing this button will result at the display of a new toolbar with access buttons at the group’s items.
Finally, based on specifications, the pressing of the GROUP 002 button should lead to a new toolbar, which will contain the group’s categories.
To define the display are of the new toolbar, first we press the key combination Ctrl+GROUP 002 and after the available toolbar-areas are displayed, by clicking we select the same toolbar-area we inserted the GROUP 001 items toolbar in (a toolbar-area can host more than one toolbars). After this definition and by opening the properties actions panel of the toolbar, we see that three new action types have been inserted, regarding exclusively GROUP 002. By selecting the Categories of Groups’ [GROUP 002] the categories of this specific group are displayed in the command list, in our example, the commands CATEGORY 001 and CATEGORY 002. We select them both and insert them to the toolbar linked with the GROUP 002 button. The next step is to properly configure the CATEGORY buttons, in order their pressing to lead to a new toolbar, which will contain all the items of the specific group/category. For this configuration, we follow the exact same procedure with the configuration of GROUP 001 button. At this point, we conclude the configuration regarding the GROUP 002 button. Pressing this button will lead to a new toolbar display, with all the items of the specific category.


|
|
To simulate the behavior of buttons «GROUP 001» and «GROUP 002», in the form design environment, we press the key combination Ctrl+ related button. |
|---|
Other Controls
With «Keyboard Control», we can add a Numeric Pad.

Also, we can add «Digital Control» where in the «BindingPath» property we set which numeric/value field of the entity will be displayed as well as the control’s style. E.g.:
for the Payable amount ESFIDocumentTrade.CurrencyPayableAmount
for the Collection amount ESFIDocumentTrade.CurrencyAmountInHandTermAmount και
for the Change ESFIDocumentTrade.CurrencyTotalRest


Accessing a Dynamic Form
A dynamic form is accessible by various methods, in various system areas:
- By a shortcut
- By setting it at an entity VIEW’s Properties, in order for it to open with double click.
- By declaring in at a Complex VIEW (for instance from the CRM toolbar Work Space/Person management).
- By declaring it at a Document Type (in the document type’s field «Form code»), so all Views will call that from, except for the case where in this View another form is defined (QCK, DEF etc.)
- By declaring it at a Task (Task type) so all Views will call that form, except for the case where in this View another form is defined (QCK, DEF etc.)
User Privileges
Entersoft products support user privileges management for information access, to provide the biggest amount of possible security at a company’s data. There is general privileges customization as well as special privileges to entities or specific parts of the application like document series, budgets, documents, etc.
User Groups & Privileges
- Every user (besides “administrators”) belongs to at least one user group. The groups are defined in the relevant section of the user registration screen.

- User privileges include the total rights of the groups this user belongs to.
- The privileges are defined PER USER GROUP and are intercompany. If a user has different privileges at 2 companies, a 2nd user for the same person should be created.
General Privileges Customization
The setting of more privileges is done by the menu Tools/User privilege/Privilege definition, from where the following management screen is displayed:
 .
.
Protected Options
At the hierarchical data list, displayed in the privileges definition screen, there are all those options the system allows to be protected by a not wanted use/access. These are reports, OLAPs, BITs, entities, entities’ fields, tables, various periodic processes, actions, data actions and various customizations.
At the «ALL privilege items» node you can see all these options. At the rest of the nodes e.g. Commercial operation-Daily actions, Warehouses, Accounting, etc you can see all the protected options categorized so if wanted, to forbid or allow global modification. These are «protected data segments».


Privilege Types
For each protected data, the administrator can set the proper privileges. For each «segment», depending in what the choice is, the capabilities are as follows:
- Show-Execution
The show privilege makes sense for fields, Views, BITs, OLAPs, as well as entity forms. The execution privilege is about Actions/Procedures.

Import-Export
The Import privilege is about fields and entity forms, while the export privilege is about VIEWs, OLAPs and BITs.
Edit-Print
The edit privilege is about entities and fields, while the print privilege is about Views, OLAPs and BITs.
Delete
This privilege is about entities.
So, a user can see a report but has no export or print privileges or has access to a field at its original value, but not at changing its value etc.
Awarding Or Excluding Privileges
For each privilege, there is the ability to define YES, NO, yes, no and «null» value. Awarding is done with YES or yes and exclusion with NO or no.
But what do these values mean and what result does their definition have?

| It is the suggested value and it means that the role (user group)
DOES NOT HAVE this privilege, since nothing else has been specifically defined. |
This means that the role (user group) has been specifically defined as NOT HAVING this privilege. |
|
This means that the role (user group) has been specifically defined as HAVING this privilege. |
|
|---|
Limitations
No change is allowed in a «no» indication (which is «inherited», by a higher level definition)
No «null» definition is allowed, if a protected data ALREADY has a yes or no indication
The reason the system predicts so many values, is exactly because it allows the definition of privileges BOTH to «higher» AND «lower» levels. Therefore, a data can have either a specific defined privilege or a privilege «inherited» by a higher node.
Moreover, there is the chance a protected data for a user having more than one value due to user’s multiple roles. For each group the user belongs to (if more than one), different privileges may have been defined. This is the overlapping privileges or successive privileges phenomenon, which is solved with the following system default method:
NO/no «privilege items» prevail those of YES/yes
YES/yes «privilege items» prevail null
The user gets the privileges (and the «privilege items») of ALL its roles
To perform a task, NONE of its roles must define NO/no for this task and at the same time AT LEAST ONE role define YES/yes for this task.
R e c o m m e n d a t i o n s
There are certain rules to be followed in order to guarantee correct process of managing privileges, without errors and unexpected results:
Careful design of user roles.
For each role a YES definition to those data where it is wanted to have access in and «null» selection to all the rest. It is better to define YES at a «higher» level at the privileges group hierarchy, with no need for a NO definition at a «lower» level.
Avoid NO. Attention, for it prevails ANY other definition.
If the use of NO is necessary, it would be wise not to «interfere» with a YES at the same role (unless the role’s users do not have another role).
A special role can be created e.g. user group «cost data exclusion» and in this a NO to be defined for the tasks we want to exclude. Next, this group CAN be added to the desired users, in order to be clear FROM which role certain privileges are cut.
User Privileges List
For the information of each user’s privileges to be available, the system must «compute»,based on the above rules, a calculation process (relatively time consuming), which is called by Tools/User privilege/Update privilege list, or by the privilege definition dialog, from the toolbar:
The task is available from this dialog, in order to update every time we change the privileges. When the process is complete, we can view each user’s list of privileges by Tools/User privilege/List of privikeges, using various criteria.


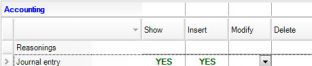
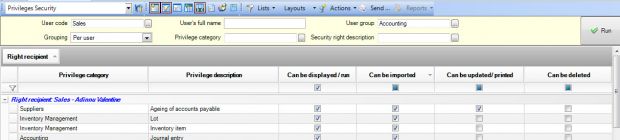
 If for instance, we set for the user group “Accounting” some certain privileges regarding some accounting action as pictured below:
…and next run the list of privileges, then, by executing the scroller “Privileges Security” with criterion an Accounting’s user, filtering the lines with privileges, there are displayed the privileges we have set before:


Specific Entities Privileges
Besides the privileges we define from the user Privilege administration menu, there are some privileges which are set for individual entities and specifically those regarding document series, transitions, tasks, budget sheets and attached documents.
Document-Transition Privileges
Document privileges are defined per document series.

In each series, the user groups are defined, as well as the actions they are allowed to do:

| Insert | Ability to insert document in the specific series in any way |
|---|---|
| Modify | Ability to modify document in the specific series |
| Delete | Ability to delete document in the specific series |
| Show | Ability to show document in the specific series, through Views or BITs |
| Insert from transition | Ability to insert document in the specific series only by transition and not directly. The selection has a meaning only when ‘Insert’ is unchecked. |
| Price/discount management | Ability to change prices or discounts. By this selection, we can give for instance, the ability to a user to change prices and discounts at purchase documents and not at sales documents. |
| Deletion of item’s line and item’s alteration | Ability to delete item’s line or item’s alteration. Applies in cases for instance, of accessory items when the ability for a user to delete or modify them is not wanted. |
| Cancellation of document entry | If this right is not set, then while the document registration screen is open, if by pressing 14x14px we select “No” at the message to save the modifications, the following prohibitive message displays:
By selecting «ΟΚ», we can conclude the action (closing the registration form without saving) only when the credentials of a user with the certain right are inserted, otherwise the document’s form remains open.
|


- Do we have to define user groups and rights to ALL series?
There is the ability of defining the behavior of user rights globally to document series, in order for someone to set ONLY rights that differ from the “general” behavior. At the general parameter «Default privilege control in document's series where sers groups are NOT defined» one can set:

- NO, which means that “everything not defined is ALLOWED” or
- YES, which means “everything not defined is PROHIBITED”
Given that in the DOCUMENT SERIES ATTRIBUTES there is the user groups list, by modifying series based on attributes we can mass award user groups to series whenever we want to differentiate rights:
- Initially we update the Series Attributes :


Then, from the document series list, we select “create document series” from “Actions”

At the 1st step of the opening dialog, we select the defined Attributes
At the next 2 steps we select the audited elements that correspond to document types we are going to update, as well as certain types that are not connected with audited elements.
At the final step we select UPDATE SERIES (not Create series)
The result will be for all the selected series to be updated based on the Attributes defined, therefore to get the privileges of the user groups, as defined in the Attributes.
For the other series (who DON’T have defined user groups) the general parameter will apply (access will be allowed or prohibited to all).

Activating lock excess per document type
User access to modification/deletion of documents is limited due to various logic and business rules the system includes e.g. closing fiscal period, posting, etc.
These limitations based on «User privilege profile», can:
- Expand; add additional mandatory prohibitions under conditions (e.g. lock of quantitative and value elements of documents that came from a transition or through Credit Control), beyond what the application provides.
- NOT apply for certain user groups or for all users, for ONLY some of their elements e.g. to be allowed to modify company dimensions or informative fields or the salesman etc while a finalization of the relative journal entries has occurred (wherever company dimensions are involved).
The profiles are set in the customization table (Documents and Series):

The documents’ data that will enable more customization rights per document TYPE, are divided in 9 categories:

- Official identification data
- Company dimensions
- Stock variations
- User defined fields
- Informative fields
- Salesperson-commission data
- Payment data in trade documents
- Cash flow data
- Special bonus accounts data
In the profile, we can set:
- In the 1st page (Restrictions excess), which user groups have access to what data category IF the document is “locked” from certain reasons (at this point we CANNOT select the 1st category- official identification data regarding quantities-values-dates etc). Depending on the data category, we can “unlock” for modification only a certain field e.g. Project or User definable field 1.
Releasing the field modification possibility that this definition provides, ends ONLY with the period’s “management information” fiscal period closing. Thus, even if the right to modify in retrospect some data of primary entries is given to some users, an “end date” can be set to this right, the period during which the fiscal closing will occur regarding M.I.S (Management information).


- In the 2nd page (Additional restrictions), for which user group it can be forbidden to modify under circumstances, some data categories even if the program allows the modification (at this point the 1st data category is available-official identification data). There is a “condition script” in which we can type the condition under which the restriction will apply, by using information exclusively from the document’s header e.g. transition step, transition state, user definable fields value etc. The expression management dialog with the available fields can be used (
 ).
).


- In the 3rd page (Apply in document types), in which document types this profile applies.
Finally, for each transition rule, the user groups that can execute them are defined, giving the ability of defining certain workflows, done by certain user groups.


Action-Task Privileges
In each task type, at the subpage «Access groups», we define in the same way the user groups that will have access to it, as well the certain privileges (show, modify, insert, delete):

Budget Sheet Privileges
About Budgets, there is a control and data protection process for EACH SHEET SEPARATELY. When a budget sheet is created at the subpage Privileges we can define both ( ):
):
- Which users have the right of authoring the budget
- Which user groups have the right controlling the budget (execution of the comparative results in budget sheets OLAP for the specific sheet)
 Regarding the definition of users being considered as sheet “authors”, we can define the “compilation supervisor”, the “pre-approval supervisor” and the “approval supervisor”.
A user can be supervisor at the same time for all, but only ONE user can be set as supervisor for each one of them.
 A time limit can be set per author (which means that until a certain date, all entries must be complete). The entry time frames are displayed in the «Marginal date» field at the budget sheet’s header (depending on the login user) and they are binding. So, each author can alter the sheet until this marginal date. If no time limit is specified, then there is no limitation.
Ordinary authors (from the moment they are set in a budget sheet at the author’s list, without being “supervisors” in any of the 3 provided columns) do not have access to any of the header’s field.
Supervisors have access to all the fields (until their time limit) except for the «status» field, which has certain rules depending on the role (supervisor type).

|
|
|---|
Deletion of a budget sheet can only be done if it is in an «Initial» status and by the user with the most important role. For instance, if there is an Approval Supervisor, only he can delete the sheet. If neither a Pre-approval Supervisor nor an Approval Supervisor has been set, then the Compilation Supervisor has the right to delete. If NO ONE is set as supervisor (Compilation, Approval, Pre-approval), then ordinary authors have FULL rights to the sheet (modify, delete).
In case a sheet is “closed”, NOT in an “Initial” status, and its marginal date has passed, it is NOT available for modification (a revision must take place).
 Finally, if NO user groups are set at the (right) list that are going to be able to run the comparative results in budget sheets OLAP, then, ALL user will have that privilege.
Attachment Privileges
Defining privileges at attached documents is done by the option classified privileges (Tools/User privilege).
 First, we must activate the ability of using classified privileges at attached documents like this:
We select from the horizontal dialog menu “Administration” the option classified tables, so at the appearing list we activate the table «Attachments».
From the same menu, by selecting “Search” we can recall a stored classification.
 In the Transaction types section, we must select “Attachments” as an entity and define for which attachment category that specific privilege classification will apply.
The options here are the values of the “Attachments Category” table field (their description) by which we characterize attachments. If this characterization is not set, we can select “all values”. However, it is important to be used, in order to set a classification only to those attachments that really need to be protected and not to all.
At the dialog section Segments we select the company’s departments, which will participate in the specific classification scenario (row level), as well as the department’s hierarchy. The two icons at the right toolbar do adding segments:
 
|
|
Adds a new independent section (of company’s structure). An independent section may or may not have subsections. |
|---|---|---|

|
|
Adds a new subsection (under the independent section) |
By activating a row in this list, the “Code” (not modified) and “Segment” fields are displayed.
In the dialog part Users-segment, we set the users belonging to each segment. A user can be “independent” or belong to one or more independent sections or subsections.
The assignment of an existing user or one of the available user groups in a segment, assumes that the segment is selected (marked) in the segment area.
Then, by selecting from the toolbar
it is transferred at the “User-segments” ή
it is removed from “User-segments”.
If the selection is about a user GROUP then, one by one all the users of the group will be added in the segment.
At the list of Available users, we can see at how many segments the users are set to belong.
The extra icons
(Add to new separate subsections) &
(Add to new separate sections) allow to set users in segments (at the “selected” segment level).


A very important distinction from all other control points of access rights is the fact that “system administrators” are involved to attachment access controls, in contrast to all other control points, where administrators have free access.
Therefore, these ones (as users) must ALSO be assigned to one or some segments, so it can be determined in turn, their access to certain attachments.
Finishing, from the horizontal menu “Administration”, we must save the classification profile.
Activating Classified Access
The activation of RLS (Row Level Security) at attachments is made only when in all existing (unclassified) attachments it is set the segment or segments which will have access to them (i.e. obtain classified access).
 This is made through VIEW “Attachments”, by selecting the attachments and running “Global classification assignment” from menu Actions.
If in some attachments it is set that a subsection has access in, then, they will be visible and manageable by this subsection’s users and by the main section’s users where the subsection belongs to (“supervisors”).
- If this task is not done, it will not be possible to save any record (e.g. at the company) that contains protected attachments.
Finally, the attachments’ classification can also be done by the subpage “Attachments” of the various application entities, by selecting
(Security Classification) from the vertical toolbar, for the selected attachments:


Data Import Tools
The application supports multiple ways of importing data either to registration forms or directly to the Database, from a simple copy-paste up to complex data import scripts (migration).
Copy-Paste From Clipboard
We can use this ability to easily import line data to a document for instance. The copy can be made either from another part of the application or from a simple text file (ASCII) or an excel file.


Especially useful is the ability to copy lines from a document to another: we select the lines and by right clicking, we select Copy.
 Next, in the other document (Attention! It must have the SAME layout) we
call (from “Actions” of the horizontal menu), “Insert lines from clipboard”.
The creation of new line immediately follows, at the item lines’ grid.
During the creation of new lines a progress bar dialog is displayed and a procedure completion message follows, either a successful or unsuccessful one (the relevant errors are displayed).
Import From Excel Or Scroller
It is about a simple data import mechanism for use in ONE table, usually in some entities (items, persons, etc). A standard use is the data export from a VIEW to an Excel sheet, making corrections, saving the Excel and finally, executing an EIM script for mass update or even import new entries.
The sources this mechanism can take data from are:
- Text
- Excel
- Clipboard
- Scroller
- Xml
Another use of this mechanism is importing lines to documents: the user prepares the header elements and mass imports lines from an external source (scroller, excel, text, etc) with an EIM script, for instance in procedures of:
- Stock picking
- Physical inventory
where the primary data originate from PDA or other mobile devices.
Customization Process
A prerequisite for the proper run of such functions is the source and layout definition by the option «Import from file customization....» from the menu Tools->Data Import/Export.
At the displayed dialog, there are 3 subpages:

General: Here we have to set the Source and the data Destination.
As Source, we select one of these: Text, Excel, Clipboard, Scroller (View) and DataSet (xml).

- If Text, Excel or DataSet is selected there is the ability to either define the file from which the script will take the data (as long as it has a standard name and position), or selecting it each time this script is executed.
- If a Scroller (View) is selected, it must be defined with the <GroupID>,<FilterID> form. For instance for the View “Negative Warehouse balances per day” we have to type ESMMStockItem.ItemNegativeBalances.
- If a DataSet is selected, besides setting the xml file, we have to define the table.
As Destination, we can select any Entity of the application.
More: This page is displayed only when as Source a Text, Excel or Clipboard is selected.
| Source selection | What is asked in «More» |
|---|---|
| Text | The file that describes the layout of the source file with the ability to manage it:
|
| Excel | The spreadsheet name and if the 1st line will be ignored in case it contains column names.
|
| Clipboard | The number of lines that must be received as no data exists, as well as if the first line should be ignored, as long as it contains column names.
|


Matching: In this page, we define the matching between Source and Destination fields.


There is the ability to view the import data in a scroller (VIEW) form, by selecting the preview icon . When the parameters are complete, we save the file to the disk.
Import Process Execution
The script’s execution is done by the option «Run import from file....» from menu Tools->Import/Export data
Import Document Lines from Excel Example
- Create an excel with the desired data

Import customization as shown at picture below, where we set as Source the excel file and as Destination “Item Line” entity.

At the “More” page we define the name of excel worksheet and activate the omission of the 1st line with the column names.

At the “Matching” page we define the matching of the excel fields with the item’s line fields.


Save the EIM file
Open the document in which the lines will be inserted and after completing the header data Import Lines from external source... (from “Actions”) select the EIM file.

The result is the excel lines are inserted as document lines and a process completion message is displayed.

SCROLLER (VIEW) Import Example
At the “General” page we select “Scroller” as a Source and as a name we set ESMMStockItem,ESMMStockItem, for the scroller “Inventory Items”. We set as Destination the table “Item Line”.

At the “Matching” page, the scroller must be executed from the Refresh button. With “Run” at the scroller’ s dialog, we return to the Matching page, where now all the scroller columns are displayed for matching.

We match the desired fields and save the EIM file.
Running the EIM at the document, from “Actions”, selecting Import Lines from external source..., the scroller appears, from which we select the desired lines and press “Accept”, so they are inserted as new lines in the document.


Advanced Import (ΕΜΙ)
Data Import with the tool examined in this part, allows us to use any kind of data «source» and to update any entity depicted in one or more Database tables like documents for instance. At the following diagram, we see the possible SOURCE and DESTINATION types that we are going to view later in data import scenarios:

The process is done from Import data (advanced mode) (menu Tools->Import/export data), through this dialog:

At the “Source space” field we define the root folder the import source files are located. Data can be inserted in multiple steps compiling a full scenario e.g. to import items, but first we have to import simple tables with their data, measurement units’ entities etc.
At the right toolbar, the following functions are available to manage the import steps:

|
Change of import scenario step turn (move up)
Change of import scenario step turn (move down) Addition of step Ability to compose an SQL script (at the opening dialog) for direct execution as an autonomous scenario step Ability to add the execution of an external application as a step, which is parameterized Deletion of the selected step Matching fields (from source to destination), details of which will be viewed later |
|---|
Import Scenario Steps
A data import scenario usually consists of discrete steps. First, the data source has to be decided (excel, access, other database, etc) and next the way the data are going to be imported in the application-if it is possible to directly import from source to destination (Entersoft tables) or if, a data import to a temporary table must occur in order for the data to be edited or for the values of the two areas (source-destination) to be matched, based on certain mapping (e.g. from an excel file containing the mapping).
In case a data import scenario ‘breaks’ in steps, special attention is needed to the execution row of these steps. The first steps must be the data import from other sources (txt, excel, access, etc) to temporary tables, as well as the import of temporary tables containing possible mappings between source and destination values. Next, before any basic entities are inserted, the ‘supplementary’ tables of the application need to be updated (grouping tables or other prerequisite tables) and then, in the next steps, the insert/update of entities.
For instance, in the ITEMS import scenario from Defacto application, we must first import data from Access to temporary tables (steps 29,31,33,35,37 –item zoom fields, MU - step 53 –item elements- ) and for each step, and update of the relevant application tables follows (steps 30,32,34,36,38)

Next, a temporary field for the VAT Categories matching is inserted (step 54) and finally, an insert at the entities “Inventory Item” and “General Items” follows it.
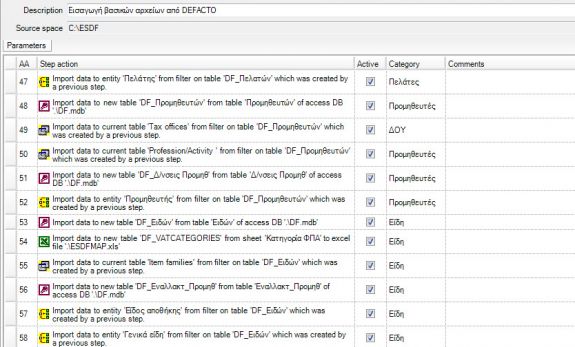
Next, we are going to see how each step is customized, what elements it can hold and which actions are made depending on each step’s type.
From the main tool screen, by selecting
‘Addition of step entry/update’ the following screen appears:

At this step, we select the destination, the table in which the import will take place. There are three options:


| New table | Define the name of the newly created table at this step execution |
|---|---|
| Existing table | Select an already existing database table |
| Entity | Select the entity in which the data will be inserted |
NOTICE : By selecting existing table the DB will be directly updated, while selecting entity will update the application, so the rules & controls of the «logical level» will be respected and the system will update the DB. This provides security regarding the stored data, but also ease, since only the absolutely necessary will be updated. Updating table is used for zoom field tables and in extreme case will the table be preffered over the entity and ONLY IF it is clear of what data are wanted.
In the next screen
the data source is asked depending on the selection at the first step.

Import from Any Source to a New (Temporary) Table
From Excel
If we select import from an Excel file, the following additional items are asked:

- Select the excel file & sheet.
- Confirm or Select the “columns data” depending on the creating table
- Activate the “Headers” option if the 1st line has column names
- Select to ignore empty excel entries, if any exist
- Automatically create column (a) Guid to create automatically a Guid column in the destination table for any row to be unique, (b) lot if we want line grouping.
From Access
If we select import from an Access file, the following additional items are asked:

- Select the mdb file and the table or view
- Confirm or Select the “columns data” depending on the creating table
- Activate the “Headers” option if the 1st line has column names
- Select to ignore empty excel entries, if any exist
- Automatically create column (a) Guid to create automatically a Guid column in the destination table for any row to be unique, (b) lot if we want line grouping.
From Link through OLEDB
 It is demanded the creation of a connection string from the opening dialog «Data link properties» and then the table selection is done,


- Confirm or Select the “columns data” depending on the creating table
- Select to ignore empty excel entries, if any exist
- Automatically create column (a) Guid to create automatically a Guid column in the destination table for any row to be unique, (b) lot if we want line grouping.
From a Database Table
A temporary table from a query is created to an existing login DB table (the scroller filter design tool is used).

From a Text File
There are two options in importing from a text file. Either for constant width file or field separator file.

In that case, defining the items if the source file is asked: location, date format, codification (windows, dos, utf-7, utf-8), decimal point.
Defining columns data is also needed. This action is necessary for setting which columns will be used. For those that will be used, we set a name, while for the others the name stays null. So in order not to import a column (to be ignored), all we have to do is erase its name.
At this point, there are some additional options available:


* Data type change:
|
|---|
| * Split a column in two: We highlight the field name we want to keep as a first column and press Εnter.
|
|---|
*  Merge 2 columns in 1: We select the column we want to merge with its next and use the relative button Merge 2 columns in 1: We select the column we want to merge with its next and use the relative button . .
|
| * Convert (EQUC): We select Convert, choosing how to convert the visual common letters. |


Import from Query to an Existing ES Table
If we have selected Existing table in the first step, we follow the next steps:
- Select an existing destination table (login database) for direct data import from another table or query. There is the ability of inserting only new lines or/and updating existing ones.
- Select a source (usually the temporary table created at a previous step) as displayed in the following screen, where the source type is necessarily “Database table” and a specific table has to be defined.

There is the ability of modifying, limiting the table’s data as well as adding extra fields through the filter design tool, from the button “Filter design”, which is activated by the “Filter” field (check box). The result (query) can be used as a source table.

- Matching columns (source destination). The value that can be given to a destination column is:
the content of a same type column from the source table
the content of source column copy
a fixed value
To check if a line is «real» (to update or insert a new one); we have to set the “identification password” (to one or more columns).


Import from a Temporary Table to an Entity
An ENTITY in the system is one or more tables, which are updated after applying a series of “domain” (business) system rules THROUGH the system (not directly in the Database).
If in the first step we have selected Entity, we select the entity from the entities’ list.

At the next step, in the “entity data” dialog, we select the source tables and their matching with the imported entity’s fields.
In the 1st row, the selected entity appears as the “destination” and we have to set:

- The source (an existing DB table) where by applying the filter
 we check the structure of columns-fields (the query’s result will be used as “source”) and we define whether an insert of new entities or/and update existing ones will occur (based on the identification password, defined at the next “matching” step).


The matching between source-destination. To check whether a line is actual (to update or insert a new entity), we have to set the identification key (one or more columns).


To add detail tables (insert master-detail entity), at the entity fields setting step, we have to:
Insert the new table by
 through the dialog “Add entity section”, where we select the desired table
 Set the source table at the source column
Check the filter design query
Define whether only insert of new entriyes or/and update existing ones will occur and if we want (at updating the entity) to delete non-existing source lines from the corresponding dialog settings.


 Match source-destination columns
Select at the «Sources relation», one or more columns to connect detail with master fields.

If the parts (details) have other parts, those can be inserted in the same way.
Link to External Sources
From the main data import scenario tool menu, there is the ability to link with external sources.

The following window appears with the following parameters for completion, in order to make the link:
Link name: Provided by the user for easy link recognition
OleDB provider: Selection between SQLOLEDB, Microsoft.Jet.OLEDB.4.0, MSDAORA
Data source: Selection of source (sql server). Defining the SQL User & Password and then selecting the database.
Supplier extra parameters: e.g. database schema
Data source connection settings: Select the database and set the user and key for the connection.
Show data source tables: Select the tables and by «apply link» (from the toolbar), view will be created in the BD from these tables (IMPV_).
After completing the parameters setup, there is the ability to save the link with «Save» for the case of reusing it.


Saving Temporary Files
There is a general parameter regarding the area in which the temporary files during the data import are stored and it is set when the application server and database server exist on different machines.

In the declared area:

- the application server must have WRITE rights and
- the database server must have READ rights.
Read Dbase Files
Since Dbase files are going to be used for the data import procedure, if in the computer there are installed applications using Borland Database Engine (BDE), we must run “Tools -maintenance/Read Dbase files / As ΟΕΜ” in order to set the proper Registry values for reading the Dbase files.
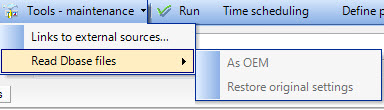

If the computer has the default settings, “As ΟΕΜ” option is inactive. With the “Restore original settings” option, the previous settings of the computer are restored.
Recall a Scenario
From the main tool’s menu, there is the ability of adding the current scenario in shortcuts:


Time Scheduling
From the main tool’s menu, there is the ability of time scheduling the scenario in order to run it periodically:


Ready to Run Migration Scenarios From Other Systems
To ease the data migration procedure from other applications, there are made some ready to use template import scenarios from the following systems:
| * Defacto | * Atlantis |
|---|---|
| * CLERP | * S1 |
| * Eurofasma | * SEN |
| * Kefalaio | * Control |
At the installation folder, in the folder ..\ESMigration\ the following scenarios exist (folders):
| ESEUF | ESDF | ESKEF | ESNTR | ESATL | ESSENtoNTR | ESS1toNTR | ESCTRLtoNTR | ESCL | ||
| Eurofasma | Defacto | Kefalaio | Excel | Atlantis | SEN | S1 | Control | CLERP | ||
| Master | Items | * | * | * | * | * | * | * | * | * |
| Clients | * | * | * | * | * | * | * | * | * | |
| Suppliers | * | * | * | * | * | * | * | * | * | |
| Debtors/ Creditors | * | * | * | * | ||||||
| Salesmen, Collectors | * | * | * | * | * | * | * | * | ||
| Persons | * | * | * | * | * | * | ||||
| Notes | * | * | * | * | * | |||||
| Fixed assets | * | * | * | * | * | * | ||||
| Chart of accounts | * | * | * | * | ||||||
| Series numbers | * | * | * | * | ||||||
| Lots | * | |||||||||
| Colours/Sizes | * | |||||||||
| Inventory | Clients without balance ageing | * | * | * | * | |||||
| Supp. without balance ageing | * | * | * | * | ||||||
| Items | * | * | * | * | * | |||||
| Clients with balance ageing | * | * | * | * | ||||||
| Suppliers with balance ageing | * | * | * | * | ||||||
| Notes | * | * | * | * | ||||||
| Fixed assets | * | * | * | * | * | |||||
| Accounting | * | * | ||||||||
| Lots | * | |||||||||
| Liquidity accounts | * | * | ||||||||
| Series numbers | * | |||||||||
| Colours/Sizes | * | |||||||||
| Entries | Clients | * | * | * | * | * | ||||
| Suppliers | * | * | * | * | ||||||
| Items | * | * | * | * | * | |||||
| Liquidity accounts forecasts | * | * | * | |||||||
| Series numbers | * | |||||||||
| Lots | * | |||||||||
| Colours/Sizes | * | |||||||||
| Notes | * | |||||||||
| Accounting documents | * | * | * | * | ||||||
| Other | Bills of materials-Tech. description | * | * | * | * | |||||
| Liquidity accounts | * |
| Symbols explanation: | * | Covered by the scenario |
|---|---|---|
| * | Not covered by this third application | |
| * | Covered by NEUTRAL scenario |
- The data migration procedure includes in summary the following steps:
- Creation and preparation of the ZeroDB database
- Copy of Necessary Files/Scenario Template for Migration
- Export data from previous application
- Determination of matching in EXCEL & Import data to EBS/Expert by EMI execution
- Check imported data by printing comparative reports from EBS/Expert and from the previous application.
- Adaptation of imported Master tables’ data, for better management of the new system’ capabilities.
Details:
- Creation and preparation of the ZeroDB database
We suggest installing the ZeroDB database, of the installation DVD, into a NEW database. This Database contains readymade customization, in order for the company’s operation to begin with an easy and quick way, when the proper needed adjustments are done as well as the data migration from the previous application.
Before we move to the next step, we have to make some customization actions, since the values of some parameters and elements may influence the data migration procedure. From the menu Tools/Customization:

 From the option “General”, from the 1st option «Companies/Branches/Fiscal Years» we have to set the Company data:

Setting data for the company identity and company’s «person». The company’s code can be modified by the option ”Change company code” (Tools/Maintenance tasks).
Opening Branches & Warehouses. At a next step, we have to match the defined warehouses, with those from the previous application.
Checking or Fiscal Year and Periods. We must check if there are other Years and Periods for the entries imported from the previous system and if not, they must be opened.
- From the option “General“, from the 2nd option, we have to check the Company parameters:
| Parameter | Explanation |
|---|---|
| Category GENERAL | |
| Replacement of person | If YES, then the person's data will be copied to the trade acct. when creating a new trade acct. with a link to an already existing person. NO is suggested. |
| Automatic catalogue items generation during import of new inventory item | If the value is YES, then each new inventory item automatically creates a new catalogue item (as long as it is not linked to an existing catalogue item). The catalogue item is created with the same code as the item and the same description. In catalogue item, we monitor alternative and accessory items, technical properties, etc and it would be wise to update them from the beginning. |
| Check TRN uniqueness in persons | Receives values 0: Not checked, 1: Upon confirmation 2: Restriction. The parameter defines the behavior in case where during the import of new trade account with simultaneous creation of new person, the T.R.N. assigned is already in use by a registered person. If value is 0 then no check is performed and the system allows registration of multiple persons with the same T.R.N., if value is 1, the system displays a warning message and if value is 2 the system does not allow the registration of a new person with the same T.R.N.
|
| Category GENERAL-SYSTEMIC | |
| Data migration temporary files area | In case the data migration procedure runs from a client it is important to set an area visible to both the Application and SQL Server accounts. |
- From the option “General“, from the 3re option, we set Segment sequences
We suggest NOT to set segment sequences for the imported entities, for it is possible the entity codes to be modified and there will be no matching to the previous codes. There is the ability to change the coding of the entities, after the import procedure is complete.
- From the option “Organization parameters”, in the 4th option, we set the Currencies.
It is necessary to confirm that ALL the currencies of the previous application exist and if not, they have to be created. At a next step, these currencies must be matched to those of the previous application.
- From the option “Inventory items”, in the 7th option, we set Measurement units.
We must check and create the measurement units, existing in the previous application. Attention is needed, in order to define the proper decimal points. At a next step, we will be asked to match the previous to the new Measurement Units.
- From the option “Document and series”, we have to set Series for the Open financial year documents.
We have to create series per Branch & Warehouse at the Open Financial Year Document Types that will be used for the data import. However, at the existing customization (ZeroDB), the used document types, have ALREADY activated the “Automatic series generation”, so at the creation of a document without a proper series, this will be automatically be created, in order for the import to continue uninterrupted.
As long as for the data import procedure we use Dbase file (e.g. Eurofasma scenario), if in the computer the procedure will be executed, there are installed applications using Borland Database Engine (BDE), we have to run “Tools / Read Dbase files / As ΟΕΜ” in order to set the proper Registry values for the reading of the Dbase files (from Import data (advanced mode)).
Copy of Necessary Files/Template Scenarios for Migration
It is NECESSARY to copy from the application folder ...\ESMigration those folders that are going to be used (ESEUF, ESKEF, ESDF, ESNTR, etc) into C:\ with the same folder names. Those folders contain the proper files, XLS for matching & EMI needed to run the process.
Export data from previous application
A set of reports is demanded for the relevant utility of the other application, in order to export the data.
Determination of matching in EXCEL & Import data to EBS/Expert by EMI execution
Data import to EBS/Expert is done by running the corresponding ”EMI” import scenarios. Before any EMI is executed, it is necessary to set the matching values at the following XLS files, contained in any scenario template:
Eurofasma => ESEUFMAP.xls
Neutral => ESNTRMap.xls
Kefalaio => KefMappings.xls
Defacto => ESDFMAP.xls & ESDLMAP.xls
Atlantis => ATL_To_EBS_Mappings.xls & TempMapTables.xls
The execution of each EMI is done by selecting «Open» from the menu “Files” of the Import scenarios dialog (Import data (advanced mode)). We select the proper EMI and press “Run”.

Regarding the scenarios using neutral tables (ESSENtoNTR, ESS1toNTR, ESCTRLtoNTR, ESXLStoNTR), the following steps are followed :
Creation of intermediate tables for matching and data import: Run at the EBS database in which the import will occur from query analyzer Create_NTR_Tables.sql (into the folder ESNTR), the script creates intermediate tables in the EBS database, which are used for matching and data import.
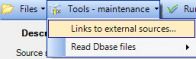 Connection with the relevant database of the previous application from the Import scenarios dialog “Tools-maintenance/Links to external sources”
 Data import to temporary tables and matching setup:


- Open the relevant EMI scenario
 Select only those steps with Category ‘Matching’ and Run
- Making the matching (Company, Branches, etc) with the icon
 .
. - Import Data for each correlation with the icon
 where in the ESCode column we select the correlated EBS code and then save.
 - Select the next steps and Run.


NOTICE: It is necessary to correlate Companies and Branches-Warehouses, since for the rest, as long as ESCode is null, there will open new entries at the new system.
Import entities from temporary (NRT) tables in EBS/Expert, by running the NTR2EBS.emi file from the folder ESNTR.
Check imported data by printing comparative reports from EBS/Export and from the previous application for checking (Agreements).
Adaptation of imported Master tables’ data, for better management of the new system capabilities (e.g. change of coding).
Import Documents From XML
There is the ability of easy data import from xml files, exported by any system, in which we can import documents (and at the same time customers-items if they do not exist) periodically.

First step is to Login in the Application Server. To accomplish that, we copy the file CSSyncConfig.xml into the subfolder CSConfig. This file contains the procedure parameters and the elements of the database in which the import will take place.
It is essential to have a timer, which is added in CSSyncConfig.xml and contains all the areas for the xml files, sets the period and a series of other parameters:
- UserID : User name
- Pwd : password
- DB : the database in which the import is running e.g. DEMO
- Company: Login company e.g. ES
- Branch : Login branch e.g. 001
- Interval : how many seconds the procedure is running
- Assm : FIIMPORTDOCS (running service’s name)
- Description : a description
- ID : FIDOCS
- Args : Parameters of importing files in the system
In the subfolder CSConfig the file FIDOCS.log is created where the reasons of a possible import failure are reported.
Second step is to place the xml files with the proper data (in the file previously set). The xml structure consists of a header with the header’s information and the details (document line, special account line).
Every XML file defines one trade document. The xml
structure is like that:
- Trade document header (ESFIDocumentTrade):
Mandatory fields for creating a document are the type, series and trade account. The rest fields can be eliminated and add any other document field.
- fADDocumentTypeGID Document type
- fADDocumentSeriesGID Document series
- fTradeAccountGID Trade account code
- fSalesPersonGID Salesman code
- ADNumber Document number
- ADReferenceCode Document reference code
- fShippingMethodCode Shipping method code
- PaymentAmount Payment amount
- fTradeAccountSiteGID Trade account site (as a string or GUID)
- fDeliverySiteGID Delivery site address (as a string or GUID)
- Trade document lines (ESFILineItem):
- fItemGID Item code (as a string)
- LineType Line type
- Quantity Quantity
- NetValue Net value in main currency
- Price Price
- Trade account (TradeAccount):
There is the ability to insert or modify a trade account. In “ESKEY”, we set the table name which correlates to the trade account entity (ESFITradeAccount) and with the field set in the Field attribute the matching is done. The options for completing the Field are:
- If ”Field” remains null or not imported at all, then depending on the value given at the header, in the field fTradeAccountGID (GUID or code) it will be searched if this code already exists in the table ESFITradeAccount (based on GID or Code).
- If a field name is provided at the “Field” (e.g. AlternativeCode), then the trade account given at the header will be searched at this field’s values. If located, then its fields will be updated with the XML values for the following fields, otherwise (if not located) it will be created.
<ESKEY> ESFITradeAccount
<FIELD>Code</FIELD>
</ESKEY>
- Code Trade account code
- Name Trade account name
- TaxRegistrationNumber Person T.R.N.
- SitesCode Branch site code
- SitesDescription Branch site description
- Address1 Branch site address 1
- Address2 Branch site address 2
- AlternativeCode Trade account alternative code
- fPostalCode Branch site postal code
- fCityCode Branch site city code
- Area Branch site area
- Telephone1 Branch site telephone 1
- Telephone2 Branch site telephone 2
- FaxNumber1 Branch site fax number 1
- FaxNumber2 Branch site fax number 2
- Type Trade account type (customer = 0 , supplier = 1, debtor = 2, creditor = 3
- Nature Trade account nature (Claims = 0 , Liabilities =1)
- Special account line (ESFILineSpecialAccount) (multiple discounts or/and charges)
- fSpecialAccountGID Special account
- SpecialAccountValue Main currency value
- Payment method line (ESFILinePaymentMethodTerm) (multiple payment methods)
- fPaymentMethodTermGID Payment method
- CurrencyAmount Amount or AmountPercentage : percentage
- NumberOfInstallments Number of instalments
SCENARIOS
- Creating a new inventory item
We must add at the document’s header the column CreateNewItem, where when giving it the 1 (true) value, then those inventory items that don’t exist will be created with the code given at the xml, measurement unit the value of the fMUCode column and VAT category the value of the fVATCategoryCode column.
Creating new note
We must add at the document’s header the column CreateNote and when giving it the 1 (true) value, then those notes not found, are created. Values can be given at notes’ fields by adding the “ESFINote_” prefix and the field’s name.
Activating only document Update
To activate this ability, we must add at the importing document the column IsPackingDocs and give it the 1 (true) value. The predefined search of a same document for its update is done based in the columns ADRegistrationDate, fADDocumentTypeGID, fADDocumentSeriesGID and fTradeAccountGID. Addition criteria may apply, by adding the column ExtraDocIdCols and giving it as a value the field names, divided by comma «,» based on the values with which the documents’ comparison is done.
Multiple document registration from a file
We can set multiple document headers with their relative line in one file. This is done if we set at the document header the column DocumentKey (a unique value for each header) and the column fDocumentKey for each document line in order to match the header top the lines. Failure of importing a document means failure or importing all documents of the file.
Extra information
- The search ability to another field besides Code (with ESKEY), functions as well as for the document type.
- By adding at the document’s header the field version with value 2, the reading of the fields is done based in the row the fields are given in the xml.
- In all foreign fields GUID or code are accepted as a value.
Import From ‘Entersoft XML’
There is the ability to import entities into the application from xml files, exported by the application itself.
The steps followed are:
- Save to xml
- In any entity from “Actions”
- In any scroller or BIT from “Send” into XML form
Import from Entersoft xml from Tools -> Import/Export data

First, we must declare the folder where the file(s) is/are and next, at the appearing dialog, we have to define if we wish to insert or/and update entries:
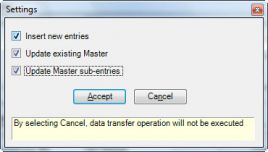
After insert, the xml files are deleted, therefore you have to keep copies if you wish to use them again.


Copy Data from Company to Company
There are 2 ways of copying data from company to company.
- From any scroller’s menu
 From any scroller, by selecting the lines we wish to transfer and from the menu Actions we select Copy to other companies.
Initially a dialog appears to select insert or/and update…

and next an option screen of the company IN WHICH the data will be transferred.
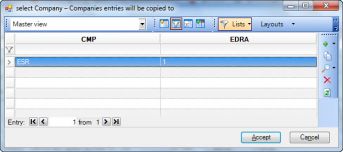

From the option “Copy elements”
Called from Tools -> Import/Export data


At the appearing screen, we select the tables transferred from the corresponding column
of each table as well as select the company IN WHICH they will be copied, from the option Companies/Select Company.
To run the process, we select Copy from Actions.


Import Stock Item Images
With this function, we can mass insert stock item images into the database.
 First, we have to create a folder in which we put all the importing images. Each image must have a proper name in order to match with the proper item. Next, we set the parameters of the process from the option Insert stock item images from “Tools -> Import/Export data”.
The necessary parameters to start the process are:
- Select language
- Replace existing snapshots
- Set specific image size (Width, Height) in pixels (optional parameter)
- Select the area where the snapshots are found
- Field in Items’ table containing the image names
The process is executed with the button .
.
A progress bar is displayed as well as a procedure completion message.
NOTICE! The images are connected with the items through catalogue items.
Import Attachments
With this functionality, we can mass import entries (attachments). They are all connected with the login company.
 The parameters of this process are set from the option Import entries from “Tools -> Import/Export data”:
- Define the folder where the imported attachments are
- Select if attachments found in subfolders of this folded, will be included.
- Select if the process will be executed in the Application Server (if selected, the folder must be visible from Application Server’s computer)
- Set document group and category (these categorizations will be set to all imported attachments)
- Set the type of attachments that will be considered (separated with «;») e.g. *.doc;*.xls or *.*
By pressing the “Run”, the process of importing attachments is complete. As long as the import takes place, a progress bar is displayed and a completion message follows.
Install Entersoft Packages
There is the ability to send or receive customization through packages.
Create (export) package
In a package, we store scroller or OLAP elements (from the homonymous option of the toolbar at the VIEW or OLAP definition dialog) with full information about the installation folder, with proper structure, in order for the recipient to directly install it.
By this option in a VIEW or OLAP, we are asked for the folder and the name of the *.espak file. If the file already exists, a screen dialog appears giving the ability of either replacing the file or adding a new scroller/OLAP to the existing file.
So, a package can include elements of many VIEWs and OLAPs.
Install (import) package
 To install a package we have to select «Install Entersoft packages» (Tools -> Import/Export data). At the appearing dialog, we select “Open”, so we select the folder and the package file (espak) we want to install.
 Then the contents of the file are displayed for selection, and we select (mark) that or those for insertion and select “Install” (again from menu “File”), therefore the installation is done.
NOTICE: Product VIEWs/OLAPs cannot be packaged.
Synchronizing Branches
It is the process of synchronizing two or more Databases in application level (and not on DB Replication level). Designed to serve in a parametric way:
- the uninterrupted function of a company in case the connection with the head office is cut in an online branch operation,
- the case where the branch is functioning autonomously (offline) and there is need to transfer data to the head office and
- for every possible case of data trade between Entersoft databases (e.g. franchise, salesmen)
The synchronization process is summarized to the following:
- Install local SQL Server & Application Server to the branch, which is connected to a local Database
- Recording of selected entities for synchronization to intermediate tables from the moment of module’s activation and during on-line/off-line function
- In case of communication interruption with centrals, connection to the local Application Server and DB and normal-continuous machine operation
- At connection restore, reconnection to main Application Server and transfer data to and from the Off-line point, via the intermediate tables (differences update at DBs):
- The data registered in the local DB will be transferred to the head office’s one
- The branch’s database will be updated with all current changes of the head office
Display Function

In case of failure to communicate with the central in online branch function, the following issues are raised:
1) failure to function the branch with simultaneous interruption of its entries’ vies by the head office
2) failure to update it for the central’s transactions or new entries
Head Office-Branch Customization
Technical Specifications of Remote Sites
To implement the synchronization, all the involved machines must have a standard IP address. It would also be wise the communication port to be different for each site to avoid conflicts. Also, at the branches we should:
Α) Install SQL Server or MSDE accordingly, depending on the number of users and the volume of data the branch needs to have.
Β) Install local database which has to be a copy of the main database at least regarding the main entities and customization. It is suggested to transfer the main database and then delete all document entries to avoid growing of database size.
The local database is suggested to be a copy of the main one, since data synchronization is based on the existence of common GID between master entities entries to both databases.
C) Install a local application (copy of main’s), as well as an application server.
D) Make proper settings in the CSConfig of the local installation, as described in Customization section.
Customize Databases & Companies
Company parameters
To make the synchronization, we have to set at company level which data will be synchronized. This customization is done per company.


| Changes to entities not synchronized by branches with head office are allowed | Set if clients can make changes to entities not synchronized by clients with head office (concerns only when installation type is branch). |
|---|---|
| Entities whose modifications are monitored in Head Office and forwarded to branches | Set the tables for which changes in server will be transferred to the clients. |
| Entities whose modifications are monitored in branches and forwarded to head office | Set the tables for which changes in clients will be transferred to the server. |
| Replication type | Installation type (server or client).
ATTENTION! While customizing, “Replication type” must be “Not at all” |
Setting Tables to Synchronize
For the synchronization to be launched, we must set at company level the tables whose data are registered for synchronization. As explained, there are two main categories of tables. Those the main server sends to the local instances & those the local instances send to the main server. The transferred tables must have the necessary information for the site to function in case it does not have on-line connection and for the main site to have a real view of each site. A good example is the following:
Tables which main server sends to local instances

Tables which local instances send to main server

Use of symbols in general parameters of setting entities for synchronization
Ζ All ZOOM tables will be synchronized
* All entities will be synchronized
-{Entity} Exclusion of certain entities e.g. *, -ESGLAccountingDocument means that all entities will be synchronized with the exception of Accounting Documents
Setting of Document Series for Synchronization
For the cases the Branch needs to operate in OFFLine mode, we have for each online series of the branch to open it respective offline series.
It must me mentioned that the 2nd series (offline) is essential in order to avoid problems with the series counting.
In addition, since some of the offline series are audited data, they have to be declared in the tax office.
Offline series must be customized like that:
| Offline link with head office | If activated in a series, then:
|

|
|---|---|---|
| Of course, for a series to be visible and available the known setting regarding users and their privileges, must apply. | ||
| Auto/Manual | It is ALWAYS suggested, that auto offline series, be modified to manual in the main site, in order to maintain the count of the synchronizing offline document. | |
| Replication | "Replication" setting regards whether the documents of that series will be transferred during synchronization.
For instance, if at the company parameters we have set to transfer from Branch to Head Office the Trade Documents (ESFIDocumentTrade) then, there will be transferred those trade documents whose series have this field activated ( | |


Main Database Transfer to Branch
After the customization of the main database is complete, we have to transfer it at the branches.
Entries reset
Then we can reset entries of the branch database (offline) per case.
Update Replication Type
At the general company parameters (category «Online-Offline») the parameter Replication type must be set:
Α) Head-office for the online database (GREEN Flag in Status Bar).
Β) Branch for the offline database (RED Flag in Status Bar).
This change must be the only difference in customization level, between the databases.
After the backup of the main database is complete, we have to directly set Replication Type to «Head-Office», in order to start and register changes at the online database.
Customization of Client/Offline Point
Files that must exist and be properly modified in the branch’s \CSCONFIG:
- Offline-ES00Server.config file
This file contains some changes from the standard application setup. There we must set the standard IP address of the local SQL Server at the point BindTo=" 127.0.0.1" as well as the local port, which must match the setting done at the offline-ESClientConnect file in the section of the local server.
- Offline-ESClientConnect.xml file
In this file, we have to set the connection with the main application server (online) but with the local one (in case where the branch must operate in offline mode).
For the main application server (online) we have to set its standard IP address, and for the local (offline) we can enter «127.0.0.1» with their relative ports.
<ESClientHostInfo>
<AppServerID>NET</AppServerID>
<AppServerDescr>NET</AppServerDescr>
<Host>192.168.1.5</Host>
<PortNumber>8091</PortNumber>
<Offline>LOCAL</Offline> (application server’s id the application will seek when connection is lost)
</ESClientHostInfo>
<ESClientHostInfo>
<AppServerID>LOCAL</AppServerID>
<AppServerDescr>LOCAL</AppServerDescr>
<Host>127.0.0.1</Host>
<PortNumber>8098</PortNumber>
</ESClientHostInfo>
- Offline-ESDBDEF.xml file
In this file, we have to set the local database.
<ESDB>
<Code>OFFLine</Code>
<Description>OFFLine</Description>
<Server>(local)</Server>
<Database>OFFLine</Database>
<DBUser>sa</DBUser>
<DBPasswd>c64CZ7uz4sI=</DBPasswd>
<WindowsAuth>false</WindowsAuth>
</ESDB>
The three files mentioned above, are the standard files we usually use. We add at their name the OFFLine- prefix and set them like that, in order during the client sync not to be shadowed by the server files. If the application sees files with those names, it reads those first and ignores the rest.
Handshake Customization
Handshake is the process of data transfer between online and offline databases.
The process is executed ALWAYS from the ONLINE Database, in which we have to make the following settings from the “Handshake….” (Tools/Application Server/System Synchronization) at the following dialog:
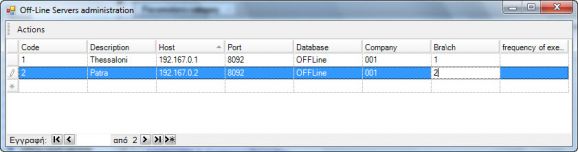
We have to make different entries per company and branch, by completing the following fields:

| Code & Description | Usually we enter a code & a description representative for the branch. |
|---|---|
| Host & Port | We enter the static IP and the branch’s port where the offline application server is running. |
| Database | We enter the offline database’s name as it is defined in the offline application server and specifically in CSConfig, in the file OFFline-ESDBDEF.xml. |
| Company | We enter the company’s code. |
| Branch | We enter the branch’s code |
Synchronization Process
During the synchronization process the following occur:
Events Registration
- In the Online Database (head office) are recorded in chronological order to the intermediate tableES00INBIN all the events that are happening in the entities defined at the parameter « Entities whose modifications are monitored in head office and forwarded to branches»
- In the Offline Database(υποκατάστημα) are recorded in chronological order to the intermediate table ES00OUTBIN all the events that are happening in the entities defined at the parameter « Entities whose modifications are monitored in branches and forwarded to head office»
The recording is done based on Timestamp (‘TS’ field see next) and not at the moment (‘SD’ field, which is informatory)
Handshake
The process of transferring data is run from “Tools/Επικοινωνία με τον εξυπηρετητή Application Server/System Synchronization/Handshake …” => Actions/Synchronization:
- Transfer of data from table ES00INBIN of the Online Database to the table ES00INBIN of the Offline Database
- Transfer of data from table ES00OUTBIN of the Offline Database to the table ES00OUTBIN of the Online Database
 From Handshake… => Actions/Settings, we set the following:
- Action: The row in which intermediate tables’ data will be transferred.
- Max Number of Entries: The number of entries from the intermediate tables transferred each time.
- Run vertically: First receive from all branches and then send to all branches.
- Automatic repeat: Repeat the handshake until the number of entries for transfer is complete.
Update from Incoming Synchronization Entries
After completing the handshake process, the data of the tables ES00OUTBIN for the online database and ES00INBIN for the offline database, will be inserted to the corresponding entities of the DB (from “Tools/Application Server/Systems synchronization/Update from incoming synchronization entries”). A list of entities for import is displayed, regarding the Login Company and Branch; they are selected and inserted as entities in the company.

Description of Process Tables
- ES00ΙNΒΙΝ & ES00OUTBIN
| GID | The GID of the line in the intermediate table. |
|---|---|
| XMLDat | The xml of the changing entity in blob data form. |
| Processed | This field has value 1 when the intermediate tables are updated and takes the value 0 when the step Update from incoming synchronization entries is successfully completed for each line. When entries take value 0 and at the same time, the column xmldat is Null that means that the entries are inserted. The only table that does not change value for processed and xmldat is not zeroed is ES00INBIN of the head office and that because, in it the primary information exists. |
| TS | Timestamp. This field contains in Binary forma the time moment an event occurred in order to keep a correct order of the entities’ import. |
| BranchID | Branch code. |
| SD | Information field for the time moment an event happened. |
| Description | Contains the description of the occurring change. |
| ObjectID | Entity |
| DSType | Dataset. That combined with ObjectID consist the Entity logic. |
| PK | GID of the importing entity |
| fCompanyCode | Company code (in intercompany entities e.g. for Persons this field takes the null value). |
| RelatedGID | This field exists only in the ES00INBIN table. It keeps the line GID of the ES00OUTBIT table, if the import in the online Database came originated from online/offline. Its reason of existence is not to transfer this line back to offline database, where it was originated. |
| CType | In this field the event type is kept. Its values are:
0=UNKNOWN
|
- ES00OFFLINE
In the ES00OFFLINE table are recorded per company and per branch, information such as the last date of receiving and sending data.
It is very important to know that then next synchronization will occur at a send/receive data bigger or equal to the last send/receive data, recorded in the ES00OFFLine table, for each company and branch (this time moment is set by the value in the RECEIVETS column).
In this table, one entry is created each time a handshake occurs, so it makes sense only at the ONLINE point.
- ES00OUTLOG
Each time a handshake occurs, data from the branch’s ES00OUTBIN will be transferred to the respective head office’s one. For capacity reasons, the branch ES00OUTBIN’s data are initially copied into ES00OUTLOG with the same values to all fields and next ES00OUTBIS empties. The only column not copied into ES00OUTLOG is XMLDat, where in there is the largest information amount.
Retail Implementation Scenario Example
New Branch Customization in Online Database
Open New Branch Site
Open New Liquidity account “Central Cashier’s Branch”, set as Automatic Payment
Open Branch User Group
Open Users and match them to Branch and Group
Set and administrator with access to the new branch
Set Group Privileges
Open Document series; Online & offline, normal & cancelling (e.g. for documents RIN, RCN)
Set at offline series «replication» & «offline link with head office»
Set user group
Set at the company parameters the entities transferred from head office to branches and vice versa
From Head Office to branch they will be synchronized Master Entities of Items, Trade Accounts and
From Branch to Head Office they will be synchronized Retail Documents and Trade Accounts
Backup online database for transfer to branch
Activate Replication Type Parameter: Head Office
Set in Handshake the new branch
Activate Timers for Handshake and Importing Entries’ Import
Branch Customization (Offline Database)
Restore backup as an Offline database (due to its size it may have to be restored in sqlserver).
Install EBS (setup installation and copy CS Folders from Head Office)
Settings in CSConfig files:
offline-ES00ServerConfig (set local IP)
offline-ESClientConnect (set local host an Online Application Server)
offline-ESDBDEF (set local database)
Login in Local/Offline database
Activate with new S/N local application server.
Run Company Write-off for offline database’s entries (Tools/Maintenance Tasks/ Company Write-off => NOT all data).
As long as in the Online database we have already installed an online/offline scenario, we delete from the OFF-Line database the following tables, from Query analyzer
Truncate Table ES00INBIN
Truncate Table ES00OUTBIN
Truncate Table ES00OUTLOG
Truncate Table ES00OFFLINE
Customize shortcuts of offline database in order to call documents with offline series
Activate Replication Type Parameter : Branch
Activate in offline-CSSyncConfig.xml of the Timer for Importing Incoming Entries
Automate Procedure
Handshake and Update from Incoming Synchronization Entries procedures can run automatically from the application in regular intervals through Timers.
Timers must be set at the files:
.. \ CSConfig \ CSSyncConfig.xml in the Application Server of Head Office
HANDSHAKE
ESIMPORTOUTBIN
.. \ CSConfig \ OFFLine-CSSyncConfig.xml in the Application Server if Offline points
ESIMPORTOUTBIN
In the offline point, Handshake makes no sense since the Head Office’s Application Server always executes it.
Timer Handshake
| <ESTimer> | |
|---|---|
|
Administrator User |
|
Password User |
|
Database Name |
|
Company Code |
|
Branch Code |
|
Time intervals in seconds |
|
Default for Handshake |
|
Description |
|
ID based which the log file is created |
| THE|esmaster|password|150|250</Args> | Connection parameters with Offline point |
|
False if procedure does not stop on error |
| </ESTimer> |
A log file is created into CSConfig of the application server, named by whatever we have set in <ID>, which is suggested to be in Latin characters.
If we set in the Interval the value «-1», the procedure is not run automatically.
In <Args> we can set eight parameters:
1. tcp://192.168.3.10:8091 IP and port
2. OFFLINE Database
3. 001 Company
4. 1 Branch
5. Esmaster Username (if null, takes logged in user’s username)
6. Password Corresponding password
7. 150 Max number of entries (Receive)
8. 250 Max number of entries (Send)
Timer EsimportOutbin
| <ESTimer> | |
|---|---|
|
Administrator User |
|
Password user |
|
Database Name |
|
Company Code |
|
Branch Name |
|
Time intervals in seconds |
|
Default for Handshake |
|
Description |
|
ID based which the log file is created |
| BranchID|100</Args> | Parameters |
|
False if procedure does not stop on error |
| </ESTimer> |
Here we see a typical entry in the CSSyncConfig.xml file of either the head office or the offline’s server.
This entry indicates that every 60 seconds the service (ESIMPORTOUTBIN) that checks “Incoming” will run and if it finds incoming synchronization entries, it updates them one by one.
In <ARGS> section, we have set 1|100.
The 1st argument (0) means ContinueOnError = false, i.e. if as the system processes the entries, one of them cannot be updated, the system will skip to the next one.
The 2nd argument (Branch) is optional and used when we want to filter the import of entries to the specific branch. This argument used only for Head office as, at Offline points, the processing includes all company’s entries anyway.
The 3rd argument (100) means that each time the service is running, it will process entries per 100 and not all at once. Therefore, if there are e.g. 2000 incoming synchronization entries, the service will process them per 100, without spending memory for 2000 but also without overloading the system.
Troubleshooting
- Possible problem
If in customization NO entities are set for synchronization, this will result into new entries being recorded without updating the intermediate tables for synchronization. These entries must be transferred to the other DB, with the same GID.
Solution by «Update from XML»
- At the Online installation, through a proper scroller we locate the master entries we want to export in order to update the offline installation. We run the scroller and select the needed entries (or, if we want all entries, we select none).
 From the scroller’s toolbar, we select <Send>. We select XML form and, depending on the needs, we choose «Selected lines only»
- We define the folder the XML files are saved and press Run.
- We TRANSFER to the OFFLINE Server
- We transfer the folder’s contents into the offline server we wish to update.
- Run Update Master Files from Export XML files from «Tools/Application Server/Systems synchronization» and locate the XML files’ folder from step 3.
- Select «Insert new entries» and «Update existing Master « and «Update Master sub- « and press OK.

The exact same procedure is used in case we want to transfer Master entries from the offline installation to the online one. The only thing that differs is the start and end point.
- Possible problem
Timer set in CSSyncConfig.xml is not running
Cause-Solution
- Check the messages in log file at CSConfig named after the timer’s <ID>
- If no log file exists, check whether the names of the files CSSyncConfig.xml & OFFLINE-CSSyncConfig.xml are correct.
- Check the above files if they contain Greek characters and change them to Latin or save the file with Encoding: UTF-8.
- Start the application server from DOS Prompt and check if it displays errors.
- Check event viewer for possible errors.
- Possible problem
Synchronization not running when process runs in Windows 2000 machine: TransactionAttribute.Isolation is not supported on the current platform.
Cause
In Windows 2000, Mode transaction Repeatable Read is NOT supported.
- Possible problem
Error on Import Incoming Synchronization Entries: «No changes allowed in entities not synchronized from branches to Head «
Cause - Solution
If head office sends an item deletion with “delete catalogue item” we change at the OFFLINE databases the parameter «Automatic catalogue item deletion if the last relevant item is deleted» to FALSE.
- Possible problem
At Handshake some entries between online and offline point, are not synchronized, while the intermediate tables contain non-transferred entries.
Cause - Solution
Check if Servers of Online and Offline points have the same date and hour settings.
Since in the ES00OFFLINE table is recorded the Time Stamp of the last synchronization (send & receive) per branch, due to time difference the following can happen: Say that the last Handshake is done at 2007-01-11 11:03 so the head office’s ES00OFFLINE table will be updated with the above Time Stamp. If the branch’s Server has e.g. -2min difference with the Head Office’s Server and after the Handshake an entry is recorded in the branch with Time 2007-01-11 11:01, this particular entry will not be transferred with the next Handshake.
Systems Communication Management (Data Interchange)
It is about the process of automated data INTERCHANGE between Entersoft Application Servers but also with other systems. It is called from the menu Tools...


A typical example of its use is the communication between head office and branches, so the branches send their orders and daily entries to head office and the head office send their invoiced orders and items-values to branches.
The interchanged data between systems are strictly in sequence order to ensure the row these are imported to the other side, and they are in text file form (fixed length ή delimited) to be readable by non-Entersoft systems as well.
Communication is achieved via WCF-services in order to be technically flexible the way nodes are connecting to the central (http, VPN, wshttp, net.tcp κ.λ.π) and no constant link is required. Finally, communication by e.g. e-mail or any other non-automated way (manually) is possible.
Whole management is central and split in four big sections:
Data Types Management
Concerns data exchanged between central and other system’s «data nodes»

Data Type Commands
It is about commands the system administrator can give to central as well as to other nodes. There is the ability to time schedule.

History Log
It is about the main monitoring console of systems’ communication and of various events.

Repair Data Type Execution
It is about repairing actions the communication system administrator can execute when needed.

Additional Functionality Customization
User Defined Fields
In many application parts, there are title-defined field, to serve needs the system does not initially provides. User defined fields are of five types:
- Date
- Number
- Flag (check box)
- Table (zoom)
- Comment (string)
 These fields are renamed (to describe exactly their purpose of use) from the option User defined fields (Tools/Customization/General). By selecting, all the user defined fields and tables of the application are displayed, where one can provide a new name to the column «Name», as well as a comment and a tooltip.
Henceforth, the field will have that name, in the entity forms (if there is a management form) as well as in the whole reporting system.


Given the ability of making management form according to our needs, we can insert at the desired place the user defined fields e.g. at the 1st form’s subpage.
If the change regards (like in the serial number’s example) a field belonging to only one entity/form, no further action is required.
But if this change regards a field which either itself corresponds to zoom table (like for instance horizontal dimensions «Dimension 1», «Dimension 2») or it’s displayed in many application entities by the same name (and meaning), then its name must change TO ALL TABLES.
To find more easily in which tables this field exists, the following should be done:
Right click on the screen of User Defined Fields -> Debug -> Global Grid Settings… and in the appearing window, activate «Filterable»:


By pressing «ΟΚ», the filter line appears, where in the column «Name» it is possible to select the seeking field e.g. Dimension 1.

In cases such of «Dimension 1» which is also a table, we must ALSO rename the Table:

The changes are stored in the file CSODSRes.xml and into the application folder CSODSRes.
Additional Entity Properties
Additional properties are fields dynamically added to entities, depending on which make sense to what entities, e.g. in items’ Category A we need the numeric fields X1, X2 which don’t make sense to items’ Category B, where we need the numeric fields Y1, Y2 and date fields Z1, Z2. In contrast with «user defined fields», additional properties are customized not only at their title, but also at their type, their possible and suggested values.
In entities like item, trade account, etc one can set a «user preference set» (additional properties group):


Based on customization, additional properties are displayed in a special subpage of the management form called «Additional properties»:

«User preference set» in various entities can be set by global modification.
The customization method is the following:
From «Tools/Customization/Organization parameters» we set then sum of additional properties in the option «Properties»:

Property types one can set are:
Numbers («number» is an integer, «decimal» takes decimals, «basic Currency value» takes decimals of basic currency)
Text (for fields like description, comments, etc)
 Date-Time (simple date, simple hour, field of date & time)
Predefined value options (Yes/No, Yes/No/I don’t know, Sex, Family status)
Option list with customization (from «properties sets» in the same menu) of the possible values, where in «option code» we set the code of each property, «value» a number 0,1,2 etc and a «code» and «description» for user selection.
 Code list where in «Additional elements» column we must give the CODE LIST NAME from which the user option is done:
Next, we can set «Properties categories». «Categories» are a simple grouping, according to which the new fields will be displayed in the subpage «additional properties».

 Finally, we create the «Properties options» (from the same menu) each one of which is a sum, a combination of properties added in entities (through User set preference field of each entity).
In sets, we define the RELATIONSHIP between properties Categories and Properties (in which category each property belongs), SUGGESTED VALUES etc.
With Insert or Double click to this list, the group definition screen is displayed:
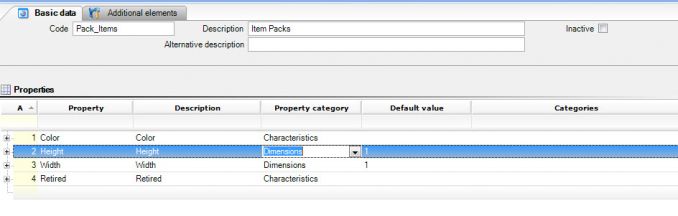
We insert the required properties, setting per line:


Property category, for automated grouping at the management form
Default vale, if wanted, that is the suggested value for the property
Finally, in additional properties, at the corresponding entity’s subpage, there is one more (not visible at first) column named «IsMandatory» (a mandatory field from the user). Depending on what is registered, this column can take 1=true value by a proper fields property:
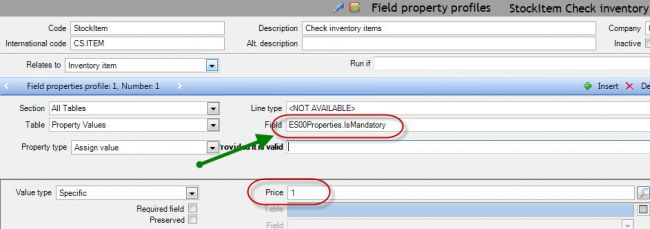
In the «Provided it is valid», we can type an expression, the condition by which completing a field is mandatory e.g. if the property is width, height and if the item is group X type etc.
 Finally, properties sets are defined in general parameters for some entities.
If in an entity which provides for property set per entry (item, trade account), this field is NOT complete, then the general parameter’s set group will apply:
After these customization actions, and at the next application login, the new fields (properties) are available to items, with the above functionality.


Field Property Profiles
Customizing Field Property Profiles allows:
- The implementation of checks (having as a result the display of a warning or forbidding message)
- The assignment of values in fields at an entity’s insert or update
- Setting some fields as required by the user
- The application approval process for updating a field’s value
In menu Tools/Customization, at the option Documents & Series, there is the option «Field property profiles», by which we can manage them.
Structure & Contents of Field Property Profiles
A field property profile’s form is split in three sections:


1st section: Basic profile elements

First, we set a code and description that must be understandable, regarding the profile’s functionality. The code is suggested to begin with CS to avoid problems with systemic field property profiles (possible convergence). The same code, copy it and to the mandatory field «International code». A basic element is the selection of the proper type this field property profile is about (about what entity). In all entities, besides documents, there is the field «Run if» in which we set those conditions which if satisfied, the profile will run.

2nd row : Command lines
Each profile can contain many functions/actions e.g. value assignments, checks, etc. Each command will be set in a different line. Each line concerns a specific dataset field of the entity (master or detail) we have selected. In each line:
- First, we set the «Table» of the entity the line’s field belongs to.
- In «Property type» we set if the specific profile line will Check, Assign Value or Change Approval Application.
- In «Field», we set the Field on which the specific line will apply.
- In «Provided it is valid» we type the condition (if needed) under which the specific profile command-line will be executed.
In case we have set in the property type «Check» then, a field will appear to set the displaying message, as well as if it is going to be a warning (if NOT activated, the message will be a forbidding one) or/and variable message (if in the message a VB expression is used combining verbal and dataset field values).

A variable message for instance in a field property profile checking at the item’s registration whether a retail price smaller than the wholesale price is given (by mistake), would have the following expression:
"Retail price "+RC("RetailPrice").tostring()+" is smaller than the wholesale price "+RC("Price").tostring()
The «provided it is valid» field in the case of message is necessary to complete.
If the message is a warning, it will simply appear as a tooltip with an indication next to the field:

If in the Property type we set Change approval application e.g. for changing a trade account’s pricelist we have to set who is the authorized user group that can approve the change.

The result will be, at trying to save the entity after changing the specific field, it will display a window like the one portrayed here, where we select the user from whom we ask approval and select «Request». If the change is approved, the save will continue, otherwise
it will not be allowed.If at the property type we set Assign value, besides the field in which a value will be assigned and its possible condition (at the Provided if valid):


We must select value type among those:
Specific if we want to give a specific value to the field
From table field, if we want the field to take a value from another dataset field, using the known field relations.

Expression, where we can set a vb expression to compute the field’s value.
We can activate the field «Required field», so the user will have to provide a value (different than NULL) in this field, otherwise saving cannot be complete.
We can activate the field «Preserved», so the user will not be able to change the value set by the field property profile (its content is preserved, even when null).
In case of value assignment, we have to set when the Assignment will take place. This is defined in the 3rd section.
3rd section : Event lines
In the third section, we set for each field property profile’s line, the event before or after which each line will be executed. It is available only in «Assign value» property type line.

The option «During initialization» (of data row) is used for default values assignment.

Each definition’s setting must be done following the row in which the fields are displayed in screen. Their placement is such to lead us in logical expressions.
Use of field property profiles is not limited only to documents but is also supported to other entities:
|
|
|
|---|---|---|
|
|
|
|
|
|
|
|
|
|
|
|
|
|
|
Commands & Functions for Use in Expressions
ES Functions
RowColumn (RC): Use of RC function returns the value of a field from the current line. Another use of RC is the retrieval of a field value not from the current column and field, but from the current row and field of another table, which is part of the current registration screen.
For instance, we could read the date of a document while a discount is recorded in an item line, in order to allow the use of discount if the date does not belong in discount season. We will type the following expression:
RC("ADRegistrationDate","ESFIDocumentTrade")
The first argument is the trade document’s field and the second is the table’s name from which we are going to read the value. The difference between using RC and ESLUFK (see below) is that value searching is not done in values recorded in the database, but in data recorded at the time of the value’s search.
ESLUFK function: This function is used when we want to find a value in a database table, connected with the value of a field from the current line. For instance, we want for the line’s item to find the item’s description. ESLUFK syntaxes:
ESLUFK(current line column name, destination table field name)
and for the above example where we look for the item’s description, we have to type:
ESLUFK("fItemGID","Description")
ESLUA function: We use this function when we want to find a value from the database using a line field’s value. It syntaxes:
ESLUA(‘line field name where we read the criterion value’, ‘sql expression to get the value’)
If for instance we want from a note line (ESFILineNote.GID) the value of the note’s field «Beneficiary» (ESFINote.fTargetAccountGID) we will type the following expression:
ESLUA("GID","SELECT ESFINote.fTargetAccountGID FROM ESFILineNote INNER JOIN ESFINote ON (ESFILineNote.fNoteGID = ESFINote.GID) WHERE ESFILineNote.GID = @ORGVAL")
In another case, where we ask the GID of the trade account (ESFITradeAccount) when its person’s code (fPersonCodeGID) matches the receipient’s (fDeliveryPersonGID) of the current line in the current company, we will type the following expression:
ESLUA("fDeliveryPersonGID", "SELECT TOP 1 GID FROM ESFITradeAccount WHERE fPersonCodeGID = @ORGVAL and fCompanyCode = ##(ESCOMPANY) ORDER BY Type")
ESParamValue : Returns values from the login session and from the company parameters, for instance:
ESParamValue(“ESBRANCH”)
ESParamValue(“ESBRANCHGID”)
ESParamValue(“ESUSER”)
ESParamValue(“ESCOMPANY”)
“User : “+ESParamValue(“ESUSER”) + “ Branch : “+ ESParamValue(“ESBRANCH”)
VB Scripting
Sqlscalar & String.Format: In many cases we need to search in the database to retrieve a value which its search is not just a lookup executed by a ESLUFK but it’s done only by running a query in the database, which (attention) must return ONLY ONE value. The command syntaxes:
SQLScalar(String.Format(“SELECT .... FROM ......WHERE πεδίο ='{0}' and field=’{1}’", RC(‘fieldname1’’), RC(‘fieldname2’’)) , Nothing).
To make the above more understandable, all we have to do is think how a database query would be executed with criteria from the current line. SQL query syntax is exactly the same we would type in any sql editor with the difference that here we have parameters like {0},{1}... etc, which during the query’s execution will be replaced by expressions that follow at the second argument in the Stringformat, with their displayed sequence. For instance:
SQLScalar(String.Format(“SELECT count(*)
FROM ESFIItemEntry AS ESFIItemEntry
WHERE (ESFIItemEntry.fTableField1Code = '{0}'and fDocumentGID<>'{1}'",
RC("fTableField1Code"),RC("fDocumentGID").tostring()),Nothing) >0
The above counts the number of item entries (ESFIItemEntry) which in the code of Table 1 (fTableField1Code) of the entry, have the same value with the value of the Table 1 from the current line (RC("fTableField1Code")), while the document (fDocumentGID) must NOT be the same with the current document (RC("fDocumentGID").tostring())).
Here it can help the building of the select, the use of the tool «report design», where after we have made the SQL statement we can copy it and use it in the expression.
Attention is needed in the use of SqlScalar at “Check” type property for the message to be displayed. In that case it would be wise to avoid its use, since that would result to constant server’s activity with queries that would decrease application’ speed.
Compare to Null – Set Null: If we want for instance, to check if the item code in a line item is complete, we would type the expression:
RC("fItemGID").Equals(System.DBNull.Value)
Logical expressions IF .. THEN…ELSE (IIF): To create such expressions we use the IIF function:
IIF(checked condition, action run if condition is true, action run if condition is not true)
E.g. if we want to create an expression that checks the ‘Price’ field’s value of the line item and inserts 10% discount if it is bigger than 100, otherwise insert 0%, we have to type in the value assignment expression for the field «Discount 1»:
IIF(RC("Price")>100,10,0)
tostring( ) function: Used we want to transform an expression type to text and syntaxes as:
Expression.tostring()
The advantage in using this function is that if the expression is null it always returns a null string, therefore we forestall problems which many times a created when comparing to null. E.g.:
RC("fitemGID").tostring()=’’
Transforming date to string (ToString("yyyy/MM/dd")): By using the CDate function, but needs attention.
CDate(RC("ADRegistrationDate").ToString("yyyy/MM/dd")
Here we transform the value of the date field «ADRegistrationDate» into string and we can use it in future expressions.
Date diffferences (DateDiff()): For instance:
As long as :
not rc("gid") is system.dbnull.value andalso not rc("adregistrationdate") is system.dbnull.value andalso not RC("DeliveryDueDate") is system.dbnull.value
Then:
datediff("d",rc("adregistrationdate"),RC("DeliveryDueDate"))
Examples
- Implementation of control “if item’s value bigger than 100 then variable message“:
Section Lines
Table Item line
Property type Check
Warning No
Line type Inventory item
Field Item
Provided it is RC("Price")>100 (the expression is created from the ‘ Create expression’ dialog and suggests from the current column and row RowColumn to read the Price field)
Expression-Message «Value is bigger than 100»
- Implementation of assignment “update item’s discount by 10 if its value is bigger than 100“:
Section Lines
Table Item line
Property type Assign value
Line type Inventory item
Field Discounts (here we set the assigned field)
Provided it is RC("Price")>100
Value type Specific
Price 10
And in the «Run when» section:
Type After field change
Table Item line
Field Price
- Implementation of assignment “update Amount 1 of the header with the client’s turnover“:
Section Head
Table Trade document
Property type Assign value
Field Amount 1
Provided it is Not rc("ftradeaccountgid") is system.dbnull.value
Value type Expression
Price ESLUA("ftradeaccountgid","select sum(esfiitemperiodics_turnover) as turnover from ESFIItemEntry_ESFIitemperiodics where ftradeaccountgid = @orgval and fcompanycode =##(escompany)")
And in the «Run when» 1 event, type «After field change» in the table «Trade document», Field «Trade account».
- Implementation of assignment “update Amount 1 of the header with the client’s turnover in the document’s Business unit“:
Section Header
Table Trade document
Property type Assign value
Field Amount 1
Provided it is Not rc("ftradeaccountgid") is system.dbnull.value andalso Not RC("fADBusinessUnitCode") is system.dbnull.value
Value type Expression
Price SQLScalar(String.Format("select sum(esfiitemperiodics_turnover) as turnover from ESFIItemEntry_ESFIitemperiodics where ftradeaccountgid = '{0}' and fBusinessUnitCode = '{1}' and fcompanycode =##(escompany)",rc("ftradeaccountgid"),rc("fadBusinessUnitCode")),nothing)
And in the «Run when» 2 events, «After field change» in the table «Trade document», Fields «Trade account» and «Business unit «.
- Implementation of assignment “update Amount 1 of the header with the client’s Turnover of the last 6 months in the document’s Business Unit“:
Section Header
Table Trade document
Property type Assign value
Field Amount 1
Provided it is Not rc("ftradeaccountgid") is system.dbnull.value andalso Not RC("fADBusinessUnitCode") is system.dbnull.value andalso not rc("ADRegistrationDate") is system.dbnull.value
Value type Expression
Price SQLscalar(string.format("select sum(esfiitemperiodics_turnover) as turnover from ESFIItemEntry_ESFIitemperiodics where ftradeaccountgid = '{0}' and fdocumentgid <> '{1}' and RegistrationDate <= '{2}' and RegistrationDate>= '{3}' and fBusinessUnitCode = '{4}' and fcompanycode = ##(ESCOMPANY)", RC("fTradeAccountGID").tostring, rc("GID"), format(RC("ADRegistrationDate"),"yyyy/MM/dd"),format(dateadd("m",-6, RC("ADRegistrationDate")), "yyyy/MM/dd"),RC("fADBusinessUnitCode")),nothing)
And in the «Run when» 3 events, «After field change» in the table «Trade document», Fields «Trade account», «Business unit « and «Registration date».
Explaining Some Ready-Made Examples
Next are explained some functionalities, implemented in customization level at the available (in “master config”) field property profile ES-4-STCOUNT-SPOT:
- On line 11 of the expression we have:
RC( "UDFValue2","SI_Analysis")
Here it’s described a behavior in the line item analysis, connected to an item line (LineItem) with the internal relation SI_Analysis and we ask for the value of a field (UDFValue2)
- On line 8 in the expression we have:
"The item "+ ESLUFK("fItemGID","Code")+" demands entering size."
Here we have the case of using a variable message consisting from the item’s code ESLUFK("fItemGID","Code") and the combination of some text.
- On line 10 in the expression we have:
ctype(_dr.table.dataset.tables("ESMMLineItemAnalysis").select(string.format ("fMasterLineItemGID='{0}'",RC("GID").tostring()))(0),datarow)("NumericField4")
The above is a special case of an expression, that looks like a visual basic code. It returns the value of numeric field 4 (NumericField4) of that moment in the 1st (0) row of the line item analysis table (ESMMLineItemAnalysis) with baseline (fMasterLineItemGID) the current item line (LineItem).
- On line 3 in the expression we have:
IIF(RC("StringField1").tostring() ="1", RC("UDFValue1"), IIF(RC("StringField1").tostring()="2",RC("UDFValue2"),RC("UDFValue3"))) - RC("UDFValue4")
Here we have an IF..Then..Else... case, translated as following: if string field1 has price 1 then value1 else if string field1 has price 2 then value2, else value3
- On line 1 in the expression we have:
SQLScalar(String.Format(“SELECT isnull(sum(isnull
(ESFIItemCurrentBalances.DebitQty,0) - isnull
(ESFIItemCurrentBalances.CreditQty,0)),0) FROM ESFIItemCurrentBalances WHERE
ESFIItemCurrentBalances.fCompanyCode = ##(ESCOMPANY) AND
ESFIItemCurrentBalances.fWareHouseGID='{0}'AND
ESFIItemCurrentBalances.fItemGID='{1}'",RC( "fWareHouseGID"),RC
( "fItemGID")),Nothing)
Saves in Amount1 of the line, the item’s current balance.
Αdvanced Scripting
For experts of the programming model ADO.net, it is available an internal variable named _dr type datarow, by which becomes available the whole entity’s dataset through our current datarow. This means we can manage data not necessarily stored in the database. For instance:
Assign the sum of Inventory Item line’s Quantity into document’s header:
_dr.Table.Dataset.Tables("ESFILineItem").compute("SUM(Quantity)","LineType=6")
Check if there are inventory item lines (LineType = 6) :
(_dr.Table.DataSet.Tables("ESFILineItem").Select(String.Format("LineType=6")).length >0)
Check if the document is in Insert state:
not rc("gid").equals(system.dbnull.value) andalso _dr.rowstate.equals(datarowstate.added)
Check if the document is in Update state:
not rc("gid").equals(system.dbnull.value) andalso _dr.rowstate.equals(datarowstate.modified)
Design Methodology
To design a field property profile it would be wise to follow some steps for its easier syntax and early error detection.
- Initially we have to design expressions and check them separately for their consistency.
- Next, we have to set the execution conditions of the specific check/assignment/approval.
- Then, we have to define the events, which will be set, for each assignment to occur in time.
- After that, we have to decide the proper logic sequence of the assignments (some assignments may require some others)
- Finally, we have to compose a whole, logical, functional plan to perform the whole expected functionality.
All design parts (expressions, conditions) must be gradually-separately checked.
Highlights
Automations
Target – Function
- Used for automatic creation or update or deletion of one or more entity entries based in one or more source entity entries.
- They set at least one map profile based on which we can create or update an entry.
- Called by a form (with a virtual button or menu action) or by a scroller, with the ability of scheduling in case of a scroller.
- They define whether the created entries will appear in a window or their execution will be UI less
Automation Types
Form automations
Source: Entity
Report automations Insert
Source: Result set (entries) of report Update
 Map profile

Source: Entity or Report
Targetν may be the Source for Targetn+1
Form automations have as source an entity’s entry and are called from the entity’s display form. Based in the data of the source entity, the user can through the automation tool, create or update the target entity (e.g. from a sales opportunity to make a sales offer). Next, the created entity can be used as a source for the creation or update of an entry if this is desired (Target T1 ◊ Target T2).
In addition, form automation can be self-applied; update the same entity by which is called. In such an implementation, the target entity is the source in and in this case we do not need to set the target entity but it is automatically selected, as long as we set that, the automation is self-applied.
For report automations, the same as in form automation apply, with the only difference that as a source we have the report’s result.
Data map profiles are automatically called by the subsystem that uses them. Wide usage is done by Entersoft CRM (task templates, sub tasks’ map profiles) and by Entersoft E-Commerce (Order from the Internet etc). Their special characteristic is that as their source we can use either a report or an entity entry (dataset).
The automation design tool is called by the option Automations in Tools/Additional development tasks. From there we can design new automations. For checking or updating an existing automation, all we have to do is at their call point (menu Automations
in the horizontal toolbar of the form or report) to press Shift+Click on the automation we are interested in.

Implementation Examples
 Form automation

Create document from customer’s form
- Create New automation from New => Form automation
- Select Source entity
 Automation title
- Select icon
 Activate new line
  in the allocation scheme area
 Select target entity
- Choose assignments:
- Document type


=> Fixed: SOR
- Trade account
=> Field: GID
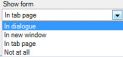 Save automation

There is the ability to display or not the window of the produced entity:
Form automations are stored into CSFormCommands folder.
Additional parameters
Auto save source before command execution: the source entity is saved before the execution of automation. Its activation is necessary in cases where the source entity is created on the fly and automation run instantly. So, we avoid an automation error message, if «Save» has been asked by the user prior to its execution.
There is also the ability to set some parameters (for completion by the user) at the moment of automation execution. For instance, we will make a parameter to select document type, in automation, from a customer’s form, which creates a Sales Order document.

From the option «Automation parameters» we add a line with a desired display name, the parameter’s type and in the search filter we can set a report to return the values, which the user will select from. Otherwise, we may not set a Filter and the user will type the code. There is the ability for this parameter’s completion to be mandatory (in column «Mandatory»).
Next, in «Field value assignment», we must, at the assignment regarding the document type, instead of fixed value to set into type «Automation parameter» and in the Parameter to select the specific parameter, previously created («Document type»).
From option «Valid for forms» we can define in which reports the automation will be available in (reuse without rewriting it as «form automation»). In this case, the report «opens» the form of the source entity (here the customer’s form) to create the document and finally, shuts down by itself.

- Report automation
Mass eMail sending to Persons from Persons report
- Select New => Report automation
- Select source report

Automation title
Select icon
Map profile
Select target entity (eMail from ESTM subsystem)
Assign values and select fields:
- Task type => Fixed: ΗΤ
- Description => Template text : Subject, Type : Plain text
- Notes => Template text : Body, Type : .rtf format
Assign next level values (master-detail) for recipients:

- Address type => Enum Value : InteractionAddressType = Email
- Recipient type => Enum Value : TaskRecipientType = Το
- Contact address => Field : Email (if there’s no email in the scroller, we insert it and when it comes as an available field in the automation we reload the scroller)
If we don’t assign the From field, how is it going to get a value?
If login user has a resource, then the resource’s email
If there is no email in the resource, subsequently the user person’s email.
If there’s no user email, subsequently, the company General parameter’s email => Category Send eMails => Sender’s address (ES_MAIL_FROM)
Execution method
- Execution method => Register one with many recipients
- Task origin => Send email via Outlook and with user selection

You can study the MassEmail.xml automation example in full scale

Report automations are stored in the CSScrollerCommands folder.


Μail/SMS Alerts
There is the ability to manage SMS messages in the application via bulk-sms, the national carrier Clickatell Bulk sms Gateway (http://www.clickatell.com/) and CosmoteSMS.
Initially the user must select from the menu Tools -> SMS management and choose ‘Connection settings’ and in the displayed window to fill his given credentials by the corresponding service carrier.
 This option reads a –BulkSMS- file, which initially does not exist, having as a result the display of an error message. Ignore it and next the window appears where you insert the Code, the Key and the mobile phone number from which the messages will appear to be sent from.
By selecting Accept, a file automatically is created in CSConfig named BulkSMS, holding all connection settings.
Next, in the same menu we have the following functions:
- Balance query
An information message appears with the account’s balance query.
- Add SMS units
It regards the ability to add SMS units by typing in the below form the coupon number, one can be provided with by the service carrier.


- Send SMS
Displays a send sms form where we type the recipient’s mobile phone and the message.
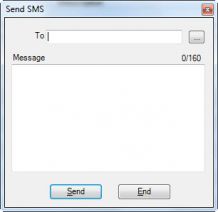

Additionally, the system, for some specific processes, provides a way of automatic notification by eMail or SMS.
- Notification for taking backups
We must complete the relevant general parameters in the Parameters Category «General-Systemic»:


- Notification for violation of inventory balance control
We must complete the relevant general parameters in the Parameters Category «Send eMails»:

Send FAX
Sending FAX is supported through the application’s environment. This function is activated by the Send action in VIEWS, where in the displayed dialog we can select in the Send the option Fax. The form is common for sending emails and for sending FAX.
To send Fax the application is based on Windows FAX Service, which is available in Windows 2000, Windows XP and in the family of Windows 2003 Servers.
Customizing Windows Fax Service is the responsibility of the IT manager’s or the authorized partner’s.
Setting the necessary parameters to activate sending files via Fax is done from the menu Tools/Customization, in the company parameters, at the CATEGORY: Send FAX:

The final parameter gives the ability to use a Fax Server different than the Microsoft Windows Fax Server, but which is based on Microsoft Exchange Server (e.g. faxmaker).
Time scheduling Tasks
With this ability, the system administrator can program a sum of tasks to be automatically executed from the Application Server, periodically, with no user interference.
Other tasks can be scheduled from the menu «actions» of a scroller like e.g. backup

Others from menu «actions» of a management screen like e.g. marketing campaign

And others from a relative button in dialog toolbars like e.g. «send» dialog from a report or the posting dialog.

Customization
In the time schedule settings definition dialog, we can set:

| Assign to | If the process will run from the Application Server |
|---|---|
| Process Recurrence |
|
| Based on time |
|
| Results recording | Ability to define the results type we want to record. If we set to record information for a «level», then automatically, information will be recorded for the next «levels». E.g. if we set «errors», errors AND warnings will be recorded, if we set «warnings», warnings AND errors AND failures will be recorded.
|
| Additional settings | Ability to set two extra parameters
|


Scheduled Tasks
Tasks that can be time scheduled are the following:
- Views – Export data
- Backups of database
- Compression & Database reorganization
- Synchronization of terminals τερματικών
- Import data (advanced)
- Stock valuation process
- Retail documents packing
- Posting of documents
- Finalization of ledger entries
- Readjustment of sales values
- Report automations
- Recalculation of financial correlations
- CRM marketing campaigns
- CRM Tasks – Salesmen activities
If we are going to time schedule «Synchronization workstations», this would make sense to be done BEFORE we update the Database, otherwise the synchronization will never happen. The user is not needed to be logged-in to the application, as long as it is logged-in to the workstation.
Information
In menu «'Tools/Scheduling» there are two information reports about the time-scheduled tasks.
- Scheduled tasks: In this report are displayed all the time scheduled tasks created in reports.
- Task execution log: In this report is displayed the history log of tasks execution. The contained information are in a first level the Assignor, the user who created that time scheduled task, the workstation from which it’s executed, the Creation date of the task, the Activation of the task, the Last fact date and the last fact result with the corresponding messages in case of failure and in second level, analytically for each task execution, its start, end and result.

Notice
 Time scheduling tasks, especially those regarding «heavy» or common used procedures must be done cautiously as regards to when it is executed and how often. If for instance we schedule by mistake, the database backup to be executed 3 times a day when the system is loaded, then the Server’s functionality will be severely clogged.
To time schedule tasks, a user must have proper privileges.
Execution of all time-scheduled tasks takes place in the Application Server and not in the workstation from which the schedule was done. Therefore:

- We should confirm that the Server is going to be active and available (e.g. not turned off) at the hours it is programmed to run tasks (Application Server and Database Server).
- After scheduling, the workstation is NOT needed to stay turned on.
In setting «how often» a task will be executed, the session used by Windows to run the scheduled task will be always ONE. Otherwise, if we schedule a task «based on time», a new scheduled task will open each time. Therefore, if we have set to run a task every hour, 24 sessions will open, each session using a user license. However, if we set it, at «Process recurrence», the session running will be always one, consequently one user license.
Management Tools (Administrator)
Update Fields History
There is the ability to monitor changes done by users, to any field, from the option Change field behavior in the menu “Tools ->System-Database Management”.
At the appearing screen, we must set the Table and the Field we wish to monitor its changes and activate the setting History. Next, by selecting «Assignment», monitoring history of changes is activated, after restarting the application server.

These changes are stored in the table ES00HistoryLog.
In some entities forms there is a special subpage called «History log», where the field updates are displayed with «history tracking» (e.g. in lead form, sales opportunity, etc) and in other ones, the same information is provided from the menu «Actions», from the option «Changes log».
Additionally, in menu Tools->Users action log one can view from the option «Field update log» the changes of ALL Database fields having history tracking. In this report the following elements appear:
1st level: Field, Max Date (date of last change), Min Date (date of 1st change) and Number of changes
2st level: Date of change, Previous value, New value, User and information on entry on which the change has been made (Code and Description).


Event Log
In menu Tools/Users action log there are options for complete information of the system’s administrator, regarding the occurring events:
Process messages log: In this report are displayed all those processes designed to keep track of their results, with information for the user, workstation, execution time as well as the result.
Such processes are Stock valuation, Closings, Recalculation tasks, etc.

Event log: In this report it is displayed the history of all events designed to keep track in the system when they occurred, with the following elements grouped by date: User, Date, Event Code, Event Description, Workstation and Type (Information, Warning, Error).
Such events are user login, entries deletion, approval authorization, backup, restart server, version updates, recalculation tasks, formal printings, etc.
These data are stored in the table ES00EventLog.
System upgrade log: In this report is displayed the versions upgrade history (date, user, station, company).

These data are stored in the table ES00EventLog.
Clean-up event log: This function is available to all administrator users. Its purpose is to reduce the number of entries in the database tableES00EventLog.
Two questions appear for:
- Simultaneous deletion of the ES00HistoryLog table
- Simultaneous deletion of data in ALL companies or just in the Current one
All deleted entries are copied into a TEXT file, which is stored in the TEMP are of Application Server.

Custom Files Reconciliation
From menu Tools/System-Database management and in option Terminal custom files reconciliation we have the ability to delete custom files from the workstations.
 In the first screen, we are asked to select the CS folders for deletion.
By selecting which the link «Which files will not be deleted?» a screen is displayed with the corresponding files.

By selecting Delete, a confirmation message appears and next, we must define the custom files backup area.

Next, by confirming the deletion, the erase of the selected folders is complete.
Online Users
Called from menu Tools/Application server and displays the users currently logged in the application.

Extra information includes workstation name, its IP address and the port number.
IT & System Indicators
From the main menu Tools, we call the report I.T. – System KPI’s which gives some interesting indications about system usage (number of entities, average number of entries, lines, documents, etc).
This statistical information help the IT Manager to track what causes great memory demands, disk space, etc and at the same time give statistical information about the daily volume of information the system manages.

Compress & Reorganize DB
The task is called from the menu Tools/System-Database Maintenance and with this option, the following message appears:

If we answer yes, the besides the compression, database reorganization occurs and more specifically, the following maintenance tasks:
- Recreate indexes
- Update SQL Server statistics
Database Backup
A necessary periodic task is Database backup. It can be done either by a user’s action whenever wanted, or time scheduled for automatic backup (recommended).
The task is called from menu «General/Backups», where a list of the created backups is displayed. From «Actions» of the view toolbar, we must select «Create new backup»:

From the same point, we can time schedule backups from the option «Periodic backup scheduling». In case a weekly backup us scheduled, then each day’s backup replaces the same day’s copy from the previous week.
Necessary customization is completing the relative general parameters (CATEGORY: General-Systemic):

| Assing to | If the process will be executed by the Application Server |
|---|---|
| Folder to sal all Database backups | The directory must be an existing directory on the machine running the Microsoft SQL Server. If left empty, the application will use the default Microsoft SQL Server directory to save safety backups. |
| Folder to save all custom file backups | The directory must be an existing directory on the machine running the Application Server. If left empty, C:\ will be used. |
| Folder to copy all Database backups | This directory must be an existing directory and, moreover, it has to be located in other equipment so that it may be available in case of any kind of damage on the database server. In order to host it in other equipment you must first create a UNC Path (E.g. \\Server2\DBBackups) or a certain Map drive (e.g. F:\DBBACKUPS). In this directory, the user who runs the application server must have R/W privileges. |
| Compress DB backup copies | Define whether the produced backup will be compressed or not. It would be wise to activate it for large databases. |
Finally, as referred in the last chapter of “MAIL/SMS ALERTS”, there is the ability from the first 2 parameters to set a mobile phone or/and email address(-es) to update about the completion of the backup taking procedure.
ATTENTION at the automatic reminder during login about how much time has passed since last backup, for it may suggest a problem at the process (e.g. lack of space, non-existing folder, and insufficient privileges).
Technical & Programming Tools
Links with Entersoft Files
Ability to set the way specific file types open.
In particular, by running ESFileAssociations.bat from the installation folder, the proper parameters are created and set in registry for opening file types
- .espak
- .emi
- .escmd
with ESFileHandler.exe.
Entersoft Commands
There is the ability to run a scroller/OLAP from a file outside of the application as follows:
- Open a txt file
- Create scroller/OLAP shortcut and by right-clicking ->Properties the following screen appears

- Copy the contents of «Order» field into the txt file
- Change the file’s extension to .escmd.
- Run ESFileAssociations.bat from the installation folder.
From now on, by double clicking on the escmd file, we are asked to Login the application and the select scroller/OLAP opens. It can be placed in the desktop.
Run SQL from File
We have the ability to run a sql command, stored in a file through the application, by the following ways:
Manual Execution
First, we have to create the .sql file in the folder CSConfig\CSSQL (if it does not exist, we have to create it).
Next, we select “Run SQL from file” from menu Tools -> Data Import/Export and a window appears for us to select the file to run.
Automatic Timer Execution
Execution is done through an ESTimer at the Application Server and the settings are defined in the CSSyncConfig.xml file. We open the file ../CSConfig/CSyncConfig.xml and set a new timer as follows:
<ESTIMER>
<ID>UPDSQL01</ID>
<DESCRIPTION>Update the state of the stock items</DESCRIPTION>
<USERID>esmaster</USERID>
<PWD>ddbBO+yOOJ1mtlZQX1ajaVre/QAAp3kq</PWD>
<DB>ESXprtZero</DB>
<COMPANY>001</COMPANY>
<BRANCH>5</BRANCH>
<INTERVAL>0</INTERVAL>
<ASSM>SQLFILE</ASSM>
<ARGS>UpdateStockItems.sql</ARGS>
<PAUSEONERROR>false</PAUSEONERR>
</ESTIMER>
To run the specific process, it is required:
At the Assm parameter, to set SQLFILE, a code to run an SQL file.
At the Args parameter, to set the name of the SQL file, which has to be in the folder CSConfig\CSSQL
The interval parameter to have value bigger than zero (0). If it is desired the process’s frequency to be set through windows scheduler, only then should the interval value be zero (0).
User must have access both to the company and the branch defined in timer.
User’s encrypted password can be found in the ESGOUsers table.
Database code is exactly as set in the ESDBDef.xml file (and not Database name).
From Windows Scheduled Task
Say we have set the above Timer in the CSSyncConfig.xml file of the Application Server.
If in the «Interval» tag we have set -1 or 0, this means that the Application Server will not take over to rung this task every N seconds (as would happen for instance if the Interval value was 60- every 60’’). By setting the value to 0, the Application Server will not execute this task-it’s just set as available for execution. This value is set in cases where there are more complex demands, e.g. once a day at 2am, when the assistance of Windows Scheduler is needed:
Select from Control Panel -> Scheduled Tasks or from the windows search bar type «Task Scheduler» and select it at the machine the Application Server is running.
Select Νew Schedule Task (Windows XP) or Create Task (Windows Vista and 2007)
In Run we set the full path for ESSchedulerEXE e.g. C:\Build\ESDEV210\Bin\ESScheduler.EXE
Then we insert space and next the Port set for the Application Server e.g. 8091
Afterward we insert also a space and next the code (ID) of the task as set into the CSSyncConfig.xml file e.g. UPDSQL01
In Run As ALWAYS set: NT AUTHORITY\SYSTEM
In the 2nd tab we set the execution details from the options Windows scheduler provides.
Select «ΟΚ»


You do not need to be logged into the Application Server to run the task.
It’s needed both the server machine to be turned on and the Application Server to be running.
ESInstallStandardDB
There is the ability to install a database without Management Studio.
By running the file ESInstallStandardDB.exe from the installation folder, the following window appears:

Here we set the database creation name in the SQL Server, its application description (code matches database name), the file from which the database will be restored as well as the identification data to connect with the SQL Server.
If there is already a Database by that name, a replacement confirmation message appears.
ESDBConnectionEdit
There is the ability to link an existing SQL Server database to the application, for it to appear as an option during login.
Its setting can be done by running the file ESDBConnectionEdit.exe, which is in the installation folder.

Here we set the code and description of the Database, the SQL server, the database name as well as the identification data to connect with the SQL Server.
By pressing at the last column «Test», data verification is executed and a relevant message appears of successful or unsuccessful connection with the Database.
Saving the data can be done either by the relevant icon or by closing the window and pressing «Yes» at the save data message.
Business Triggers
For using Business Triggers, first we must create the file CSBOTriggers.xml in the folder \CSConfig of the application.
Examples of Use
Run Custom Code at Update, Insert
We can run Custom code at UPDATE and INSERT of an entity. To activate, all we have to do is set their parameters in CSBOTriggers.xml, where we must add a section like the highlighted one. In brief, at this section, we define the Database, Company and Entity where the Custom logic will apply as well as the Class name containing the Custom code.
<?xml version="1.0" standalone="yes"?>
<ESBusinessTriggers xmlns="http://tempuri.org/ESBusinessTriggers.xsd%22>
<ESBOTriggers>
.............
</ESBOTriggers>
<ESBODSObj>
<DB>TestDB</DB>
<Company>Test</Company>
<ObjectID>ESFIDocumentTrade</ObjectID>
<DSObj>Customer.BO.CSDocumentTradeDSSaveObj,CSBusinessObject</DSObj>
</ESBODSObj>
</ESBusinessTriggers>
or
<?xml version="1.0" standalone="yes"?>
<ESBusinessTriggers xmlns="http://tempuri.org/ESBusinessTriggers.xsd%22>
<ESBODSObj>
<DB>TestDB</DB>
<Company>Test</Company>
<ObjectID>ESFIDocumentTrade</ObjectID>
<DSObj>Customer.BO.CSDocumentTradeDSSaveObj,CSBusinessObject</DSObj>
</ESBODSObj>
</ESBusinessTriggers>
At the implementation part, the Class containing the relevant code can be written in C# or in VB.Net, while it is necessary to add the following References:
ESBusinessObject.dll
ESDataTable.dll
ESResMngr.dll
ESSessionCtx.dll
Examples of such Classes are:
C#:
public class CSDocumentTradeDSSaveObj: Entersoft.Framework.BLL.ESDSSaveObj
{
public CSDocumentTradeDSSaveObj()
{
//
// TODO: Add constructor logic here
//
}
public override void PostObjectCommit(Entersoft.Framework.Platform.ESDataSet pDS)
{
base.PostObjectCommit(pDS);
//
// TODO: Add Custom logic here
//
}
}
Automatic Codes Creation in Other Companies
In many cases, there is need for common coding & mainly automatic creation of entities like items, trade accounts, etc from company to company, e.g. 3 companies belonging to the same group require common customer coding in all companies.
To satisfy this need we must create the file CSBOTriggers.xml with UTF-8 encoding into the installation folder ..\CSConfig at the application server, after we have first defined the following:
<ESBUSINESSTRIGGERS xmlns="http://tempuri.org/ESBusinessTriggers.xsd%22>
<ESBOTRIGGERS>
<FROMDB>SOURCEDB</FROMDB>
<FROMCOMPANY>001</FROMCOMPANY>
<TODB>TARGETDB</TODB>
<TOCOMPANY>002</TOCOMPANY>
<OBJECTLIST>ESFICustomer,ESFISupplier,ESMMStockItem,ESGLAccount,ESFIItemService,ESFIItemExpenses</OBJECTLIST>
<BRANCHID>1</BRANCHID></ESBOTRIGGERS>
</ESBUSINESSTRIGGERS>
Finally we have to restart the application server.
ES Query Analyser
ES Query Analyser is a tool like SQL Management Studio in a more simplified form. It is executed from the option «Create database queries» (Tools/System-Database Maintenance) from which the following window appears, with connection to the sql server and the login database.
 By selecting «New SQL» from the icon 19x19px a window opens to type the desired sql command. Next, we can run this command from the icon 14x14px Execute and the command’s results are displayed in the bottom part of the screen.

Call External Form in EBS Environment
From the menu «External commands -> Administration», we can set external applications for running through the EBS/Expert environment. If for instance, we have created a .NET form and we wish to take advantage of the Entersoft application Session, then we follow the next steps:
- Select from main menu «External commands -> Administration...»
- Set a unique code and description with which it will be displayed in the Menu

In the Order field, we provide the FullyQualifiedAssemblyName of the designed form’s class. This consists of <NAMESPACE>.<CLASSNAME>, <ASSEMBLYNAME>, as set in .NETProject settings (ΕΧΕ or DLL). Attention should be given to the name of AssemblyName because it should not include either the extension or other path information, only the assemblyname.
As command type we set <.ΝΕΤ form>
Accept and Save changes.
Logoff – logon in the workstation.
Next, after tested, we must send it to all workstations through the procedure "Workstation synchronization". To activate this mechanism automatically, we have to select Upgrade custom server version from Tools -> Version/Release updates.
The next time a workstation does a Login, it will be suggested to "Synchronize" due to difference in the custom version. If the workstations were synchronized before this action, the only thing carried will be that assembly.
Call WEB Links
From menu «External commands -> Administration» we can set to call a web site. To achieve that, in the Command type we must set «Internet page (URL)» and in the order to set the URL of the internet page.

Next by logging off – logging on the application, an extra option has been inserted in menu «External commands», with the defined name.

By selecting it, a new window appears (tab page) in the application’s environment with this internet page, where we have the ability for further browsing.

Add-In Handlers
There is the ability to set additional options in the Actions menu of a scroller or an entity form.
Add Handler in Scroller
At the scroller’s xml, right in the row: </DATASET>(attention at the backslash where Dataset ends) and under the row: <EDITABLE>False</EDITABLE> we add the new handler’s command. E.g.:
<SCROLLERCOMMANDHANDLERID>Custom.CSHandler.Handler, AttachHandler</SCROLLERCOMMANDHANDLERID>
There are some readymade handlers (referred in the manual Data Presentation and Print Tools), but there is also the ability to implement custom handlers, based on the following steps:
- Implement the handler and add the Full qualified assembly name of the Handler created in the scroller where the action will appear. This consists of <NAMESPACE>.<CLASSNAME>, <ASSEMBLYNAME>, as set in .NETProject settings (ΕΧΕ or DLL). Attention should be given to the name of AssemblyName because it should not include either the extension or other path information, only the assemblyname.
- At the scroller’s xml, right in the row: </DATASET> (attention at the backslash where Dataset ends) and under the row: <EDITABLE>False</EDITABLE> we add the new handler’s command.
<SCROLLERCOMMANDHANDLERID>Custom.CSHandler.Handler, AttachHandler</SCROLLERCOMMANDHANDLERID>
- In function ExecuteCommand of the handler it is visible if the added action is selected and if what was programmed is executed.
ATTENTION: The created assembly (ΕΧΕ or DLL) must be inserted in the directory of the application in the Server
Add Handler In Forms-Screens
To add custom actions, functionality, even custom forms in Entersoft Business Suite and Entersoft EXPERT screens, the following must be done:
- Complete the file CSFormAddins.xml that is in the CSConfig directory of the application. If file does not exist, it must be created with the following form:
<?xml version="1.0" standalone="yes"?>
<
Addins>
<Addin>
<FormID></< font>FormID>
<Handler></< font>Handler>
</</ADDIN< font>>
</< p>
</ADDINS>
For instance:
<?xml version="1.0" standalone="yes"?>
<
Addins>
<Addin>
<FormID>ESGOProject</< font>FormID>
<Handler>Custom.ERP.Project,MyCustomAddin</< font>Handler>
</</ADDIN< font>>
</< p>
</ADDINS>
If the implementation is done correctly, in the expanding “Actions” menu of the form, will be displayed those actions added with the custom dll.
