EBS - User Guide EN
EBS Daily processes and Use Cases
Περιεχόμενα
- 1 Company Structure
- 2 Basic Entities
- 2.1 Customer
- 2.2 Salesperson
- 2.3 Supplier
- 2.4 Creditor
- 2.5 Debtor
- 2.6 Expenses
- 2.7 Service
- 2.8 Inventory Item
- 2.9 Fixed Assets
- 2.10 Cash & Bank accounts
- 3 Opening balances
- 4 Purchases
- 4.1 Suppliers Offers
- 4.2 Order to supplier
- 4.3 Goods Receipt from supplier
- 4.4 Supplier Invoice
- 4.5 Send goods to supplier
- 4.6 Credit Note
- 4.7 Credit discount Notes
- 4.8 Purchases on consignment & clearance
- 4.9 Changes in market prices
- 4.10 Purchases of special categories items
- 4.11 Commercial agreements & claim of rebates
- 5 Expenses
- 6 Costing of Imports
- 7 Payments
- 8 Sales
- 8.1 Offer to a customer
- 8.2 Sale Order
- 8.2.1 Basic functionality
- 8.2.2 Stock availability
- 8.2.3 Alternative, compatible & accessories
- 8.2.4 Selling combinations of items
- 8.2.5 Discount functionality
- 8.2.6 Gross profit margin – On line cost
- 8.2.7 Corporate dimensions
- 8.2.8 Information during Ordering
- 8.2.9 Mass replacement items in Orders
- 8.3 Stock reservation for customers
- 8.4 Shipping to a customer
- 8.5 Invoicing customers
- 8.6 Customer order of high priority
- 8.7 Sale Order cancellation
- 8.8 Customer sale return
- 8.9 Credit Note
- 8.10 Receipt of a destroyed item from a customer
- 8.11 Returning defective item to the supplier
- 8.12 Selling items of special categories
- 8.13 Cancellation Note
- 8.14 Factoring
- 8.15 Pricelist customization
- 8.16 Global processing of selling prices
- 8.17 Invoicing Policy
- 8.17.1 Infrastructure - model
- 8.17.2 Configuration
- 8.17.3 Examples
- 8.17.3.1 Discounts based on quantity and Item category
- 8.17.3.2 Additional discount due to payment method
- 8.17.3.3 Providing gift due to order quantity
- 8.17.3.4 Charging installation services of particular items
- 8.17.3.5 Charging insurance fees to sales abroad
- 8.17.3.6 Discounts by combining quantity scale of many categories
- 8.18 Sales discounts controlling
- 8.19 Sales and distribution performance indicators
- 9 Retail sale points
- 10 Providing Services
- 11 Collection management
- 11.1 Collecting cash
- 11.2 Cash Invoice
- 11.3 Collecting by credit card
- 11.4 Customer deposit in our bank account
- 11.5 Collecting by a customer’s cheque
- 11.6 Collecting by a 3rd party cheque
- 11.7 Transferring Cheques to the bank for guarantee
- 11.8 Repayment of cheques/notes receivable
- 11.9 Replacing a customer’s cheque
- 11.10 Customer’s advance payment
- 11.11 Collection management processes
- 12 Contracts
- 13 Open items monitoring
- 13.1 Forecast of inflows & outflows
- 13.2 Settlement with customers
- 13.2.1 Credit days
- 13.2.2 Matching methods
- 13.2.3 Matching rule
- 13.2.4 Payment method
- 13.2.5 Payment methods per item category
- 13.2.6 Use of dimensions to payment methods
- 13.2.7 Definition of payment method for credit cards
- 13.2.8 Common payment methods for many cash desks
- 13.2.9 Examples of payment methods design
- 13.3 Matching processes
- 13.4 Open balances control
- 14 Credit Control
- 15 Transfers and Inventory Corrections
- 16 Production & Assembly
- 16.1 Bill of material
- 16.2 Assemblage
- 16.3 Production Order
- 16.4 Material adequacy control
- 16.5 Ordering & receiving raw materials
- 16.6 Production – Consumptions update
- 16.7 Production expenses
- 16.8 Outsourcing production
- 16.9 Production through dissolution
- 16.10 Production in Progress
- 16.11 Special production issues
- 16.12 Production costing configuration
- 16.13 Production costing process scenarios
- 16.14 Cost determination process & output
- 16.15 Posting to cost accounting
- 16.16 Production process Indicators
- 17 Stock Valuation
- 18 Fixed Assets Life Cycle
- 19 Accounting Tasks
- 19.1 Accounting customization
- 19.2 Chart of accounts
- 19.3 Accounting documents
- 19.4 Accounting document Template
- 19.5 Corrective transactions of trade accounts
- 19.6 Accounts of taxes & withholdings
- 19.7 Documents posting
- 19.8 Ledger entries finalization
- 19.9 Fiscal Year Closing
- 19.10 Balance Sheet & results statement
- 19.11 Consolidated reporting
- 19.12 Purging of fiscal years
- 20 Management information tools
Company Structure
The management of system companies is achieved through the main menu:

From the companies list we have access to the company’s management screen. The completion of the company’s necessary identity data, is accomplished in the 1st page:

For each company, is automatically entered a separate “person”.
Attention must be given to the «VAT Regime» field, as it is influenced the Invoicing and Purchases VAT as well as the management of the gross (final) sales prices. If the company has deducted VAT regime, we alter the default value “standard” of the field.
New branch – new warehouse
In the “Addresses” tab-page, we must define:
- The Head office of the company
- The Branches
- The Warehouses
Especially the warehouses (Warehouses) are the «logical» warehouses, even if, from the same «physical» warehouses are served more than one companies or branches. Also, if the company:
- is responsible for repairs of devices-machines
- sends goods or fixed assets for repair to suppliers
- sends goods to exhibitions-demos or sampling
- undertakes transfers for others account
- takes responsibility for the storage of third parties items until their delivery to customers
…probably has the need to monitor Inventory PER THIRD PARTY (person-supplier, customer). For this purpose, it may be defined “logical” warehouses BY Third parties or TO Third parties without being necessary to be opened per position or destination, separate warehouses.
In the “Addresses” tab-page, these registers must be defined, with their data:

| Site identity | The identifier code, the type (grouping field), the description, the address into 2 fields, the postal code, the City, the Area, the District the Telephones and Fax consist the branch or warehouse identity. After the branch new opening, documents series must be opened for this. |
|---|---|
| Status | If a branch becomes “inactive” and the related transactions have been completed, the related documents series will also need to become inactive. |
| Supervisor name | Selection between persons defined as company managers (in ‘Persons/Associates’ tab-page). |
| Branch | Is activated when it is branch |
| VAT Regime | It is suggested the regime of the company, however, a branch may be located to a reduced regime area. |
| Independent | It is activated when it exports independent accounting result (prints and keeps BOOKS to the same branch) and only then. This flag influences the stock valuation process, which ‘runs’ separately for this branch. |
| Accounting Segment | To the parameterization system of the “Accounting post”, this is the method where documents are sent to Accounting, it is used to many «connection accounts» the segment (account grade) «Branch». In this case, the content of this field (from the branch register) will be taken into account. |
| Warehouse | It is activated when it is a warehouse. The main warehouse of a branch is not need to be separately opened but, the address-branch will be also characterized AS a “branch” AND as a “warehouse”. The other warehouses will be separately defined and will be characterized as “warehouses” and the next field will be completed in compulsory. |
| Belongs to the Branch | Selection from all the addresses, characterized as “branches”. The field must be completed to all the independent warehouses (that are in different address) but also to all these that are NOT main warehouses of the main address or of a branch. |
| W.H. from/to third parties | It is activated in the cases mentioned before, in order to define that will be monitored per THIRD PARTY. The inventory (in every fiscal year beginning) for these sites must be defined PER THIRD PARTY. The transits from and to them must be declared with (especially for this reason designed) documents (with “third parties” indication). |
| Not to be valuated | It is activated in warehouses that concern storage for third parties, where the items are NOT in our ownership, such as, a service area. On the other hand, when our goods are found to third parties installations such as, an exhibition area, this field must be inactivated because the items found to this area PARTICIPATE to the stock valuation of the company’s inventories. |
| Automatic activation | If it is activated, during the opening of a new item, this warehouse will be automatically added as an area where the item CAN BE placed. |
| Send priority | It is a priority number, which is used in In-house transfer automatic suggestion (branches and warehouses stock replacement) included to the Inventory sub-system. The areas with higher send priority will be “preferred” for stock items send to other areas having deficiencies. |
| Receipt priority | It works similarly to the previous field. The areas with the higher receipt priority and in the case where inventories are not enough to cover all the deficiencies, will be “preferred” for the coverage of the deficiencies. |
Using the icon, a dialog opens, containing the full data of branch-warehouses. In this dialog, you may also find the e-Mail address, the Web site, as well as the following information:
| Default Retail Customer | It is used in Retail receipts, in case we want to differentiate behavior per branch e.g. VAT regime, pricelist etc. |
|---|---|
| Default Expenses Creditor | It is used in Expenses invoices as the default creditor that gives values to fields like usual payment method, bank account by branch area for deposits to the Public Services etc. |
| User defined fields | Numeric fields, code lists, characterizations for free use e.g. categorizations in case of large number of branches. |
One of these addresses is the Main address of the company. This must be completed to the “master address” area, in the 1st page:

 What Is the difference between Master Address and Main functional site?
The main functional site is the main company installation where stock kept and in most cases, it is identical to the Master address. It is not identical, when the formal master address found to independent site, where there never take place inventory transactions.
Why is this definition necessary? The Stock Valuation process generates some costing transactions (internal accounting notes, necessary for cost reconciliation) in “main functional site”. Thus, if in the above case the costing transactions were created in “Master address”, these would be the only Inventory transactions to this site. This will result to the Master address (which is inactive as to the Inventory) to compulsory appear in the official Inventory trial balance for take total costs and profit/loss. This would be at least paradoxical, whereas with this explicit definition, is avoided.
Alterations to sites
Any alteration after using the branches and warehouses (transactions found) demands much attention.

|
The characterizations «Branch», «Warehouse», «Independent results» and «Not to be valuated» are taken into account in Stock Valuation process and thus, should not be altered. If it is necessary (the privilege for making alterations should only be given to experienced users having full system knowledge) the stock valuation process should be re-executed for all periods. |
1st scenario: Usage alteration from Warehouse to Branch
A new “logical” site should be defined, which will be characterized as Branch (and Warehouse) with the same address data.
New document series for the new Site should be created
In-house transfer of the stock must occur from the old to the new site, with the proper reasoning (change of use)
The previous address («warehouse») must become inactive
2nd scenario: Warehouse Transfer
If the transfer concerns the same building or when a Delivery Note is not required, we just may change the Address data on the same register.
If the transfer demands issue of Delivery Note or/and when the warehouse is transferred to a different Branch authority, a new Address must be opened and as with the 1st scenario, all inventories must be transferred and the previous address to become inactive.
3rd scenario: Warehouse inactivation – replacement by another warehouse
The stock must be transferred to the new warehouse
The warehouse must become «inactive»
In documents series where this Warehouse was the “default warehouse”, a replacement must occur with the new warehouse.
Opening fiscal year
In company management screen, in Fiscal Year tab-page can be achieved the opening of a new Fiscal year. The login with a day that does not belong to any of the already defined Fiscal years, is NOT allowed.

In this screen, for each line –Fiscal Year in the middle, are found the data available for control/modification and to the bottom part, there are the Fiscal Periods in which every Fiscal Year is divided.
By selecting the  new Fiscal year icon, one new line opens in Fiscal Years list and the indicator is placed to the upper part of the form, in order to define the fiscal year data.
| Identity | Name, start-date and end-date of the Fiscal Year. | |
|---|---|---|
| Number of periods | It is the number of fiscal periods, where the financial data will kept and must be per 2 greater than the number of “standard” periods (months of the Year). The reason is that the year-beginning transactions as much as year-closing transactions must be kept as separate financial “measures” for many accounting processes. | |
| Balance sheet limit | Informative day field e.g. for S.A. companies with 31/12 fiscal year ending, the limit for publish results is 30/04 of the next fiscal year. | |
| Basic currency | For the case of transition in different currency (as happened in Greece in 2001) | |
| Exchange rate formula | From the basic currency (by default for installations in countries with strong currency, where bank exchange differences are expressed as «1 basic currency = N foreign» as it happens with the Euro) or in basic currency (by default for installations in countries with not a strong currency, where bank exchange differences are expressed as «1 foreign = N basic currencies» | |
| Exchange rate differences valuation per period | The system, besides the automatic closing of exchange differences (for all the paid transactions in foreign currencies), provides automatic valuation process of the OPEN claims and liabilities in foreign currency at the END of the FISCAL YEAR for balance sheet reasons. The companies that want this process to be executed also for the END of PERIODS, must activate this setting. | |
| Official stock book keeping & Stock cost determination period | In case of an audited Inventory, is defined the number of periods (months) which consist a COSTING PERIOD, that is the WEIGHTING period for which every time the stock valuation process is executed, it will take into consideration analytically the transactions. If you have ANNUAL average weighted stock valuation price, define 12 if you have 12months fiscal year period, that is 14 fiscal periods). The costing period is a CLOSED FISCAL “year” for Inventory costing and it features an ‘audited’ inventory. The definition of this period is not necessarily identical to the time where results are PRINTED, but it depends on the period in which the stock cost and profit are supposed to be DEFINIT. In case of a non-audited inventory, define the number of standard fiscal year periods e.g. 12 | |
| Fiscal year type | Under-definition | It is the not-yet-activated Fiscal Year. This is the initial value of the field during fiscal year opening. Login to the system is not allowed for a date belonging to an “Under-definition” fiscal year. |
| Open | It is the Fiscal Year in progress, meaning that financial transactions can be inserted and modified within its limits. At least ONE “open” Fiscal Year must always exist in a company’s definition. | |
| Closed | It is the Fiscal Year whose the financial facts have been completed and no modifications are allowed to them. The Fiscal Years turn to “closed” automatically by the fiscal year closing process. | |
| Historical | It is the Fiscal year with historical data, kept for comparison reasons, and does not have full financial data e.g. it contains only entries and ‘periodics’ (table of monthly totals) or just ‘periodics’, without original “documents”. This data comes up either from a migration of previous system or from the «transfer a fiscal year to historical» process, which possibly occurred for disk space reasons or/and system performance reasons. | |
| Company rates | The ‘Pro-Rata rate’, the ‘I.R.R. rate’ (Internal Rate of Return) and the ‘Income Tax Rate’ are informative fields and they are used in reports. |
Continuing, the  icon must be selected for Period Generation, through a dialog where we confirm the process:
 The periods are automatically produced and appear to the periods list.
On this list, for operating Fiscal years, we may see if period closure occurred per sub-system (Accounting, Sales, Purchases, Stock, etc.).
Now, we must change the Fiscal year type into “Open”.
What is ‘period redefinition’ & When it is necessary?
If a Fiscal Year has no transactions, we can delete periods or change period ranges. If transactions exist, we need a special period redefinition process.
When for instance, the company scheme is changed and one company must get into “clearance”, it is necessary to create Balance Sheet up to a specific date and, for the rest period, to occur a new autonomous Fiscal Year.
If after the limit date there no transactions, the reduction of the fiscal year length is free, the same applies for the increase. The current operation in needed when there are transactions occurred AFTER this limit date.
The functionality is only available for the last Fiscal Year and creates (based on the new ending date) a new Fiscal year having as a start the next day and as an ending the ending of the current Fiscal Year (which can modified later). It is called through the
icon and through a confirmation dialog, the redefinition of periods – periodic data is executed.
You must also change the length of the “stock cost determination period”.


New job position
When a new position is created, it may consist a new unit for different sub-systems so, some further actions must occur.
- Opening of a person
- User creation and connection with the person
- Addition of this person to company’s contacts.
- Incorporation to users group or creation of new users group (“job position”). In the 2nd case, the privileges allocation must occur from the beginning and the access to documents series, allowed transitions, task types or further tasks, reports etc, to be controlled. If the position belongs to Accounting Department, the privileges in accounting Journals must be updated. Finally, if there are classified documents, then the access functionality must be examined.
- Opening of resource (for use in CRM tasks) and integration to « communication profile»
- Possible opening of a new Cash liquidity account (if it concerns cash)
- Possible opening new document series (if the terminal-client is new with separate printer). Be aware for matching with the suitable users group and a new Cash account as “automatic payment account” (if it is about a new transaction position with customers).
- In the case of a Retail shop and if the salesperson concept is identical with the one of the Cashier, the user must be opened as a salesperson, too. The same “Person” must be connected to both the salesperson and the user.
- If it is about a salesperson, it will possibly need to be assigned some customers groups, to be defined as their “salesperson” (through global modification).
- If it takes responsibility of receipts, some customers groups may need to be assigned for receipts communication and organization and in this case, it will need to be added to the Collectors and to be defined as customers “Collector” through global modification.
Basic Entities
 The easiest way to create a new basic entity to any sub-system is the “New” option from the main toolbar.
The management screen of the entity (SITE) opens immediately, we complete the necessary data, we save and complete.
Another way is through the «Insert» command (or the Insert button) from a list illustrating this kind of entities e.g. Customers, Items etc
 If it is about repeatable multiple entries, we remind that from the toolbar of the screen and through the “New” or “New by copy” command, we can save and at the same time to create a new entity.
Customer
Customer is a company trade account, to whom we provide (or we intend to provide) products or services and should be opened even before obtaining “accounting” register, if we want to create, for example, an order of him.
The application is automatically opens for him a «person» where, actually kept all of his “demographic” data (in this unique place). If for instance, a customer becomes customer of another of our companies (to the same system, to the same database), it will be connected with the same “person”, or if he becomes a supplier, his “demographic” data will be the same.
If a customer has many branches, we simply define his branches in the same form. If, however, for each customer branch, the “agreement” is different e.g. the pricelist, the payment method, or if, each branch has different accounting department, different credit limit and so on, we probably need a new, full, different register. In these cases, the best solution is to open a new separate customer for each branch (and with a different “person” so, the main Address will be different).
Identity data

| General data & Master Address |
These are the customers’ identification data. By completing the Zip Code, data fields as City, Area etc. are automatically completed. If the “mapping services” have been activated, then by typing the “Add/s 1” the position is detected and fields like PC, City, Area, District, Geographical zone are completed (it also appears the
By completing the data of the main Address, this Address is added to the “Addresses” sub-page, |
|---|---|
| Card no. | It is given, when a “bonus” card is issued for the customer (loyalty card). It is used for identify the customer during sale. |
| Template | The template is an easy way of ready default values to several data fields, depending on customer category. The templates are designed, through the Parameterization table (Tools). |
| Photo | Through the  icon, we can save ( icon, we can save ( ) a photo (e.g. logo) and through the ) a photo (e.g. logo) and through the  icon we recall it. We can also display it, in customer lists. icon we recall it. We can also display it, in customer lists.
|
| Additional information of a physical person |
If the customer is a physical person (the person type is determined by the field next to the code), then, there are additional fields available such as the name and full name separation, the nationality, the sex, the mobile, the calendar etc.
|
| VAT Regime | Selection between the values ‘Standard’, ‘Reduced’, ‘In EU’, ‘Outside EU’, ‘Exemption’. It influences the VAT calculation in sales documents. |
| Branch | If it is defined a particular (company) branch to the customer, during customer search, to all documents of this branch, will be sorted to the top whereas in documents of other branches, during search, will be sorted to the bottom. There is not a prohibition for using series of other branches and if required, an additional control must be customized. |
| Properties Set | The properties set enables the presence and management of an additional “sub-page” of additional properties  that may be designed through Tools/Customization/Company Parameters/Properties and, even by customer (per customers category) to be DIFFERENT through this “properties” field. Alternatively, one common property-set can be defined for all customers, in company’s parameters in “Additional properties” category. that may be designed through Tools/Customization/Company Parameters/Properties and, even by customer (per customers category) to be DIFFERENT through this “properties” field. Alternatively, one common property-set can be defined for all customers, in company’s parameters in “Additional properties” category.
|
| Profession | By selecting profession, to the «Business activity» field is suggested the profession description and it can be differentiated with a more detailed text (which is not formalized through professions code list). |
| Groupings | The group and the category are in reality “person’s” groupings whereas the family is exclusively of the particular customer. This means that if the same person is connected with a supplier, the group and the category will be the same. |
| Salesperson | The salesperson to which the customer is “assigned” will be now suggested to the sales documents, where he can be differentiated per document or/and sold item line. |
| Recommended | The person introduced the customer. By giving part of the name and F3 or Shift-F3 search is accomplished. From the  icon we can, through the pop up «internal» menu, insert new person or to see the current. icon we can, through the pop up «internal» menu, insert new person or to see the current.
|
| Preferences |
It is a multiple choice field with the persons’«interests»:
Which is based on a general parameter for persons management:
Which is selected among different “categories” that have been parametrically defined:
|
| Reminder | To the text field through the icon we can define a comment that will appear through the customer selection at any trade or cash transaction. icon we can define a comment that will appear through the customer selection at any trade or cash transaction.
|


Financial data
In this sub-page there are data of accounting nature or related to the internal Accounting department processes (credit control, collection management).

| Opening date | It is automatically completed |
|---|---|
| State reporting group | It is used in Customers Summary Status creation processes. |
| VAT regime | It is the same field also defined to «Identity» |
| Accounting category | It must be selected from the default categories in order the posting of any document to be later feasible. The«Ledger Account» is not used by the default parameterization (the accounting category is used instead) but it can be completed if the posting parameterization is modified and uses it. |
| Currency | If a foreign currency is given, which is the «usual» for a foreign customer, this will be proposed at any transaction. Through reports per currency, we can check the customer balances for any currency. |
| Budget group | It is used to budget sheets as a special grouping element, through which the customers budget can be monitored. |
|
It is a «profile» which enables the design of the applications behavior depending on the customer solvency degree. It allows controls and prohibitions of different levels in order to protect the company from bad depts. The concepts, the customization methodology and the functionality are described in a specific chapter of this manual. |
| Credit limits |
The upper credit limits that we give to the customer. The balance limit is the accounting balance (debit-credit). The trade balance limit is the accounting balance limit plus the unpaid notes permitted value. The balance limit plus own notes is the accounting balance limit plus the unpaid notes permitted value, where it only takes into account the notes that the customer himself issued (and not a third party, e.g. a customer of his). When one of these limits is overcome from the customer and thus we have «credit margin excess», to the documents having the credit control option activated to the document type, the application, if there is a «credit policy reacts according to the settings whereas if it is NOT exist, it reacts depending on the value found to the general parameter (Tools/Customization/General/ Company parameters) in “credit control” category:
|
|
Based on the days of payment delay and based on this interest rate profile (which is customized to Tools/Customization/Financials) which is defined to the customer, the «Interests based on payment delays» report is received and if necessary, a relative debit note is being issued. |
| Credit Days | Give the days of settlement eg. 60 for 2 months payment aggrement. This element is informative, but also used in credit control processes. Additionally, the system generates customer invoices payment forecasts, based on this agreement (after N from issue date) except if there is a specific “payment method” designed and it is applied during Invoicing. |
| Collector | The person responsible for money collection from the customer, is selected between the persons defined as collectors to the Tools/Customization/Finacials. It is used in receivables planning processes. |
|
Payments date Day in month Working hours |
In these informative fields, we can define possible restrictions forced by customers’ accounting department for week days or hours appropriate for payments or contacts for the balances agreement. |
| Matching |
The usual matching method of receivables-payments (for the correct update of the «balance aging») is “on account”, that means Fifo by date (each receipt pays the older invoice). An other option is “based on rule” for special payment processes eg. per project, where the rule is defined to the next field. With any of the 2 above mentioned options, the matching is automatically occurs on-line while documents are entered. Finally, we can exlude the matching process in order to only occur by user selection or not at all. The automatic matching is a default process in order some of the most important system reports to be taken. |
|
The matching rule allows the method of AUTOMATIC “opening” and “closing” entries connection with different functionalities which allow the user intervention to be avoided or restricted, in order to define which documents are paid from each receipt. The matching rules are defined to the Customization (Tools/Customization/Finacials). |
| Bank accounts |
There are the detail data of customer’s (person) bank accounts. In some cases it may be needed a (returning) amount to be deposited. Then, the definition of the «related company bank account» (from which we transfer money) is usefull. The «Bank» and the «Account number» are compulsory fields. The banks are defined into Customization (Tools/Customization/Finacials). |

Commercial terms
In this sub-page we define the trade transaction data with the customer, for example the invoicing and discount policy, possible additional charges, the delivery parameters etc.

| Price range | For the cases of simple prices policy, we can define at inventory items 5 sales prices (wholesale, retail and three other of free use) and a «price range» at customers, that points the one of the 5 item prices that the customers takes. This is taken into account during Sale for the sale price proposal, if there is not a pricelist or other pricing method. |
|---|---|
| Price list | Select a particular pricelist for the customer. See the specific chapter of this manual about setup of pricelists. |
| Pricing group | It is used for customers grouping, where a common pricelist is in force (to which the Pricing group is defined). In this case, during invoicing or sales orders , the proposal of pricelist is based on customer pricing group (if no particular pricelist is defined). If there are more than one pricelists for the customer pricing group, the selection will occur by the user. |
|
In invoicing policy we can describe the conditions for providing discounts, offers, gifts, mutually exclusive discounts and offers, conditions of additional charges or bonus points for loyalty cards. See the specific chapter of this manual for configure invoicing policy. |
| % discount | Input the discount percentage, if the customer takes a particular – agreed discount. |
| Payment method | The payment method describes the settlement with the customer (when he pays, in how many installments, when the VAT is paid etc). See the specific chapter for information about setting up payment methods. Some of them may be excluded as options for the particular customer, through Credit control policy customization. |
| Special accounts groups |
When special charges are used, transport, additional taxes or default witholdings eg. in Public sector customers, we can setup special accounts for automatic calculations during invoicing.
|
| Related supplier |
Informative field for cases, where there is a default supplier for the items supply ordered by this customer.
|
| Commission level | It is a customers categorization that participates to the salespersons commissions calculation method. Details as to this customization are found to the specific chapter. |
| Orders priority | Informative field which is used for prioritization of customers, when the stock is not adecuate for the fullfilment of all pending sales orders. |
| Shipping method | It is the default shipping method to the customer. The shipping methods are configured through Customization/ Transaction parameters, where we also define the « Transport type » for the Intrastat report (if exports to the European Union occur). |
| Documents grouping | We define if it will occur «packing» of the documents, i.e. on many delivery notes if the invoicing will be suggested to generate ONE or MANY (one-to-one) documents. |
| Shipper | Selection between the persons that have been defined as “shippers” for the goods delivery to the customer. |
| Itinerary |
In cases that we do transportations through our own means, we define here the route where we usually incorporate the deliveries of the particular customer. Each route is defined in Customization/ Transaction parameters and it determines the Vehicles, the time, the duration etc.
|
| Trade delivery data per Site |
For each customer site (address) and each our own Branch (where the transit document is issued) and Bussiness Unit, we can define a particular shipping method, route, shipper, shipper address etc. Additionally, it can be defined a specific salesperson and a collector (as a default). Finally, ONE from all the customer addresses can be defined as being the default invoicing address and ONE as the default delivery address. These data are inputed in document forms but through this definition of default values, the need for the user intervention can be eliminated. |
| Global dimensions | If for the customer are defined particular dimensions values, these will be suggested to the header of all of his documents. |
|
In this list, we can define a specific salesperson by Business Unit. If Business Unit is set by ITEMS, then, the default salesperson of each document line (item) is based on this definition, according to the Business Unit of Item line (instead of the proposal of the customer’s salesperson). |

Contacts
In this sub-page, we define the persons (individuals) that we know in the customer business and the persons (companies) connected with the customer in any way.

- With the
 icon, the layout switches from a “card” to a “list”
 - With the
 icon, is achieved a new person insertion and a “contact” at the same time, connected to the customer (in “relations’ list” to the bottom part).


- With the
 icon is achieved the selection from the current persons as a “contact” to the customer.
 - With the
 icon it appears the persons’ management screen of the contact.


To the rest of the contacts’ fields are defined a number of data such as, the position, the relation type with the customer, department etc. One person may constitute a “Contact” for different customers, with separate role each time.
User defined fields
If we need more fields, are provided more static fields of various types (dates, comments, numbers,flags, tables) for free use and customers grouping/print, the name of which is defined in Customization.
Properties
It is a number of dynamic fields (this is, not stable in number and not the same for all customers) and they are activated by the field “User preferences set“.
Attachments
The method of documents management and incorporation is described in the EBS-Intro (Introduction manual).
Control and information data
To the left part of the screen, through the “contents” hierarchical tree, a large number of information connected to the customer, is available (from the time that transactions are taking place). This information provides an overview (360ο view) for the customer (documents, balances, suspensions, opportunities, problems occurred due to the relation etc.:

The audit view gives at a glance the most important information concerning the customer. 
The statement is the “accounting” statement of the customer’s transactions in various formats.
The unsettled receivables show which invoices in particular, are constitute his open balance whereas the balance justification shows the matching of entries (the way every claim was paid)
The related accounts are the trade accounts related to this customer (e.g. customers of the same group of companies, registers of the customer to other companies). The list shows the basic financial figures. If the customer is ALSO a supplier, it shows his “merged” balance.
The data per period shows his balance progress per month.
In sales data, information is provided that concerns to all trade activities: items/categories that were purchased, items that he has NOT purchased yet, sales prices that are enforced for him, per item or category, and the offers that have been given to him.
In the transactions analysis, we can check his pending orders, his not invoiced yet delivery notes and the unpaid notes.
The Budget vs Actual shows a comparative picture of budgeted and actual turnover per month (in case we have separate budget for this customer).
Other related information are the Projects, the Contracts with the customer, the open tasks , the telephone calls to and from the customer, the sales opportunities and other sales activities (appointments, presentations etc).
In case we provide support services, the information of the customers’ open cases is available, as well as the related tasks and the complaints that we have received from him, also.
Salesperson
The salesperson is an employee of the company or the external associate who undertakes, forwards, manages a part of the company’s sales. The sales are “credited” to salespersons and for each transaction is being estimated, with various methods, a sales commission value, independently to the way, the conditions and the time is attributed to them.
Identity

| General data |
Through the «Link to person» setting, the application automatically opens for him one “person” where actually kept all of his “demographic” data. If for instance, the salesperson is external associate and we open him as creditor in order to accept Service Provision Notes from him, the linked “person” will be the same. The same thing will happen if the salesperson is our representative, thus, in order to issue an invoice (suppose that he invoices the final customers) we will also open him as a customer and we will connect him with the same “person”. The salesperson can be also a system user. We make sure that everywhere the SAME PERSON corresponds. The “personal data” sub-page |
|---|---|
| % base commission & commission profile | The base commission is expressed in % on the (net) turnover and the commission profile (which is configured in Tools/Customization/Salesperson) determines which amount of the base commission will be calculated for each item-customer combination. |
| Incorporation & jurisdiction data | We define the branch and the Commercial unit that he belongs as well as the business sector, activity etc. if he exclusively occupies with some of these. |
|
Depending on the identification to the customers “salespersons per business unit”, here, the same information is defined, from the salespersons side. By activating the “replacement of original salespersons” the customers are updated at the same time. |

User defined fields
If we need more fields, are provided static fields of various types (dates, comments, numbers, tables) for free use, the name of which is defined to the Customization.
Supplier
The supplier is a trade account of the company, from whom we are supplied goods, fixed assets, row materials or any “incorporated” items and he must be opened even before obtaining accounting status (accounting “register”) if we want to insert e.g. an order to him.
His data management, the fields and entities meaning which are available to his management screen, are common or respective to these of the customer. Here we examine the parts, where management is differentiated.
- Anytime we refer to supplier «balance» e.g. to credit limits or to “positive” balance to the statements, as the usual sign, is always consider to be the credit (in contrary to the customer, where is consider to be the debit). Thus, when we purchase, the supplier is credited and when he has a credit balance, it is regarded as a “positive” (expected sign) balance. The debit balance is regarded as negative (when he owes to us).
- The supplier’s bank accounts per bank and the “related company bank accounts” from which we deposit to, are of great significance, as they are used to the “Planning of payments” and automated Payment orders which are sent to the banks. It is very useful to activate this functionality, in order to save time and to minimize the errors.
- Some information are only presented to the suppliers’ management screen:
| Usual settlement | We choose note, bank transfer or cash. This information is used for the payment method proposal to the Planning of payments. |
|---|---|
| Supervisor | The supervisor of the supplier account monitoring (procurements supervisor). |
| Purchases in consignment | We define whether we purchase with the consignment regime from the particular supplier. This process is supported by some dispatch documents and for those goods that will be sold, it occurs “clearance” per period and payment to the supplier based on this “clearance”. The process is described at the specific chapter of this manual. |
Creditor
The creditor is a trade account of the company who provides us services or any other products we monitor to the Accounting as “expenses” e.g. consumables, fixed assets spare parts, advertising material, packages materials etc. Actually, creditors are all the payable accounts, but in this sub-ledger monitored all the other payables accounts (except suppliers) e.g. company’s personnel, external associates, owners of rent buildings etc.
The meaning and handling of fields and entities available to the creditor’s management screen, are common or respective to those of the supplier. You may be informed from that chapter.
The screen differs, as the person “existence” is not compulsory to the system, thus the sub-pages are differently constructed.

If the creditor does not participate to the “State Summary Agency Report“, you may not open a “person.”
The suggested value to the “Link to person” field is YES and this is a strong recommendation for the following reasons:
- The services that he provides may will be incorporated to the Summary Statements in the future and then, the creditor’s identity data (required for the report) will not exist. As is already known, the ONLY part of the system keeping identity information, addresses, etc. is the Persons.
- It is possible to activate expenses payments through Bank Accounts and then, data that only kept to the Persons will be required, in order the payment orders to occur electronically.
It is recommended to be separately opened and not as Suppliers for accounting agreement reasons, but also for making entries easiest e.g. in a goods receipt Note or in a Purchase invoice, all the numerous creditors will not be appeared during searching. In accounting, it is correct to be monitored to summary accounts (“Other creditors”).
Debtor
Debtors are generally all the borrowers of the company, the “receivable” accounts. To the particular sub-ledger monitored all the other debtors, except customers. Debtors are the banks (debited interests), the shareholders (for the processes of capital payment), tenants own property etc.
The meaning of fields and entities available to the debtor’s management screen, are common or respective to those of the creditor. You may be informed from the previous chapter.
They are used in various documents for issue revenues. It is recommended to be separated from the customers for reasons of accounting agreements. In accounting, it is correct to be monitored to summary accounts (“Other debtors”).
Expenses
Expenses are all the intangible “accounting” items (with value monitoring) that the company needs in order to operate and to create revenues.
The systems’ invitation for the separate opening of the expenses and in the same time the parallel monitoring into Accounting, offers a number of advantages:
- It helps to organize back-office. Each process is designed and illustrated with the appropriate way into the system , in contrary to the “freedom” during issue an Accounting transaction.
- It makes easier the entries from NOT specialized users and restricts the ERRORS, due to strict documents organization , of the predesigned «Post» and application checks It prevents problems in reconciliation, due to primary entries in Accounting.
- It allows expenses monitoring «on credit» where are presented all the real dates of the debts.
- It allows the payment with notes, the issue of computerized checks and a 360 view of Bank Accounts based on valeur.
- It allows automatic calculations e.g. in deposits, interest rates, taxes, issue of royalties, withholding, VAT etc.,
- It allows informative costing and creation of results statement per Project, Sector, Service, Activity
- There are some cases where this is NECESSARY, by abolishing the line between Sub-ledgers and General Ledger, e.g. Costing Folders
- If the Accounting department is external, the Management department takes early information, for the expenses evolution, without delay.
In the pre-configured Data Base, all the expenses that may be used are already opened and the relative configuration of Accounting Posting is ready. Despite these, could select between the three following methodologies for monitoring the expenses in relation to the Chart of accounts:
1st method One by one for all the expenses (except the depreciations)
2nd method Analysis of the expenses and maintaining in Accounting only the compulsory e.g. some of these can be opened per VAT, the training expenses can be opened per category or per site or per training cycle, the rental expenses could be opened per building, floor etc. and the same time, in Chart of Accounts we only open one account per expense type.

3rd method The expenses summarized to items and, during invoicing, input by the user of the specific General Ledger Account every time. You could also make visible the column “comment 5” where the default setup of expense documents places the title of the account.

The expenses monitoring is directly connected with the creditors monitoring. Suggested to open:
- One «general» creditor that will be useful in many cases of expenses in cash or “indifferent” as to the creditor data, who will need to be placed as default in Expenses Receipts.
- One creditor “Wages and salaries” in order to enter the payroll entry (and special –autonomous withholding accounts) in order the Payroll entry to be correctly produced and posted.
- Use of a horizontal dimension for the employees as cost positions through which we will be able to manage various expenses or money deposits per person. Alternatively, each employee could be opened as a creditor.
- Opening of the debit interests as “expenses” and the credit interests as “services” and for each Bank, a creditor for issuing debit interests and a debtor for issuing the credit interests.

| Expense profile | The profile is an easy way for ready default values to the fields, depending on the expense category. The profiles are designed in Customization table (Tools). |
|---|---|
| Grouping | The family, group, category, and sub-category are expense groupings enabling to take summary information, as we usually do not monitor the expenses one by one but per general categories. |
| Special accounts groups |
When the expense «sweeps» a special tax or charge or withholding.
|
| Vehicles | Besides the fact that at the documents concerning expenses for particular vehicle, the related field is available, you could deside to develop specific expense codes PER vehicle, especially when this distinction is of great significance. Thus, here is completed the transport mean that the expense is concerned. The vehicles are opened at Tools/Customization/Transaction parameters. |
| Budget group & Calendarization template |
Both used in Budgeting. The budget group is a special grouping element through which the expenses may be monitored to budget. The calendarization template (defined at Tools/Customization/Budgets) allows to split a yearly forecasted amount by month for example. To generate percentages per month in the template, could use the “update from actual data” functionality e.g. convert last year sales to % percentages.
|
| Allocation profile | Used to distribute expenses to cost centers, within expenses documents. More information see to the relevant chapter about registering expenses and allocation methods. |
| VAT category |
Instead of this correct approach, some users input the total value to the net value, making the VAT null or insert 2 separate lines to the document! DO NOT do it! |
| Accounting category | In the default parameterization, the “ledger account” is used for posting, but the accounting category could be used instead, if the posting parameterization is altered. As far as the expenses VAT is concerned, if it is about an expense with non-deductible VAT, could either monitor the “VAT not deductible in Income Tax” at a special account in Chart of Accounts or to post it to the SAME Expense Account. |
| Specific tariff | In expenses that are used in Imports costing, we define the Specific tariff. Thus, for instance, the import duty will surcharge the imported items that belong to the same tariff. |
| Cost element type | Concerns costing. As much for the Production Costing and the Imports costing, the expenses categorization is necessary as the “cost elements types” describe the allocation method to the “units to be costed” (produced items or imported). |
| Relates to State Reporting | It is activated if the current expense will participate to the values calculation of the Summarized Suppliers Invoices Statements. |
| Horizontal dimensions | If for the expense, will be defined particular dimensions values, these will appear to documents lines as the default and thus will update the related trial balances and statements in order to easier take statistics such as Expenses per Sector, per Activity etc. |


User defined fields
If we need more fields, are provided some static fields of various types (dates, comments, numbers, flags, tables) for free use and grouping/print of the expenses, the name of which is defined to the Customizations.
Attachments
The method of documents management and incorporation has been described in the EBS-Intro (Introduction manual).
Service
The services (training, maintenance, health, legal, consulting etc.) are provided from the company to customers, creating revenues. In services are opened any other revenue sources such as rent of property, credit interests, extraordinary revenues. As “intangibles” they only have value monitoring. Particularly in Sales, the information of quantity sold is available for specific service types.

| Service profile | The profile is an easy way to give ready default values to fields, depending on services type. The profiles are designed in Customization table (Tools). It is preferable to be created and selected in this field, in order to ensure that e.g. the accounting category, the measurement unit, the groupings will be correctly inputted. |
|---|---|
| Control profile | Through the control profile, documents behavior can be easily parameterized for this type of Services, for instance, the application check for the upper limit of discount permitted during issuing an order or an invoice. The existence of a “% maximum discount” (see below) does not activate any process because the method of using and the “meaning” of documents and thus, the suitability of each application check per case, concern the implementation of each installation. So, in order to define that in sales, a check of the % maximum discount must be active, insert a control profile (code, description etc) and, into it, create a new line with the “Sales” attribute (the attributes are freely designed and, at each document type, one or more attributes are matched), activate the option of maximum discount and finally, select this profile to this field. |
| NPF code | For those having Revenues-Expenses Journals, here is selected the compulsory category of the Unique Ratio of Net Profit for the Revenues journal. |
| Grouping | The family, group, category, sub-category are groupings enabling to take summary information. |
| Wholesale price | When we do not keep pricelists values of the services, we define the sale price and also whether it includes VAT or not. Continuing, to the documents that have been appropriately parameterized (e.g. Services Invoices) in order to present by default the “wholesale price”, this price will be suggested to the user. |
| Retail price | We define the retail sale price and whether it includes VAT or not. Continuing, to the documents that have been appropriately parameterized (e.g. Services Receipt) in order to present by default the “retail price”, this price will be suggested to the user. |
| % discount | If for this service a fixed discount to the initial price is provided, we give it here. When we keep the discount pricelists (per customer), this discount is not possibly used during invoicing. Details concerning the design of pricelists, see to the specific chapter of this manual. |
| Maximum discount permitted | If the users, during invoicing have access to values and discounts, through this field (and with parallel use of “control profile”) we can restrict the discount that can be given, up to a maximum amount (either through value or price reduction or through discount definition from the user). |
| Pricing group | It is useful in pricelists design. Each service can be inserted into a pricelist either DISCRETE or through the “pricing group”. Thus, in a “prices” pricelist we usually insert all services with their sale prices whereas in a “discounts” pricelist, we usually insert the discount for a service category e.g. consulting. Details concerning the design of pricelists, see to the specific chapter of this manual. |
| Standard cost | Since there is not a direct cost allocation to service “items” (they are not “purchased”), we could view sales statistics for the estimated gross profit, if we give at this field the hour (for instance) average standard cost price. |
| Special accounts groups |
When the service «sweeps» a special tax or charge or withholding for public sector etc.:
|
| Budget group & Calendarization Template | Both used in Budgeting. The budget group is a special grouping, through which the revenues of services monitored to budget. The calendarization template (Tools/Customization/Budgets) allows to split a yearly forecasted amount by month for example. To generate percentages per month in the template, can use the “update from actual data” function e.g. convert last year sales to percentages. |
| Commission level | It is a services categorization that participates to the calculation method of salespersons commissions out of sales. For details concerning this parameterization see the specific chapter. |
| VAT category | For the automatic calculation of the VAT, it is compulsory to select the respective “category”. The services have always standard (23%) VAT and this can take default value through the “profile”. |
| General Ledger Account or Category | To the default parameterization of services posting, the “Accounting category” is used, but the General Ledger Account may also be filled and then, the parameterization could be altered. |
| Measurement unit | Despite the fact that services are intangibles, the measurement unit is necessary for pricing policy to be functional, e.g. price per “hour” for consulting or per “piece” for studies, seminars etc. |
| Relates to state reporting | It is activated if the current service will participate to the values calculation of the Summarized Customers Invoices Statements. |
| Horizontal dimensions | If for the item, will be defined particular dimensions values, these will appear to documents lines as the default and thus will update the related trial balances and statements in order to easier take statistics such as Services per Business Unit, per Activity etc. |
User defined fields
If we need more fields, are provided static fields of various types (dates, comments, numbers, tables) for free use, the name of which is defined to the Customization.
Attachments
The method of documents management and incorporation is described in the EBS-Intro (Introduction manual).
Inventory Item
Inventory items are all the goods (merchandises, products, raw materials etc.) which are purchased or produced and are sold or consumed, for which a full quantitative and value monitoring (register) is required. The items codification to separate codes-registers is usually an accounting subject.
Identity

| Basic data | They are the unique determination data of the item. As far as the code is concerned, it can be later changed from the “system administrator” and the system will automatically keep the previous code to the “Multiple codes” (see the “Storage” sub-page), in order to be feasible the search process through any of its codes. It can be defined a particular code format using of grouping data in the item’s code (but also to description) with an automatic produced segment etc. There are 3 fields for the description as well as one main “Barcode” (if a scanner is used). In “storage” sub-page there is a place-holder for define multiple barcodes e.g. for packages reasons, multiple suppliers etc. | |
|---|---|---|
| Basic item | For the NOT “basic” items, it must be defined another “basic” item to which are belong. This enables the mass management of the daily prices based on the changes to basic only (“parent”) items. Details for this functionality, see to the Pricelist chapter. | |
| Item profile | The profile is an easy way to give ready default values to fields, depending on items categorization. The profiles are designed in Customization table (Tools). It is preferable to be created and selected in this field, in order to ensure that e.g. the accounting category, the measurement unit, the groupings will be correctly inputted. | |
| Type | It is a fixed “accounting” categorization of the items. The type is the default grouping of the items to all the official Inventory Reports to help to the accounting reconciliation. It must not be confused with the field “accounting category” (see below) which is used for the “accounting posting” despite the fact that, as a concept, is usually identical. For the system, the type is a simple grouping field (with fixed values), whereas the accounting category is freely defined and used in Posting process for the ledger accounts detection that need to be updated. | |
| Groupings | The family, group, category, and sub-category are items groupings enabling to take summary information. The statistics are usually based on the categorizations and not per item. | |

|
 Instead of filling the 4 previous fields, using this action button, we can select the items’ grouping from a hierarchical tree maximum of 4 levels as many as the basic groupings of the item. The definition of this hierarchy is achieved through the Code lists “group”, “category”, “sub-category”, to which may be defined the ”family”, “group”, “category” where they correspondingly belong (Tools/Customization/Inventory items). The groupings may be independent to each other e.g. the “white kitchen devices” category may be bound to the “Refrigerators”, “Washers” etc. whereas the “fitted kitchen devices” can be independent. Instead of filling the 4 previous fields, using this action button, we can select the items’ grouping from a hierarchical tree maximum of 4 levels as many as the basic groupings of the item. The definition of this hierarchy is achieved through the Code lists “group”, “category”, “sub-category”, to which may be defined the ”family”, “group”, “category” where they correspondingly belong (Tools/Customization/Inventory items). The groupings may be independent to each other e.g. the “white kitchen devices” category may be bound to the “Refrigerators”, “Washers” etc. whereas the “fitted kitchen devices” can be independent.
|
|
| Manufacturer | Selection from legal «persons» who have been characterized as «manufacturers» | |
| Catalogue item | The application opens automatically (based on the parameterization*) one «catalogue item» for each item (with the code and description of the inventory item), where kept all the relations with other items which may have not been opened yet as “inventory items” or may not be sold by the company e.g. competitive, compatible. The catalogue items are common for all the companies in the system. | |
|

| |
| Season |  If the item belongs to particular season, such as, the clothes, shoes models etc. The season is a selection criterion of items in many official statements and statistics. Through the definition of the «Item control profile» (see “Administration” sub-page), it can be checked to the transactions (orders, customers returns etc) in order items of a season different of the current, not to be accepted. If the item belongs to particular season, such as, the clothes, shoes models etc. The season is a selection criterion of items in many official statements and statistics. Through the definition of the «Item control profile» (see “Administration” sub-page), it can be checked to the transactions (orders, customers returns etc) in order items of a season different of the current, not to be accepted.
|
|
| Characteristic |
Single, set, produced.
In sales documents, the contents of the set items are automatically “developed”, are analytically stated a documents “lines”. In contrary, for produced items, during invoicing, their contents are not visible or available. They are produced through an independent procedure, which is not necessarily the same, stable and repetitive. Many times, the raw materials (codes and quantities) are defined by the user, exceeding the components defined in bill of materials. Thus, during sale, the only thing that is defined is the produced item. |
|
| Basic BOM |
It must be defined for the “sets” and for the “produced” items. As far as the produced items are concerned, details for bill of materials see to the specific chapter about Production Process. As far as the “set BOMs” are concerned, after the item is saved, we can insert the related BOM through the main menu (Entities/Inventory/Bill of materials) or through the Customization table (Tools):
|
|
| VAT category | For the automatic calculation of the VAT we compulsory select the “category” where the item belongs (standard, reduced, low). In sales, the VAT rate is defined from the combination of the “VAT category” of the item and the customer “VAT Regime” whereas to the purchases, is the “VAT regime” of the company site (branch) that it is taken into account (the VAT value can be given by the user, according to the supplier’s original copy. | |
| Ledger account or accounting category | To the default parameterization of Items posting, the “Accounting category” is used, but the General Ledger Account may also be filled and then, the parameterization could be altered. | |
| Measurement unit | Here is defined the basic measurement unit of the item in which the stock kept. In “storage” sub-page are defined all the other measurement units or/and item packages. The basic measurement unit is required, in order the item to be functional. | |
| Supplier |  The main supplier of this Item. Searching may occur through code or name. In “administration" sub-page can be defined additional data as well as other alternative suppliers of the item. If we want during purchases, to compulsory be used the suppliers defined to the item and not any supplier, we activate this check through the “Item control profile”. The main supplier of this Item. Searching may occur through code or name. In “administration" sub-page can be defined additional data as well as other alternative suppliers of the item. If we want during purchases, to compulsory be used the suppliers defined to the item and not any supplier, we activate this check through the “Item control profile”.
|
|
| Codification | It is the item code, in accordance with the supplier codification. In documents, item search can be based on this code. | |
| Purchase price |
This purchase price, is updated from the purchase invoices automatically with the last purchase price (if this option has been activated in the “Item control profile”).
|
|
| Wholesale price | It is the basic wholesale sales price of the Item. We define whether it contains VAT or not as well as the %markup (on the cost price). The % markup can be used in various adjustment processes of the sales prices, starting from the cost prices. To the documents (e.g. Offers, Invoices, Credit notes) that have been parameterized as to suggest the “wholesale price”, this price will be suggested to the user, except if the application of a specific pricelist (the customer’s pricelist) leads to another default price. | |
| Retail price | We define the sales retail price and whether it includes VAT or not, as well as the retail sale %markup (on the cost price). To the documents (e.g. Retail receipts) that have been parameterized as to suggest the “retail price”, this price will be suggested to the user, except if the application of a specific pricelist leads to another default price. | |
| Prices 1,2,3 |
They are additional sales prices. If we have a simple scheme of pricing policy, where the customers’ prices zone leads to particular sales prices of the items (one of these 5 prices) then, the 5 prices are defined for all items and, during Invoicing, as soon as the customer is given, the appropriate price zone (1 .. 5) for all item lines is activated. The prerequisite is to select a “sale” price (retail or wholesale) as proposed price in the document type. The name of these fields can be altered (Customization/General/User defined fields). |
|
| Pricing group | It is useful in pricelists design. Each item can be inserted into a pricelist either DISCRETE or through the “pricing group”. Thus, in a “prices” pricelist we usually insert all items with their sale prices whereas in a “discounts” pricelist, we usually insert the discount for an item category e.g. “items on removal”. See the specific chapter of this manual for details concerning the design of pricelists. | |
| % discount | Give here the fixed % discount that provided to the initial price, if there is one. When there are discount pricelists (per customer), this discount is not possibly used during invoicing. See the specific chapter of this manual for details concerning the design of pricelists. | |
| Discounts group | Some discounts may be configured through items and customers “categorization” to “special discount accounts”, which can be incorporated to the items for the final value calculation (exclusively to the “Discount 4” field of the lines) or for autonomous lines that do not influence the inventory (cost, turnover), but only the payable amount and the trade account (supplier, customer) turnover. At this field, select this categorization (discount group). See the specific chapter of this manual for details about design discount policy. | |
| Maximum discount permitted | If the users, during invoicing, have access to values and discounts, through this field (and parallel use “Item control profile”) we can restrict the given discount up to an upper limit (either through value or price reduction or through discount definition from the user). The 0% cannot be regarded as upper limit, is ignored. | |
| Minimum gross profit % |
During sales process, a temporary Cost of goods sold is available, based on which the on-line gross profit is calculated. If the sales value or the discounts lead to limited or negative gross profit, this may be checked and restricted, based on the threshold defined here. The way, the type of transactions and whether or not it will be checked, can be defined into the “item control profile”.
|
|
| Commission level | It is a categorization of the items, that participates to the calculation method of the salespersons commissions out of sales. See the specific chapter for details concerning this parameterization. | |

|
Text field for notes, comments in relation to the item. | |

|
Text field for the typing of a reminder message that we want to be presented to the users after the selection of the particular item. This will occur to those documents that defined to the related setting of the “item control profile”.
|
|
| Characteristics | There is a multiple choices button (through the  icon) with item characteristics which is supported to a general parameter for items management (respectively with the “preferences” field of the customer), which is selected between various user definable “categories”. icon) with item characteristics which is supported to a general parameter for items management (respectively with the “preferences” field of the customer), which is selected between various user definable “categories”.
|


Administration

| Valuation method | Selection among stock valuation methods. It is usually defined per item category (recommended use of “items’ profile” which suggests the correct valuation method). If the item is a “set” or has the “Not to be valuated” value to this filed, it is ignored during the Stock Valuation Process. |
|---|---|
| Analysis per lot | It may be selected Stock valuation analysis per item lot, which means that all grants of every lot (sales etc.) will be take cost from the particular lot’s purchases. Prerequisites for this functionality are the stock valuation method to be “Average weighted price” and, to all item transfers, the lot to be compulsory completed, that can be ensured through the items’ control profile. |
| Analysis per period | In cases of annual or generally not monthly costing period, this option activates monthly costing period only for some particular items. Thus, for instance while for all the items, is in force the annual costing period, could define especially for the Production raw materials, the stock valuation to be “locked” per month (through this field). Thus, any purchases later than a specific (valuated) month or a retrospective discount will NOT affect the consumptions cost of this month, as it will generally happen on an annual (Year To Date) calculation. The functionality is only provided if the stock valuation method is the “Average weighted price”. It is NOT allowed to be activated in produced items. |
| Standard cost price | The Standard Cost Price is typed by the user on one hand, in cases where the stock valuation method is the “standard cost price” (thus the sales and other grants take this cost price), on the other hand, in cases where there is stock and its’ cost cannot be defined in any other way. Such a case is a return (delivery/credit note) from a previous fiscal year sale and, at the same time, there is no other stock for this item. |

|
In the opening dialog, we can enter costing prices per period for history reasons. Standard price: If there are values here, they are preferable (to the field “standard cost price”) by the Stock Valuation Process, if needed. Additionally, the Fiscal Year Closing process creates every time an entry to this list, with the cost price of the “opening” entry. Sell-out price: It is the minimum selling price. It is used by the Stock Valuation Process, in cases where the cost price that has generated from the process is lower than this (the sell-out price) or zero. Desired cost price: It is defined when wrong transactions have occurred and their retrospective cancellation, correction or even investigation is not feasible. If it has a value, the Stock Valuation Process will use it, in order to take correct results from this period on. |
| Tax code |
Field with selection from a table (with code, description etc). It is useful in cases where many items are opened (for administrative, management needs) but they correspond to ONE “official” (tax) code, with which these items must appear to Inventory Official Reports (where this field must be selected as a grouping field INSTEAD of the item code). The prerequisite is to fill this field to ALL THE ITEMS (at least to those that participate to the Official Reports), otherwise, some items will be printed without code! |
| NPF code |
Field required, if a “Revenues-Expenses Journal” monitored. The required codification defined through Tools/Customization/Organization parameters/Official codification.
|
| International code | Informative codification for cases of items that follow an international or standard codification that does not necessarily coincides with the company’s one e.g. the records ISBN, the ball codes etc. |
| Relates to State Reporting | We define whether the item will participate or not to the calculation of the values of the Summarised statements Customers and Suppliers Invoices. |
| Specific tariff | If the item is imported, and if during Imports costing, it is surcharged with expenses of this category (i.e. import duty), the specific tariff must be defined here, in order the allocation of expenses to be executed correctly. |
| Intrastat code | It is used in Intrastat statements, where the items appear with a specific Eurostat coding (Tools/ Customization). If there are no transactions within European Union, the code may not be filled. |
| Cost element type | Concerns Production Costing. It is defined to raw materials and describes the allocation method to the “Cost Units” (produced items). |
| Calculate VAT on |
The VAT is calculated on Net Value, by default. There are however cases where the VAT must be calculated on the cost value (such as in the case of used vehicles sales) or on the value before the recycle tax (such as with the new cars). In these cases (and depending on the field, where the related charges monitored, which possibly need to be ignored to the calculation), the “net value” must be inactivated and to activate the values that will consist the base of calculation of VAT. |
| Item control profile |
VERY IMPORTANT FIELD, which defines the behavior of the item to various documents and activates checks during user typing, in order errors to be avoided. The fields that are filled to the item (e.g. % maximum discount, minimum order quantity, Permitted W/H, Safety Limits etc.) do not activate directly any control process as the use method (and the «meaning») of documents, and thus the appropriateness of each control per case, concern to the specific implementation.
Generally, must organize some “Control profiles” depending on the items types (the “behaviors”) that he wants to describe, then to create related “Item profiles” with the corresponding control profile and to every new item, the profile must be always entered, in order to have the default “behaviors”. |

 How to activate Stock Control during transactions
|

How to deactivate or restrict the use of an item
|

How to warn users for item double entry into the same document
| |
|---|---|
| User preference set |
|
| Usual order |
|
| Minimum order |
|
| Available to WEB |
|
|
Warranty template |
|
| Budget group & Calendarization Template | Both used in Budgeting. The budget group is a special grouping, through which the revenues or the purchases monitored to budget. The calendarization template (Tools/Customization/Budgets) allows to split a yearly forecasted amount by month for example. To generate percentages per month in the template, can use the “update from actual data” functionality e.g. convert last year sales to % percentages. |
| Special accounts groups |
When the item “sweeps” a special surcharge eg. stamp, recycle task or other charge or deductions for the public sector etc.:
|


How to activate Color-Size, Lots or Serial Numbers
|
Serial numbers, Lots, Size-Color, Dimension 1, 2
|
They are activated accordingly to the item type and the requirement for stock “analysis” monitoring per one or more stock dimensions (variations). No matter which of these dimensions is activated, the appropriate Item control profile must be defined and selected in order the users to be enforced to give these data to the transactions, where it is necessary and not to occur wrong data. As it is already known, the system does not automatically activate any of the checks since the meaning and use of the documents is designed in implementation level. As far as the serial numbers are concerned, sometimes, there is the need for the serial numbers to be monitored ONLY during sale (for warranty, service). In this case, in the control profile lines concerning purchases, orders etc. we would define to the « s/n administration» setting the «no» value (NOT to be filled) or “allowed” (to be optionally filled), whereas to the lines concerning sales, we would define “required” (to be compulsory filled). In cases of strict serial numbers management, could activate a check for their “position” (to be actually in the warehouse where the export occurs) or for explicit values to their “status” field (i.e. “available”, “approved by Q.A.” etc.). Before a serial number is used to a transaction, it must (similarly to an item) be opened from its specific manegement screen (Inventories/Serial Numbers). Aa far as the lots are concerned, through an Item Control Profile, we could define “Automatic Consumption” based on a list with the right sorting e.g. by lot expiration date. This will be defined to the lines of the Control Profile concerning sales, consumptions. In order a lot to be used to any transaction, it must (similarly to an item) be opened from its special manegement screen (Inventories/Lots).
As far as the lots, colors and sizes are concerned, you must define to be compulsory entered to orders, reservations etc. in order to monitor the EXPECTED and AVAILABLE stock, and to the sales, purchases, internal transfers etc. in order to monitor the ACTUAL STOCK. If this parameterization does NOT occur, it will NOT be ensured that the users will give the necessary data and none of the related reports (Lots registry, trial balance per dimension, stock per color-size etc.) will present correct data for sure. |
|---|---|
| Color pallet, Size pallet, Stock variation set 1,2 |
They are tables with the allowed values of these dimensions for the particular item. Are defined to «Tools/Customization/Inventory items/Stock Variations». Stock variation set is the subset of the values of a dimension which is active for a particular group of items e.g. a group of colors from the superset of colors for all items (for instance, color set of skirts, color set of shocks) or for sizes pallet, the clothes size pallet (S,L,XL,XXL or 42,44,46…) is different from the shoes size pallet (35…45). |

|
If we deal with too many colors and so, their grouping in combinations (color pallets) is not feasible and the only thing needed is the definition of this specific ITEMS’ COLORS, then, through this icon, this definition is achieved:
|
| Horizontal Dimensions | If particular dimensions values are defined for an item, these will be transferred as by default to the documents lines and through these, they will update the related Trial balances and Transactions, all the Revenues and Expenses statements, in Accounting but also to Statistics eg. Sales per Business Unit etc. The dimensions values of items, overcomes (as defaults) the rest involved entities at documents (customer dimension, branch/series, type of transaction, contract etc.). |


Item’s suppliers & purchase prices
| Item Suppliers |
In this list, some additional data for the main supplier are available and here, they are also defined some (alternative) suppliers of the item.
|


Storage

| Measurement units & Packing units |
How function the measurement units and packaging units? All the measurement and packing units defined at the customization table. At this point, it must be defined (apart from the main measurement unit, in which stock kept) all the alternative units and packages that will be available for this item. During any transaction, ANY of these units can be used. Among them, there is an explicit definition of alternative unit, weight unit and volume unit, if needed. Once they are selected (from the superset of units) to the homonym fields (to the left) then, they are automatically added to the list on the right. Independently the unit in which the quantity of each transaction is expressed, which may be any among the units of this list, the system stores and uses the items’ quantities to these 4 units.
Between measurement units there is RELATION (in each item, it is defined the relation of each unit to the main unit) which usually is not “binding”, which means that some units may not come up from another, necessarily. The packaging units in contrary, usually have a binding relation with the main measurement unit (boxes, pallets, boxes, 10kilos etc). The relations can be either expressed TO or FROM the main (basic) unit:
Each unit, within its definition, can support a specific number of decimals as well as 4 “variables” (quantity 1,2,3,4) which are provided to documents lines for easy typing and calculation of final quantity from “dimensions” of packing units). From these variables, can be calculated any “document line” quantity i.e. weight, volume, alternative qty). The definition screen of a unit allows the re-name of the available quantities and the configuration of all “line” quantities, with simple expressions:
If we have 4 variables, the line quantity will be typed like this (through
If a unit is characterised as “to read”, the application will NOT allow to documents lines access in “quantity” column, in order the user-input to always occur through the pop-up dialog, with the values of these variables.
Thus, the user may undertake quantities counting in the exact format that they are found (each “broken” package, contains the item to the next package format (e.g. box with pair of shoes consists from N pairs), whereas, at the end, only the total quantity in main unit (“minimum” unit) is displayed and updates Inventory. |
|---|---|

|
A special package case is the sortiment (usually used in clothes and shoes businesses). It is a particular combination of quantities to particular colors-sizes. The sales or/and purchases orders are defined in “number of sortiments”. In the measurement units list, it must be defined a reference measurement unit (that will be used to the documents) and that is “connected” (1 to 1) with a sortiment (defined in the customization table). Using this icon, a new sortiment definition dialog opens, with the size and color item pallets already filled.
To the documents, with the selection of a unit connected to a sortiment, the quantity typed, is automatically developed* into “size-color” analysis lines, based on the quantities (by multiplying) of the sortiment.
|
| Trading Measurement unit |
Select between the main & alternative unit. It is the unit in which quantities “closings” will occur during the consecutive transitions (e.g. orders) in the various workflows, until a delivery is completed. What does this mean? The unit in which the customer orders are defined or, in general, the quantities to which we “communicate” or “agree” with trade accounts, is possibly different from the main unit and then the quantity in that (main) unit is NOT entirely known, until the final delivery or receipt occurs (with counting or weighting). Consequently, to all previous stages, the quantities may be expressed in alternative measurement unit and through this (even without exact precision), the quantity in main unit will be calculated. This functionality is meaningful in case of units NOT having A BINDING RELATION TO EACH OTHER. Thus, whereas a customer orders “pieces”, the main measurement unit may be e.g. the “kilos”, so during order execution, the “pieces” must be defined, and when these are delivered (and not, necessarily, the “estimated” weight), the order will “close”. During actual delivery, the main measurement unit (or the “line” quantity) is entered WITHOUT the “trading” quantity be altered (through automatic calculation from main unit). |
| Multiple item codes |
This list contains all codes (older codes, suppliers codes, constructor codes, barcodes) through which the item may be identified. Especially if the item code is modified, its’ previous value is automatically saved to this list. In order to search the items through these codes (during enter documents and type item code or use OCR), some fields must be defined here, depending on the type and the content of barcode:
In general parameters, the processing type for the items’ “bar-code” field can be also defined (if necessary). Additionally, you can determine the processing type for codes (“multiple codes”) defining that “Barcode processing required” but have NO “Barcode processing type”. The print of labels with bar codes is described in “EBS Reporting” manual. |
| Warehouses allowed and Stock safety levels |
In this list, we define the warehouses, where the item kept. For each of these, we can see the actual and available stock.
|

|
The storage locations defined through an hierarchical table from Tools/Customization/Inventory items/Storage locations. This data may be used to views of “picking list” type, for instance. |


Related Items

In this list, are defined the relations with other items. The information kept to the related catalogue items (and not to “stock items”). Consequently, it is available to the other companies if the same items are used and, on the other hand, relations may be defined to items that are not yet stock items e.g. compatible equipment, competitive equivalent items etc. The “Relation types” are defined in Customization/Inventory items/Catalogue items.
The quantity relation is useful in cases where the alternative items are asked during Sales orders or Invoicing INSTEAD of an item that is initially entered but it is in lack. Then, besides the substitution of the item with its alternative item code, it will be also applied the equivalence between quantities e.g. instead of 100ml Item Α 150ml Item Β (relation 1.5).
|
The price relation is used to the price automatic adjustment of NOT “basic” items when we readjust the prices of the corresponding BASIC (parent) item to which the NOT basic items belong. The price relation is determined with an expression to the dialog appearing with the |

|

The specific relation between the basic and not basic items that belong to them, there is no need to be defined by user every time. It is enough to be correctly defined to the general parameters:

...and thus, will be automatically created.
With the  button, the user may make copy of these relations to other (similar) items. In the dialog that appears, he selects the items TO which the relations will be copied and defines which relations (just the marked or all) will be copied.
Item prices per variation

|
When the item has dimensions/variations and when they differentiate the sales prices or the item discount, in this list, prices and discounts can be re-defined and REPLACE during the sales processes (order, invoice, etc.) the (general) price & discount of the item. The definition concerns all sales prices (wholesale, retail, price 1,2,3) and, for the %discount there is possibility to assign it directly to “price” (decreasing the base value) or update one of the discount fields, available to the document line (discount 1,2 or 3). |
With the  icon, we can produce lines automatically, according to the Cartesian multiplying of the dimensions values (from the dimension set) e.g. all colors-sizes combinations.
Obviously, it is NOT necessary to insert lines for all dimensions, monitored by the specific item, but ONLY for these dimensions, where the price differentiated. For instance, in an item monitored both in color and size but the value is differentiated ONLY by the size, there are created as many lines as the sizes are (independently to the color).
Caution: In order this page to be available, but also activated in sales processes, the related parameter must be set to “true” to the general parameters:

The “prices per dimension” is an easy way of defining a “pricelist” as the sales prices defined at the 1st items’ sub-page. If you use pricelists, this parameterization is ignored and the pricelist (in which the prices can also be defined per color, size etc) prevails.
User defined fields
If we need more fields, static fields of various types (dates, comments, numbers, and tables) are available for free use, the name of which is defined to the Customization.
Attachments
The method of documents management and incorporation is described in the EBS Introduction manual.
Additional properties
 If the “User preference set” is defined to the administration sub-page (or a general set has been defined for all the items in the general parameters) then, in this page, all supplementary fields/properties of the item are displayed and can be entered.
With the proper parameterization, they can be used in views, cubes or other reports.
Control and information data
To the left section of the item management screen, through the hierarchical tree menu, a wide range of information is available for the current item (movements, costs, pending orders, availability issues, delivery delays etc.:

 The Audit view gives the most important information for the item AT A GLANCE: availability, sales & cost prices and the most important 2 years sales data. In 2nd level (
 )views of pending orders, open offers, delayed deliveries etc.
The Register (in 3 layouts) shows the Item transactions with all supplies and grants, per quantity and value.
The “sales analysis” shows detailed sales data per salesperson, customer, and branch for the selected date range.
In “check cost views” are displayed the items’ Valuation results
In “pending”, check which customers’ orders are not delivered yet, and which suppliers’ orders are expected. There are choices for check items’ returns (from customers, to suppliers). When dimensions monitored, a number of choices allow review the sales data, the various transactions & balances per dimension. If the item is produced, its BOMs are available.
The Budget vs Actual shows a comparative view of budgeted and actual turnover per month (in case we have specific budget entries for this item).
Define WarehousesUpdate SuppliersAssign Measurement UnitUpdate Cost Prices |
In the main items list through “Actions” menu, some processes are available for easy mass update of items (which are selected-marked to the list). So, after the initial creation of items, if there is need of global modifications (e.g. supplier write-off, new supplier, new warehouses etc) we can execute such updates to a subset of items, without opening the item form one by one. |
|---|---|
|
|
 
|


Fixed Assets
The fixed assets are part of the company assets. This sub-ledger allows the monitoring of fixed assets Registry, their cost, the Depreciations with various methods and any types of cost modifications as well as a large number of informative data, related to the fixed assets.
As fixed assets are considered:
- All the distinct fixed assets
- Additions and extensions to existing fixed assets
Addition or extension is a separate fixed asset, which becomes a “part” of the basic fixed asset, and monitored “under” that, to the same account (fixed assets Registry “line”).
Each Fixed asset becomes active from the time it obtains “Depreciable acquisitions”. Depreciable acquisition is each value (to be depreciated) fixed asset entry e.g. Purchase, Transfer from other fixed asset. Each purchase invoice for instance, is automatically creating a separate Depreciable acquisition. The acquisition costs and the depreciations monitored in Depreciable acquisition level.
Identity

| General identification data | They are the unique definition data of a fixed asset. It can be defined a main and alternative code, description and alternative description. |
|---|---|
| Basic fixed asset | Most of the fixed assets are “basic”. In the additions or extensions of these, must deactivate this field and define to the next field , the BASIC code where it belongs. , the BASIC code where it belongs.
|
| Groupings | The profile, type, category, group etc are groupings of related functionality to the inventory item. |
| Account | Enter the ledger account where it is monitored, and its’ Parent account is automatically displayed. It is reasonable that the fixed assets are not analytically monitored to the Chart of Accounts. |
| Depreciations rule | In order the procedures related to depreciation to work, this field must be definitely filled. For information about the design method and the functionalities of the depreciation rules, see the specific chapter of this manual. |
| Measurement unit | Necessary fields in order the fixed asset to participate to documents. We can define the fixed assets “profiles” with the appropriate default values. |
| VAT category | |
| Purchase price | Informative field |
Administration

| Administrative data | The Supplier, the Country of origination and other informative fields to this section, are of similar use and functionality with those of the inventory item. |
|---|---|
| Allocation profile | Used to distribute depreciations to cost centers, within depreciation documents. |
| Management of serial numbers | We can activate the monitoring of Serial Numbers for fixed assets, in order to know at any moment the position and the history of the transfers of every distinct element. If activated, serial numbers must be determined during transactions, and in order to avoid mistakes, we must define serial numbers as compulsory, through the Control Profile. |
| Accounting data | Define the accounting categories for the basic fixed asset type, the depreciation and depreciated assets, for correct posting. Only the 1st is in use by default parameterization. |
| Other depreciation rules | Besides the basic depreciation rule which concerns to the calculation of accounting (taxable) depreciations, there can be defined additional depreciation rules: an alternative (administrative) depreciations scenario to be monitored independently to the accounting one, and on the other hand, an additional (informative) depreciation rule, which supports variation of the taxable result, according to alternative accounting standards. Through this field, are supported the depreciations based on the International Accounting Standards (IAS). |
| Not in use | Informative field, which is used in various views as a fixed assets selection criterion. |
The user definable fields and the functionality of incorporating documents are working in the way, previously described for the Inventory items.
In the hierarchical list «Contents» on the left, since a Fixed asset is activated and obtains Acquisitions, Transactions etc. the user may view a number of information such as Contracts, Serial numbers list, Transactions register, Data of calculated depreciations, possible inactivation etc.
Cash & Bank accounts
Liquidity accounts are all the accounts of Available Liquidity (Cash Accounts of Head Office and Branches and Company Bank Accounts) as well as the Cash flow forecast accounts, e.g. for Loans, Overdrafts, Credit cards payment installments (for those doing Retail sale) etc. Through these accounts (which consist a separate full sub-ledger) are accomplished the receipts, payments and Cash Flow entries to the system.
For the cash, we must create as many accounts as the different physical and “logic” Cash registers, for which we want to monitor the BALANCE. For instance, if for the same Cash register, there are two removable “drawers” for each user that are separately counted and monitored, two liquidity accounts must be created. If in a branch, part of the daily cash periodically delivered to the branch Supervisor, then, for the “logic” Cash register of the Supervisor, we must create also a separate liquidity account.
For each bank account, we must create a separate Liquidity account, even if these are already analytically opened in Chart of General Ledger Accounts. The reason is that the sub-ledger of Liquidity Accounts provides procedures of notes issue, payment order to banks, deposits by cash transfer with automatic calculation of bank expenses, reconciliation process for Bank statements and future balance forecasts, functionalities out of accounting context.
Finally, it could be opened a specific forecast account for use during Invoicing or other processes that may influence the cash flow, even though it is not required, since the actual balances are differentiated into the system from the forecasted balances. Such an action is possibly enables the conceptual organization of Liquidity Accounts.
An example of Liquidity accounts development from the system parameterization:

Account data

| Branch |
Some cash accounts are used by particular branches and other are “common” for all branches. In the application, there is NOT a particular reason of branch determination, since balances kept PER branch, anyway. There are probably other reasons, accounting or organizational, that would lead to the opening of particular accounts per branch. Especially for the Cash accounts, it usually kept a separate register-code per branch. If a branch defined then, in the documents, and depending on the series branch, the liquidity account of the particular branch appears by default. |
|---|---|
| Nature of account | A grouping of the accounts (Code list) |
| Currency | It is suggested the basic currency and is modified when the account is in foreign currency. The balances of the liquidity accounts kept PER currency. This means that we can use the same account for all transactions in any currency, but if the currency is explicit, it is defined here. |
| Preserved |
It determines if the currency (defined to the “Currency” field) is compulsory to all transactions. If deactivated, then, the account can be used in transactions of any other currency. The balances keeping is achieved per “entry” currency and this way (such as in the case of separate accounts per branch) the opening of separate accounts per currency is not compulsory (as far as the system is concerned). |
| Balance threshold | Used for define in Cash Registers a minimum balance for current needs, and to set limits to Bank accounts for automatic payments. |
| Ledger account & Accounting category | It is used for posting of cash transactions. In the default parameterization, the “Ledger account” is only used, but the accounting category may also be entered and the parameterization may be altered. |
| Automatic payment |
Since activated, the system will automatically suggest this account during issuing receipts. If we define ONE account of automatic payment per branch (with a particular branch defined) then the automatic system suggestion will depend on the document series (which always belong to a branch). It can be defined only ONE account as “automatic payment” for the same currency and branch. |
|
Automatic forecast |
Since activated, during issuing forecast entries (such as these that are automatically produced during Invoicing either from the system, or through payment methods application) the particular liquidity account is suggested (which could be the SAME with the one of “automatic payment”). It not allowed defining more than ONE account as “automatic forecast” for the same branch and for the same currency. For those having transactions in various currencies, there are two alternative methods as far as the keeping of “automatic forecast” liquidity account is concerned:
No forecast entry allowed to be registered in different currency from the one of the transaction (“invoicing”), in order the (correct) calculation of exchange rate differences, to be feasible. |
| Issuance of notes |
If selected, will be suggested in all cases of payable notes (cheques) issue, as the “payment account”. It means that is the usual bank account, through which we issue cheques. Of course, during create cheques or other notes, the account may be changed. Only ONE such account can exist for each branch and each currency. Respectively, during the receipt of receivable cheques/notes, the (liquidity) payment account suggested, is the “Automatic payment” (usually the cash account). The usual process is to transfer them to a Bank, and thus, an overdraft bank account is used. |
| Bank data | If it is a bank account, the Bank must be defined (opened in Customization/Liquidity/Banks and each of them consists a “Person” for keep identity data). It must be defined also a Bank Account Number, the bank branch where it has been opened and the special branch code (informative). If available, we fill also the IBAN and SWIFT codes of the account. |
| Valeur days | We define the number of days within which an amount becomes available to the Bank account. As a result, in EACH deposit that occurs to the account, as well as in notes/cheques acquittance to this account, the Cash Flow will be updated by this number of days after the registration date. In cash accounts, it must be zero. |
| User defined fields | If we need more fields, a number of static fields of various types are provided (dates, comments, numbers, flags, tables) for free use, the name of which is defined in Customization. |
Credit cards configuration data

If we accept receipts with credit cards and if to this account, occur deposits of credit cards installments from the Bank (that makes the “clearing”), we must fill the following data:
| Relates to card |
It must be activated in order the receipts processes to be recognized by the system as a special payment method. For instance, in receivables lists there are 3 columns “Cash & Deposits”, “Checks/Notes”, “Credit cards”.
|
|---|---|
| Max No. of installments | It is defined in order a not acceptable number of installments, not to be typed by mistake during the payment with “credit card” payment method. |
| Cash claims account | It must be defined a “Debtor” to whom the claim will monitored (since the customer that pays with credit card has no balance (open item) as he had paid with cash but, for the company, such a payment is just a “forecast inflow” like the one of postponed cheque). The debtor account (defined here) is updated with the amount of the receivable, in order to occur an accounting reconciliation of the accounts receivables. |
| Credit card rate profile | It must be selected a profile where the withholding calculation method by the bank has parameterized (Customization/Liquidity). The system calculates on-line the withholding value and this amount deducts the amount expected to be deposited by the (clearing) Bank, during the cash flow forecast system update. |
| Credit cards types |
We can monitor the credit cards per “card type” (e.g. Visa, AMEX, MasterCard etc.) and to configure these types so the entry of the payment become easier. This parameterization is accomplished to Customization table (Liquidity-Credit cards-Card types). Each credit card type is defined to the following screen:
The option “selectable”, the “position selection” and the “icon” (that is selected from the applications’ icon library or other file), determine the cards’ presentation to the credit card special selection dialog to Retail screens (POS) such as to the scheme:
In the list of the card type definition screen, we define these Banks (to facilitate the user in selecting) and the Bank (liquidity) account (possibly of a different) Bank for “clearing” where transactions will occur (we only open liquidity accounts for the banks that we cooperate and undertake clearing, by defining our account to them, where the installments are deposited). We also define:
To complete the configuration of credit cards, it should be built suitable payment methods. |


Cheques numeration data & cheques print
When payable cheques are issued from the current bank account, we may monitor their numbers and to properly parameterized the system in order to issue & print computerized cheques.

| Numeration type |
|
|---|---|
| Numbering data |
|
| Cheques numbering limits (block of cheques) |
In this list (on “serial” numbering), we can enter the numbering limits (packages or “block”) either for information reasons or for AUTOMATIC ATTRIBUTION OF CHEQUE NUMBER. During printing, the number may be produced (and then it will take the information from the first active “block” with available number) or just to be printed to a form having a preprinted number. In the 1st case the data of this page, is necessary. We complete the upper and lower limit and the Approval date. The “current counter value” is automatically updated with the last numbering value used by the system, during the printing of computerized cheques. |
| Print form |
In order the cheque to be printed, a printing form must be defined to this field. The searching of the appropriate form is achieved from the \CSReports folder. We can design forms and to place them to this area.
To facilitate the initial parameterization, there are available forms in ESReports folder that concerns particular banks. You may copy them to \CSReports. |
| Cheque number calculation | We activate it, when we want to define the way of the automatic calculation and cheques NUMBER attribution, during the process of automatic creation of computerized cheques. |
| Type of cheques numeration |
An EXPRESSION must be entered here, to define the “structure” of the cheques number. In its formation may participate tree types of “sections”:
In order to define the formation type of the number, we must join the above sections. For instance, if we want the number to be consisted from the 9999 number, to be followed by a dash and finally a 7digits numbering with zeros to the beginning and to the end of the check digit, to exist, the expression will be as follows:
|
| Check digit calculation | It is activated when we want to define the way that the CHECK DIGIT of the produced cheques numbers will be calculated |
| Type of check digit calculation |
An EXPRESSION must be entered here, that will produce the “check digit”. In its formation, may be included expressions of type NoteDigit(1), NoteDigit(2) etc., depending on the digit (1st, 2nd etc.) of the produced cheque number. Here, can be also implemented more complicated check digit calculation algorithms e.g. the (notedigit(1)*2+notedigit(2)*3) mod 3 expression calculates a check digit which is produced if we add the 1st digit with the 2nd and the 2nd with the 3rd and take the remaining figure (mod) of the produced number deviated with the 3. |


Opening balances
The start period balances in the beginning, when the system is setting up, usually occur by migration process from the prior system, so there is no need for user data-entry.
On the other hand, each Fiscal Year closing process automatically transfers the starting balances to the next fiscal year and thus there would be no need for intervention.
In the following, is described the method of issuing start period balances for each sub-ledger, for cases that it may need intervention or in cases that it will not occur migration, and the initial data are typed manually, based on reports.
Views και Reports of Progressive balance
The starting balances, taken into consideration (to all sub-ledgers reports) are those of the older OPEN fiscal year, in order to take the correct temporary results before Fiscal Year closing, as long as a parallel operation in two sequential fiscal years occurs.
Into Trial balances and Statements, there is the functionality of defining the Fiscal Year from which the starting balances will be taken, because in case of OFFICIAL printing BEFORE the closing, it must be taken into consideration the (possibility of ZERO) starting balances of the specific fiscal year, which the report concerns to.
|
|
During Fiscal Year Closing we may inactivate the automatic opening transactions (balances carried forward) for a sub-ledger, indicating so, that it will be created in another way, by user’s responsibility. If such transactions are created on an open Fiscal while the previous one is still open, this data will NOT be visible to the current balances (e.g. stock availability checks, reports etc) until definite closing occurs. As far as Trial balances, statements etc. are concerned, we must make sure that we select this Fiscal Year (from which the starting balances will be taken) otherwise the starting balances of the older open Fiscal Year will automatically be used. |
There are two methods to create year opening transactions:
|
|
|---|---|
|
| |
| If the related document types are more than one, a selection dialog appears, where you can select the appropriate. |

Trade accounts opening balances
Customers & Debtors
Appropriate document type: SOD (Opening receivables (debit balances))
Use this type in the majority of the cases when the opening balance is debit.
If it is a credit balance, use the SOC document (Opening receivables (credit balances)).


| Date | The date is not necessarily the Fiscal Year’s start date, but it must belong to the Fiscal year, on which the opening balances concern. |
|---|---|
| Line type | “Customer” suggested, depending on a document type setting. However, if we want to insert a debtor, must change the line type as the trade account searching based on it. |
| Trade acct. branch | If we want to monitor the balances per trade account site, the opening balance must also analyze per site; consequently, there must be as many lines for each customer as his branches. |
| Expiry | For the FIRST opening balance to the system, it is very important to enter the open amounts PER expiration date, if from previous system such a report is available (Age analysis). Continuously, the ageing of the balances kept analytically. |
| Currency | If the trade account monitored in foreign currency, we insert his opening balance to this currency and we check from the full line data ( ), the amount calculated in basic currency. ), the amount calculated in basic currency.
|
Suppliers & Creditors
Appropriate document type: POC (Opening payables (credit balances))
Use this type in the majority of the cases when the opening balance is credit.
If it is a debit balance, use the POD document (Opening payables (debit balances))
The user guidelines and the columns meaning are the same with those for the customers’ opening balances.
We NEVER use the SFD, SFC, PFC, PFD documents. These exclusively used by the Fiscal Year Closing. Their difference is that they do NOT update the Ageing of Accounts Receivable/Payable (open balances) as these are “temporal” data, from the time the system functionality starts so, they are not “copied” as start open balances through years. On the other hand, when the system starts, during first registration of trade accounts balances, these data MUST be updated.
Warehouse inventory
Appropriate document type: IOP (Stock Opening Entry)
Use this type for the initial inventory of the items per value and quantity. Alternatively, it can be used the IOQ (quantity) document to be followed by IOV (value) which must contain exact the SAME quantities. Use of different documents per Warehouse recommended.

The date is not necessarily the Fiscal Year’s start date, but it must belong to the Fiscal year, on which the Inventory concern.
If the inventory concerns Third Parties Warehouses or TO Third Parties then, it is necessary to occur per trade account. Consequently, for the same item, there must be as many lines as the trade accounts on whose behalf (or installations of which) stock found. If this will not happen, the stock PER trade account (the reason to define a Warehouse to concern Third Parties) will be incorrect.

|
After the entry of the Inventory is completed, it is necessary to execute Stock Valuation of the Inventory period in order the items’ opening cost price to be correctly determined. This process is also necessary if for any reason, the inventory that is automatically created by the fiscal year closing is modified, or if inventory transactions are added via typing. The above recommendation is useless if, for each item, there is ONLY ONE inventory transaction (specific W/H, specific package unit and, specific or none Trade Account). |
If system commence occurs in the middle of the Fiscal year, then, it must be used the document type:
IIP (Update Inventory based on Trial balance for interim period),
Through this, we can avoid transferring all the Fiscal year transactions up to this time, by just transferring the data (quantities and values of all types) from the last Inventory Trial Balance. The date of this document must be the end of period, and after the results are checked, must CLOSE the fiscal period. Stock valuation process can NOT and must NOT be executed for this or prior period.
It does NOT cover the case of alternative unit monitoring either of warehouse dimensions (color-size etc). In such cases, you must analytically transfer all the transactions history.

Fixed assets inventory
Acquisitions
Appropriate document type: FAO (Fixed assets opening acquisition entry)
For the needs of the Fixed assets registry, must be inserted all the Fixed Assets with their Quantity and Purchase Cost. Recommended the use of different documents PER branch.
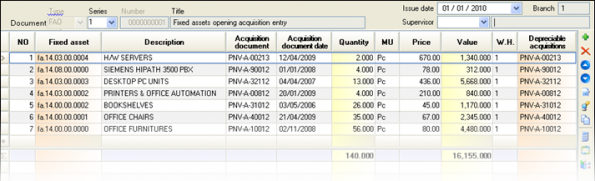
The data Acquisition document (original acquisition document code) and Date of Acquisition document (actual acquisition date) must be definitely entered, as these are reported to the fixed assets registry and define the original data of the Fixed Asset creation, whenever it occurred. If they are empty, to the Fixed Assets registry, will appear the data of the current accounting note.
If serial numbers monitored, they can be entered through the
icon of the vertical toolbar. For details as for the serial numbers handling, see the “Purchases of special item categories” chapter.
During typing, the «Depreciable acquisition» column is not accessible from the user, as the system automatically creates acquisition record (based on the «Depreciable acquisition link» setting of the document type, which MUST have the value “AUTOMATIC”). In an already saved document, this column displays the “acquisition document” as content.
By moving to the fixed asset screen, the “depreciable acquisition” that has been created through the Inventory process appears to the 1st sub-page with its data.
The “depreciable acquisition” data are accessible for define supplementary fields e.g. the exact installation place or grant data (amount, source, related law). If the total cost must be depreciated within the fiscal year, activate the “Depreciation in fiscal year” field. The Depreciations start date has taken value by the system (based on the acquisition date) according to the company parameter value “Default Depreciations Start Date”. For instance, if the parameter defined as “alternative document start of the month date”, for a purchase on 23/1, the depreciations starting date proposed at 1/1). This date is editable by the user.
If the fixed asset purchased again, each time, a new “depreciable acquisition” created. All the acquisitions of a fixed asset displayed in sub-page “acquisitions list” to the same segment of the screen:


Depreciations
Appropriate document type: FAP (Fixed assets opening depreciation entry)
FAE (Alternative depreciations opening entry)
Based on the Fixed Assets registry data of the previous Fiscal year, you must AFTER inserting the acquisitions opening entry (in order “depreciable acquisitions” to be created for each asset), to also insert the prior periods progressive depreciation value (the depreciations total of the previous fiscal years).

In each fixed asset line, the acquisition is automatically selected if it is only one, otherwise it is expected from the user to select one. The “depreciable acquisition” column is necessary to be completed (based on the setting “Depreciable acquisition link” of the document type that MUST have the value “OBLIGATORY”).
In case alternative (administrative) depreciations were monitoring in the previous system, these total depreciation values must be also registered through the appropriate document type.
All the prior period depreciation documents appear to the homonymous list from the «Transactions/Fixed Assets» option of the main menu:


The “difference” value is the asset cost to be depreciated.
Liquidity accounts opening balance
Appropriate document type: BCO (Liquidity Accounts Opening)
You must enter the start debit balances of all Liquidity Accounts that concern to Cash and Bank accounts.

If some accounts monitored in foreign currency, insert amounts to this currency and check from the full line data () the calculated amounts in foreign currency.
If Loans accounts opened, the start credit balances of these Liquidity Accounts are accomplished through the document type: OLC (Liquidity accounts opening balances (credit)).
Notes inventory
Receivable Notes in Portfolio
Appropriate document type: NIP (Notes Receivable Inventory in Portfolio)
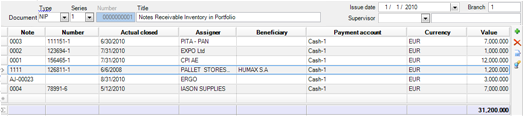
We select the branch series of which the portfolio will be registered. Through this document, the “body” of cheques/notes created for the first time. In order the notes to be entered as a “line”, at this point, the data of the note must be defined through the
button (within a dialog). Selecting “Accept”, the note appears, with its main data, as a line of the document. Information concerning the various notes’ fields found to the chapter where the note receipt from customer is described.
The issue date in all other cases of receipt note creation coincides with the document date. In the case of the inventory it must be typed the actual “issue” date, this is the “receipt” in previous fiscal years.
With the completion of this process, the notes file is correctly updated (Book, expiration list etc.) and are also updated the “trade” customer balances from inventory, with the addition of the not expired (open) notes in the inventory, of their «accounting» balance.


Receivable Notes to Banks
Appropriate document type: NIB (Opening of receivable notes at Bank)
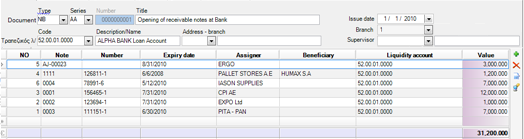
In the header of the document it is compulsory to enter the Bank Account over which the notes where transferred to the bank. This is the notes “payment” liquidity account on their expiration date. For each line, to the specific note dialog (

Receivable Notes transferred to Supplier
Appropriate document type: NIS (Notes receivable inventory to Supplier)

This document needs to be used for alll the receivable notes found in Third parties in order to properly update the “trade” balances for BOTH customers and suppliers. For each line, to the note dialog (

Payable Notes
Appropriate document type: NPI (Notes payable inventory)

In this document we will take into inventory all the payable notes that were issued from one or more Bank accounts to our suppliers. For each line, to the note dialog (


|
We recommend that you check the notes through the (available to all reports) POSITION of the NOTES, and LOCATION TYPE. Reports which give this information are for instance:
|
Accounting opening balances
Appropriate document type: AEO-GL (Accounting Opening Journal Entry)
This document must have been set as follows …

It must determine the opening period type, and the special Journal of Opening & Balance sheet entries.
As the entry date, it can be placed any Fiscal year date until the limit date for Balance Sheet closing of the previous fiscal year.
 Continuously we insert the child accounts from the last Final Trial Balance of the previous fiscal year with the debit or credit amounts of each one:


For organizational reasons you may insert more than one accounting documents per group of accounts by using the opening Balance sheet account and by positively or negatively reversing it at the end. Use F11 button for automatic entry balancing to the current line account
The entry result may be checked by the Balance with analysis of progressive totals

..or from the Opening and Balance Sheet Closing Book or from the Opening entries journal.
After checking and reconciliation of Accounts Opening Balances with the Closing Balances of the previous Fiscal Year, must run finalization of this Accounting Journal.
Purchases
In this chapter will be examined the purchases scenarios for all stages of supply process from the offer and purchase order up to the goods receipt, the check of deliveries, the Invoices issuing and the monitoring of cost prices variances. Furthermore, it will be examined the purchases monitoring processes under Consignment regime as well as, Financial goals agreements with the suppliers, producing the appropriate claims (for credit notes).
The following guidelines and examples are mainly based on the default product parameterization, as far as the documents are concerned, the transitions, the screens format and the reporting components.
To enter a purchases document use one of the following methods:
|
|
|---|---|
|
|

|
|
|
|
|

|
|
|
|
|


Suppliers Offers
The reason of offers recording sent by suppliers is:
- In order to be compared to the final prices & discounts taken
- In order to compare offers by different suppliers for the same goods and select the most appropriate
Offer from a particular supplier
Appropriate document type: POF (Purchase Offer)
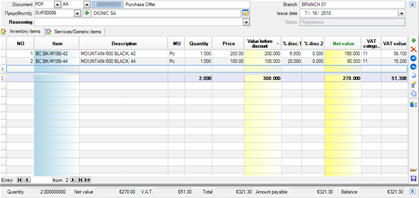

| Type & Document series |
|
|---|---|
| Date |
|
| Supplier |
|
| Other General Data |
If additional data needed, e.g. comments, delivery date, project, contract etc., we may “open” the header through the “maximization” icon to the right, and thus more information will appear to more “sub-pages”:
|
| Items Offered |
In the items list, we detect the items by any of the available searching methods (with code, description, supplier code etc.) and so the related “items lines” are inserted. If it about items that do not exist, have not been re-ordered, there is access to the Item form for create new items, from the “internal menu” presented using right click. In lines data, must enter at least the quantity and price. If the item has been purchased from the supplier, the last purchase price is suggested. If a pricelist monitored to the supplier, price and expected discounts proposal is based on the pricelist. |


If offers of the same item issued from many potential suppliers, you may check «Compare offers» (called from the menu):
By changing cube layout and/or activating “totals” for display the minimum price, maximum discount, or minimum lead-time, you can evaluate the offers data, before proceeding to purchase Order.


Offer from multiple suppliers
An alternative process for issuing purchases offers is multiple entry to the same screen (for instance, during a phone research of market prices).
Appropriate document type: PPS (Supply preparation)

In this data entry screen, the following functionality is available:

- Each item selection causes the automatic fill of the side columns of the main supplier, his telephone number, last purchase’s price, and the date of possible delivery based on the “lead-time” (defined to the “item-supplier” list of the Item management form).
- In order to select items to be ordered, instead of searching through items list, it could be used the Re-order review, (through Shift-F3), where choosing “accept”, the selected items will be transferred to the current screen with their requested quantities (ready through the re-order proposal).

- In the “Supplier” column, is achieved selection between the alternative Suppliers defined to each item.
- By completing the requested quantity, the “quantity offer” column takes the same default value (it is possible to be different, smaller if the supplier has no availability or greater if e.g. a better price achieved.
- There is a column to define until which date this offer is valid.
- For the same item, we can take different offers from many suppliers. For making this process easier, use the “copy” functionality (from the current line to another), through the “Αlt-V” buttons combination. To the new line, select new supplier and fill the related data.
- By evaluating the offers per item and deciding the better supplier, activate the “preference” column in order to define that these lines will end up to an order. The basic data of these lines will appear with bold font.
After save, the transition process of this document to order can be executed, which will create as many Orders as the suppliers of the selected lines are (marked at the “preference” column) with the particular contents of the offer.
Order to supplier
Appropriate document type: POR (Purchase Order)
Manual input

| Type and Document Series |
|
|---|---|
| Date |
|
| Supplier definition |
|
| Supervisor |
|
| Contact |
|
| Payment method |
|
| Transfer data | In the “Transfer” sub-page can be enter data concerning the delivery (to which Warehouse, from which supplier’s site, the shipping method) as well as the agreed arrival date. |
| % discount |
|
| Contract |
|
| Order Items |
In the items list, we detect the items by any of the available searching methods (with code, description, supplier code or “multiple” code that contains all the bar codes etc.) and so the related “items lines” are inserted. If it about items that do not exist, have not been re-ordered, there is access to the Item form for create new items, from the “internal menu” presented using right click. In lines data, must enter at least the quantity and price. If the supplier belongs to item’s suppliers, the measurement unit (or package), and the purchase price proposed accordingly to that definition. If the measurement unit modified, the suggested value will be converted (through the relation between units) to the particular measurement unit. If a pricelist monitored to the supplier, price and expected discounts proposal is based on the pricelist. The expected delivery date suggested, is based on the supplier’s lead-time (days) defined to each item. If the supplier does not belong to the item’s suppliers, then, the delivery date is copied from the Order header (Transfer data) and can be modified by the user. |


More analytical information as to the functionalities provided to the order, found to the chapter concerning sales order, where the needs for automation and information are more frequent.
Information during Ordering
 While focused in item lines, through the “Previous Item Entries” command from the vertical toolbar or through Ctrl-F11 may directly view all the transactions with the particular supplier for the particular item, the quantity, the price, and the discounts taken.
 Access to a full view of Inventory for the current item and data related to current supplier with the “Item summary view” command from the vertical toolbar that displays information:
For the item: availability for all and for the current warehouse, average cost price, latest purchase price, and sales values.
For the item and supplier combination: quantity, purchases turnover and average cost price for previous and this year, latest order and invoice data).
| An interesting functionality here is that both the item and supplier, are visible filters by the user, so, he could enter any supplier or/and item and see the results. Therefore, during ordering, we can search e.g.in which price another supplier sells the same item. |
Based on an Offer
If an already registered Offer is the final Order to the supplier, a transition must be executed to produce the Order.
Appropriate transition: 473. POF=>POR (Order to Supplier from an Offer)
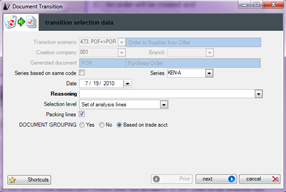 Document series will be selected
A confirmation will follow
An order will be created and
The order will be displayed to the screen.
The user could modify any field of the order (e.g. arrival date or quantities) and print or send it by mail

If a selection of items must occur (i.e. some only items of the Offer will be ordered) then, in the dialog of the transition, you must choose “Set of lines” to the “Selection level” criterion, so, before confirmation, the items selection step will appear.
At Items List appeared at this step, there is the possibility to select the line as it is to proceed (for the initial quantity) by activating the 1st column (
) or to type the desired quantity (part of the initial quantity).
Similar functionality is provided at case of “Set of analysis lines” which is used when we have goods with color-size or lot monitoring.


Based on Offers evaluation
If purchases orders must be produced by an already registered offer from multiple suppliers (PPS- Supply Preparation), where the definite choices made by activating the “Preference” column, then, the orders generation is achieved through a transition of this document:
Appropriate transition: 472. PPS => POR (Supply Preparation to Orders to Suppliers)
The transition is properly configured in order to select automatically the lines having the “preference” column activated, and to group them per supplier, in order to produce a separate Order document for each one.
If then, from the 1st stage document (PPS) asked “Show transitions”, can see in detail the generated orders and the items/quantities of each one of these.
Finally, we must transfer the orders to the suppliers by fax or by mail/e-mail.

Based on Customer Order
When we want to generate orders to suppliers based on the sales orders, we can use the available transitions:
129. SOR=>POR Purchase order from customer Order (to items main supplier)
105. SOR=>POR Purchase order from customer Order (to the «related» customer supplier)
In the 1st case the user may change the supplier to whom the order of each item will occur, to the “supplier” column of the transition dialog, where the main supplier of each item is suggested:

The result is to be produced as many purchase orders as the different suppliers are (defined to the Items section).
In the 2nd case, the orders occur to the Related supplier who is defined to each customer (if there is such a process, to define the “preferable” supplier on a customer’s level).
In both cases, the customer order is NOT protected from double transition to purchase order, which means that the pending “quantities” are not kept. After the goods receipt from Suppliers, the initial customers orders POR must generate Delivery Notes (or Sales Invoices-Delivery Notes) through one of the processes checking the stock adequacy (e.g. “Check stock availability” view.
When we want to make an order to a supplier on behalf of specific customer, then, must use a special document type (SCO Sales Order with automatic stock reservation), where, the existing quantities are reserved for this customer (and they can directly be converted to Deliveries) whereas the items and quantities not available can be converted to purchase orders. The orders occur to the main supplier of each item.
Appropriate document type: PSC (Purchase Order for specific Customers)
Appropriate transition: 174. SCO=>PSC (Order to Supplier for specific Customers)
The appropriate selection method of this transition is:

- If it is about a particular customer order, through the (SCO) order,
- If it is about mass process of customers’ orders for items to lack, from the sales orders list, by isolating the particular orders (document type SCO).
This process will produce as many purchase orders as the different main suppliers (of items to lack) are. In these documents, the supplier defined to the header and, for each line item, the customer for whom the order put.
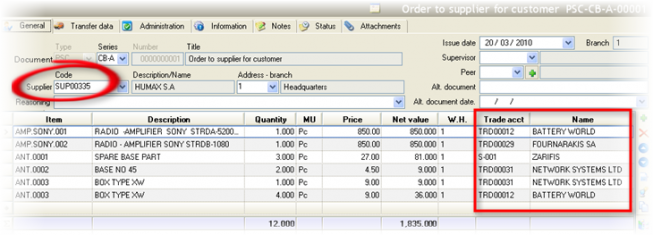
Based on this information, can monitor which goods expected and which already been received for particular customers, from the “Customers’ Orders Status Review” scroller.
In this scenario, the workflow is the following:

Through the Stock replenishment process
Orders to suppliers generated by mass processes aiming to stock replenishment up to the desired levels. These processes are depending on many factors such as:
- Type of goods and stock turnover rate
- Algorithms calculating the optimal stock, partly to serve the sales within a reasonable time, and also inventories of large scale and high cost to not maintain
- Suppliers leads times
- Frequency of cost prices changes
In the Stock replenishment chapter are described ordering methods as well as stock distribution methods to the various Warehouses-Branches of the company.
How do we see the results of issuing Purchases Orders?
| View | Content | |
|---|---|---|
|
|
Orders |
List of registered purchases orders
|
|
|
Pending orders | The orders that have not been yet received or have been partially received |
|
|
Pending orders per Item | Items and quantities of not yet received orders by (expected) arrival date |
|
|
Delayed goods arrivals |
Orders that have not been received, whereas the agreed arrival date has elapsed
|
|
|
Stock transactions history |
Items detailed records, where the orders also appear (and not only these concerning on the Official Inventory Books).
This view is not easily readable in 1024x768 screen analysis due to columns number |
|
|
Stock quantitative control |
Cube for check items’ quantities per item, branch, and WH.
|
|
|
Current stock availability |
The current stock status per Warehouse with information for the expected, orders to be delivered and the future stock.
|


Information for Order Customization
 In order to change the layout of the Order screen, you may use a dynamic form, defined to the document type. In addition, you can change the grids layouts (add or remove columns) and save them.
 If Items must not be accepted if the particular supplier does not belong to the “Item’s suppliers” (in cases of strict processes with supervisor, evaluation criteria, approval and final ordering to “approved” suppliers), activate the relevant option of the document type.


Goods Receipt from supplier
Pending receipt of Invoice
Issue during goods receipt, in order the Warehouse to be quantitative updated.
It is very important to be used the correct document type for the appropriate quantitative transfers, since some documents influence the Costing of the Inventory (the cost prices etc.) and others do not.
Here, we examine the document accompanying goods received. The Supplier has issued this document as a “Delivery Note” to our company.
Appropriate document type: PLN (Goods receipt Note)


| Type and Document Series |
|
|---|---|
| Date |
|
| Supplier definition |
|
| Alternative document |
|
| Alt. document date |
|
| Received Items |
In the items list, we detect the items by any of the available searching methods (with code, description, supplier code or “multiple” code that contains all the bar codes etc.) and so the related “items lines” are inserted. It may also be used a bar-code reader. If it about items that do not exist, have not been re-ordered, there is access to the Item form for create new items, from the “internal menu” presented using right click. In lines data, must enter at least the quantity and price. If the supplier belongs to item’s suppliers, the measurement unit (or package), and the purchase price proposed accordingly to that definition. If the measurement unit modified, the suggested value will be converted (through the relation between units) to the particular measurement unit. If a pricelist monitored to the supplier, price and expected discounts proposal is based on the pricelist. In cases of imports from European Union, the weight is also required. The expected delivery date suggested, is based on the supplier’s lead-time (days) defined to each item. If the supplier does not belong to the item’s suppliers, then, the delivery date is copied from the Order header (Transfer data) and can be modified by the user. |
 If there is not another item purchase from the particular supplier, the temporary value (estimated invoice value) will be zero. It is good that an (indicative) value is given as if an invoice would not issued until next Stock Valuation process runs, this value will be used for stock cost value and monthly cost price determination (even if it becomes only from “Forecasted entries” (from not Invoiced Quantitative Notes). If there is not another item purchase from the particular supplier, the temporary value (estimated invoice value) will be zero. It is good that an (indicative) value is given as if an invoice would not issued until next Stock Valuation process runs, this value will be used for stock cost value and monthly cost price determination (even if it becomes only from “Forecasted entries” (from not Invoiced Quantitative Notes).
|
Based on Order
When the goods receipt concerns a prior Supplier Order, it could be produced by transition of Order:
Appropriate transition: 101. POR =>PLN (Purchases Orders Goods Receipt)
When the Order to the supplier has occurred on behalf of specific customer through the PSC document type, then:
Appropriate transition: 478. PSC =>PLN (Arrival of purchases Order for customers)
In both cases, the order retains the transition information and it properly updates the available stock.

Thus, in any scroller where we had “expected” quantities, we will have REDUCTION of the expected, and INCREASE of the PURCHASES quantity (and of the actual stock balance).


Due to replacement
When we receive (with ‘PLN’) a defective item or with a lack or differentiation of the expected item and we return it to the Supplier (with ‘PRN’), then, if a Credit Invoice is not issued by the Supplier, the item will be probably replaced. In this case,
- in order to have correct cancellation of the expected values (pending invoicing) and these documents to be ignored from the Stock valuation
- in order to “lock” the Delivery Note through which we returned the item (in order to prohibit transfer to Credit Note, by mistake) and the Goods Receipt Note of replacement (in order to prohibit transfer to Invoice, by mistake)
the correct approach is to use the transition configured for this purpose exactly:
Appropriate transition: 124. PRN => PLN (Goods Receipt Note from Return Note to Supplier)
From repair
When we send an item for repair to the supplier (using the document type ‘SPC’ which does not create expected invoicing/credit value) then, the item’s receipt note from the supplier must be respectively issued using the special Goods Receipt document which does not create pending values (either manually or by transition).
Appropriate document type: PNS (Goods Receipt note (No charge))
Appropriate transition: 144. SPC =>PNS (Goods Receipt from Delivery note (without value))
In cases of repairs, Serial Numbers are probably monitored. In order to have correct information, in this case, (which is the position of serial number), it must be defined both to the Goods Delivery Note and the Goods Receipt Note. The default items lines grid layout includes the serial number:

Details for serial numbers handling found to the specific chapter “Purchases of Special Categories Items”.

 How to check the accuracy of receipt of goods

In order to check if the actual quantity arrived is identical with the «theoretical» one that is reported to the supplier’s accompanying document, we could give in a document of temporary use (a copy of the ”Offer” for instance) the actual quantities and to select ”Compare documents” (menu «Transactions»):
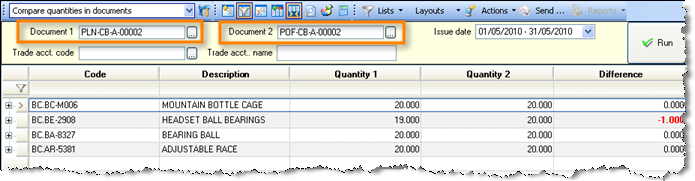
If differences occur, we must issue either a Goods Return Note in case of deficit goods receipt or a new Goods Receipt Note (issued by the supplier) for any surplus items, after contacting the supplier.
In the 1st case, the Return Note will be generated through the 123. PLN => PRN transition (Goods Return Note from Purchases Receipt Note) selecting from “Set of lines” only the items and the quantities that were NOT received.

How do we see the results of issuing Goods receipt Notes?
| View | Content | |
|---|---|---|
|
|
Purchases/Arrivals | List of all Purchases documents concerning quantities or values |
|
|
Quantitative Purchase Documents not Invoiced | Goods Receipt or Delivery Notes that have not been “connected” to invoices. Therefore, we expect the relevant invoices to be issued by suppliers. |
|
|
Inventory records |
It presents all the stock quantitative and value transactions. The Goods Receipts update the columns of “Import quantities” (depending to each format):
The same update (summarized) also occurs to the Monthly Statement of Stock Book and to the Inventory Costing Balance. |
|
|
Stock quantitative control |
Cube for check Items’ quantities per item, branch, and W.H.:
|
|
|
Journal of Quantitative Stock Entries |
List of Items’ transactions PER date and Warehouse, with double qty columns to both main and alternative unit:
|
|
|
Current stock availability | The current Inventory status per Warehouse with information for the expected quantities, the orders to be delivered and the future stock. The quantitative goods receipts do positive update of the “stock” column. |


Supplier Invoice
For a Goods receipt Note
When the received invoice refers to one or more prior Goods Receipt Notes, the document can be produced through a transition from the list of the “Quantitative Purchase Documents not invoiced”.
Appropriate document type: PIV (Invoice for Goods Receipt Note)
Appropriate transition: 102. PLN => PIV (Invoicing Of Goods Receipt Notes)
The suggested format of the Purchase Invoice is the following:

After the Invoice generated from the source one or more relevant Goods Receipt Notes, we must open the screen of the new document and check or fill a number of fields, according to the original document.

| Document Identity |
|
|---|---|
| Prices and Values |
|
| Quantity |
|
| Additional charges |
|
| Payment settlement |
|


If for any reason the (value) Invoice is NOT created through transition, but it is manually typed, then, BEFORE the Stock valuation process executed, it must occur “automatic quantities matching” in order to be connected to the related Goods Receipt Note(s), so “pending values” not to exist. Such values would create wrong “forecasting” cost entries and differentiate the items’ cost value. The “automatic quantities matching” described to the chapter about Invoices received BEFORE goods arrival, where, this process is unavoidable.
How do we see the results of issuing Purchase Invoices?
| View | Content | |
|---|---|---|
|
|
Purchases/Arrivals | List of all Purchases documents concerning quantities or values |
|
|
Purchases & Expenses Journal per VAT rate |
|
|
|
Inventory records |
It presents all the stock quantitative and value transactions. The Invoices update the columns of “Import costs” (depending to each format):
|
|
|
Supplier statement |
The Supplier’s statement (of accounting nature) with detailed transactions and progressive balances.
The same update (summarised) also occurs to the Suppliers’ Trial balance. |
|
|
Outstanding payables |
|
|
|
Accounting |
An accounting entry is created to the Suppliers, Purchases and VAT accounts and it updates the Accounting journals, the Account Statements, the Trial Balances etc.
|


Invoice – Goods receipt Note
When the Invoice received is simultaneously a Goods accompanying document, then the following document type must be used. If an Order to Supplier has already registered, the Invoice can produced by transition through the orders list.
Appropriate Document Type: PNV (Purchase invoice – Goods Receipt Note)
The default format of a Purchase Invoice is exactly the same as the one of the value invoice (PIV).
| Type and Document Series |
|
|---|---|
| Date |
|
| Supplier definition |
|
| Alternative document |
|
| Alt. document date |
|
| Transfer data |
|
| Contract |
|
| Invoice Items |
|
| Additional charges |
|
|
Payment settlement |
|
|

Information during Invoicing
While focused in item lines, through the “Previous Item Entries” command from the vertical toolbar or through Ctrl-F11 may directly view all the transactions with the particular supplier for the particular item, the quantity, the price, and the discounts taken.
Access to a full view of Inventory for the current item and data related to current supplier with the “Item summary view” command from the vertical toolbar that displays information:
- For the item: availability for all and for the current w/h, average cost price, latest purchase price, sales values.
- For the item and supplier combination: quantity, purchases turnover and average cost price for previous and this year, latest order and invoice data).
As far to the area where the results of an Invoice-Goods Receipt Note issue are visible, see to the previous section as to the way that the two documents (of which the combination consist the current), affect the system (Invoice, and Goods Receipt Note).
The Trial balance and the Inventory Records are updated both by quantities and values:

Information about setup of Purchase Invoices
To the document type, in “Lines” sub-page, check the following parameters:
Default item price. From the available options, the following 4 are appropriate for purchase documents and the 1st of these, is set to the predefined document configuration:
Supplier purchase price: If the supplier is among the “Item’s suppliers” the purchase price is proposed from this table. This price updated during each purchase (based on an option of Item’s Control Profile). It is the latest item’s purchase price from the particular supplier.
Supplier purchase price net: It functions as the previous, but any discounts of the latest purchase have been deducted. Thus, if in the latest purchase from the particular supplier, the price was e.g. €100.00, and the discount 10%, with the previous option, it will be proposed €100.00, whereas with this selection “net”, it will be proposed €90.00. In case of activation of discount proposal (either from the supplier or from the pricelist) it must NOT be selected the “net” price, as the system will suggest double discount.
For both the previous and this option, the functionality is bound to the suppliers’ list of items. This means that if for an item of the document, the current supplier does NOT belong to the Item’s suppliers, no price will be proposed.
Last acquisition price: As acquisition defined any primary cost entry that concerns particular quantity e.g. stock opening entry (inventory), purchase, import cost entry. The proposed price comes from the latest acquisition, even if that was not an invoice not even this supplier’s invoice.
Last acquisition price net: It functions as the previous, but the calculation accomplished with deduction of any discounts.
- Default price per trade acct.: The field is accessible only if in the “Default item price” option has been selected the 3rd or the 4th from the above options (Last acquisition price). In this case, may define that this “last” price to be searched ONLY from transactions with the supplier of the document and then there are two options:
- Copy only the price from this last transaction
- Copy both the price and the discounts to the line
Selecting this option, in reality, we have the same result that we would have if monitored alternative suppliers to the items and Item Control Profile for the item Purchase Price update. If however Item’s suppliers monitored, there is the advantage of keeping always updated and saved to a table (available for any use) the latest purchases prices per item and supplier.
- Calculate VAT on totals. Even though the VAT calculation per line is legal, and lawful, it is possible that the accountant will consider as more appropriate the VAT calculation on the total per VAT regime and also the computerized systems to approach this logic. In this case, and in order to avoid interfere to the values, can activate this setting. To understand the difference between the 2 computation methods, see example:
- VAT calculation per line
Suppose that all items have VAT 19%. We notice that to the final totals, the VAT value is not EXACTLY the 19% of the total net value (118,50*0,19=22.52), whereas in contrary, the VAT value of each line is EXACTLY calculated based on the percentage.


VAT calculation on totals
In the same example, we notice that to the final totals, the VAT value is EXACTLY the 19% of the total net price whereas in the 3rd line is 0.01 increased, compared to the EXACT result that would give the product to the 19%. This will be noticed to the totals per VAT rate (depending on the number of the different VAT rates appearing to the same document). If a difference from the calculation occurs (usually 1 cent of the euro), is assigned to the item line (of this rate) with the greater value.


- The VAT calculation on document totals is active only during issuing (and not when modify). Also, even during insert, if the user types the VAT value of any line, this functionality becomes inactive.
Invoice – Goods receipt Note based on Order
If the Invoice - Goods Receipt Note based on a previously registered Order, it can be produced by the order transition:
Appropriate transition: 128. POR => PNV (Invoice for Purchases Orders)
If the order to the Supplier occurred on behalf of particular customer (through the PSC document), then:
Appropriate transition: 479. PSC => PNV (Arrival of Purchase Invoice from Order for specific customers)
In both cases, the order keeps the transition information and it appropriately updates the available stock.
Thus, in any view that we had pending orders information, this is considered as “expected”, we will see REDUCTION of the “expected”, and an INCREASE of the PURCHASES quantity and the ACTUAL stock.
Invoice of additional charges
If the Supplier issued an Invoice of additional value (e.g. because of a prior mistaken invoicing), it must represented to the system with the following document type and NOT the one, used for invoicing Goods Receipt Note (PIV) as then, it will be caused a wrong Stock Valuation.
Appropriate document type: PDV (Debit note)

The Inventory Record only updated to the Purchases value column and the Total acquisition cost will be influenced (increase of the average cost price). In Accounting, a debit will occur to the Stock account and a credit to the Suppliers account.
If the mistake occurred to the Initial Invoice requires a reduction of the invoiced value, then the Supplier will issue a Credit Invoice and, in the system, it will represented as a Credit Discount Note (using the document type PCV).

Invoice anterior of Goods receipt Note
When we have a Purchases Invoice, whereas the goods receipt has not occurred yet e.g. because the invoice sent electronically or by mail, whereas the cargo is in route, it should:
- Issue the (PIV) invoice
- When the goods arrive, issue the PLN (by “copy” from the Invoice or manually) and

 From the Purchases documents list, having “marked” the (PIV) invoice, ask from the “Actions” menu the «Automatic quantity matching» (the simple option or the «Criteria-based” one), in order to be “connected” to the Goods Receipt Note, to have the correct history and to correctly updated the “pending” quantities. If pending quantities remain, then, the generation of a new Invoice from the Goods Receipt Note (by mistake) would be allowed. Moreover, during the next Stock valuation process execution, “forecasting entries” would be produced, whereas no pending values or quantities exist.

In order the “Automatic quantity matching” to be functional, it must be typed the “102. PLN=>PIV” transition code to the “Origin Transition Rules” field in “behavior” sub-page, of the “PIV” document type screen. The “Origin Transition Rules” field defines the transitions through which the current document can produced (comma-separated list per priority, which does not apply to “PIV” as it cannot produced from another document type, than the Goods Receipt note). So, during “automatic quantity matching”, a searching process will occur to the correct documents (sources), in order the “connections” generated to be EXACTLY those as it would have happened through a transition.
Cost Handling of Quantities “On The Way”
If before the Stock valuation process execution it has NOT been received a Goods Receipt Note, an automatic costing entry would appear which will cancel the Invoice value, since it does NOT correspond to existing Stock. In next period, this difference will be eliminated, due to Goods Receipt Note presence and its connection to the Invoice (in retrospect).
If this happens to the End Of The Fiscal Year (this means that there is still no Goods Receipt):
During Fiscal Year Closing will need to be accomplished accounting settlement of the Difference, which will occur through the Stock valuation process (handling of Purchases under reception). This is the purchases value suspended.
In the Inventory of the new Fiscal Year, this value will NOT be included.
In the new Fiscal Year, when we receive the goods, the Goods Receipt Note must be issued as an Invoice – Goods Receipt Note with zero value. This is achieved if we copy the “PNV” document type to another with “Goods Receipt Note” title or by creating new SERIES of the “PVN” with “Goods Receipt Note” title, and we will make sure that the lines value will be zero. With this action, the last purchase price at Item’s Suppliers data will be (temporarily) zero.
To the Inventory sub-ledger, this difference (of the last stock valuation) must be issued with the IPC (Stock purchases corrective – value) document type. It may also be produced through transition (or lines copy) from the “PIV” document. To the header, you will need to give the “Purchases under reception” General Ledger Account. Thus, the value will be transferred to the Purchases Account. At the same time, the effect of the value will be restricted to the Inventory as to the Supplier (his statement) and our liabilities (open items) have already been updated from the Invoice of the previous Fiscal Year.
Send goods to supplier
Pending receipt of Credit Note
It is about Delivery Notes that we issue as goods accompanying documents when we return goods to Suppliers.
Appropriate document type: PRN (Goods Return Note)
This document used even if we do not know if the Supplier will send a Credit Invoice or new replacement items. It has already been described the goods receipt case due to replacement from the Supplier.

To the Alternative document field (which, in Purchases documents issued by the supplier, used for the original document code), it can be entered the code of the Goods Receipt Note or the Invoice for which this Return occurs. There is a searching functionality with F3 to this field (header and lines).
The searching functionality based on two company parameters, where defined (in a “comma” separated list) documents’ attributes displayed (in F3 dialog), and documents’ attributes where this search is in force:



Without Credit Note pending
Used in case of Delivery to suppliers for control and repair or delivery from a Third Party Warehouse (e.g. Service) where the value is not taken out (since the goods does not “belong” to us). It is also used for goods returns that we obtained for various purposes (test, presentation, check etc.) with a “PNS”, for which a Credit Note will not be issued, It can also be generated through transition from the Goods Receipt Note.
Appropriate document type: SPC (Goods Return Note (without pending Credit Note)
Appropriate transition: 125. PNS => SPC (Goods Return Note (without value) from Goods Receipt)
In cases of repairs, Serial Numbers are probably monitored. In order to have correct information, in this case, (which is the position of serial number), it must be defined both to the Goods Delivery Note and the Goods Receipt Note. The default items lines grid layout includes the serial number:
Details for serial numbers handling found to the specific chapter “Purchases of Special Categories Items”.
Credit Note
Issued from Suppliers for our Delivery Notes (Purchases Goods Return Notes) in order to cancel the value charged by a prior Invoice (only of course, if a related Invoice already issued).
Appropriate document type: PCN (Credit Note for a Delivery Note)
Appropriate transition: 106. PRN => PCN (Credit Note for Goods Return to Supplier)
This document always concerns a particular stock quantity and it cannot be used for value correction only. We never make the quantity zero to it.
As with the Purchases Invoices case, the values (net, VAT, total) must be exactly the same with these of the original document.
For the number of the original document, we use the “alternative document” field.
If the credit note refers to a particular or many particular Invoices, with which it must be “correlated” in order to have a correct update of “Ageing balances”, we may define these documents to the “Status” sub-page to the “reference document” field using the  icon:
icon:


 To the presented dialog, may occur search of the reference documents. The selected documents will participate to the automatic matching, execute during the Save of the document.
In order not to remain “pending quantities” and influence wrongly the Stock Valuation Process, the Credit Note must either produced by transition or created annually, and to be later connected with the Goods Return Note.
This may happen as follows:

 From the Purchases documents list, having “marked” the (PCN) credit note, ask from the “Actions” menu the «Automatic quantity matching» (the simple option or the «Criteria-based” one). Prerequisite for this process to be functional is that to have been entered the “106. PRN=>PCN” transition code to the “Origin Transition Rules” field in “behavior” sub-page, of the “PCN” document type screen.
So, during “automatic quantity matching”, a searching process will occur to the correct documents (sources), in order the “connections” generated to be EXACTLY those as it would have happened through a transition.
How do we see the results of issuing the Purchases Credit Notes?
| View | Content | |
|---|---|---|
|
|
Purchases/Arrivals | In the purchases documents list the credit notes are negatively update the columns “Gross Turnover” and “Net Turnover”. |
|
|
Purchases & Expenses Journal per VAT rate | Auxiliary Journal for reconciliation VAT Inflows, where for each VAT rate, net and VAT values reported per accounting category. |
|
|
Inventory records | It presents all the stock quantitative and value transactions. Depending on its format, it displays the Credit Notes values negatively to the Purchases columns or generally to Imports columns. The same update (summarized) also occurs to the Monthly Statement of Stock Book and to the Inventory Costing Balance. |
|
|
Item returns |
|
|
|
Supplier statement |
In the Supplier’s statement (of accounting nature) with detailed transactions and progressive balances, the Credit Notes are updating the Debit, except if the “trade accounts update from "reversed" transactions with NEGATIVE entry of the same sign (D/C)” company parameter is activated (set to “true”) and thus, will appear as negative in Credit. The same update (but summarized) also occurs to Suppliers Trial Balance. The Supplies statements and Trial Balances “with turnover separation”, at the same time, give the information of the net and gross turnover information where the credit notes act negatively, as expected:
|
|
|
Accounting |
An accounting entry is created to the Suppliers, Purchases and VAT accounts and it updates the Accounting journals, the Account Statements, the Trial Balances etc.
|


Credit discount Notes
It is issued from Suppliers either to correct a wrong charge or (mainly) due to Agreement (e.g. for turnover goals) which, if achieved, must result in providing credit. It can be issued for a particular Purchase Invoice (if it is paid according to the settlement for instance), either at the end of the month, 3 months period, year etc, or whenever our purchases have met an agreed target.
Appropriate document type: PCV (Purchases Discount Note)
The use of credit discounts documents can be checked from the Discounts justification statement (from the Business Snapshot/Cost Analysis menu) which analyzes the purchases discounts and contains a special set of columns for “retrospective discounts”:

Issue of the supplier’s original document
In this document, quantities are not visible, as they do not affect the system.
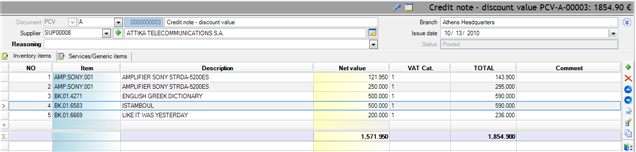
If we do not know the items that the discount is concerned, and we insert the Credit document using a generic item or as an Expense Credit Document, then, the Purchases cost (turnover) will not affect the Inventory (stock costing process, average cost price etc.).

- The analysis into items of which we take the discount is strongly recommended even if they are not separately reported to the original (in order to have a correct COST to the INVENTORY).
The effect of the credit discount documents to the system is corresponding with the one of the Goods Return Credit Notes. In Accounting, they may update a different purchases account, depending on the chart of accounts.
Discount for a particular Invoice
If the Credit Note refers to particular Invoice, in order the items not to be typed again, we can use the related transitions:
Appropriate Transitions: 109. PNV=>PCV (Discount Credit note from Invoice - Receipt note (with zero value))
103. PIV=>PCV (Discount Credit note from Purchase Invoice (with zero value))
After document created, we must open and enter the values of the original supplier’s document.
Rebate claims from suppliers
When the expected from the Supplier discounts, concern an agreement of turnover goals, the system provides a process for calculate and automatically create the claims for discounts taking (see chapter “Commercial Agreements”). Their entry into the system, has the following advantages:
- Smoothing of inventory cost modifications and on time information, in comparison to taking information for the actual stock cost (after discounts) only once per year, as it usually happens.
- Monitoring of possible discounts differences, according to the agreed (compare claims to actual rebates).
Appropriate document type: PCF (Purchases Rebate Claim)
These “forecast” entries can update specific for this purpose General Ledger Accounts, in order to obtain reconciliation between Accounting and Inventory sub-ledger:

When the Credit Notes issued by Suppliers (“PCV”), all the prior forecast entries (PCF) must reversed:
Appropriate document type: PCR (Reversal of Rebate Claim)
Appropriate transition: 136. PCF=>PCR (Suppliers’ Claim reversal)
The Stock cost variation, at the month when the Credit Note issued, will be ONLY the DIFFERENCE, compared to the forecast entry and NOT the total credited value.
For the related information (forecasts comparisons with actual discounts attributions) see the Compare Suppliers’ rebate claims to actual report (Entities/Accounts payable/Information):

The report presents the Purchases turnover (before the reductions of the Credit Discounts document PCV), the corresponding claims for rebates (from the not reversed claims PCF), the issued rebates (PCV), the claim that these rebates correspond (reversed by PCR), the possible difference, and the remaining amount (forecasted).


Discounts expected in the next fiscal year
If the company is entitled to purchases discount that is not issued yet by the supplier, whereas the fiscal year must close, then, we would enter an Inventory transaction for reduce cost and a reversed document to the new fiscal year when a (PCV) credit note sent from the supplier/s.
Appropriate document type: IPC (Stock purchases corrective - value)
These entries are monitored to the “Fiscal year Purchases Discounts under settlement” General Ledger Account, which is given to the header. To the lines, give the discount amounts and the accounts to be credit. In the next fiscal year, it must occur symmetrical entry with negative amounts (cancelling process or issue the same data to the “reversal entries” sub-page.

Purchases on consignment & clearance
Some suppliers provide the items for sale and they paid later, based on sold items clearance, for the period “discharged” (and not based on the balance resulting from Invoicing or Goods remaining to our site). To accommodate these processes, the purchases must be “connected” with the sales in order to get as a result, the amount payable to Suppliers, ONLY for the items sold.
At this point, the specificity covered by the system is that the “purchase” and “sale”, are attributes given to the various documents in an independent way from the one monitored to the Inventory and the rest sub-ledgers. This allows the implementation of the Consignment process through any transaction, use of Third parties warehouses, Quantitative Notes or/and through typical Purchase and Sales Invoices.
The tasks needed are available to the Periodic Processes/ Consignment processes menu. At the end of this chapter described all information about the requested customization.
Sales clearance
The displayed dialog contains two lists (Sales - Purchases) and allows determining which Purchases come from what Sales:
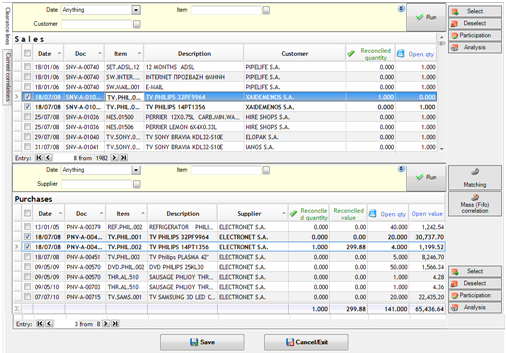

|
|
|
|---|---|
|
|
|

|
|

|
|


All matching information is available to the 2nd sub-page of the process dialog under the “Current matching data” title.
The user can modify the quantity directly to the column “matching quantity” of this grid (thus, the
column will be activated) or delete the matching (thus it will be displayed as deleted).
The
button allows checking the full data of the matching entry, through a dialog, where the user can ask loading of the connected documents (
).
In order the matching information to be saved (or the deletions etc.) the SAVE button must be selected.


Matching of purchases returns
This process allows us to define which returns to suppliers, concern what Purchases. It must be prior to Purchases-Sales Clearance.

To the upper part are displayed the returns and to the bottom part the purchases. In order to match lines, use the same tools as with the Purchases-Sales Clearance. The result will be the net purchase quantity, to be “connected” to SALES. The mass matching process selects lines of Returns and Purchases of SAME items and SAME suppliers, sorted by date.
Matching of sales returns
This process allows us to define which returns by customers, concern what Sales. It must be prior to Purchases-Sales Clearance.

To the upper part are displayed the returns and to the bottom part the sales. In order to match lines, use the same tools, as previously. The result will be the net sales quantity, to be “connected” to PURCHASES. The mass matching process selects lines of Returns and Sales of SAME items INDEPENDENTLY of the customer (“mass (FiFo) matching per item”) or of SAMES items AND the SAME customer (“mass (FiFo) matching per customer”), sorted by date.
Resolution entries
It is a view of all the Purchases-Sales clearance entries for selectable date range in order to finalize the entries (which means that the entries will not be able to be deleted or modified), and to calculate the amount of reconciliation (payable amount), owned to the consignment suppliers.
This view has grouping and TOTALS per SUPPLIER and (sales) branch, while it displays the quantities and values based on the Clearance. The values are proportionally calculated on the total cost (of the connected Purchase), based on the quantity sold.
Using the “Finalization” button, the entries obtain the appropriate attribute (in order to be “locked” for modification/deletion) and they can become accessible again through the “Undo finalization” button. These actions are functioning for the SELECTED lines (in the 1st column, activated with the “select”, “deselect” buttons, also) and affect the LAST COLUMN which shows the status of each entry (finalized or not).

- Within this view, may connect the appropriate report format using Crystal Reports or with a layout (and print preview) or/and an automation for produce automatically the suppliers’ payment documents (receipts or payment orders).
Preparation of matching
This process allows the mass matchings accomplishment between returns and initial invoices in sales and purchases but also sales matching to purchases, for a definable date range. After that, the user can process the results and make corrections, if needed.
The “clearance” date is stored to the produced matching entries. This is the ending date of the period given to the criterion.

Information of Consignment processes customization
To all the suppliers with whom we work in this way, the “Purchases in consignment” field (in “Commercial terms” sub-page) must be activated.
 To all the document types that will participate to the process, the “Consignment type” field (in “Behaviour” sub-page) must be always updated.

Indicatively, to the system documents, could be in force the following scenario (based on invoices and receipts):

 To the series of the abovementioned documents types that will participate to the process, the “Refers to consignment“ field must be activated.
Each item line of documents, of which the TYPE defines any consignment type (except the “does not refer to consignment”)» and at the same time the document SERIES defines that it CONCERNS consignments, is stored woth the “Refers to consignment” line field activated (this means that it can participate to the matching processes).

NO item line which participates to consignment matchings can be deleted or modified in quantity in such a way that it would cancel its reconciled quantity (increase of the quantity allowed, recrease allowed up to the threshold of the matched quantity).
The matching processes operate with lines quantities to the MAIN measurement unit.
The lists used to matching processes can be differentiated per installation, since are Views (scrollers):
- Area “Suppliers”
Clearance Entries
- Area “Purchases Documents”
Purchases Lines
Purchases Returns Lines
Purchases Lines for Returns matching
- Area “Sales Documents”
Sales Lines
Sales Returns Lines
Sales Lines for Returns matching
Changes in market prices
The monitoring of the purchase/cost values in a company is a critical process, which must execute at regular time intervals in a structured method and it should be followed, if necessary, by the respective actions of sales prices adjustments.
How to monitor changes in prices
The system provides tools for prices modifications monitoring which can be used depending on the invoicing policy method, applied to each installation.
Inside the items’ management screen the alternative suppliers of the item are defined and at this point, is monitored the price and the date of the last purchase. In order for this update to automatically occur, it must be properly defined to the items’ Item control profile.

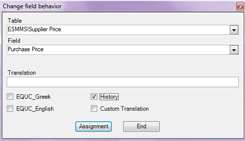 If despite these, the prices at this point are used INSTEAD of a pricelist (in order the agreed prices with the suppliers to be recorded through typing or another way), the Item Control Profile should NOT be customized in order to be automatically update the purchase prices.

If we want a history log for modifications of these fields, the history keeping functionality must be activated through the “Change Field Behaviour”.
Information for all prices’ modifications is available to the “Purchase prices log” list (where the user can ask only a particular number of the last changes to be reported):
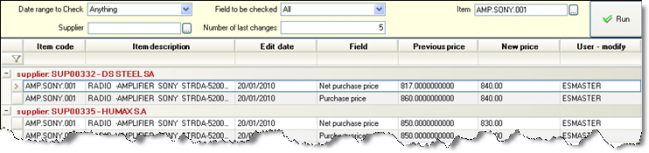
Another useful check of over time changes of cost prices based on the registered suppliers’ documents. The “Purchase prices variance based on transactions” list presents the last and the preceding net purchase price (deducting possible discounts), with the percentage modulation criterion, (that is comparison of the two sequential modifications exceeding a given % of difference).

Apart from purchase prices issue, and depending on the stock valuation method, it is useful to check the actual cost prices and their variance justification. This implies the frequent and correct execution of the Stock valuation process. In particular, we recommend the use of the Entities/Inventory/Stock value control menu reports:


Official cost prices per period: It presents for each item, the calculated cost prices per month. Recommended, in order to check the cost price evolution.
Compare official cost prices: It presents the items by supplier, with their cost prices calculated for the selected month AND the previous one, with their percentage variance. Ideal for monitoring significant changes in cost prices.
How to verify compliance with the agreed prices
A first-level check users can do, when the default purchase price (based on the agreed prices) is NOT the same with the one of the original documents. Though, it is desirable to have an independent control mechanism which will make information available to us at any time and from the appropriate people that will examine the difference between the “appropriate” and the “actual” prices. This mechanism is supported by the “Item prices log templates”.
The “templates” supply a purchase agreed prices calculation on a daily or another periodical basis, which, no matter how the prices declared into the system (e.g. in items’ suppliers list, in purchase pricelists, in specific contracts etc.) detects and stores the agreed purchase prices, in order to be available for cross checking. This is achieved through invoicing process simulation.
To define “Item prices log templates” (Tools/Customization/invoicing policy), must choose the parameters that must be taken into consideration e.g. specific pricelist or items or branches or colors/sizes for which the prices file will be calculated and stored.
It must be given a typical trade account for whom the calculation will occur (just like an invoice by him were entered).
It must be either defined a branch or a series. If a branch is defined, then, this will be illustrated to the history log as a “dimension”, if series defined, then, may monitor the prices for the whole company without the branch dimension.
From the “Actions” menu of the templates list, the calculation and deletion functions of price history log are available.
The deletion is necessary to minimize the History log size, when this is not useful any more (define a date range and, any price calculated in this period, will be deleted).

As far as prices calculation is concerned, a dialog will open to define the template/s (based on which the calculation will occur), as well as the reference date.
The process can be time scheduled and daily executed.
From the time this process executed, the view “Item prices log” (through the “Entities/Inventory/Information” menu) is available.
It displays the items’ current prices for the selected date to the date criterion. To the “Actions” of the scroller toolbar, the calculation processes and price file deletion are also available.

In the same location, it is also available the “Compliance of purchase prices to Suppliers’ pricelists” view, which displays the purchases found with different values than the current, for a selected time range.


How to adjust selling prices when purchase prices change
Depending on the company nature and the invoicing policy, can be used different methods to adjust selling prices.
- Through Purchases Documents
In purchases documents, the “Readjustment of Sales Prices” automation is available (through the horizontal toolbar), which will function for the selected items only:

 By calling this function, a dialog appears, where the following must be selected:
The items’ selling prices (Wholesale, retail etc.) for modification
The method used for the re-adjustment. The final price can be increased based on:
The % markup of the price that will be updated (only available for the wholesale price and the retail price)
The percentage that will be given by the user to the numeric dialog field.
Finally, the user can directly enter the desirable price. In this case, the unit price of the purchase document is not taken into account.
Through Imports Folder
To the import folder, in “Costing” page, the “items’ retail and wholesale price update” automation is available. This automation adjusts the selling prices (wholesale and retail) to the item, in the way that these are calculated through this particular view.

From The Readjustment of Prices process
This process, described in detail to the related chapter, allows the mass modification of selling prices, as much to the items (current base prices) as to the sale pricelists, even in the level of dimensions (prices per color-size). It is based on purchase prices (or other options for starting price), gives the possibility to use the items’ mark up or other specific %, gives some rounding method options etc.
It is the most complete and suitable procedure for changing prices.
Purchases of special categories items
With Color-Size
The purchases orders are usually occur through the sampling procedure, listing the quantities of each combination Item-color-size and then the order entered. The user can enter one line per item with simultaneous quantities definition to a matrix, per dimensions combination, through the F12 (
) button on the item line:

As for the display method of the colors-sizes values, two general parameters are used. The 1st parameter concern the sorting method, horizontally and vertically (“stock variation set field based on which the colors-sizes sorting will occur to F12”). The 2nd parameter indicates the dimension which is used for the vertical and the horizontal axis (“Priority matrix (F12) appearance dimensions”).
In other cases e.g. during retail sales or return to supplier, the rendering method is not multiple. It is easier to define the color/size per line, with additional columns display to the lines grid:

A functionality that combines the ease of management to a matrix and the completeness of information that the development of colors-sizes per line offers, is the use of “Stock dimensions enter in matrix, maintaining of line level management” command, with Alt-F12:
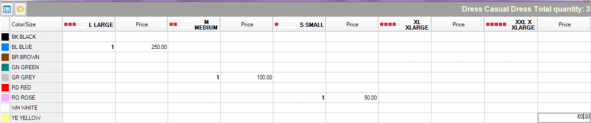
By typing data to this dialog, the information of colors-sizes analysis is placed to different lines (so many lines as the not-zero “cells” of the matrix):

Even if lines of the same item created by the user, using this command afterwards, these lines are recognized after grouping of all their basic fields, and they are ALL displayed together, within the same dialog.
As the usual reason behind discrete lines development is the different PRICE, the dialog appears with DOUBLE COLUMNS for each color-size combination (quantity and price). To the bottom of this dialog, a setting deactivates the “price” columns in order to “fit” more size columns (size is usually the horizontal axis).
Finally, through the Shift-F12 buttons combination to an item line monitoring colors-sizes, the color-size values are copied from the previous line (either if the line had one or more dimension lines connected).
It is necessary to pay attention to the correct definition of the Item control profile for the items monitoring dimensions. It must be defined compulsory input of these fields, in order to ensure the correct update of Stock.
In case where, during goods arrival, there are modifications in colors-sizes level compared to the initial (of the order), there are two cases:


- If the goods receipt note produced by transition, it is sufficient to correct the colors and sizes to the document lines and so, the “pending quantities” (created by the order) will be correctly updated (decreased).
- If the goods receipt note was manually typed and we later want to connect it to the order through the automatic quantitative matching process, the “Automatic quantity matching with strict dimension control” parameter must be FALSE, in order to try firstly match lines by dimension (color-size) and item and if not found, to try match by item only. If the parameter is TRUE then, the matching will strictly occur for SAME combinations of color-size.
With Lots
The lots are either created through the Lots List (Entities/Inventory/Lots) or through the items’ management screen (Contents/Dimensions/Lots) or/and automatically, during their insertion to Inventory (through a document) as we later see.
Basic fields of the Lot are the Production Date and the Expiry date. These fields are also useful for the automatic lot selection during sales or grants in general.
During the entry of an item monitored in lots, through a purchase document, we can select the desirable lot by pressing F12 (


|
New line insertion for selection from a list of registered lots (drop down list). | 
|
|---|---|---|

|
Selection from a definable view (scroller) | |

|
Create new lots from a dialog, where the necessary data entered by the user. With “Accept”, the lots appear to Lot lines grid. | |

|
Automatic creation of new Lots and insertion of new lines (F11): Since there is a code format for the lot (autocounter), the new lot/s automatically created, with Measurement unit the Base SKU of the item and “production date” the date of the Purchase document. | 
|
Using the above functionality, the user may define more than one Lots to ONE item line the quantities of which consist the total quantity of the item line.
Alternatively, the lot can be defined PER LINE, if we have made the “lot” column visible at the lines grid or/and the “lot code” column (through which is accomplished automatic lot creation, by entering a not existing lot code).
Finally, it is possible to configure the automatic lots’ generation, in order the various lot’s fields to take default values based on the document data (the document through which lots are created).
We can create a field properties profile, by defining

To the “Relates to” field -> Lot
To the «Provided it is valid» field, the expression
NOT _dr.Table.Dataset.ExtendedProperties("CTX_DOC_LINE") Is Nothing
To the “Field”, that field to which we want to give default value
To the “Value type” field -> Expression
To the “expression” field -> the appropriate content (use the expression editor
 )
)

Examples
Update of the lot expiration date from “date 5” of the item line with the following expression:
CType(_dr.Table.Dataset.ExtendedProperties("CTX_DOC_LINE"),DataRow)("UDFDate5")
Update of the lot Shipment date from the document issue date with the following expression:
CType(_dr.Table.Dataset.ExtendedProperties("CTX_DOC_LINE"),DataRow).GetParentRow(“FK_ESFILineItem_ESFIDocumentTrade”)("ADRegistrationDate")
With Serial Numbers
The serial numbers are either created through the Serial number List (Entities/Inventory) or through the items’ management screen (Contents/Dimensions) or/and automatically, during their insertion to Inventory (through a document) as we later see.
Basic fields of the Serial number are the Position, the Status, the Start date and Expiry date of warranty.
During the entry of an item monitored in serial numbers, and having registered the serial numbers master data, we can select them by pressing F12 (


|
|
New line insertion for selection from a list of registered serial numbers (drop down list). | 
|
|---|---|---|
|
|
Create new serial numbers from a dialog, where the necessary data entered by the user. With “Accept”, the serial numbers appear to serial numbers lines grid. | |
|
|
Automatic creation of new Serial numbers and insertion of new lines (F11): Since there is a code format for the serial number (autocounter), the new serial number/s automatically created (depending on the quantity), with Measurement unit the Base SKU of the item and “Position” the company Branch of the Purchase document. |
|

| ||
| The serial number “status” is configured by fields property profile to all the documents where S/Ns may be used. |
Through the abovementioned functionality, the user could define to ONE item line more than one serial numbers, depending on the quantity of the item line.
Alternatively, the Serial Number can be defined PER LINE, if we have made the “S/N” column visible at the lines grid (through which is achieved selection among existing serial numbers) or/and the “S/N code” column (through which is accomplished automatic serial number creation, by entering a not existing serial number code).
Finally, it is possible to configure the automatic serial numbers’ generation, in order the various serial number’s fields to take default values based on the document data (the document through which serial numbes are created).
We can create a field properties profile, by defining

To the “Relates to” field -> Serial Number
To the «Provided it is valid» field, the expression
NOT _dr.Table.Dataset.ExtendedProperties("CTX_DOC_LINE") Is Nothing
To the “Field”, that field to which we want to give default value
To the “Value type” field -> Expression
To the “expression” field -> the appropriate content (use the expression editor
)
Update of the serial number warranty expiry date from the « Date 5» of the item line, with the expression:
CType(_dr.Table.Dataset.ExtendedProperties("CTX_DOC_LINE"),DataRow)("UDFDate5")
Update of the serial number warranty starting date from the document issue date, with the expression:
CType(_dr.Table.Dataset.ExtendedProperties("CTX_DOC_LINE"),DataRow).GetParentRow(“FK_ESFILineItem_ESFIDocumentTrade”)("ADRegistrationDate")
Commercial agreements & claim of rebates
The commercial agreements, through which the turnover goals recorded and rebates (retroactive discounts documents) or rebate claims (forecast entries for expected rebates) are automatically produced based on the goals’ success, complete the Invoicing Policy functionality (prices, discounts, contracts), by clearly defining the context of the commercial co-operation between two companies (customer-supplier relation).
A thorough trade agreement generally states the contractors (Company, Supplier) and the time of effect. Usually, the time of effect for an agreement is one calendar year. The terms of the agreement define some of the following areas:
- Invoicing policy: Prices, Discounts or benefits applied during buying (e.g. 10 + 1 free)
- Benefits policy: Benefits related to the performance, awarded on a periodical basis (one year, 3 months period etc.)
- Credit control policy: Amount of credit limits, payment methods, discounts based on payment method etc.
- Shipping policy: Delivery terms, lead times, discounts based on these terms etc.
The benefits from an agreement term may be implemented either by Credit note for the retroactive discounts (Rebates) or by Service provision invoice from us to supplier.
The monitoring of the commercial agreements consists from three levels:
The definition of the agreements’ terms
The calculation of rebates
The necessary reports and statistics

Such agreements may relate to either customers or suppliers.
How to define a commercial agreement
The system defines the “commercial agreement” entity based on which the rebates calculation is achieved. An agreement may contain MANY Retroactive Discount Profiles (individual terms).

In this way, it is feasible to configure different discounts profiles for different calculations e.g. per brand, business unit etc. depending on the items’ grouping fields that the agreement is based on and to integrate them under the same “agreement with the trade account”. Thus, the profile could be “degenerated” to ONE scale description for COMMON values of the grouping fields e.g. one profile with N lines for item’s category A, containing the targets limits (scale) and the % of rebate, a second profile for item’s category B etc.
An Agreement contains data concerning trade accounts and detailed data of all the discount profiles. During moving between profiles in the list, the sub-page “discount profiles details” presents the data of the current (particular) profile:
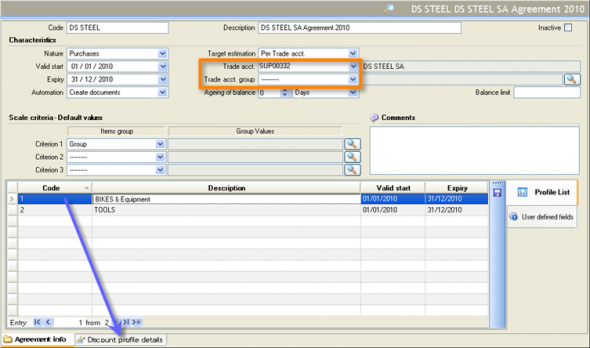
The Screen of Agreement is a dynamic form, customizable in installation level.


Basic Data Of Agreement
| Nature | We select whether it concerns sales or purchases |
|---|---|
| Automation | It defines the documents creation method. The process is implemented through automation, and a default automation “Create documents” is available. |
| Trade Account | If it concerns a particular trade account, select him to this field. |
| Trade acct. group | If it does not concern a particular trade account, must select a grouping field of trade accounts and to the next field, must select specific group values ( ), to define with this way for which trade accounts the agreement is in force. ), to define with this way for which trade accounts the agreement is in force.
|
| Ageing of balance and |
If a precondition for implementing the agreement (calculation and take benefits) is a minimum age balance, we define this limit, as well as a marginal amount for control. This means that if for instance, the age limit is 90 days and the marginal amount 500.00€, an unpaid for 100 days invoice of 300.00€ will not be taken into consideration (the process will proceed). |
| Scale Criteria | There are 3 items grouping fields as default, in order to be used to the discount profiles definition (to amounts scales). |
Retroactive Discount Profiles – Basic Data

| Start-Expiry | The period for which the retrospective discounts will be calculated. |
|---|---|
| Results view | We define the scroller for presentation of calculation results. The results are stored to a particular table for calculation justify and for information purposes. Through its new calculation of the same profile for the same time range, the previous results automatically deleted. |
Retroactive Discount Profiles – Scales (goals setup)
| Size |  The “size” of the scale data may be the Turnover, the Quantity or the % of variance from previous fiscal year. What does this mean? The target size, instead of DIRECTLY refer to turnover or quantity achieved within the calculation period, may refer to GROWTH e.g. If the variance was +10% => discount 1% on the turnover, if the variance was +20% => discount 3% etc. The “size” of the scale data may be the Turnover, the Quantity or the % of variance from previous fiscal year. What does this mean? The target size, instead of DIRECTLY refer to turnover or quantity achieved within the calculation period, may refer to GROWTH e.g. If the variance was +10% => discount 1% on the turnover, if the variance was +20% => discount 3% etc.
|
|---|---|
| Calculation view |
For the detailed calculation data (sizes), four different views are available and could choose one of them or develop a new one in order to meet specific requirements. These scrollers found to the “Retroactive Discounts Profiles-Entries selection” area.
|
| Excluding Doc/s | We can select documents types to be EXCLUDED by the process e.g. already issued discounts credit notes. |
| Items group & group Values |
There are 3 items criteria for use to “scale” lines, which selected among various items’ grouping fields. In each line, the criterion’s values are selected through a list, the “members” of which may be predefined to “group values” fields. So, the user can only select from these values during insert the scale lines. |


Retroactive Discount Profiles – Scales (benefits setup)
| Size |  The “size” of benefit could be either a %percentage or a value (thus the currency is also defined) The “size” of benefit could be either a %percentage or a value (thus the currency is also defined)
|
|---|---|
| Document type | The document type that will be produced by the process. |
| Items exemption | Here we define the field and the value of the items’ grouping field, which are excluded by the process of benefit distribution to particular items. This means that whereas the turnover (“size”) calculated for all the items of a group, during calculation of proportional benefit per item, some items are exempted. |
| Assign to | Define if the results analysis to produced documents will occur to the “current item” (for every item) or to a specific “Generic Item” (of type expenditure). The “current item” is default choice in order the Stock costs, profits etc. to be correctly updated. As far as the printing of the credit document is concerned (needed only in Sales), if it is to avoid the printing of detailed items, this can be done by using “lines grouping” to the print form (see the “Presentation & Printing Tools” manual). Thus, if we have common “reasoning” to the lines (e.g. to the “comment” field) during process execution, it can be printed ONE line with the values totals (discounts) having this “comment” as grouping field, while the document does contain detailed lines. |
| Scale |
The main definition of an agreement term (discount profile) is the one that sets particular conditions (goals) and connects these with particular benefits. In this area, we define the scales, either if they concern values of different criteria or different values range to the same criterion or any combination of these, as well as the BENEFIT (whether it is a value or a %, defined to the header).
|

How to see the results & update forecasts
The calculation process is accessible through Periodic Processes.
In the dialog appeared, the user must select a specific agreement and one or more terms (discount profiles), provided to have a common produced document type). Then, he must define series for document generation and some comments, if needed.

Through the action buttons to the bottom area, the calculation process can be executed (
) and, finally, the generation of documents to occur (
).
The first sub-page “Results” shows the results of calculation (for the current discount profile), and the second sub-page “Documents” shows the documents that produced.

As a COMMON document is produced from many profiles for the same trade account, the discount profile in which each (item) line was based on, is transferred to the documents’ lines (at the “additional item line” table).


How to check the implementation of agreements
Through the Calculation results menu option, we can see the all the results of the calculation’s executions.
The available data (for filtering, grouping etc.) are the Trade Account, the Agreement, the Profile, the Item, etc. So, even without create documents, we take a full picture of expected discounts.

Expenses
In this chapter will be examined the typical expenses scenarios and the data entry and monitoring method within the system. Additionally, will be examined the Cost Centers concept and the various methods to allocate expenses to them.
The guidelines and the examples are mainly based on the default product parameterization, as far as the documents are concerned, the transitions, the screens layout and the information tools.
In order an expense document to be created, the following ways are available:
|
|
|---|---|
|
|
|
|
|
|
|
|


For these expenses that are typical – repeatable, it is preferable that appropriate shortcuts to be created (e.g. Rentals, Electricity, Telephone, Subscription, Payroll etc.), where:
- Document type, creditor and the expense will be ready – already entered
- If the amount is fixed, it must have been also entered at the lines of this “document-template”, in order the user to put minimal effort
- The document series, preferable to be removed, just before is “sent” to the shortcuts.
Remind that the shortcut is created through the “Actions” menu of the document (at its horizontal toolbar). During create shortcut, the current DATA of the document stored as it is, ready for every future use.
Expense receipt
- For petty expenses, when immediately paid and we do not wish the Creditor to be updated:
Appropriate document type: BXP (Expenses, interests and other bank payments)
When we want the creditor to be updated, even when he is immediately paid:
Appropriate document type: XPD (Debit note)
This document may be issued as “on credit”, i.e. the payment occurs later with a separate document. In general, this is not a common case. We usually have “on credit” at Invoices, and not at Receipts.
The default format of the Expenses document is the following:

| Type and Document Series |
|
|---|---|
| Date |
|
| Creditor definition |
|
| Payment method |
|
| Cost Center |
|
| Expenses |
|
|

Information for Expenses documents customization
As far as the default Payment Cash register is concerned, this is determined to the document series, to the Liquidity accounts list of the series:

In the general case, it has been opened ONE cash liquidity account per Branch and this is the default payment account to the documents in cash. Especially for the “automatic payment” account, could be defined on a series basis, IF:
- It is fixed (ONLY the specific account): Used when each job position corresponds to a separate cash register, where balance counting and monitoring is accomplished.
- It is not fixed, but it may be used any other account of the same Branch (ONLY acct. of the same branch). This is used when the separate cash registers to the same Branch can exchange money and the counting and control occurs in Branch level. Even when each cash register of the branch is separately monitored, the expense may be entered from one work position but the payment to occur with cash of another Cash register. Here, we enable the payment from the actual Cash register, without a “cash transfer” through a particular document to be necessary.
- There is no constraint. When we may need this? While the expenditure registration logically is made from document series of each branch (for correct statistics and cost control at branch level), but the actual payment may be obtained from the headquarters. In that case, the main cash register must defined as payment account to expense documents of other branches, thus we release here the cash account selection to the user, in order to get correct cash balances, without unnecessary cash transfers.
The same functionality is available for the FORECAST account that is used in transactions “on credit”. This influences the way obligations will appear (outstanding expenses) per branch.
How do we see the results of issuing Expenses?
| View | Content | |
|---|---|---|
|
|
Expenses Documents | List of all expenses documents. |
|
|
Trial balance of items-expenses |
Statements of accounting format with the expenses credit/debit of the selected period and progressive totals (with drill down to the detailed entries, available to “Account statement” reports too).
|
|
|
Purchases & Expenses Journal per VAT rate |
|
|
|
Creditors Trial balance | Accounting format balance and similar statement, with the detailed entries. |
|
|
Purchases and Expenses per branch |
Cube analysis per branch, where all horizontal dimensions are also available.
As much, the horizontal dimensions as the PERIOD can be moved to the cube dimensions. The Stock and Fixed Assets purchases data may be removed from the layout (through the “data” option). |


Services Invoice
Appropriate document type: XPI (Invoice)
Technically, the only difference from the Debit Note (XPD) is that it updates the State Reporting. It may contain cash payment or not.
An example of the accounting entry generated when the invoice in “on credit”:

An example of the accounting entry generated when the invoice is “in cash”:

Services Credit Note
It is issued in cases of mistaken debit from the company’s creditors. It may contain cash receipt or not.
- When there is money return at the same time and we do not want the Creditor to be updated:
Appropriate document type: CNC (Credit note with payment)
When we want the Creditor to be updated, even if paid at the same time:
Appropriate document type: XPS (Credit note for expenses)
An example of the accounting entry generated:

If it is a receipt (does not update the State Reporting), we use the XPE document (Expense Credit Note (receipt))
If we want posted with negative values (just like a cancelling document), must use the document type:
Appropriate document type: XPC (Credit note)
An example of the accounting entry generated:

If it is a receipt (does not update the State Reporting), we use the XPR document (Credit note for expenses (reversal))
Self-Dispenses
Such a dispense transaction occurs in cases where the materials (inventory items) are consumed from the enterprise itself. The “recipient” is an employee or a department of the company.
Appropriate document type: SDN (Self-dispense Note)

Data concerning the transfer (WH, Shipping method etc) can be entered to the “Transfer data” sub-page. It updates inventory quantity and cost of grants and at the same time the expenses (in accounting). It does not participate to Revenues reports or Expenses reports, but just to the Stock Book reports.

In Accounting, it equally updates revenues and expenses.
During the stock valuation process, if in the end it has been calculated a different cost from the one defined to this transaction, cost correction entries are generated (reverse of self-dispenses estimated cost and registration of the finalized cost, after stock valuation).
When such a transfer cancelled or a mistake occurred or the item returned to Stock for any reason, the following document must issued, which makes exact the same entries of a reversed sign:
Appropriate document type: SDR (Self-dispense Return Note)
In cases where the recipient is customer, see the documents and the workflows used to the related chapter concerning free grant (sale).
Self-dispense customization information
- If the VAT of the self-dispense will be calculated or not (on the cost value), it is determined at document type through the activation of the “Calculate VAT” setting:

- If a Delivery Note is issued, the same prefix with all other Delivery Notes, can be defined to the document (common numbering):

Rentals
The rental payment entries issued into the system either by a simple debit note and then, separately the payment receipt or, at the time of payment, through a single document.
The documents that are used are these of the Receipts or Services invoices (XPI, BXP etc.) described at the previous chapter.
Rentals customization information
We recommend to create:
- The owners of the properties rent, as Creditors.
- The rental expenses to the expenses file either as one or separate codes per property.
As far as the rental stamp duty is concerned:
- It must be opened as a special account of “tax” type which is “depending on item” and is a “Stand alone” line
- To the expenses document types, this account must be added the “Charges/Withholding” sub-page
- The account must be incorporated to a special accounts group of “tax” type
- The group must be defined to the items-expenses “Rent” to the “Special taxes group” field.
Cars’ expenses
Appropriate document type: ΧΡΙΤ (Expense Invoice (for transportation means))
This document differs to the other used for the expenses, only as to the layout:

Transportation means’ customization
The transportation means must opened to the vehicles table (Customization/Transaction parameters). To the related fixed asset (if it is monitored to a fixed asset) the vehicle can be filled to the homonymous field of the fixed asset register.
Relative Reporting
By completing the vehicle to the expenses lines, we can have a full cost overview at any time (insurance, service etc) from the “Fixed assets/Information/Vehicle expenses” choice:

- The actual expense column shows the net value except if it is about a non-deductible expense (e.g. leasing) so it shows the total value.
Freelancers’ payments
Receiving Services
For register an Invoice issued by a freelancer, we usually use the XPI, XPD or BXP documents.
Withholdings
These transactions involve some withholding, such as Engineers payments subject to withholding tax of 20% (implemented as a "withholding” on the payment value). The relevant customization should be:
Opening of Special accounts “depending on trade account”
Opening of related group of special accounts of type “withholding”
Definition of the withholding group to the Creditors’ (freelancers) register
Definition of the special accounts to the expenses documents types to the “Charges/Withholding” sub-page.
Certificates for Services provided
From the “Accounts payable” reports, these Certificates are automatically issued, for any legal use.


The report printing occurs through mail-merge for the selected trade accounts after a template word text is selected.
The report uses two company parameters (to the “Self-employed persons certificates parameters” category):


To the 1st parameter it is entered a (comma separated) list of profession codes concerning the certifications issue and
To the 2nd parameter is entered a (comma separated) list with ledger accounts mask which is updated by the SPECIAL accounts that will participate to the report calculation (it is required that the “GL code” field to the related special accounts screen, is completed). This is required in order the particular amounts only (and not any transactions related to the trade account), to be taken into account.
Instruction,: When we want e.g. a particular withholding type that it is referred to a particular Civil Service, we just have to complete the “special accounts” criterion. The same handling needed, when we only want particular creditors. Both special accounts and trade accounts are available criteria to the filter.
Expenses with company’s Credit Card
The expenses documents paid through company’s credit cards, given to the Accounting department by the cards’ users. In order to have a full monitoring and control of these expenses:
- For each card, it must be opened a Liquidity Account to the name of the Beneficiary.
- The expenses registration must be in cash with the usual documents (XPI, XPD or BXP) which are used for the other expenses cases. There must be defined the “payment liquidity account” that corresponds to the card user.


You may open special payment methods, with the particular liquidity accounts being ready and just select the corresponding payment method (of the card’s user) to the header.
The payment of the card account will be inserted through the BCT (Cash deposit) document for the deposit of the amount due, from the Cash register or a Bank account to the Card account. To the header we insert the Liquidity account FROM which we pay and to the document line the Liquidity account of the card that we pay.

This entry will “close” the Cards’ liquidity account statement:


The deposit of any additional Bank charges will be issued through a expenses document in cash, to the creditor “Bank” (e.g. BXP), where liquidity accounts of company’s cards, are not involved. Into this, the additional charge will be inserted as an expense.
When we want to monitor a credit limit to these company’s cards, we could define it through CLC document (Corrective entry for liquidity account (Credit)) at the beginning of each year, so it would appear to the “Credit” column (in Balances & Statements) and cancel it at the end of each year.
 To the document type, it will NOT be defined an accounting journal, in order posting of the document not to occur since it will just consist an internal control entry.

In this case, to the Liquidity Accounts statements, to the credit column, we check for any credit limit excess. The balance of these accounts after each payment will not become zero, but equal to the credit limit.


Banking Interest expenses
Appropriate document type: BXP (Expenses, interests and other bank payments)

The result of this entry will be the update of Cash (credit) and the Expense (debit).
Bank interest expenses customization
- The banks must be opened as creditors.
- The charges from interests must be opened as Items-Expenses.
Payroll
Obligations to the employees
Appropriate document type: XPD (Debit Note)
We use a creditor “Wages and Salaries” (Obligations to the employees) which has been opened for general use, for anything related to the company’s employees.
To the expenses, we open the related accounts of fees and contributions (with zero VAT.). To the expenses lines we insert all the debit amounts to these accounts.
To the special accounts, we open (“Stand alone”) withholding accounts (insurance funds, tax payments in advance etc.) and we connect these to the document types, in order to be selectable. We select them to the special accounts lines and we type all the credit amounts.
When the document is posted, it is produced a payroll entry for the period whereas at the same time the creditor (to the creditors sub-system) shows the amount is due and the expenses sub-system has been updated with the Payroll expenses of the period.
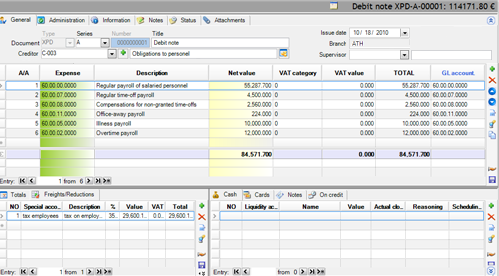


Payroll payment
Appropriate document type: CPS (Cash payment (to suppliers))
When we deposit the payroll, we use the same creditor “Wages and Salaries payable” and to the lines, the Cash register or the Bank account from where the payments occur, and as amount, this creditor’s balance.
The result will be a debit to the creditor (balanced) and a credit to the Liquidity Account (Cash or Bank).
Payroll advance payment
Appropriate document type: CPS (Cash payment (to suppliers))
If an employee asks for an advance payment, we issue this receipt, where we use the general creditor (“Wages and Salaries payable”) to the header, and the Cash account (branch cash register) to the lines.
We may open the employees using a horizontal dimension (dimension 1 or 2) and to select the particular one to the header (sub-page “Administration”). Since the Payroll is inserted in summary, the update of the cost center with the amount of the advanced payment, will not give to not authorized users the information of the salary per employee, but just of the advanced payments.
Clearance of payroll advanced payments
After the Payroll entry of the period is registered with the total of the salaries due, and before the payment, we insert virtual cash return to the cash register from each employee that received an advanced payment:
Appropriate document type: CRS (Cash receipt (from creditor))
Appropriate transition: 203. CPS => CRS (Cash Receipt from Cash Payment)
The general creditor “Wages and Salaries payable” is used again.
After that, the payment occurs for the total payroll amount, whereas to the detailed report that we prepare with the deposited amounts per employee (usually for send to the bank) we exclude the amounts of these returns from their salary. We can view the advanced payments from the general creditor’s (“Wages & Salaries payable”) statement, by grouping per cost center (e.g. Dimension 1).
Expenses advanced payments & clearance
In this case, we advance money to an employee for a trip, for example, and then, based on the expenses list provided by him a clearance process occurs: either he refunds the remaining amount if he has spent less or the Accounting pays the difference, if he has spent more.
Expenses advance payment
Appropriate document type: CPS (Cash Payment)
The employee (e.g. a salesperson) will be opened as a creditor that must used at the receipt’s header. At the document’s lines, we use the cash liquidity account of the particular Branch and we enter the amount paid. To the creditors’ statement, is created a debit (negative) balance.
Receipt of expenses documents
When the employee brings the documents (invoices or debit notes), these will normally inserted into the system with XPI or XPD document types (caution! without payment). The result will be a new credit to occur for each of the creditors, i.e. they will obtain a credit balance.
Clearance
In order the clearance to be feasible, these obligations must be transferred to the employee that had paid these).
Appropriate document type: TOC (Account credit balance offsets)
The creditor-employee is defined to the header and the suppliers or the creditors with the amounts of the received invoices, to the lines. The result will be the “balancing” of the various creditors of the expenses and the “Creditor-Employee” to present a balance through the following transactions:
- Debit due to advanced payment (MINUS)
- Credit due to expenses (PLUS)
The balance remaining represents the amount of CLEARANCE.
- If the amount of the advanced payment is greater (debit balance), it will occur a money return from the employee to the Cash register through the CRS document whereas
- If the amount of the advanced payment is smaller (credit balance), it will occur an extra money deposit to the employee through the CPS document.
The creditor-employee register will “balance” then (will become null for the Date of clearance).
Expenses per cost center
The expenses allocation processes to Cost Centers through Cost Accounting Ledger (using allocation sheets and allocation rules to draw up corporate results) are described to the related chapter, to the Accounting Tasks unit.
If Cost Accounting is not in use, the system’s “horizontal dimensions” could be used in a way that expense transactions would “split” into cost centers (represented by one dimension or a combination of dimensions) and then, review results through views, cubes, BITs and reports of Expenses sub-ledger or General Ledger, the majority of which is available BY dimension.
Allocation through rules assigned to Expenses
The allocation (to company’s dimensions) profiles defined through Tools/Customization/Organization parameters/Business dimensions/Allocation profiles:

An allocation profile contains:
Conditions. They consist by a validity date range and a set of values of system’s horizontal dimensions. During applying the profile, the condition must be checked by the system and if only fulfilled, the default allocation will be generated.
Allocations. An allocation is a set of lines for each “condition” that contain WEIGHTS or PERCENTAGES (to be applied to the expenses amounts, during issuing documents) and a set of values of dimensions that represent COST CENTERS. If “number” selected as a “weight type”, instead of % percentage (like at the above example where the number of employees is the allocation criterion), these numbers will be converted to % percentages (weighted as to their sum) during actual allocation.
To define a dynamic allocation rule, can create a view (into the folder Variable Allocation Views-> ESGLAllocationDynamic) for example “Revenues per business unit”, and declare it to the “Dynamic allocation view” column of the conditions part of this dialog (making it visible by “add/remove columns” functionality):

Into this view, the columns must have predefined names: Dimensions as Project, Business Unit, Activity, Dimension1, Dimension2, Site, Date period for compare to the date of source transaction as DateRange and Numeric column that gives the allocation ratio as Weight.
If a dynamic allocation view defined, allocation lines not allowed.
The allocation profiles may be assigned to the expenses, as a default.
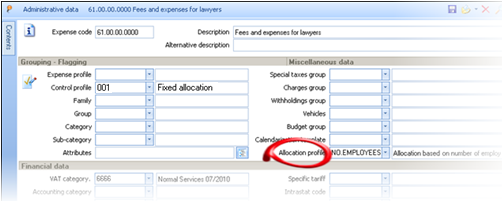
Finally, to the Item’s control profile (that the expense belongs) must define “compulsory allocation” in order to requiring the user to define or check the allocation:
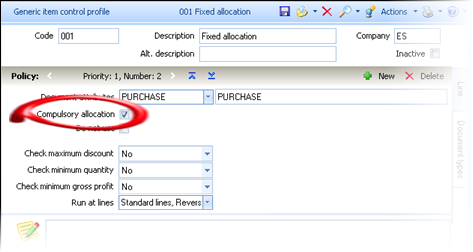
During issuing an expense receipt, the allocation will be generated automatically:


- On demand (using the command “allocation to cost centers” from the vertical toolbar to the expenses part)
- During saving document, if an allocation profile found to each expense included (otherwise, storing will fail)

Into the allocation dialog, the user might edit the allocation, add or delete lines, change dimensions, amounts or percentages. To the bottom part there calculated the totals in amount and percentage, as well as the remaining amounts “for allocation”. Cannot exit with an “accept”, without a 100% allocation of the line amount.
What will happen after posting the document is that, every transaction generated from lines to the Expense sub-ledger and to the Accounting, will have as “source” these allocation lines, so a document with ONE line, will be illustrated with MANY transactions as to the updates (provided that defined more than one cost centers).
If exiting this dialog, the allocation degenerated into ONE line of 100% (surcharge only ONE cost center), then, the dimensions will just be transferred to the parent line (expense line).

On the other hand, an expense line will ALWAYS have zero values to their dimensions fields, for those dimensions that defined to the allocations.
To the Transaction/Expenses menu, the process “Apply cost allocation profiles” could run in order to generate massively any missing allocations. This process needed:


- If the allocation profiles configured after registering Expenses
- If into the Item’s control profiles the “compulsory allocation” setting was deactivated, so documents allowed to be issued without declared cost centers
- If wish to overwrite existing allocations using a specific allocation profile
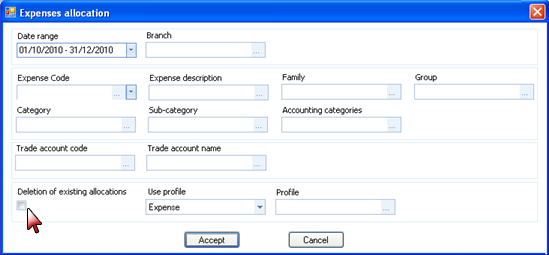
We can define various criteria for detecting the expenses to be allocated. If we wish to recalculate the allocations must activate the “deletion of existing allocation” setting. If to the “Use profile” field select “specific”, then, we must declare this specific profile to the next respective field.

Allocation through time sheets
If some expenses charge the cost centers based on labor hours or on machine hours, then could registered the time sheets through the following “internal notes”, that will lead to an “allocation rule”:
Appropriate document types: INW (Internal Note of work hours recording)
INM (Internal Note of machines hours recording)
These notes displayed from “Transactions/Other offset entries/Various internal notes” and entered through the main toolbar option “Internal Processes”.
For instance, it may be issued for a person (the persons here, opened as creditors, since in cases of external partners, it is compulsory anyway) the total working hours per project in detail or summarized per day or month, with tasks (service-items), filling the “employment” (quantity) column:
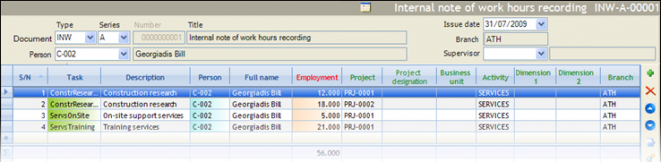
As much these data per cost center as the corresponding per machine (fixed asset), if needed, will be able to be used as allocation criteria of “not allocated” expenses.
From the main menu Transactions/Expenses/Allocation of expenses to cost centers, we take an expenses report with various criteria.

The “actual expense” column equals either to the net value (if VAT is deductible) or to the total value (if it is not deductible).
By selecting (“marking”) the lines to be allocated, may select one of the ready automations, which by taking into consideration the internal notes of hours recording, of the same time range with the one of the selected to the expenses list, make allocation of the amount of each line by converting the “employment hours” per cost center to % allocation to these.
Allocation to Cost Centers based on working hours (with replacement)
A dialog appears for the selection of the “horizontal dimension” (Project, Business Unit, Activity, Dimension 1, Dimension 2) which represents the cost center for which “employment hours” have been recorded and for which must produced the analysis of the selected expenses. By pressing “Accept” to this dialog, each “original expense line” will be replaced from as many lines are needed in order its value to be attributed per cost center. To use this automation, the login user must belong to “user group for cost allocation to CC” defined to the company parameters.


 In “Activity” dimension we open the “ADMINISTRATION”, “SUPPORT”, “DISTRIBUTION” and “SALES” departments
To the particular month, we insert the working hours per activity for employees of each department, occupied to activities, through an Internal Note, using an item-expense for each line (which ignored to the process):


Based on these data per department, some ALLOCATION PERCENTAGES occur:

| Cost Center | Persons | Calculation | % Percentage | |
|---|---|---|---|---|
| D1 | Administration | 9 | ( 9/50)*100 | 18 |
| D2 | Sales | 8 | ( 8/50)*100 | 16 |
| D3 | Distributions | 13 | (13/50)*100 | 26 |
| D4 | Support | 20 | (20/50)*100 | 40 |
In the same month, suppose we want the Marketing expenses, to be allocated based on this allocation.
 To the expenses list, we select the particular marketing invoice of the month and, at the automation dialog (appeared through selection from “Automations” menu), activate the “allocation based on business activity” option.


This invoice with an expense WITHOUT VALUE to the “Activity”

has been modified from this procedure by obtaining 4 lines (instead of one) with the particular allocation into “activities”:

This allocation is feasible if only the expenses documents does not correspond to finalized Ledger Entries.


After the allocation is completed, the allocated expense lines are NOT displayed anymore to this list for cost centers allocation. If the process needs to be repeated, the field “allocated line” of the related expenses lines, will need to be disabled (value=NO). You can use the functionality of global modification through a DOCUMENT LINES view or through the “Expenses list” by selecting lines from the 2nd level (lines).
Allocation to Cost Centers based on machine hours (with replacement)
The process is exactly the same with the one based on working hours, but by using the internal notes of machines hours recording (INM).
Allocation to Cost Centers based on working hours (with reversal)
When the expenses have participated to reports that is not feasible (or desired) to be altered , the cost centers update process can achieved through reversal of initial transactions and creation of new with cost centers allocation. This automation produces new documents (ANW - Expenses allocation based on work hours) that implement these updates.
Start with the list of expenses to be allocated to cost centers, select the lines and then, choose this allocation process from the “automations” menu. In the appearing dialog, some new options are available:
 the date and the document series for generate the new document
besides all the other horizontal dimensions, the “branch” is also available for re-allocation of expenses (during “replacement” of expense-lines in the original documents, the branch cannot be altered, it is always the branch of issuing from document series)

For internal control and reconciliation purposes, the issuing date must belong to the same month with the initial transactions (e.g. end of month). Even if the information is NOT posted to Accounting, it will be difficult (if not impossible) to obtain any control, if these re-allocations issued to a next month.
In this scenario, the initial Expenses documents are not influenced. In the new documents, the “reverse” lines are reversing all the update results of the initial lines (to the NULL or WRONG cost center) and update the new cost centers from the beginning, using the data occur from the recorded hours, through the “standard” lines.
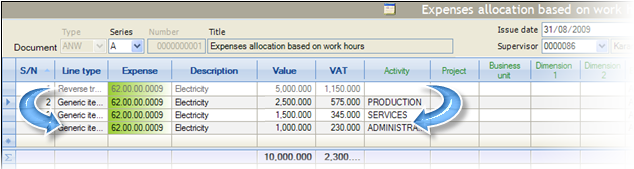
In this example, the ACTIVITY is selected as ALLOCATION dimension, and reported totally 40 hours to “Production” activity, 24 hours to the “Services” activity and 16 hours to “Administration” activity (through various “INW” to various dates of the month, by various persons). These hours are producing for the 3 activities a distribution 50%-30%-20%, thus, the automation generated the ANW document with CANCELLATION of the initial entry with the NULL activity (5,000.00€) and insertion of NEW entries with ALLOCATION to the 3 activities (2,500.00€ - 50%, 1,500.00€ - 30% and 1,000.00€ - 20% respectively).
By executing the “Expenses to be allocated” again, these expenses will NOT be anymore included to the list, and “original” expenses’ lines which have been allocated, are not modified or deleted. Only if the allocation documents deleted, the process can be repeated or the initial lines (“unlocked” anymore) to be altered.
The “re-allocation” documents ANW displayed to the “ Expenses corrective documents“ list, through the Transactions/Expenses menu.

Allocation to Cost Centers based on machine Hours (with reversal)
The process is exactly the same with the previous one, based on working hours but in this case, are used the Internal Notes of machine hours recording. In this case, the generated documents belong to different type (ANM - Expenses allocation based on machines hours).
Information for customizing the Expenses’ allocation through timesheets
 The documents types used to these processes defined to general parameters:
To allocation processes which REVERSE the initial transaction, we can post the produced documents also to Accounting, (by updating the Accounting Journal to the ANW, ANM document types), in order the “per dimension” reports (between Accounting and Expenses sub-system) to give the same results. In this case, the generated entries, are negative for the reversed entries and positive for the new entries. Especially for the expenses with not deductible VAT, the VAT amount is ALSO transferred and allocated. The accounting groups used for posting are:

ES.0.EX.1001 Expenses Acc/nt (Cost determination)
ES.0.EX.1002 Expenses Acc/nt Contra (Cost determination)
ES.0.VT.1006 Acc/nt of VAT Expenses not deductible (Cost determination)
ES.0.VT.1007 Acc/nt of VAT Expenses not deductible Contra (Cost determination).
The work or machine hours recording, can be also achieved with any other way (through a custom D.B. table, through a project task implemented to CRM etc.), provided that the automations would properly changed in order to search the “hours” (or any other criterion) from the correct SOURCE.
By using the Internal Notes of work hour recording INW and INM, you can properly update the views of dynamic allocations used in expenses’ allocation profiles or in cost center accounts’ allocation profiles (where the criteria are not statically described to the allocation models, but are dynamically occur through definable views).
Costing of Imports
Through this system can monitored all the processes of goods import to the Warehouse, consisting from STAGES during which the cost of imports gradually formed. This means that, when an import case does not actually completed with a Goods Receipt and an Invoice from Supplier, but there are mediators who charge additional costs or if there is a customs procedure etc. then, the “cost determination” process is necessary, as it will properly allocate (using various rules) all the additional costs to the imported goods.
For each Import, a “Costing folder” is created. The two main concepts of a Costing folder are:
- Costing units. They are the imported goods of purchases documents (FNV or FIV) with the initial supplier cost (invoiced amount). They are the “units” on which the various additional costs should be allocated.
- Cost elements. They are the additional costs (fare, insurance costs, customs and taxes) that will charge the imported goods (“costing units”).

Especially, as far as the Imports from Abroad are concerned, there are two exchange rates used to the documents:
- Exchange rate. The bank exchange rate on the day of items’ arrival, based on which values conversion is enhanced (for official books update).
- VAT exchange rate. The VAT exchange rate to intercommunity transactions is used for values calculation for Intrastat statement. In other cases (imports from third countries) this rate is identical to the Bank’s “exchange rate”.
In the following, two other concepts are used, associated with Imports from abroad:
- Converted value. The original invoiced amount converted in base currency, using VAT exchange rate.
- Statistical value. The converted value plus the additional costs up to the borders.
Order from abroad & Import Folder
For each import case, must create a new Imports Folder (Entries/Purchases-Imports/Import Folders).

| Folder type |  We select the appropriate type from the suggested list. The type defines a number of important information concerning cost determination and cost posting to Accounting. Thus, depending if the import occurs through the process of a separate invoice (FIV) and receipt note or through a single element (FNV), as well as if it concerns intercommunity import or import from third countries, we select the corresponding type. We select the appropriate type from the suggested list. The type defines a number of important information concerning cost determination and cost posting to Accounting. Thus, depending if the import occurs through the process of a separate invoice (FIV) and receipt note or through a single element (FNV), as well as if it concerns intercommunity import or import from third countries, we select the corresponding type.
|
|---|---|
| Branch-W.H. | We select the Branch or W.H that the Import will occur. |
| Miscellaneous data |
In this sub-page, can be entered the General Ledger accounts, used by posting process.
If to the folder type, a “closing account” is defined, it will be suggested to these 3 fields. |
| Informative data | We may add comments, attachments etc. to the folder through the related sub-pages. |

By inserting the order to the supplier, we can fill the “import folder” to the “Administration” sub-page of the Order document.

The result will be that as much the Order as all the other documents that will follow e.g. Goods Receipt Note, Remittances to Supplier etc. will appear to the “Documents” folder sub-page:

Purchase Invoice from a foreign firm
To the documents containing costing units (FIV or FNV invoices), it must be defined the Folder, to the homonymous header field, as well as all the information concerning values calculation (Currency, Exchange rate, VAT exchange rate). The items are displayed to the “Cost units” page of the folder.

To these Invoice forms, the “sub-pages” of the usual Purchases documents have different layout in order to appear to the 1st sub-page, all data fields which participate to the related reports and calculations e.g. Exchange rates, Folder, Delivery terms and Trade nature.
The buttons to the bottom part of the screen lead to some of the most frequently used functionalities:
- Full supplier data, which leads to the supplier data administration screen
- Financial data of the supplier, which leads to a dialog of summary financial data (plafond, balance etc.)
- Supplier Detailed entries, which leads to the supplier statement report, with all his transactions.
- Accounting entries, which leads to the related ledger entry (if the document is already posted)
- Invoice history log, which leads to chart illustration of document’s progress (related documents).
The result of posting this Invoice to Accounting is the following:
| Entry | Account | Accounting Group | Amount | Debit | Credit |
|---|---|---|---|---|---|
| General Ledger | Supplier | ES.1.TA.0001 | Total value | ||
| Current assets orders (Folder account) | ES.1.CF.0002 | Total value |
In case of charging additional expenses by the supplier (in the same invoice), which are allocated to the goods received as additional cost, we can use one of the following methods of issuing:
- Either with a charge special account e.g. “CF-TRS”
- Either with an “expense” generic item (to the corresponding lines sub-page). In this case, in order it to be allocated to the items and to influence their final cost, the expense item must belong to the appropriate “cost element type”, that describes the cost allocation method, as explained at the end of this chapter.
Besides the General Ledger update, the result of this Invoice entry is the update of suppliers’ statement and of our obligations to him.
The warehouse is not updated (by value). This will occur during the (temporary or definitive) closing process of the Costing (Imports) Folder, that will be later examined.
Goods reception
The receipt of the imported items when the Import procedures are completed and the Invoice is ALREADY received and registered to the system, thus will need to be inserted through a transition:
Appropriate document type: PLN (Goods receipt Note)
Appropriate transition: 110. FIV => PLN (Goods receipt Note from Invoice by a Foreign Firm)
The Goods Receipt Note appears to the “documents” sub-page of the Import Folder.
DO NOT “reverse” the documents actual order, trying to “fit” to the usual process of Domestic Purchases, as in some cases (e.g. Fixed assets Import from Abroad) can create problems or the need for additional documents’ customization (beyond the ready-system customization).
Issuing of import’s expenses
The expenses documents (XPI) which put additional value to the Import, are issued in the same way as all the other expenses cases, and the only difference is that the Import Folder must be defined to the document header (to the «Administration» sub-page). This information will be used as much to the document posting as to the Cost determination process.
The Folder is transferred to the expenses lines and can be differentiated per line, for cases of common expense invoices for many Folders:

Thus, a line of an expenses’ invoice can surcharge one import folder and another line another folder.
The expenses concerning each import, are displayed to the “Cost data” page of each folder.

The accounting result of issuing an Expenses’ Invoice referred to Import Folder/s is:
| Entry | Account | Accounting group | Amount | Debit | Credit |
|---|---|---|---|---|---|
| General Ledger | Creditor/Supplier | ES.1.TA.0001 | Total Value | ||
| Current assets orders (Folder account) | ES.1.CF.0001 | Net Value | |||
| VAT of Import Folder Expenses | ES.1.VT.1007 | VAT value |
Especially in case of Imports from Third Countries (outside EU), the Invoice of the agent and Customs declaration, must be registered:
Appropriate document type: CUD (Custom declaration from Third Countries)

- This document has special layout in order to enable (make easier) the entry of various value types (Statistic value, taxes, other custom expenses etc.) of goods customs clearance.
- The Creditor in this document is usually the Customs clearer
- The Folder must be defined to “Administration” sub-page.
- To the Custom Declaration are reported the total Statistical value and the VAT of this value paid to the Customs Office by the agent. Independently of any other calculations that may have occurred (by the folder’s processes) for cost’s defining, these values must be typed INTO THIS document, in order Accounting as well as our Obligations, to be properly updated. Use the appropriate item-expense for the Statistical value of the related VAT ratio (default items CF* -> Statistical value of imported Χ%).
If there are ALREADY issued Expenses Invoices that concern the Statistical value (participating to this value), BEFORE the Custom clearance entry, you must execute the “Calculate Distributions” task from the Folder “Actions”.
During the Statistical Value typing, is automatically achieved the calculation of the “Statistical value difference“ in order, only this value, to be allocated as an additional cost to the imported goods. This value is the difference between the calculated Statistical Value of the folder (which has been configured from the various Invoices) and the Statistical Value referred to the Custom Declaration of the customs office (defined exclusively at this point, in the “CUD” document).

To the SAME document, are reported the taxes and other customs expenses. For these expenses, (expenses list of customs clearer) of which the original data are attached, there are 2 cases, since paid to the agent (customs clearer):
To not concern the summarized State Reporting, thus, are inserted into the SAME document (CUD) without the information of each contracting partner, and then our obligation will ONLY concern the customs clearer (of the header) for the total expenses.
To concern the summarized State Reporting, thus, the expenses must be inserted with the usual expenses documents (XPI, BXP). In this case, an offset entry of the obligation TRANSFER from the other creditors to the customs clearer, must be inserted (TOC – Account credit balance offsets).
The accounting illustration of the Custom declaration document, is the following:
| Entry | Account | Accounting group | Amount | Debit | Credit |
|---|---|---|---|---|---|
| General Ledger | Creditor/Supplier | ES.1.TA.0001 | Total Value | ||
| Third Countries Expenses | ES.1.CF.1002 | Expenses net value | |||
| Expenses VAT of Import Folder | ES.0.VT.0004 | VAT value | |||
| Current assets orders (Folder) | ES.1.CF.0001 | Net value | |||
| VAT Account of Customs declaration (Third Countries Folder) | ES.1.VT.1008 | VAT value | |||
| Account of Statistical Value Difference | ES.1.CF.1001 | Statistical value difference | |||
| Account of Third Countries Expenses | ES.1.CF.1002 | Statistical value difference | |||
| Informative accounts | Arrivals Account (Customs clearance Value) | ES.0.CV.0003 | Statistical value | ||
| Arrivals Account (Customs clearance Value)-Reverse | ES.0.CV.0004 | Statistical value | |||
|
Costing procedure
Since the Suppliers’ Invoice and the various Expenses documents have been “connected” to the Folder, the Cost determination process (the final cost determination of the imported goods through expenses allocation), is accomplished through folder closing. This process produces costing entries for the Inventory update. Before closing, the Inventory is NOT updated with the (initial) cost of the invoice from abroad.
 There are two closing types (Temporary and Final), each of which can be cancelled and re-executed, in cases where parameterization has changed (the expenses allocation method) or if we received an additional expense document or if a mistake occurred. The difference between the Temporary and the Final closing is only the capability of using a different Purchases account (forecasted Purchases e.g. 2?.99*) instead of the standard accounts (2?.00*) and also the fact that through the Final Closing, the folder status becomes “closed” so, it is not allowed to connect new expenses to the folder. The activation of the closing process is achieved through the “Actions” folder menu. The result of the process is:
- Creation of “Import Costing” document which is presented to the “Documents” sub-page and to the “Imports costing documents” list for all folders through main menu (Entries/Purchases-Imports). This document creates a cost entry to the Inventory Records, which allows the execution of the Stock valuation process, providing correct results.
- Creation of cost elements analysis to the imported goods, which displayed on 2nd level, under each item line (per %VAT) to the “Cost units” folder sub-page.

Update of the “Costing” folder sub-page, which displays an estimation of Sales Prices re-adjustment based on the new definitive cost of each imported item.

The closing process creates two (2) Accounting entries, one (1) to the accounts of the General Ledger Chart and one (1) to the accounts of Informative Chart of Accounts, depending on the Folders’ Types configuration (see. Unit with parameterization information).
The accounting ledger entries can differentiate, depending of the origin country (European Union or Third Countries).
For an Intra-Community import, the entries are as follows:
| Entry | Account | Accounting group | Amount | Debit | Credit |
|---|---|---|---|---|---|
| General Ledger - Purchases | Current assets orders (Folder) | ES.4.CF.0010 | Total Value | ||
| Intra-community acquisitions | ES.4.CF.0001 | Converted invoiced value | |||
| Expenses of Intra-community acquisitions | ES.4.CF.1000 | Additional cost | |||
| General Ledger - Statistic VAT | Statistic purchases VAT | ES.4.CF.0001 | VAT value | ||
| Statistic purchases Debt VAT | ES.4.CF.0002 | VAT value | |||
| Informative accounts | Intra-community goods acquisitions VAT exempted | ES.0.CV.0001 | *Statistical or Converted invoiced value | ||
| Intra-community goods acquisitions VAT exempted - reverse account | ES.0.CV.0002 | * Statistical or Converted invoiced value |
*the type of values monitored to the Informative accounts, depends on the folder type customization.
For an Import from Third Countries, the entries are as follows:
| Entry | Account | Accounting group | Amount | Debit | Credit |
|---|---|---|---|---|---|
| General Ledger - Purchases | Current assets orders (Folder) | ES.4.CF.0010 | Total Value | ||
| Acquisitions from Third countries | ES.4.CF.0001 | Converted invoiced value | |||
| Various Expenses of acquisitions | ES.4.CF.1000 | Additional cost | |||
| Informative accounts | Arrivals Account (Converted invoiced value) | ES.0.CV.0001 | Converted invoiced value | ||
| Arrivals Account (Converted invoiced value) – Reverse | ES.0.CV.0002 | Converted invoiced value | |||
| Arrivals Account (Detailed expenses values) | ES.0.CV.0007 | Expenses value | |||
| Arrivals Account (Detailed expenses values) – Reverse | ES.0.CV.0008 | Expenses value |
Costing Folder configuration info
- Folder type
Each import folder “belongs” to a “TYPE”. The type is a required customization element which describes the way of update of Inventory and Accounting, by the Folder Costing.
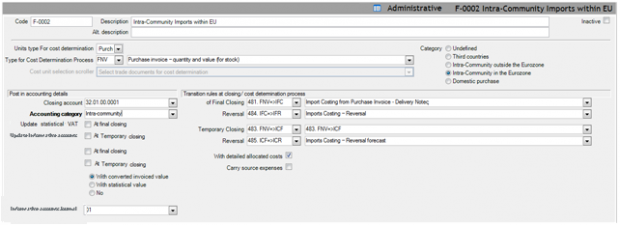

| Units type For cost determination |
|
|---|---|
| Costing units document type |
|
| Category |
|
| Closing account |
|
| Accounting category |
|
| Statistical VAT update |
Through these settings decided WHEN and IF the VAT of statistical value will be updated
|
| Update Informative accounts |
WHEN ? It can be defined, either to the final or temporary closing or to both. If you do not activate any of these 2, then, the primary documents (FIV or CUD, XPI etc.) will create off-balance sheet entries depending on the next field value and provided that, the “Informative accounts Journal” in not null, otherwise, no entry will be created to these accounts. WITH WHAT VALUE?
|
| Informative accounts Journal | In order the update to be accomplished, a check is preceded if the Journal field has been filled. If not, the application does NOT create entries to the Informative accounts. |
| Transition Rules |
These are the transitions being executed during the final or temporary closing. The necessary transition rules are contained to the default parameterization and produce the following documents (depending the type of closing): IFC Imports Costing (used by definitive closing) ICF Imports Costing – Forecast (used by temporary closing) IFR Imports Costing – Reversal (used by definitive closing cancel) ICR Imports Costing – Reversal forecast (used by temporary closing cancel) |
| With detailed costs | During closing, if this field is activated, the expenses are transferred (in detail) to the closing documents (as “reversed” lines). In order to use the provided parameterization, this field, must be selected! The implemented posting method, implies the existence of the detailed expenses lines to closing documents. |
| Carry source expenses | During closing, if this field is activated, the initial expenses are transferred to the closing documents (with the allocated net value and the related VAT, in order to be used in special customizations and to meet special requirements , when desired). |

If you have all cases combinations (Imports from EU and from Third countries AND either through a single document for Invoice and Goods receipt or – other times- through separate documents), then, 4 folder types are needed: two folders for the intra-community transactions (for FNV & FIV) and two folders for the Third countries transactions, respectively:

Obviously, the above folder properties are functional, only if used from the respective “update profiles”, otherwise they are just informative. The current system’s configuration uses these properties, but if you have a different customization, you need to undertake alterations, in order to take advantage of them.
Cost element type
Each expense (cost element) which can be “connected” to a folder, it belongs to a TYPE. The cost element type describes the way that the expenses (belonging to it), must be allocated to the costing units.
For the cost elements types list, see Customization/Cost Folders. The starting D.B. contains the most frequently used types with the suggested allocation method:
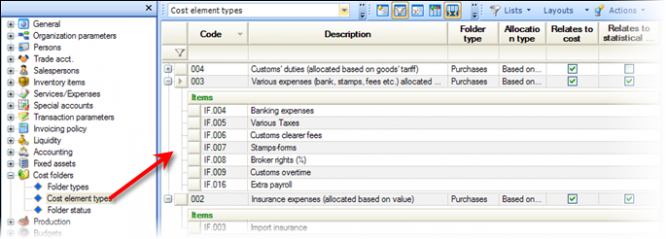
The cost element type management screen is shown below:


| Units type for cost determination | The existing options are Purchases – Transits - Sales and for the case of Imports we select Purchases, as with the Folder type. |
|---|---|
| Distribution type | We can either select “Based on fields” (and complete the distribution criteria to the “Distribute based on fields” area or “Based on (simple or complex) expressions” if the allocation rule cannot be described by a single field and then, we create the appropriate expression to the “Distribute based on expressions» area, using the command button  that appears in this case. that appears in this case.
|
| Allocation field | The “costing unit” field (of the item line) based on which the net value of the cost elements (expenses connected to this type) will be distributed to them. |
| Allocation to all the items |
If selected, the additional cost distribution (the expenses net value) will occur to all costing units (items) based on the distribution field or the expression defined. If not selected (deactivated), the process will allocate expenses only to items that fulfill the “matching criteria”. The fields “Cost element’s matching field” and “Costing unit’s matching field” must be entered, in order the allocation to be executed correctly. |
|
Cost elements’ matching field & Costing units’ matching field |
Through these fields we can define the fields that will be COMPARED between the cost element (expense) and the costing unit (item) for the distribution to be done. For instance: a) Import duties with Specific tariff Χ to be allocated to Items with the same tariff b) Insurance fees against particular contact (entered to user defined field of the item line AND the expense line). |
| Affects cost | If selected, the values will surcharge the (additional) cost value of the Costing units. Only the scenario of the “Statistical value difference“ which occurs in case of Import from Third country, does NOT concern cost (but ONLY statistic value). |
| Affects statistical value | If selected, the values will be summarized to the Statistic value of the Costing units. |
| Generic Items List | Bulk select of the Generic Items – Expenses, that we want to integrate to the Cost element type. Through this definition, the lines of these items will be able to participate to the Cost determination process. An item may belong to only ONE cost element type. After this definition, you will see that the “cost element type” field has been updated to the generic items-expenses management screen. |
The starting DATABASE contains preconfigured cost elements (the generic items-expenses with a IF* code) belonging to the default cost element types. Please check them before use:
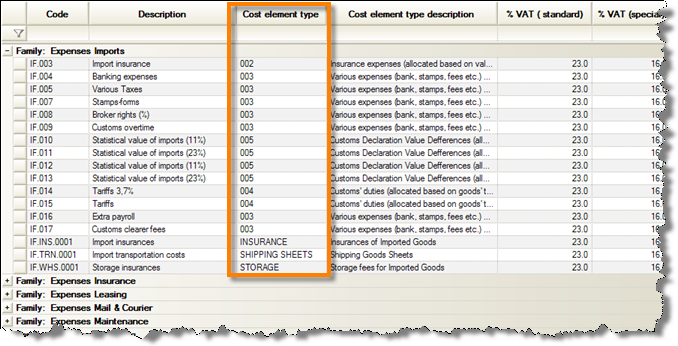

Costing of domestic purchases
When various additional costs concerning a purchase from a domestic supplier, are charged from someone else e.g. the shipper, a 3PL company etc., which issued through SEPARATE INVOICES, we can use the Imports Costing Folder, in order goods final cost to be calculated, taking into account all these additional expenses (through cost element types and application of the allocation process).
The functionality is similar to the one of the Import from Abroad.

- A folder type is opened for the Domestic Purchases.
- Since we receive the Purchase Invoice PIV (or a PNV – Purchase Invoice/Goods Receipt Note), the folder can be opened and the Invoice to be connected.
- To the Expenses Invoices, the Folder must be selected as it happens with the expenses, for Imports from Abroad.
- With “distribution” and (or only) folder “closing”, additional cost items’ entries are produced and at the same time, the expenses are reversed into the Expenses sub-system (since “transferred” to the Inventory cost value).
The differences from a Folder from Abroad are
- It is NOT used interim “folder” account,
- There is no (or sense) “Temporary closure” and mainly,
- The Inventory is updated from the beginning by the Supplier’s Invoice, whereas all the expenses are added during “cost determination” as Purchases corrective (additive) cost entries, as it could be done by a PDV – Additional Purchases Invoice).
In Accounting, the expenses when created, update an “Expenses Account” and the corresponding “Expenses VAT Account” (the use of special items IF* is not required) and, when folder closure occurs, these entries are reversed and transferred to the Purchases Account and the corresponding Purchases VAT Account.
| Entry | Account | Accounting Group | Amount | Debit | Credit |
|---|---|---|---|---|---|
| General Ledger | Purchases Account | ES.4.CF.1050 | Net Value | ||
| Revenues VAT Account | ES.4.CF.1060 | VAT value | |||
| Expenses Account | ES.0.EX.0001 | - (Net value) | |||
| Expenses VAT Account | ES.1.VT.1007 | - (VAT value) |
Costing Folder for Domestic Purchases Configuration info
- In folder type, must define the “Category” field as “Domestic purchase” and activate the “with detailed costs” field:
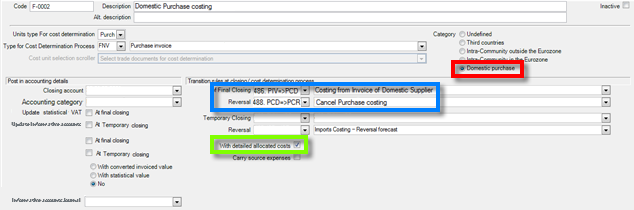
The documents used are:
PCD Purchase Costing
PCR Purchase Costing - Reversal
The transition rules used are:
For the case of a discrete Invoice and Goods Receipt Note
486. PIV => PCD
488. PCD => PCL
For the case of single Invoice-Goods Receipt Note
487. PNV => PCD
488. PCD => PCL

The expenses that will be used to this process, must be explicitly created and belong to specific ‘purchases” cost element types, in order to achieve the appropriate method of cost distribution.
Import and customs clearance of transit warehouse
For the temporary storage, must create specific warehouses which operate in the same way as the other regular warehouses, without any special property (field). The handling of Customs Clearing Reports per Storage Unit (Lot), is not achieved through the sub-system. Here, it is monitored the costing issue, exclusively.
When moving from such a warehouse to a regular warehouse (paying customs duties and receiving the goods “free” from any duty regime) some additional charges are charged and the “Transit folder costing” must be used in order the items to be inserted to the regular warehouse carrying their whole cost, with their additional charges.
For these transfers to a “regular” Warehouse, a specific document type must be used:
Appropriate document type: IDC (Stock transit with charges during export)
The items must be opened twice: One for the “transit” items and one for the “free” items. This is necessary as they have separate cost valuation process. Another method is to define as a branch with “independent” valuation this customs Warehouse (temporary storage).

- Open a folder type of units type “Transits”, where the “IDC” will be defined to the “document type for costing” field.
- Create cost element types for the clearing customs duties or other expenses that put additional costs. The cost element types must be filled to the appropriate item-expenses, to the homonymous field.
- The ”transit» items are imported to the “transit” warehouse through the Import (from abroad) process, and they take final acquisition cost, through Imports Costing Folder.
- Open a Transit Folder for each export occurred through this Warehouse, from the Entries/Warehouse/Transit Folders menu, and the export will be defined through the ”IDC“ document, which displayed at the ”Stock corrective documents” list. To this document header, must define the Folder and the “transit” Warehouse. In the 1st grid of items, declare the item codes that are imported to the “regular” warehouse (free from duty regime) and in the 2nd grid, declare the corresponding exported items (“transit”). The Branch and the WH of the series, are transferred by default to the exported items.
 For make the data entry process easier in case of double item codes, may create a “relation” of each of these items with the “symmetric” ones. Connect the items with this relation, and give the “code” of the relation to the “Relation for auto-generate reverse transfers” field of the “IDC” document type (behavior sub-page).

The result will be, by defining an imported item in the 1st grid, the corresponding line to the 2nd grid, to be automatically generated (during save or through the Ctrl-Shift-F9 buttons combination use).
To the Expenses documents that we want to be allocated within the Folder, we must define the “transit” folder code to the header (to the” Administration” page) or, alternatively, from the “Cost Data” sub-page of the Folder, to ask “connection” and select the lines of the expenses documents that will be participate to the Cost determination process.
After these actions, the Stock Valuation process will properly correct the cost of the exported items as well as the “acquisition” cost of the imported items, after allocation of any additional costs (“connected” to the folder) executed. The posting of the Transit documents “IDC” must occur AFTER the Stock Valuation is completed. The accounting entries balance to the “header” account.
If there are expenses which surcharge the items as long as they are under transit regime (before “transfer” becomes) e.g. storage fees, insurance fees etc, you must register them to the system, by using the particular inventory items and NOT the items-expenses. Consequently, it is the Inventory sub-ledger that will be updated and the not the expenses’ one.
Appropriate document type: PDV (Purchases Debit Note)
You may use a particular document series with the appropriate title.
Payments
In this chapter, will be examined the process of liabilities payments (to creditors, suppliers, employees, shareholders, social security funds, public organizations) through various methods (remittances, manual or computerized company’s cheques, cheques of our customers or cash), as well as the way of controlling and planning payments. Payments scenarios based on an approval process by authorized users, will be also examined.
The guidelines and the examples are mainly based on the default product parameterization, as far as the documents are concerned, the screens layout and the information tools.
In order a payment document to be created, the following ways are available:
|
|
|---|---|
|
|

|
|
|
|
|
|


Cash payment
With cash are usually paid …
- Petty cash. This entry occurs through the expenses documents (BXP - Expenses, interest and other bank payments) and not as “payment receipt”.
- Advanced payments to employees.
- Obligations of small value to creditors.
Appropriate document type: CPS (Cash payment)

| Document Type and Series |
|
|---|---|
| Date |
|
| Supplier Definition |
|
| Alternative document |
|
| Payment lines |
|


How do we see the results of issuing payments?
| View | Content | |
|---|---|---|
|
|
Payments’ documents list | List of payments (to suppliers and creditors) with amount separation to cash-deposits and notes columns. |
|
|
Cash check statement |
Statement of receivables and payments per branch, user and payment method:
|
|
|
Receivables - Payables | Similar to the previous information, with the format and the analysis functionality of CUBE. |
|
|
Accounts Payable Trial Balance | The payments are displayed to the Debit of the Trial Balances and the corresponding Statements Reports with the detailed entries. |

Remittances to suppliers
Through the bank, occur most of the company payments such as, suppliers’ payment or advanced payments for purchases orders, Third parties’ payments such as telecoms, electricity, rents deposits, payroll deposit etc.
Appropriate document type: CPS (Cash payment)
The functionality and the operations are identical to those of the Cash payment with the only difference that, in payment lines, used Bank accounts (among liquidity accounts) and not Cash accounts.

The Banks are usually charge the Bank Charges which can be included to the same document, in order the Liquidities and the Payables sub-ledgers to be properly updated. These charges reduce the total amount of the deposit that will be transferred to the supplier’s register.
 Example
Suggesting a fund transfer to Supplier from our Bank account of 5.000,00€. The Bank charges 60,72€ for the transfer. We define to the deposit amount 5.060,72€ and a “Charge” of 60,72€. In order to define the additional expenses, we undertake “totals area maximize» to the bottom form part through the
icon, and in this way the special accounts list becomes available:

The supplier will be updated with the difference:

The Bank Account will be updated with the actual outflow:


Customization Information
- There must have been opened “autonomous” Special Accounts of “charge” type with the % charge, if known, in order to be automatically calculated during the (CPS) deposit slip entry.
- The special accounts must be added in “Charges/Withholding” sub-page of document type, in order to be selectable.
Another method for funds transfer entry, is through a multiple remittances document from a Company’s Bank account to (many) suppliers with a common document for all of them, based on the Bank statement:
Appropriate document type: BSP (Remittances to Suppliers)
Such a document may be automatically generated after the processing of our liabilities to suppliers (and creditors) through the Payments scheduling process. Alternatively, can be manually issued.

To the header, give the Company’s Bank Liquidity account FROM which the deposits will occur and to the lines, give the particular Beneficiaries and the transferred amounts to each one.
Result of this entry will be the debit of the Trade Accounts and the credit of the Bank Accounts.
In this case, the transfer expenses will be separately entered with an expense document “in cash”:
Appropriate document type: BXP (Expenses, interest and other bank payments)
|

|
|---|---|

|
Payment with company’s cheque
Appropriate document type: NDT (Notes delivery Receipt)
The issue and delivery of the payable notes to suppliers is achieved through the (CPS) document type from the “notes” sub-page or through this special document type (NDT). Alternatively, it could be used the Payments scheduling process, which is appropriate for a mass handling of liabilities to be paid.

In order to fill the detail data of the cheque, must select the  icon to the lines segment so, it will immediately open a dialog with the full note data:
| Note type | The available types (with the appropriate information for posting) defined to “Customization”. | |
|---|---|---|
| Code | In order to be able to issue computerized cheques, a code format in this field with automatic numbering, is recommended. | |
| Number |
The printed cheque’s number, useful to identify and to register a unique entry in Notes’ Book. The number is automatically calculated during save, if, to the Liquidity account, is been activated the “Calculate cheque number” field and it has been given an appropriate “calculation type” to the “Cheque numeration data” sub-page. |
|
| Issue date and Expiry (due) date | The Issue date is the documents’ registration date. The expiration (due) date indicates the exact time of cash outflows (from our Bank Account) and also updates the “Notes Expiration list”. | |
| Payment Bank account | The account proposed is the Liquidity account of “Notes issue” (as the usual bank account from where we issue cheques) and causes the automatic completion of cheque’s “Issuing Bank” (next field). At payable notes the information is useless, but at receivable notes, the Issuing Bank could be different from the Bank of actual Payment (clearing). | |
| Computerized | It is automatically activated, when the prerequisites for printing through the system (the process of print computerized payable cheques) are fulfilled. In a computerized cheque, Bank account modification, is not allowed. | |
| Nominal Value | Since it is possible for a note to be in a foreign currency, the amount are available in both currencies as well as the exchange rate. The outstanding value (i.e. the value not paid yet) is updated (reduced) automatically, through the transactions. | |
| Assignor | To the payable notes, it is not completed, it is our Company. To receivable notes, concerns the Trade Account from whom we take (receipt) the note. | |
| Beneficiary | The headers’ trade account is automatically completed. | |
| Issuer | It may be differentiated from the assignor only to receivable notes. | |
| Guarantor | The possible guarantor existence is defined here, through the Persons’ file. | |
| Status |
The Status 1=Pending (i.e. not paid yet), is displayed as a default, based on customization.
|
|
| Holder/Position | The supplier is automatically placed. | |
| Remarks & User defined fields | A number of reasoning fields, comments and of other types, are available for free use depending on the needs. |

By returning to the document line, the notes’ basic data are displayed. The system undertakes uniqueness control (based on customization) and warns or prohibits the entry, in cases where the same number is found to another note (of the same “type” and “nature”). 
Also, it cannot be added a payable note of another beneficiary by mistake.
The functionality called “Print payable cheques” is available:
|
|
|
|---|---|---|
|
|
|
|


Information for customize Payable cheques Print
 In a Notes’ screen, we select the
  icon through the horizontal toolbar and then “Printout administration”. We select a printing form among the forms stored to the \CSReports folder.
Through the same option, it is possible to export the template file for create a new print form.
How do we see the results of the payments entry through cheques?
| View | Content | |
|---|---|---|
|
|
Records and Expiration list of notes payable | Statement of not expired yet notes-cheques, which have been issued and delivered to various suppliers (or, generally, to trade accounts). |
|
|
Notes Payable Trial Balance |
Notes statement per supplier:
|
|
|
Suppliers Trial Balance (commercial balance analysis) |
Trial balance with columns of notes debit and credit
|


Transfer of a customer’s cheque to supplier
Appropriate document type: NDS (Transfer of Receivable Notes to Supplier)
It is used for the suppliers or creditors payment through RECEIVABLE Notes on hand (issued by our customers or third parties). It can be also issued the CPS Cash payment, through the “Notes” sub-page.
In this document, instead of entering a new note, a selection must be done among the open receivable notes.

To the Beneficiary column, the supplier is automatically completed.
The result of this entry is the update of the cash OUTFLOW forecast with the same amount of the corresponding cash INFLOW forecast entry (from the customer’s note). The suppliers’ “accounting” balance is reduced, whereas the commercial balance remains the same:

The customers’ account (assignor of the cheque) will not be affected either as to the accounting or as to the commercial balance.
During the expiration date and the note final payment, and only then, it will be reduced the suppliers’ open notes (and his commercial balance) AND the customers’ open notes (and his commercial balance) at the same time.
Replacement of a cheque/note
The replacement of a payable note will need to be defined to the system with two separate documents, for the return of the initial and the delivery of the new:
Appropriate document types: RSN (Notes return by Supplier) (old cheques)
NDT (Notes delivery receipt) (new cheques)
If the replacement concerns a receivable note,
- If it is immediately returned to customer (assignor), then the workflow will be the following:
Appropriate document types: RSN (Notes return by Supplier) (old cheques)
NCR (Notes return to Customer) (old cheques)
NDT (Notes delivery receipt) (new cheques)
- If it is not returned to customer (assignor), but we intend to give the note to someone else, then the workflow will be the following:
Appropriate document types: RSN (Notes return by Supplier) (old cheques)
CTN (Cancel of transferring receivable notes) (old cheques)
NDT (Notes delivery receipt) (new cheques)
In all cases, we select the supplier to the document header.
The return (RSN) is negatively displayed to payments and to all the financial statements concerning notes:

To the suppliers’ Statement…

Is increased the “accounting” balance with a new credit, whereas the “trade” balance remains the same:

Especially, the Transfer cancellation is not displayed to the supplier’s statement, since it only updates the notes’ beneficiary (he is being abolished).
The liabilities that we paid by the note/s returned, are now displayed to the Unsettled (open) payables.
Thus, with the insertion (and return) of a cheque, the suppliers’ balance aging (DPO, Age analysis etc.) is not affected. Any new payment that will occur, will be “connected” (matched) with the liabilities that are now open.
- Actually, it occurs cancellation of the matching provoked by the note. This is based on the “refers to note cancellation” setting of the RSN document type.
We recommend that when various modifications happen, as the above, to use the “Note history log” functionality which is available to the Note screen as well as to any other Notes view e.g. List of Notes, Notes Book, Notes Expiration list etc. (“actions” to the horizontal toolbar):

Expiration of payable Notes
During payable notes expiration, the amounts necessary for their payment, are transferred to the related Bank account.
The monitoring of the liquidity needs is achieved through the Cash flow Review and from the Notes Expiration Lists.
If an account has NOT sufficient amount (“expected balance”),

then, we should transfer there, amounts from another account:
Appropriate document type: BCT (Cash Deposit)

To the header of this document, will be defined the account FROM whom we will transfer money (credit of liquidity account - cash OUTFLOW) and to the lines, will be selected the account TO whom the transfer will happen (debit of this liquidity account - cash INFLOW).
Based on the bank statement, it should be issued into the system all credit values of Bank Accounts to which the payable cheques correspond, at their expiration date, usually.
The transaction will occur through a “notes payment” document type, for update Liquidity accounts, Notes and Trade Accounts (for correct “commercial” balances of beneficiaries) sub-ledgers.
Appropriate document type: MPN (Mass payment of payable notes)

To the header, we select the bank account where the cheques belong.
To the lines, we select the particular cheques which are about to expire. The searching dialog displays those having the particular bank account as a “payment liquidity account”.
The result of this transaction to the Suppliers’ sub-ledger, will be the decrease of the “commercial balance”.
This means that only by the declarative payment of particular cheques, delivered to suppliers, their “commercial” balance will become equal to their “accounting” balance (on the day of payment-disbursement). For this reason, the payment must be achieved through THIS process and NOT through any other way provided by the system for debit or credit of Bank accounts.
The shareholders must be opened as Debtors. In Accounting it is NOT USEFUL to open accounts for shareholders in detail.
The payments can be inserted with a document allowing money payment (with fund transfer usually from a company’s Bank account) to many shareholders at the same time.
Appropriate document type: BCP (Remittances to Customers/Debtors)

To the header, we select the Bank account and to the lines, the Debtors with the amount of each one payment. The result will be the credit of the Liquidity (Bank) accounts the debit of the shareholders’ accounts.
In order to balance these accounts, we can be issue a transaction of type “credit note”:
Appropriate document type: SJC (Receivables credit note)
To the header, we select the debited General Ledger Account and to the lines, the Debtors with the corresponding amounts.
Payment of taxes & withholdings
The various taxes - withholding are illustrated as Special Accounts into the system. These are updated from the various trading documents and we either receive an amount (return) from the related Entities/Organizations (pension funds, tax office, other public institutions) or we pay (transfer) the relevant amounts to these Organizations.
Related entities (accounts) for clearing
Organizations or Agencies where we attribute taxes/withholding or from whom we receive money (taxes return etc.) e.g. Tax office, Social security, Prefecture, Municipality etc. must be opened as trade accounts and defined to Special Accounts that they concern (to the “Related organization” field).


Financial clearance
When these organizations are monitored through account registers (debtor, creditor) with debit and credit transactions…
- Payments from/to them are issued through the usual cash transactions documents:
CPS Cash payment (to creditor) CPC Cash payment (to debtor)
CRS Cash receipt (from creditor) CRC Cash receipt (from debtor)
based on the related trial balances or the unsettled payables/receivables.
- The offset entry of balances closing for the related special accounts is achieved through separate documents (a kind of accounting notes):
ADB Special accounts debit note ACR Special accounts credit note
based on Special accounts Trial Balances for check the liabilities obtained by transactions, where they were included.
If the payment is accomplished by cheque, can be defined particular Ledger Accounts that each cheque “pays”. During posting, this “Account analysis” replaces the entries to be created to the creditor account, defined at document header.
 Example
Suggesting that for the Social security in Accounting, there are 2 accounts, one for the current obligations and one for the delayed obligations. The Social security will be opened as a creditor and at the payment cheque line, could be defined the “analysis of cheque amounts” to GL accounts to be posted, through F12 use. To the appearing dialog, define the accounts and the related amounts. In this way, we avoid opening eg. Creditors for each General Ledger account (when corresponds to the same Organization).
If these organizations are NOT monitored through account registers (creditor, debtor), the payment can be done through special documents for the financial settlement, which only update SPECIAL ACCOUNTS and LIQUIDITY ACCOUNTS (or cheques) …
If the Organization is a “Creditor” If the Organization is a “Debtor”
Appropriate document types: BRP (Tax payment) TDP (Tax payment)
BSD (Tax return) TRN (Tax return)
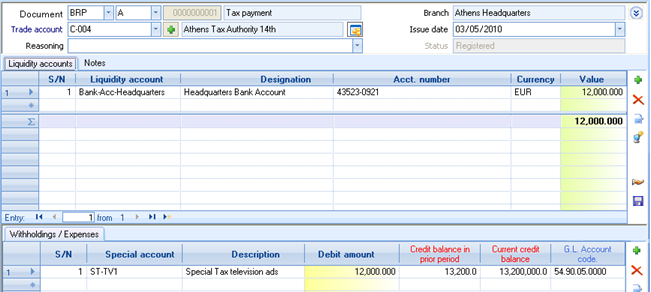
Since the trade account will not be updated, these document types undertake “Check payment of total amount”, which means that amounts of special accounts declared, to be exactly what the lines of cheques and liquidity accouns are summed (amount payable).
To the special accounts lines («Withholding/Expenses»), in order the user to be helped, the account balance is calculated and displayed (current and previous month). The searching displays those, from the permitted by the document type special accounts, having the headers’ trade account defined as “Related organization”.
To the cheques lines, can be created payable cheques and then, the header’s trade account is placed as their “Beneficiary”. In this case, a "commercial balance" is created to that trade account, until the cheque be paid.
For the receivables or payables control, there can be used the Trial Balance and Statement PER “Organization” (related organization) of the Special Accounts. In these reports, we see the way their balances were created.
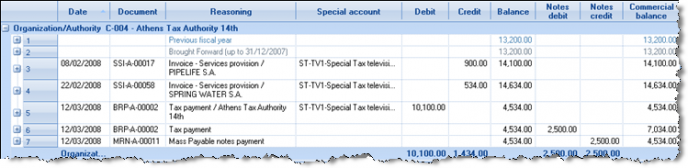
To the above example, there was an opening credit balance, some credits of the special account of type “tax” through invoices and some debits through payments. One of these payments was made by cheque due 12/3, when paid (so the accounting balance equals to the commercial balance).


VAT payment
The full VAT monitoring achieved through Accounting. In order to monitor the company liquidity, concerning the reasoning of receipts and payments (through liquidity accounts sub-ledger), could…
- Open the VAT as a special account of “Tax” type, with “related organization” the corresponding Financial Service that will have been opened as a Creditor.
- At the end of each month, based on the Monthly VAT statement, derived from all the taxable inflows and outflows, to enter a credit transaction with the amount to be paid, or a debit transaction with the amount to be returned:
Appropriate document types: ACR (Special accounts credit)
ADB (Special accounts debit)
At the end, the financial settlement will be done using the documents for tax payment and/or tax return:
Appropriate document types: BRP (Tax payment)
BSD (Tax return)
Customization information as to the special accounts return/clearing
In order the documents for issuing payment/return of taxes and withholding (when there is no register for the related trade accounts) to function properly, i.e. BRP, BSD, TRN, TDP, these document types must have appropriate values to the following settings:
| Check payment of total amount | It must be activated, in order the total of the payment amount to be checked if it is equal to the amounts defined to special accounts lines. If the amounts are not the same, the document will fail during posting as the ledger entry will not be balanced (since, no debit or credit will occur to trade account). |
|---|---|
| Filter special accounts by related trade account | It must be activated, in order the selectable special accounts (among these which are allowed to the document) to be those having the headers’ trade account to the “Related Organization” field. |
| Calculate special accounts | For special accounts which are of “%” amount type, the calculation must be deactivated so, the amount to stay free for typing. The auto-calculation functionality is useful in other cases e.g. bank expenses. |
| Analysis of totals | To the “Totals options” in “Header” sub-page, the “analysis of totals” option must be deactivated in order the special accounts list to posses all the available space. This setting is ignored in case of a dynamic (user defined) form. |
Planning of payments
The organization and scheduling of payments recommended for a mass company’s debt management, leading to selection of those to be paid by various criteria, and the choice of how they will be paid, allowing the adoption of computerized cheques or transfers to bank accounts of creditors. These procedures include inter-company management (all debts of the group) and the possibility of interference approvals by authorized users before payments accomplishment.
The processes of mass management and payment of payables are activated from the Transactions/Cash-Notes/Planning of payments menu. The selection criteria are common:

| Company | Can be selected liabilities of many companies |
|---|---|
| Currency | For separate liabilities management in foreign currency |
| Date range | The period where the transactions were issued and the period of their due dates (deadlines) as to the managing liabilities. The ending date depends on the correct configuration of trade accounts’ payment methods. |
| Trade Account | Selection of particular suppliers or creditors, for processing. |
| Branch | Selection particular branches liabilities, for processing. |
| Grouping | Here, could ask for liabilities separation per branch or for another from systems’ horizontal dimensions, in order to manage these in a particular way. If grouping is not asked, then, all the liabilities will be concentrated to ONE line per trade account. |

|
By maximize the filters area, some supplementary fields become visible e.g. project, business unit. |
Payments by computerized cheques
Through the “Create payments” the list of payables (liabilities) contains the following data and functionalities:
- The columns displayed are the code and name of the supplier, the total payable amount and the days of delay since the oldest open (unpaid) invoice.
 Using double click the suppliers’ screen will be displayed for further information
- In 2nd level (+), the analysis of unpaid debts is displayed with their detail data
- The user may configure the list and save the layout (
 ). The list of available columns contains the date of the 1st and the last unpaid amount, the suppliers’ “Credit days” (for comparison with the days of delay) etc.
 - The process can be transferred to the shortcuts, through the
 icon selection
 - The list with its current data and layout can be printed through print preview
 icon selection.


If the “Create cheque” column is activated (
), the user may complete the desirable amount to the “Payment amount” column (by default, the whole amount proposed).
It can be achieved determination of specific invoices to be paid through the 2nd level (“open items” analysis), instead of defining a total amount in the 1st level. This will affect the matching that will automatically occur. Otherwise (if amounts only given to the 1st level), the matching will be achieved in the usual way (FIFO by date).

The “for settlement” column at this point selects the line amount and summarizes it to the “payment amount” column of the 1st level. If you want to pay part of the amount of the particular invoice, simply alter the column “amount due”.
Continuously, the cheques’ desirable Expiry date must be completed, as well as the Bank account through which the payment will occur to the “From Bank account” column. The name of the Bank is automatically displayed (the Bank acct. number is also an available column through the “Edit formatting” action).
Under the list, must be defined the Issue date of the transactions as well as the document series.


 If we want the payment to occur through multiple cheques, we use the
  icon to the selected line, or the F12 button. It will then, open a dialog for definition of detailed data:
Payment amount
Number of cheques
1st cheque expiration date
The expiration dates of the other cheques depends on the “Calculate upcoming expiries» field value:
Either at the end of each next month from the 1st cheque expiry date
Either at the same day (1st cheque expiry date) per month
Either “null” in order the user to complete the expiration dates to the created lines.
The amount that is selected to be paid, is (equally) distributed to the lines.
To the payments lines having many cheques, the amount modification is not allowed.
The user should modify the amounts of the individual cheques or to delete this analysis through “F12”.
By completing the selection of the payment data, select “Continue”, and thus the process begins and when finished, the results screen appears. If all the required data are correct, the cheques and the documents are created and are displayed to screen, in order to be printed…
Those payments that created without problem, are presented with a “Success message” containing the cheques’ number created, and through double click, the document is displayed.
We can activate these, for which cheques print is desired (to the “print” column) and to select the “Print Cheques” to the bottom part of the dialog. It will then follow the computerized cheques print process, after selecting the “printing device”, using the appropriate “printing form”, defined to the related bank account data. Instead one of the available printers, it can be selected the “Selected printer in bank account”.
Besides, the generated documents may be printed (to the form, defined at series) by using the button “Print documents“.


Any incomplete payments are presented with a “Failure message“ explaining the reason.
Payments by manual cheques
The process is similar to the previous one, with the difference that the cheques’ numbers are NOT produced by the system, but it must be given by the user. This occurs to the “cheque number” column (not visible to the default layouts, but selectable through right click-add/remove columns):

Mass payments through Bank
From the “Create payments” option, through the
icon use for loading the alternative layout, we can also select payment by fund transfer via Bank. For this process, some supplementary columns are necessary. All the other features, described in the section of payments through cheques, are available.


| Payment method | Fund transfer or cheque. The default value depends on the suppliers’ “Usual settlement” field. |
|---|---|
| Withdrawal | Select between the Bank (liquidity) accounts of the company, the one FROM which the amount due, will be transferred. |
| Deposit |
Select between the Bank accounts defined to the supplier TO which the amount due, will be transferred. It is suggested his “main” Bank account, and if the related company’s bank account is also defined there, this is suggested to the Withdrawal account (to the column “From Bank account). The suppliers’ bank accounts found to the suppliers’ management screen, to the “Financial data” sub-page:
To the “Reasoning for Depositor” field, and to the “Reasoning for Beneficiary”, it can be given the desired content for the transactions, for the Bank. |

After the options are finalized, (amounts, accounts etc.) with the “Continue” button, the processing of the payments lines starts, the documents of payments (BPC) are created, and a dialog appears with the results:
At this point, it can be selected the “Export to file” button, which calls the “Mass payments from bank account” view (which is alternatively called from the Entities/Liquidity/ Information menu:
To the “actions” menu found the export file processes (implemented according to format of the Piraeus and Alpha Banks).
After confirmation, the appropriate file is produced (for sending to Bank) with all information for transfer the selected amounts from our Bank Account to the beneficiaries’ Accounts.


Payments approval process
 The process is implemented by 3 operations which are sequentially executed, belonging to the same workflow.

- You initially prepare a “proposed” payments list,
- The payments are approved by authorized users and in the end,
- According to the selected options, the system produces documents, cheques or money transfers to Bank Accounts.
The functionalities are similar to these that provided to all the other payments planning processes, already examined to the previous chapters.
Preparation of payment Orders
 In the appearing list, all the open liabilities to suppliers and creditors are presented. The purpose of this process is the creation of a payments proposal:

To define the payable amounts of the proposal could use one of the following methods:
To the 1st level (“trade account line”) activate the “For settlement” column, thus the total amount due is proposed to the “Payment amount” column, which can be modified by the user. If a cheque would be used, the user can type a proposed expiration date for this. As far as “matching” is concerned, the liabilities will be automatically connected to payments by FIFO method (older balance).
To the 2nd level (“open items lines”) select particular liabilities to be paid by activating again the «For settlement» column, and the proposed payment amount can be always modified by the user. As far as “matching” is concerned, this will be done for the particular transactions (if approved).
 By finalizing the payments processing and by completing the date and series for the payment orders for approval to be created, we select the “continue” button and the payment orders will be created with the initial “workflow step” (see the customization guidelines at the end of the unit). At the end, a dialog will appear with the results of this process.
The payments orders (PSD) presented to the “Payments to Suppliers” list (and respectively to the “Payments to creditors”), without having updated the system, at this point of time (cash statement, balances etc.).
Approval of payment Orders
In this step, the created payment orders will be APPROVED or REJECTED.

The approval will either occur for all the orders, on trade account basis with the “Approve all” or “Discard all” columns or separately for each liability through the “Approval” and “Discard” columns, to the 2nd level. The authorized user who approves the payments, may differentiate the “payments proposal” with:

MODIFICATION OF THE PAYMENT AMOUNTS
MODIFICATION of the payment method (with cheque or fund transfer)
MODIFICATION of the EXPIRY DATE (for cheques)
Through the “continue” button, the payment orders approved, will go over the “OK” (approved) step (see the customization guidelines at the end of the unit) preceded their individual data modification (e.g. approved amount, expiry date) and the deletion of the rejected.
Create payments based on approved orders
At this final step, for every approved order a payment document (CPS) is produced. The expiration date and the payment method of the particular liabilities proposed are based on the already defined data.

After you check the date and the series, selecting “Continue”, the documents (and the cheques, if defined) are created and the related payment orders are turned to “COMPLETE” (paid), based on customization of workflow steps.
The matching with the initial invoices will occur to this step, using the approvals’ detailed data (automatic or selective matching).
Customization Information for Payments Organization and Planning
- If processing is undertaken for many companies, the document types and series codes that will be used, must be exactly the same to all companies.
- For computerized cheques issuing:
- The expiry date and the Bank account must be defined to the selected lines.
- The “Notes numbering” data must have been defined within this Bank account
- The CODE of the cheques must have a Code format of automatic numbering WITHOUT prefix.
- To the company parameters, must define the document type and the type of the payable note that will be created

For funds transfer creation:
The Withdrawal and Deposit accounts must be defined to the selected lines.
To the company parameters, must define the parameters as to the document type (recommended BSP or BPC), as well as the transactions fields where the reasoning for the Bank payment order should be stored.

The Bank account must be defined
For the export file to other Banks, the necessary file-format alterations can be implemented, depending on the banks that the company co-operates. For this purpose, please contact the Entersoft’ Customer Service Department or a certified partner.
For the implementation of the approval process:
- The document type for the payment orders must be defined to the company parameters (the PSD – Payment Order is proposed) as well as the document fields, where the payment orders’ information will be stored for use to next steps (expiry date for the cheques and payment method):

- The “workflow steps” must be defined (initial step, approval and final):

Sales
In this chapter, sales scenarios will be examined for all the stages of the process from the offer and the ordering, up to the actual loading of the items, their shipping and Invoicing.
The instructions and the examples are mostly based on the recommended customization of the product, as far as the trade documents, the transitions, the screen layouts and the informative tools are concerned.
For a sales document to be entered, the following ways can be used:
|
|
|---|---|
|
|
|
|
|
|
|
|
|
|
|
|


Offer to a customer
Appropriate document type: SOF Quotation (offer)
The offer is made to an existing or a candidate customer and contains particular items as wells as services with the appropriate prices and discounts, while also the payment terms or other parts of the deal with the candidate customer. If there has been any monitoring of the sale process up to the time when the Offer is required, then the offer will be created automatically by the CRM workflows, thus eliminating the need for manually typing and entering the offer.
The Offered items might not have been entered as Inventory items so (based on customization that should have preceded this step) "general items" containing a free description can be used.
Also, in an offer, it is possible for certain alternative scenarios to be indicated. For example, two recommended solutions, each with its own total value.
The printout of the offer can be pre-designed by an appropriate layout or it could become available in a file, which could be attached to the document by the user. If the printing occurs by the system, it can be stored in a PDF file and to automatically be attached to the document, based on the customization of the document series.

| Document type and series |
|
|---|---|
| Date |
|
| Offer recipient |
|
| Salesperson |
|
| % Discount |
|
| Other general data |
|
| Offered Items |
|
|
For every Item, the quantity and price will have to be defined at minimum. Depending on the commercial policy of the company, discounts (of one or more categories), gifts, offers etc can be applied. Furthermore, the Item description can freely be changed, for use in the particular document only, in order to serve the needs of the offer, without having to enter the particular Items in the system following those particular specifications. In this way, for example, using one common “catalogue Item”, the user could enter various offers and only when those offers substantially progress onto “orders”, a more detailed entry in the Inventory can be implemented (Item, specifications, relations to other items, colors, sizes etc.) | |
| Grouping offered items |
|
| Incorporation of the offer entry |
|


Customizing Offer information
- The customization of line categories will take place through Tools Customization Transaction parameters. For every value in the “Item line categories” table, we can set if the line category is optional or not as well as a scenario.

As far as the Offer layout is concerned, it can be customized the lines layout (as can be seen in the Introductory manual about grids in entity “details”) as well as the display structure as a whole (as seen in the Technology Guide about data entry forms designer).
As far as the functionality of the recipient and the item are concerned, certain settings are required to the document type SOF:
Stating and customizing (through Ctrl+F12) of a header layout (proposed name: “Trade002”) if a dynamic form has not been designed.

Stating a line layout

Statement of the way that the trade accounts are defined, where the option to use a PERSON instead of a CUSTOMER is always open (through Recipient selection). In the “Define trade account from recipient” field, we can choose whether to use:

New Trade Account. If by completing the person in the recipient field, a Trade Account is located, he is placed automatically into the document. On the other hand though, if a Trade Account is not located when searched for, a dialog for creating of that Trade Account will be activated. In this dialog window, the template of the “default” Trade Account will be used so that the minimum entering will be asked for from the user.
Default Trade Account. If the Trade Account is not found for the selected Person, the “Default” one will be used, which might mean a “general use” Person. In this case, the Default trade account must have been entered in the previous field. Furthermore, the process must be organized in a way that if offer progresses, the customer is actually created before the transition to an order (or invoice). This can be done either by the classic handlings through the menu, or by using the quick adding dialog inside the particular Offer Document. Then, this customer must replaces the “default” trade account to the Offer’s header.
Definition of the way of Inventory Item detection, from the catalogue Item, if a catalogue Item is required to be used instead of an actual Inventory Item.
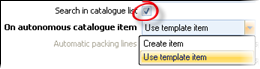
On the one hand the Search in Catalogue Items field is activated (the line layout for the Candidate Items will have to include the Catalogue Item column, like the SOF layout). In this case, the “Comment” line field will be used to store the description of the chosen Item, and an alphabetical search in Items (inventory and catalogue) is available in this field, to give to the user the ability to alter and store the proper description. This description will be active only in the particular document, as already mentioned.
On the other hand in the On autonomous catalogue Item field, when a linked Inventory Item is NOT found one of the following options will have to be chosen:

Create Item, which will activate the quick adding dialog for a new Inventory Item requiring the fewest possible data
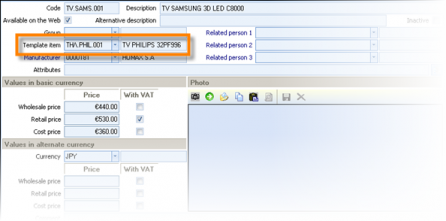 Use template item, which will use the “template item” of the catalogue Item, while the actual entry (of the proper inventory item) and alteration of the document lines will be done in a later stage. In this case, an update process of the Catalogue Items must to be done for filling their “template item” with an Item connected to an actual Inventory Item, such as it will cover the necessary functions like VAT class or measurement unit.

Choosing this option, the system recognizes the fact that the catalogue Item is not the same as the Inventory Item, and proposes prices from the Catalogue Item and not from the “template”.
Sale Order
Appropriate document type: SOR (Sale order)
The sale order is entered for a particular customer and contains Inventory Items, additional charges and information for the settlement of payment. Based on the business processes activated and customized for the sale orders:
- A credit control check of the customer is executed
- The availability of every Item for the ordered quantities is checked.
- The foreseen by the trade policy prices, discounts, gifts or any other provisions are proposed and additional charges like Delivery cost, taxes etc are calculated in order to form the total value of the order.
The order can be produced by a previously entered offer (transition 471. SOF=>SOR). If a “general” customer or candidate items have been used, they will have to be defined and entered as an actual customer or actual Inventory Items, before the transition takes place (through modification of the Offer document). This is due to the fact that the order will set off a chain of reaction updating the particular ledgers.
Basic functionality

| Document type and series |
|
|---|---|
| Customer definition |
|

|
Check trade account balance. This choice leads to an information dialog of the basic financial data of the customer, his Outstanding invoices and credit limits
More information on the credit limits found at the relevant chapter (Credit control) |
| Customer Statement |
|
| Salesperson |
|
| Supervisor |
|
| Peer |
|
| Payment Method |
|

|
|
| Transfer data |
|
| Pricelist |
|
|
policy |
|
| % Discount |
|
| Contract |
|
| Workflow step |
|
| Priority |
|
| Order Items |
|


Stock availability
Through the vertical toolbar or by pressing F11, the user can get analytical information on the stock availability of the Item, in each Warehouse and also, if the same Item (code) is used by other Companies of the system, displayed those stock quantities too (there’s a color indicator for stock in other companies).

The quantities displayed are the actual and available balance (not reserved), the expected (from other branches, suppliers or by Production and quantities already loaded/on the way), the sales orders in progress and orders issued by other branches, as well as the future stock after the possible delivery of all the above.
Based on that, the user is able to notify the customer about if and when the Item will be available, and in case that there is availability, the user can proceed to stock reservation or dispatch in-house from another branch.

Alternative, compatible & accessories
If an item is out of stock, the user is able to use the vertical toolbar to select the button called “Select based on relation” (CTRL+F9) and thus offer the customer a similar alternative, or technically equivalent item. For this to be an option, the relations between the Items must already have been set (to the Items mgt screen). In this case, a list comes up from which a choice can be made to replace the Item of the current line.
The «Filter Equal» in the column “Relation type” can be used if the relations are too many.
If we need to propose accessories or in cases where the accessories are actually asked for, we can use the F9 key or select “Select based on relation” from the vertical toolbar. For the new lines to be entered, all we need to do is press “Accept”.
In both cases, the “Quantitative relation” of each new Item applied to the Quantity of the current Item, with a possible repercussion to the proposed line quantity.
Another use of relations is when the customer asks for a specific Item with the condition that the Item will be compatible with another Item possessed by him already. In this case, the item (which will not be included in the order finally) is entered and using the vertical toolbar and “Select based on relation” we select the compatible items we need.

Selling combinations of items
In a few cases, some Items are sold along with others.
Set/Kit
If an Item package is sold as a whole, an auxiliary Item of a “Set” type can be created. When inserting it in an Order line, the parts will be developed underneath displaying the Items it contains. The allowing or not of the user to have any access to edit the lines of the contained Items, depends on the type of BOM (Bill of materials). The “Static” BOM type, will allow the user to interact only with the set line while the “dynamic” type allows full control over the lines of the set. The set Item itself (displayed in the document as a secondary header in the lines, colored differently) will neither take part in the document totals nor it will update the various sub-ledgers, apart from the Sales Statistics. The “Static” set, in particular, can be used sometimes as an OFFER pack of certain items to a special price.

Special BOM (Macro)
If a special Item is not in our interest to create, a “Special Bill of materials” can be defined (Entities/Inventory/Bills of material). The special BOM is a type of macro through which we are able to enter a variety of Items in a document by using the “Add through auxiliary BOM” action, found in the Actions button in the vertical toolbar of the document, or just by pressing Alt-F9.
The dialog for the BOM search will be activated and after we locate and select it, we can set the quantity so that by pressing “Accept”, the proper item lines are created without the “header line” to exist, like the previous case. The auxiliary (special) BOMs can be used in a certain time frame, and then freely deleted, since no “trail” is left in the documents.


Gifts and offers
Item combinations can be provided through the Invoicing Policy, where by selling a particular Item or an Item that belongs to a specific category or a minimum quantity of an Item, other Items can be inserted automatically as gifts or to a special price.
Discount functionality
As far as the discounts are concerned, “Discount 1” proposed from the header/customer, “Discount 2” comes from the Item, “Discount 3” is available for editing an additional discount or assigned by pricelists, invoicing policy etc, while the “Discount 4” is a sum of discounts deriving from the application of Special Discount Accounts. The first three discounts can all be applied to the starting value (quantity*price) or each one can be applied on top of the previously applied one. This can be set by a specific parameter in the customization:

All of those discounts take place on net values, while one more discount type, the gross discount will be applied to the final value (after applying the VAT charge). By using the Alt-F7, the discount on the sum, will be broken down to all the lines and can be given in three ways:

| Immediately as a discount amount | %Percentage |
|
|---|---|---|

|

|

|
Actually if a gross discount is used, it will be un-taxed and transferred in one of the 3 first discounts of every line based on a company customization parameter:


Gross profit margin – On line cost
In every document line, in the “Cost value” field, the cost is stored based on the online average item cost (calculated on all types of acquisitions) making the indicative cost and profit of the whole order available.
In order to be able to see this information, this column can be transferred to the “visible” part of the Grid (layout) using right-click and “add/remove columns” to the grid header.
Moreover, the cube “Profitability per order” (Business snapshot/Profitability analysis) can be used providing this information. There, the user can compare gross profit between orders, customers, items and so on.


Corporate dimensions
The horizontal dimensions (Project, Business activity, Business Unit, Dimension 1, Dimension 2) end up with a particular logic in the document lines from which the revenues and expenses will be updated and results BY dimension will be produced.
The following scheme displays the dimensions’ value setting priority of the item lines which is valid for the special accounts, services, fixed assets, liquidity accounts etc as well.
By choosing a document type, the horizontal dimensions receive the value set by the document type if they have been entered and when the series is chosen, the values will be overlapped. By choosing a customer, the same will occur in the dimension fields of the header, where the user is able to alter them while, other processes like choosing a particular contract, application of a business rule or a field property profile can provide new values to these fields.
From this point on, the dimension values of the header are transferred to the lines of all types, where every entity can redefine the dimension value. For example, in case a Business unit has been stated in an Item, that will finally be the recommended value of the item line and will update the transactions, statistics etc., no matter if all the “lesser priority” entities would define a different business unit.
Information during Ordering
Having defined the item in a line, the command “Previous Item entries” (accessible from the vertical toolbar or Ctrl+F11) will immediately display all transactions of the current customer in the past for the particular item, while the price and discounts at that time are also visible.

A full supervising review of the item’s relation to the customer can also be obtained by using the “Item Summary” command, from the vertical toolbar, which will display the following information dialog:
 For the Item of the transaction: availability, total stock and stock to the current warehouse, cost and sale prices, and
For the combination of the item and the trade account: quantity sold, turnover and average sale price last year and this year, last order and last sale data.

An interesting function here, is the fact that the Item as well as the customer are visible parameters by the user. So, could see the results by changing the customer or/and the Item. This way, during the customer order, we can look for the turnover the customer has made for other Items or sale price given to another (relevant) customer etc.
After entering the order, in order to keep track of its progress, the “Show Transitions” (Transition/Show Transitions) button is available (to the horizontal toolbar), analytically displaying the quantities, when and how the order was served.
Mass replacement items in Orders
 Sometimes, after issuing orders, either by customer request or due to some commercial policy or an Item abolition, or inability to deliver or any other factor, some Items will have to be replaced and the items to be sent to the customers will be similar or items of a new collection etc.
In the “Pending orders (per Item)” view (Transactions/Sales/Revenues/Information) the user can do this action by using “Change Items” command, which will be applied to all the marked item lines.
We choose the item, which will replace the item used in the marked lines. Apart from the code, the ability to choose color and size is also provided. The process will REPLACE the data either of the whole line (regarding the Item) or even only the color and size. If the “Combination” setting is activated (“Yes”), then the changes will not take place for the color and size given to all lines, but only for the combination of the particular “from” color and the particular “from” size (to the same item line).

How we can see the results of Sales Orders issuing
| View | Content | |
|---|---|---|
|
|
Orders-Reservations | List of registered orders 
|
|
|
Pending orders |
Orders which have not at all or just partially been delivered.
|
|
|
Pending orders (per item) |
Items and quantities of not yet delivered orders by delivery date
|
|
|
Customer pending orders | Abeyances of every kind towards customers by document (confirmed orders, reservations, production orders, in-house dispatches) |
|
|
Delayed shipment status |
Orders that have not been shipped, whereas the agreed delivery date has elapsed
|
|
|
Summary routes review |
Items and quantities by route and Geographical delivery zone
|
|
|
Stock transactions history |
All Inventory’s transactions by item. The Orders as well as all other transactions appear to this (and not only the “official” transactions that affect actual stock).
|
|
|
Stock quantitative control | Cube for check items’ quantities per item, branch, and WH. |
|
|
Current stock availability |
The current stock status per Warehouse with information for the expected, orders to be delivered and the future stock.
|


Customizing Order information
 In order to change the Order layout, a dynamic form can be used which may be declared to the document type.

In grid layouts, the visible columns can be altered and sorted according to the needs as well as stored for future use.
- In order to accelerate the operation and if the available stock column is not required, the layout “ES-1-SALE-STOCKBAL” can be removed from the document type, by also removing the “Available stock” from the grid layout.
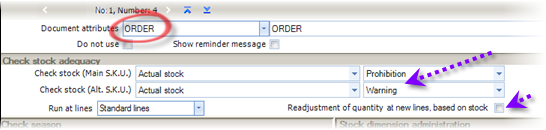 For the user to be alerted when a shortage is in effect, an Item Control Profile can be used to Items. The property “Order” must be defined at a Profile line, to enforce the stock control check (i.e. actual stock or available stock not to be negative). Alternatively we can activate the feature of “Readjustment of quantity at new lines, based on stock“. The stock in this function is the one defined as to be checked (i.e. actual). It will be proposed then, the maximum possible
- If there is a need for searching only between Items existing in stock, we can activate that ability in the document type.
- NEVER attempt to use any of the additional development tools provided by the system, to give a value to the “%Discount 4” and “Discount 4 value” due to the fact that those fields come up by summarizing special discount accounts which are “distributed” to item lines.
 The Order can accept an advance payment as mentioned before. If we need to disallow that, and the payment receipt to always issued separately, then in the document type’s customization the payment options could be deactivated (only if a dynamic data entry form is not in use).


If however we need all the settlement information to be clearly visible, the above instruction is not recommended. A field property profile should be used to disallow the existence of liquidity accounts of type “Actual”:

- The Credit Control is activated through the field “Check credit limits” of the document type. If we need the credit limits check to only be a warning in the order but deny the invoicing (in case that credit control rules exceeded), we can activate the Credit Control Policy at customers’ data, defining this behavior BY document type (document property, actually).
- As far as the default price is concerned, the following parameters in the document type, in the “Lines” sub-page, should be checked:
Default price. Among the available options, the ones below are the appropriate ones for the sale documents and the 1st of them has been chosen to the pre-configured Order:
Wholesale price: If a price zone has been defined to the customer and the choice at this point is one of the related to the price zones (retail price, wholesale price, price 1, price, 2, price 3), the corresponding price of the item is proposed, no matter which of the 5 is declared to the document type. The same feature applies to the Retail price, Price 1, Price 2, Price 3.
Last sale price: It is proposed from the last dated sales transaction.
Last net sales price: Works like the one above, but any discounts subtracted from the last sale price. This way if the last sale price was 100.00€ and the discount was 10%, with the previous option the default price would be 100.00€, while according to this option, the default price will be 90.00€. If a default discount is active (either due to the customer or through a pricelist), the net price should not be used because the application will propose a double discount, in this case!
Default price per trade account. The field is accessible only if the “default price” has a value of “last sale price” or “last net sale price”. In this case, we can define here that this “last” price should be found ONLY in the transactions of the specific customer of the current document and then, two choices will become available:
Either the price of last transaction should be proposed to the line,
Or, the price AND discounts to be proposed.
- As far as the cost is concerned, that calculated and immediately provides the information of the gross profit on a line level, it is based on the setting “Default cost price” of the document type:
Spot cost price: This is calculated as an average price of all purchases since the last fiscal year closure, and is the quotient acquisition cost / acquisition quantity.
Official cost price: This is the official cost price calculated by the Stock Valuation process for the last fiscal period.
Standard cost price: This is the standard cost price, which defined to the “Cost prices” of each Item.
Last acquisition price: The “price” field from the last dating purchasing transaction.
Last net acquisition price: This is like the previous choice, but taking out the possible discounts taken place.
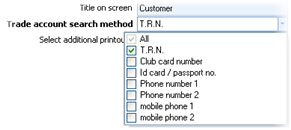 In the “T.R.N.” field, the possibility for locating the trade account is strengthened by using not only the TRN to search, but also the ID number, phone numbers, card number (if it applies), through the “Trade Account Search method” field in the document type, where multiple choice permitted.

This statement will result in the user being able to supply any of the known data (or part of them) in the one and only “T.R.N.” field at the document form and the customer to be located by any of those. This way if the customer has a phone number of 210-8920201 and a club card with the number 3220190 and in the document, the «*201*» string is typed in, both of them will be displayed to choose from, if these two fields have been activated for search.
Stock reservation for customers
Reserving stock can be achieved in various ways:
Manual input
Appropriate document type: SRC (Stock Reservation for Customer)

The available stock calculated and displayed for the current Warehouse and for all company’s Warehouses. The reservations only affect the Inventory sub-ledger and in particular DECREASE the AVAILABLE stock. They are presented in all views mentioned at the previous unit (about Orders) and affect all functions using the available stock (i.e. stock control).
Release of a reservation can only be enforced by the following transition, when the items are going to be sent to the customer, while a cancellation (when the goods will not to be sent at all) will produce the same result:
Appropriate transition: 137. SRC=>SLN (Goods delivery Note from Stock Reservation)
This transition designed for cases when a reservation entered primarily and no orders made beforehand.
In case the processes are intensive and for the system to be able to update immediately, before the entry of the items is completed, do save of the document by pressing (CRTL+S), and continue entering the rest of the items.


After approval of customer Order
When an Order registered, then approved, and the stock should be reserved until the routing of the order to be sent off to the customer, the following transition should be used:
Appropriate transition: 151. SOR=>SRC (Stock Reservation from Sales Order)
For sending the Items to the customer in this case, the following transition (designed for cases where the workflow begins with an Order) should be used:
Appropriate transition: 152. SRC=>SLN (Goods delivery Note from Stock Reservation)
During issuing an Order
Another process leading to reservation provided through the following document type, where, while ordering, all quantities currently available are reserved, while all the others remain “in order”.
Appropriate document type: SCO (Sale Order with automatic Reservation)
The ones depleted will be directly ordered to suppliers and as soon as they arrive, they will be sent to the customer. This workflow is described in a next chapter, about “customer order of high priority”.
Customizing information
In this case, NEVER must use fields “Amount4” and “Comment5” of item line, because are reserved by preset configuration.
Shipping to a customer
Goods delivery Note (Invoice pending)
The delivery note is issued to accompany the items we send off to customers. The invoice that charges the customer will follow and will most likely be regarding more than one delivery note. The reason that a single Invoice is not issued in the mediation of distribution companies for the actual sending.
Appropriate document type: SLN (Goods delivery Note)


| Document type and series |
|
|---|---|
| Locating the customer |
|
| Transfer data |
|
| Sending items |
|


The results of entering the Goods Delivery Note are…
It updates the Inventory by reducing the actual stock.
It updates the customer risk (displayed by choosing
 at header) with the value of the expected invoice (“temporary net value (for invoicing)” column).

Customizing Delivery Note information
 Check for no item that not allowed to the particular Warehouse to be accepted. This check can protect the users from typing the wrong item code or from using the wrong series. Since the allowed Warehouses are declared to Items (there is a mass procedure to implement this too), it must:
To be ensured that the setting “check Item W/H” is activated to the Items’ Control Profiles (to every line that concerns transfer of quantity), and, in the other hand,
 To activate at SLN document type the setting “W/H filter”, which will result in NOT displaying (during search) the items not allowed to the current document’s warehouse.
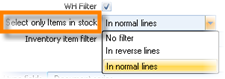 Ability to filtering during search only items in stock (into the current warehouse). To the “Select only items in stock” field of the document type (to the “Lines” sub-page), may choose if this filter is active and to what line type (normal or reverse).


How do we see the results of issuing Delivery Notes?
| View | Content | |
|---|---|---|
|
|
Sales/Revenues | List of all Sale documents concerning quantities or values |
|
|
Pending customer invoicing | Delivery notes or Goods receipt by customers who have been linked to the corresponding Invoices. |
|
|
Inventory records |
The Stock book with all transactions affecting quantities and/or values. Depending on the layout, it will be displaying the deliveries in the Sales column or the exports in general
Same updating, though more concentrated, see the Monthly Statement of Stock Book as well as the Inventory Costing Balance. |
|
|
Stock quantitative control |
Cube for check Items’ quantities per item, branch, and W.H.:
|
|
|
Journal of Quantitative Stock Entries |
List of Items’ transactions PER date and Warehouse, with double qty columns to both main and alternative unit:
|
|
|
Current Stock availability | The current Inventory status per Warehouse with information for the expected quantities, the orders to be delivered and the future stock. The quantitative Good Delivery Notes do negative update of the “stock” column. |


Goods delivery Note for an Order
When the delivery based on an Order, which entered beforehand, the document can be produced in an automatic way, through an Order transition.
Appropriate transition: 111. SOR=>SLN (Goods delivery Note from Sales Order)
When the customer Order made through the process of automatic stock reservation (SCO), then:
Appropriate transition: 176. SCO=>SLN1 (Goods delivery Note from Sales Order/Stock Reservation)
In both cases, the Delivery note will keep the transition information and will correctly update the Stock availability, reducing at the same time the ordered quantities.
This way in any view we have had the information of pending customer orders, we are also going to notice a reduction of the orders and the actual balance, as well as an increase in the sales quantity.
Selecting the transition, in the appearing dialog, we can provide the series and the date for the Delivery note with some additional capabilities (choice of lines or whole documents of orders and grouping to create a single Delivery note for the customer from more than one orders:
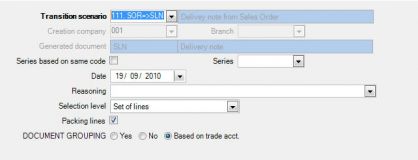
Choosing “Next”, ordered Items displayed to select those that will be delivered. In the criteria, the customer is included as well as the “workflow step” (in case that Orders approval process is in force).
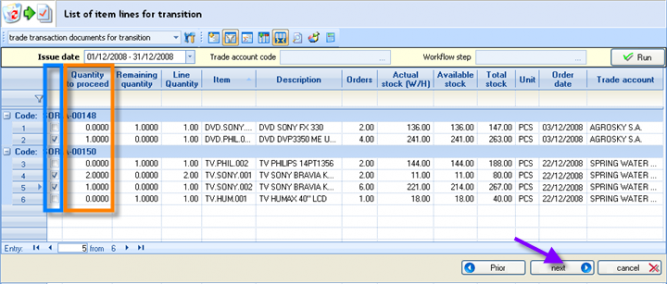
Through the 1st choice column
, the quantities of the Order document lines are selected automatically to become “Quantities to proceed”. Alternatively, the user could provide a smaller quantity directly in this column, thus selecting a partial delivery, tracking the quantity not to be sent to the “Remaining quantity” column. The actual and available stock at this moment is also visible to the next columns.
In this stage, if we have chosen “Documents set” in the selection level of 1st tab, in order to make whole orders be sent and to allow us to choose which ones, the next display will be different, displaying an orders overview and not lines:
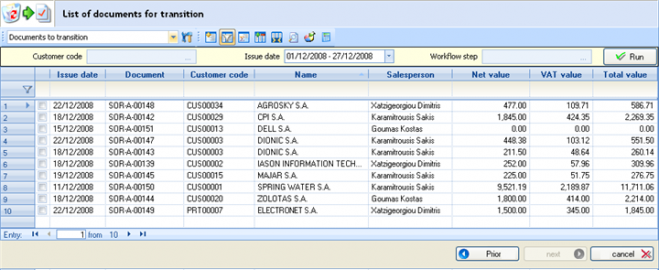
In the next step, the choices we have made will be displayed for confirmation of the process:
If we want to avoid the confirmation stage, could select this setting to the “transition profile” (sub-page “Additional parameters”):
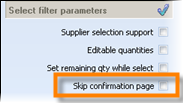
After confirming, we can press “Run”. The process will create the Delivery Note/s, which will show up in the results page:
The appearance of this page depends on the setting “Execution method” in the transition profile customization (sub-page “Results”):

At this point, the user can move on to the printing of delivery Notes, through “Actions” of this results view.
If the result of the process is a single Delivery Note (which would happen in case of a transition from inside an Order form), then this document will automatically open (based on a setting of the transition profile).


Manual entry of Delivery & posterior connect to Order
The transitions, apart from the service that they provide for automatic document creation based on others of a previous workflow stage without the need to type, will also have some additional important results into the system: They update the pending quantities created by the source documents. This way, if an Order is not sent through a transition, it will appear as “Pending”, resulting to the possibility of re-transitioning by mistake. Furthermore, in all the availability lists, stock will appear as pending (to be sent) quantities which are not actually outstanding.
For the above reasons and even if typing is necessary to enter a document which belongs to a workflow of another, we will have to ensure that it will be connected to that document in order to close the cycle of the outstanding quantities.
 At the document type customization, in the sub-page “Behavior”, the transition code from which the document derives will have to be entered. If the rules are more than one, they will have to be entered separated by a comma, using a particular queue, which will represent the workflow followed.

If for example we are using Orders and Reservations which produce Delivery Notes, the first rule declared to the Delivery Note document type would be the one that uses Reservation as a source (that means that whatever is sent will firstly close the reservations). In this case, if the reserved quantities are not enough, meaning that the Delivery Note has a greater quantity, then it will be “closing” up the possible ending Order quantities as well (having declared it secondly in the transition rules of this field).
 At the document entered by typing, specifically in the “Status” sub-page, we are able to enter the document code (Order) which we wish to be connected. The Order number for example SOR-Α-00034 (full Order code) is declared in the field called “Related document”.

If the Orders closing up are more than one, the button
can be used, which leads to a dialog where a search is possible to locate all the appropriate documents.

On the other hand, any document produced by transition (and based on the setting «Observe document history» and “Monitor pending quantities” of the transition profile) contains the list of all the related documents (with lines fulfilled by the current document’s lines).


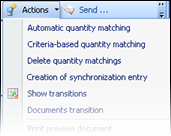 In a document list like “Sales/Revenues” which displays the documents which we want to connect with the ”previous” ones, we mark these documents i.e. delivery notes and then, we select through the “Actions” menu of the horizontal toolbar one of the following functions:

- Automatic quantity matching. A dialog will appear for the execution of the process:
a. If a declaration of a related document has been done before, just press “Accept” and the matching process will be executed, connecting the documents with the ones declared as related.
b. If no related documents have been declared, we are able to choose which data will be taken into consideration in this correlation process, in order to locate the proper source documents (Orders). If the “delivery address” has been selected for example, the delivery Note will be connected only to Orders with the same “delivery address”. Activating the “previous documents” field, ensure that no matching with Orders of a later date of the Delivery Note will take place.
The data input in this dialog will be taken into consideration during matching, anyway. If for example an Order document has been declared as a related document from a different branch than the one possibly declared in the dialog, this matching will NOT take place (though this is a very rare case scenario).

- Criteria based quantity matching. A different dialog will appear:
Through this dialog, specific data will be declared for the AUTOMATIC selection of source (Order) documents to be matched, for example Order with specific dimensional values.
The process result will be to connect the chosen and the “source” documents while, this way, to update the system regarding the pending quantities just as if a transition had occurred in the first place.
In the Delivery Note it is possible for the Item Code to be changed in a line. This way the quantities matching of the line will remain intact and nothing will remain Outstanding.
The automatic quantity matching that we have seen previously occurs using criteria of 1) the customer, 2) the criteria possibly declared in the dialog of the automatic matching or the source documents which have been declared as related documents and 3) the items and their “dimensions”. If the choice of similar dimensions between source and target documents should be kept or not, will be set through the parameter “Automatic quantity matching with strict dimension control”

In dimensional items, it is possible that not the exact colors-sizes-lots ordered to be actually sent, due to several reasons and after communication with the customer. Most of the times, we want the “quantity matching” to occur, even if the dimensions are not identical and, not to keep a back order. If “no” is declared, the application will firstly check and match all lines with the same dimensions and for the rest quantity, this parameter is checked.


Handling of total quantity to be delivered (weighing)
In Delivery Notes with a variety of Items, in order for the right quantity totals to be printed, the confirmation of the quantities will take place sometimes by certain methods e.g. weighing. In this case, if the user knows the total quantity regarding a certain unit and it is not the one coming up from the lines of a Delivery note, he needs a way to declare it and the system to do proportional automatic updating of the document lines.
This can take place through “Allocate quantities”, which activated by pressing the Ctrl + Q key combination after the lines concerning the allocation are marked. The result will be the display of the dialog which allows just that:
 We can see for the chosen Item lines, the sum of the quantities («Calculated»), provide with new («actual») and look at the difference between the two («Difference for distribution»). Choosing “Update”, the lines will be updated with the new quantities based on the starting value of the lines.
This function is useful only if the quantity declared here is about the One and only measurement unit of the chosen items. For example, if some lines with an alternative unit A and others with an alternative unit B, have been selected, this function will have no meaning due to the fact that only one quantity can be given.. The same applies to the weight, in case it is measured in “Kilos” in one line and “grams” on the next. In this dialog, the unit in which the quantities should be given , is displayed, using the “current line”. As many lines do not have this unit, will be ignored, while calculating totals as well as while distributing the possible differences.
Delivery with no charge
When the Delivery note should be issued to a customer for items, which will not be charged (meaning that an invoice will not follow), a certain type of document needs to be used. This usually takes place in cases where samples are sent for testing, checking etc. or sending back some items to the customer, which had been received for checking or servicing.
Appropriate document type: DWV Delivery Notes (Without Value)
If the sending to the customer concerns an already issued Receipt Note (without credit invoice pending), a transition can be used, so that the data will not have to be retyped:
Appropriate transition: 140. GRN=>DWV Delivery Note from Receipt Note (for testing, control)
This quantity updates the quantity of the “Other exports” in the Inventory Books.
In case the delivery is concerning an item of the customer which we have received for fixing and at the same time we are charging services, the types of documents we can use described at the specific chapter about providing services.
Delivery notes’ renumbering
In case before the printing, a numeration of the Delivery Notes of the day is needed, so that they will follow the queue in which the deliveries will be made, the specific for this purpose process “Document numeration” can be used (Tools/Maintenance tasks).
In the dialog displayed, for a day and a specific series or prefix and document type, we can see the documents meeting the conditions for the numeration:
• Not-transitioned
• Not-cancelled or cancelling
• Using automatic series
• Using series with “sequential dates”
• Not-printed
At the criteria area, the “Trade account”, “Document code”, “Transport means” and “Itinerary” can be used to limit the number of documents participating to the process.

For all the displayed documents, the «Update» key starts the process, which will apply to them a number by issuing date based on the sorting of this view.

Order routing process
In case we have some transport means executing certain routes, a “sharing” to them must occur for the goods to reach their destinations based on the delivery addresses, then, a summary list must to be prepared for each route and, after checking and producing the delivery notes, must print the appropriate list for the transporters. The following process recommended for this purpose:

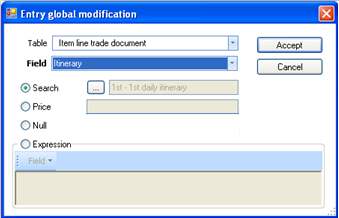


Invoicing customers
For a delivery Note
Usually the invoice is sent by post, though there is the possibility of electronic posting without the need for printing.
For locating of the Delivery Notes, which must be invoiced, use the view “Pending customer invoicing”. From this list, the Invoices can automatically produced by transition:
Appropriate document type: SIV (Sales Invoice)
Appropriate transition: 113. SLN=>SIV (Sales Invoice from a Goods Delivery Note)
To the invoices generated by the process will need to check or correct the (proposed) prices and discounts, and also to check the settlement payment.


| Prices and values |
The application has already put prices, discounts and VAT based on the Delivery Document. If any changes must be done, for example in discounts etc, they can be made possible either by line, or by using the field “%discount” in the header (sub-page “administration”), using the |
|---|---|
| Quantity |
Although the document is purely regarding the value, the quantity of every line must be correct and matching the invoiced value. This quantity is the one that will form the average sale price. It must never be set to zero. If an Invoice must issued that does not concern a specific quantity, but it is a value corrective, special documents exist for that purpose and described in the next chapters. This document type (SIV) must be used exclusively for Invoices after Delivery Notes. |
| Additional charges |
If there are additional charges, they can either be entered as services in the 2nd line tab,
or as special charge accounts in the special accounts footer tab:
|
|
Settlement Payment |
The payment method defined in the customer register and proposed to all his transactions. Using the icon The user is able to interfere and define the actual dates and amounts for payment if there is a specific deal made. If no payment method is defined and no data were entered here by the user for the payment forecast then, during saving of the document (for update outstanding receivables in the right way), the system will automatically create a forecast line visible in the “on credit” tab, along with the total amount to be paid. The due date of this automatic forecast entry will be set as many days after the issue date as defined by the “Credit days” in the customer. |


If for any reason the Invoice is not entered through the transition but is typed in, we must do automatic quantity matching before the process of stock valuation is executed. This way the Invoice will be “connected” to the Delivery note so that no value is left Outstanding. Such values would lead the Stock Valuation process to create wrong forecasted transactions for sales that either quantities or values missing.
How do we see the results of issuing Sale Invoices?
| View | Content | |
|---|---|---|
|
|
Sales/Shipments | List of all Sales documents concerning quantities or values |
|
|
Invoicing documents | A list of the documents creating Turnover per branch. |
|
|
Revenues Journal per VAT rate |
|
|
|
Inventory records |
It presents all the stock quantitative and value transactions. The Invoices update the columns of “Sales value” (depending to each format):
|
|
|
Customer’s statement |
The Customer’s statement (of accounting nature) with detailed transactions and progressive balances.
The same update (summarised) also occurs to the Customers’ Trial balance. |
|
|
Outstanding receivables |
|
|
|
Accounting |
An accounting entry is created to the Customers, Sales and VAT accounts and it updates the Accounting journals, the Account Statements, the Trial Balances etc.
|


Sale Invoice – Goods delivery Note
Invoicing usually works this way. It charges the customer and comprises of an accompanying document of the Items.
Appropriate document type: SNV (Sales invoice – Goods delivery Note)

The way the fields are completed and the possibilities existing for locating the customer, direct checking of his financial status, functionality of the payment method, transfer data, prices and discounts, customization are described extensively at the chapter about Sale Order.

In the same document, Services can be brought in, or/and Fixed assets, in the other line tabs.
A lot of care should be given into the way that the Payment method is managed. As far as the settlement is concerned in the order, the data is only informative (unless there is an advance payment). During invoicing though, those data affect the Aging of customer balance so, it is important to choose the right payment method and/or checking the forecast entries produced.
The user is able to interfere and define the actual dates and amounts for payment if there is a specific deal made.
If no payment method is defined and no data were entered here by the user for the payment forecast then, during saving of the document (for update outstanding receivables in the right way), the system will automatically create a forecast line visible in the “on credit” tab, along with the total amount to be paid. The due date of this automatic forecast entry will be set as many days after the issue date as defined by the “Credit days” in the customer.
As far as the visible results of a “Sales invoice” are concerned, in the previous chapters we have seen the way that the two documents, whose union composes the present sales document, affect the functionality and reporting.
Invoicing of Orders (with prices agreed in Order)
To be able to send and at the same time invoice customer orders, a transition will have to be used.
Appropriate document type: SNV (Sales invoice – Goods delivery Note)
Appropriate transition rule: 112. SOR=>SNV (Delivery Note - Invoice from Sales Order)
After the production of the invoices, we can check on the validity of the transfer data, prices and discounts etc and finally print them.
If the Sales invoice has been typed in, the automatic quantity matching will have to be used.
Invoicing of Orders (with new prices)
If the prices and discounts in the order are “indicative” and, during invoicing, we want to apply the new-current prices and discounts, then must use a different transition:
Appropriate document type: SNV (Sales invoice – Goods delivery Note)
Appropriate transition rule: 112. SOR=>SNV (Q) (Delivery Note - Invoice from Sales Order (with new prices))
The difference from the previous transition is that from the original order(s), only quantity and information data are copied, rather than prices and discounts, so be applied in the Invoice afresh the pricelists, contract results, invoicing policy or even simple loading items’ prices which in the meanwhile might have changed.
Invoicing additional charges
This document is used for charges, corrections or additional Invoicing to the customer, due to mistakes taken place during the starting entry regarding the item price or value, which now require additional charging.
Appropriate document type: SDV (Debit note)

It charges the customer and updates the turnover. If the mistake taken place was requiring customer credit, then a credit Discount document (SCV) will have to be used and NOT a negative value on the current.
DO NOT use the simple Invoice for a Delivery note (SIV), because the “pending values” produced this way will be wrong and will be taken into account, during the Stock Valuation process.
According to the default settings in the customization, the same numbering and prefix applies as the «SIV».

No charge granting to a customer
The process is regarding the sending and invoicing of the customer with no charge. A simple Delivery note is not the appropriate document, since the no charge grant is equivalent (accounting wise) to a free invoicing (and not only delivery). In this case, the posting method is differentiated compared to a Sale invoice’s, matching rather the Self-dispenses (see chapter “Expenses”), but in this case the recipient is actually a customer and not an employee.
1st Scenario-> Unified document for quantity and cost
Appropriate document type: FGN (Free grant Note)
Data regarding the shipping can be entered to “Transfer” sub-page, after the header has been maximized using the icon
.
The document is updating the Inventory sub-ledger as to quantity and cost of “other exports” while at the same time it will update the expenses as well, regarding the accounting. The receivables sub-ledger is not updated. The transaction will take part neither to the Revenues nor to the Expenses reporting, but only to the Inventory and VAT Journals.

In accounting, the revenues and expenses updated with the same amount.

During the Stock evaluation, if finally a different cost has been calculated than the one declared in this transaction, corrective transactions will be produced, fixing the cost value
When a transport of this sort happens by mistake or the item is returned by the customer, the following document must issued, which produces the exact opposite result:
Appropriate document type: FGR (Return from free grant)
During the printing of those data, it would be best if two separate “print forms” would be used and simultaneously printed, using the ability of declaring multiple forms in the document series:


- One will have the layout of a “Delivery Note”, containing purely quantitative and informative data for the customer while
- The other one will have the layout of an “Accounting Note” with the same number and will contain the cost and VAT data, that refer to the General Ledger entry.
2nd Scenario -> Distinctive documents for quantity and cost
In case of issuing two documents, one Delivery Note and one separate cost element, there are two alternative scenarios:
Appropriate document type: SDQ (Self-Dispense Note - Quantity)
If there has been a reservation before the shipping, the following transition can be used:
Appropriate transition: 138. SRC=>SDQ (Self-Dispense Note from Stock Reservation note)
The Shipping note must be followed by the cost element (within the same Stock costing:
Appropriate document type: SDC (Self-Dispense Note - Cost Value)
Appropriate transition: 160. SDQ=>SDC (Self-Dispense Note from Delivery note)
The update matches the one done by the unified document, though in two stages.
If for some reason, an SLN (Goods Delivery Note – for sale) issued beforehand, then we must use a different document type regarding the cost and not “SDC”):
Either issuance of a regular Sale Invoice with zero value along with a negative result of the gross profit:
Appropriate transition: 126. SLN=>SIV (ZERO VALUE invoice from Sales Delivery note)
In this case, this transaction considered as a Sale, regarding the Stock Books.
Or issuance of a Free Grant Note from (after) Sales delivery note:
Appropriate document: FGS (Free Grant Note from (after) Sales Delivery note)
Appropriate transition: 148. SLN=>FGS (Free Grant note from Sales Delivery note)
This document will transport the sales quantity to the quantity of self-supplies (or other exports, depending on the layout of the Stock Book report), while at the same time the cost is being updated.

Regarding the accounting, it updates Revenues and Expenses at the same time, just like the other Free Grant Notes (SDC, FGN).

Invoicing of public sector’s customers
Sale to customer of type Public Sector can take place with any of the sale documents. The specificity in this case is that if we are aware of withholding taking place, we are able to configure the system to be able to calculate them automatically. This can occur by using special Withholding accounts, which after being set in a group of withholding, they will be set to the relative customers at “Withholding group” field, and stated in the proper document types.
Since this configuration done, the withholding amount REDUCES the total (payable) amount as well as the customer charge. This way the receivables will be updated correctly (with the amount remaining after the reduction of the withholding).

An alternative scenario would be invoicing without withholding and, during payment, to enter the withholding amount, based on the “State payment order” report, which usually given.
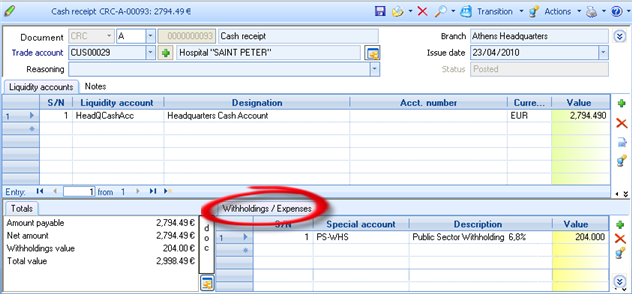
In this case, the withholding RAISES the payment amount, so the customer credited with the correct amount, resulting in balancing of the Invoice claim with the total amount.

Details about customizing Special Accounts see to the relevant chapter “Accounting tasks”.


Customer order of high priority
This is about a workflow during which the customer orders and, as many items have enough stock will be reserved that moment, while for those that are out of stock, an order/s is sending to the supplier/s on behalf of the customer. As soon as the Items arrive, and based on the appropriate information about the progress of the Order, the shipping and invoicing to the customer will proceed.
- In this flow, using the default documents types that described below and designed especially for this purpose, the fields “Amount4” and “Comment5” of the line items, have been reserved.
Order with direct reservation of available stock
Appropriate document type: SCO (Sale order-Stock reservation)

In the document lines, the following columns are available:

Available stock in current warehouse
Reservation, which activated by default if stock exists
The result is that the lines “to reserve”, will update the “RESERVED” stock to Inventory sub-ledger as soon as the document is saved (without any transition to occur), while the rest items will update the “ORDERED” at the same time.
Direct order to supplier on behalf of the customer
For all Items that are out of stock, the order is sent off to the suppliers, using a specific transition:
Appropriate document type: PSC (Order to supplier for customer)
Appropriate transition: 174. SCO=>PSC (Purchase Order for specific customer)
Selecting the transition, in the appearing list, the system displays the main supplier of each item (lines of order which have not activated the “reservation” field), and the user can select any items’ supplier instead.
The process will produce as many documents as the different suppliers are.


At this point of the procedure, the view “Customers’ Orders status review“ will display the Items with the proper indication in the “Ordered from supplier” column. The orders presented here are exclusively of this kind (and not all sale orders), that is Sale order of “high priority”:


Receiving goods by supplier
As soon as the Items arrived, the following transitions can be used:
Appropriate transitions: 478. PSC=>PLN (Goods receipt Note from Purchase Order for customers)
479. PSC=>PNV (Invoice – Goods Note from Purchase Order for customers)
The result will be the automatic reservation of new stock for each customer. The view “Customers’ Orders status review“ will display the Items with the proper indication in the “Sent by supplier” column.
Shipping and Invoicing of respective customer
The shipping to the customer can be implemented automatically by using one of the following transitions:
Appropriate transitions: 176. SCO=>SLN1 (Goods delivery Note from Sale Order with stock reservation)
175. SCO=>SNV1 (Sale Invoice-Goods delivery Note from Sale Order with stock reservation)
ONLY after this action will the stock reservations be released, due to the initial Sale orders.
The “Customers’ Orders status review” will display the items with indicator in the “Launched” column.
Sale Order cancellation
If an Order or part of an Order has not been delivered and it will not be delivered at all for various reasons, this must be declared into the system, for avoid to always shown up as a “pending” order.
- Wrong order
In this case, one of the following actions could be used:
1st method: Line deletion
2nd method: Quantity reduction
3rd method: Order deletion
Cancellation from the customer side
In this case, one of the following actions can be taken, allowing the updating of the “Lost Sales”
1st method: Transition to SRO (Sales Order Rejection)
2nd method: Quantity reduction with an, at the same time, updating of the “Lost sales quantity” column


Customer sale return
Pending issuance of a credit Note
This case is about documents accompanying returned goods that issued by customers (or by us on behalf of the customer), due to a defective Item or for change delivered Items, for which a Credit Invoice will be issued.
Appropriate document type: SRN (Goods receipt Note by customer)
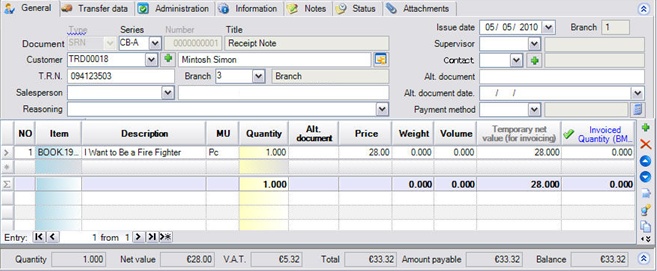
It updates the stock quantities, negatively in the “Sales” column and creates a value abeyance, which will reset when a Credit Invoice issued.

After delivering items for check or test
This is regarding the cases of Items that have been shipped to customer (using a DWV – Delivery note without charge) and then returned by him, after having been checked, tested, presented etc. A Credit Invoice will not follow such a Delivery Note, but the Items expected to be returned by the customer. In this case, it must be use the appropriate transition:
Appropriate document type: GRN (Goods receipt Note (without value))
Appropriate transition: 139. DWV=>GRN (Goods receipt Note from Delivery note (without value))
It updates the stock quantities in the “Other exports” column.
Simple quantitative goods receiving
In some cases, we are not sure of the way we are going to handle the accounting part of the actual goods receipt.
Appropriate document type: GRN (Goods receipt Note (without value))
An ordinary case of quantity receiving is regarding checking, or servicing. For details on the type of documents issued when the repair process is finished, the relevant chapter on Service rendering will provide more information.
If we simply send back the Items to the customer, we use the Delivery Note without charge (‘DWV’), as described to a previous chapter. A transition is also available for this case:
Appropriate transition: 140. GRN=>DWV (Delivery note from Receipt note (without value))
Return Policy
Activating the Return policy in the Sale Return documents, you can apply business rules about if and when the return from a customer is allowed, for example like:
- Return check using a code change
- Definition of the maximum allowed number of days since buying for the changes to take place
- Support of special, customizable by the user scenarios of unacceptable returns, like for example the return of goods bought during a discount period
- Checking for returns in the same season of the initial buy
- Ability to overcome the above return checks for specific user groups.
If for some of the above an authority given to overcome the check, the process of authorization from the authorized users will have to be activated. This will take place if in the dialog coming up, an authorization request asked.
Selecting “approval request”, in the appearing dialog, must select the user to whom the request is addressed (
), type a comment, if needed, and select “request”.
The (logged in) authorized user will be notified then and, after providing the system with his own authentication details, the approval will be accepted and saving of the document will become feasible, while an on screen message will inform the user about the approval (or rejection) status.


Customizing information on the return policy
- Which trade documents it can be activated in
In TRADE documents through the “Activate return policy” field, either the document type has “Forecasts sign” => CLOSING (meaning credit documents) so it takes into account the “normal” item lines, or the document type has “Forecasts sign” => OPENING (meaning invoices, debit notes) so it takes into account the “reverse” item lines.
Configuring control types
A series of general parameters in the category “Document administration” make that possible:
Checking of NON-accepting return of items after a specific period of time
Returns=>01- Acceptance authorization by 1st User Group (Number of days). The number of days since the initial buy for which the right to overcome the check is valid for the 1st group declared in the next parameter. Setting 0 will disable the check.
Returns =>02- Acceptance authorization by 1st User Group (Group name). We declare the user group/s, (separated by comma, if many) which have the right to overcome the date range check declared in the previous parameter.
Returns =>03- Acceptance authorization by 2nd User Group (Number of days). Like in the 1st parameter for the second user group – different number of days.
Returns =>04- Acceptance authorization by 2nd User Group (Group name). Like the second parameter for a different user group.
Checking for required input of “changing code”
Returns =>05 – Check completion of initial document in returns line. If defined YES, the “alternative document” field will always be checked not to be null in the line of the returned Item. If it is a credit document, the definition of the alternative document in the header will be enough.
Returns =>06- Acceptance authorization upon non-completion of initial document. (Group name) The user group/s with the right to approve the return in a line with an empty alternative code or a non-valid code (non existing or of another customer etc).
Checking for return from a period of DISCOUNTS or another discount reason
Returns =>07- Return check for discount reasons from line field. This is where a line item field is defined where, during sale in case of a discount provision the DISCOUNT REASON is coded and input. When entered, the prohibition of certain “reasons” of discounts can be facilitated.
Returns =>08- Discount reason field content on non-acceptable return We enter the value/s (separated by comma, if many) of the above field at the initial sale document line, with which the value of the filed (declared in the previous parameter) will be compared to and in case the same one is found, the return will be prohibited.
Checking of Seasonality
Returns =>09– Check return in same season. A “Yes” here will activate the checking of the season declared in the item to compare it with the returning season. The season taken into consideration for checking, if the item has dimension management, is the season declared in the dimension pallet or in case no season found there, is the season declared to the item register.
Returns =>10– Acceptance authorization upon return in different season (group name); the user group/s with the right to overcome the check for returns in the same season.
Automatic return approval
If the user belongs to any authorized user group (from the above ones) with the authority to approve returns, the dialog for the user authorization will not show up and the return is automatically approved (with YES in this parameter). The default behavior is to always display the approval dialog (“false”).
Returns =>11- Automatic return approval to users belonging to authorized users group.
Check application methods
The checks activated during the saving documents and they function in an intercompany level.
This will actually mean that in case the customer has bought something from a store and attempts to return it to another (which monitored in another system company and not another branch of the same company) and if the return policy is being circumvented, this will be recognized if only the Items have the SAME coding.
If Inventory dimensions have been entered, all of the checks will be made for the returning Item with the same dimensions as the ones on the line of the sale document.
Credit Note
It is issued to cancel out the value charged by a previous Invoice, in case it was issued first.
For a Goods receipt Note
Appropriate document type: SCN (Credit Note from (after) a Goods receipt Note)
Appropriate transition: 117. SRN=>SCN (Credit note from a Goods receipt note)
This particular document is regarding always a specific quantity of items and cannot be used only for correct invoiced values. We never zero the quantity in it. The system (based on the proper customization of the document), if the user attempts to set the quantity to zero, will warn him for a possible misuse of the document:

If the credit document refers to particular sale invoice/s with which it should be «matched» in order to maintain a proper “balance ageing”, we can declare the document/s in the “Status” sub-page as “related documents”, using the icon
:
In the dialog appearing next, a search can take place to locate and use the related documents.
The ones chosen will be part of the automatic matching executed along with the document storing.
In order to not allow “outstanding quantities” left (so, not to affect the Stock Valuation process), the Credit Note must either generated by transition or entered by typing and linked to the Goods Receipt Note afterwards, through automatic quantities matching process. In order this to be executed correctly, the transition “117. SRN=>SCN” must be defined to the “Origin transition rules” field of the document type SCN.


Sales discount credit Note
Appropriate document type: SCV (Credit Note – discount value)
It is issued for the retrospective discount provision to the customers after an agreement for certain commercial goals has been fulfilled or for a specific invoice if the payment settlement was observed or rarely for fixing an Invoicing mistake (higher prices than what had to be given). If the Commercial agreement is monitored into the system, a mass generation of credit discount documents can be generated and issued to the customers. In the display of such a document, the column of the quantity will not be visible in the line grid layout since it has no effect on the system.
If we are not aware of the Items to which the discount is targeting and we enter the Credit document by using a general Item, then the Sales Turnover by Item will NOT be affected. Therefore, in order to have a correct Turnover per Item and Customer and Stock actual cost value, the discount credit invoices strongly recommended to contain the particular Items for which the discount is given.

Discount for a specific Invoice
If the Credit document refers to a specific Invoice, to save the Items from being typed in again we are able to use the foreseen transitions:
Appropriate transitions: 121. SNV=>SCV (Discount Credit note from Sale Invoice-Goods delivery Note)
122. SIV=>SCV (Discount Credit note from Sale Invoice)
In both cases, the Credit note is generated with a zero (0) value so that it will have to be recalled and the discount value will be entered.
Credit Note for VAT exemption
In case that after the issuing of a sale invoice, a certificate stating a VAT exemption is submitted by the customer, then, a specific credit invoice will have to be issued. In this, the invoiced document lines must be contained with their initial net value and VAT value as “normal” lines and also, all these lines must be contained a SECOND TIME with the same net value and a ZERO VAT value (through a specific for that purpose VAT category – zero) as “reverse” lines. This is necessary in order to update the correct General Ledger Accounts (when analyzed by VAT category). The customer credited with the difference value, due to the VAT.
Appropriate document type: SCN Credit Note of Exempted VAT (Sales)
For the automatic generation of the document, there is an automation available in the documents «SIV» and «SNV», as well as at “Sales/Revenues” list, which using as a source the Sale Invoice will generate the "Credit Note of Exempted VAT”:
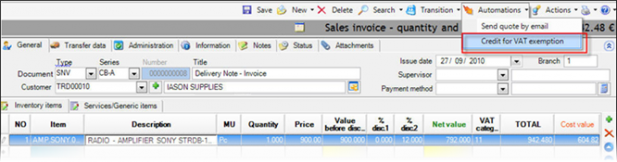
After the series and issue date is entered to the appearing dialog,
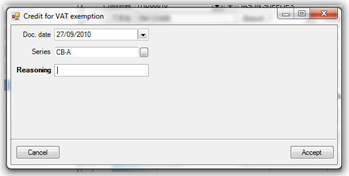
...the document created and a credit of VAT amount produced to the customer:
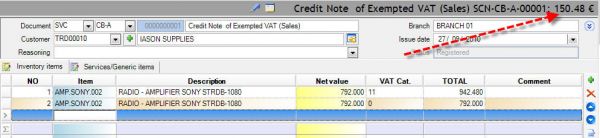


How do we see the results of issuing Credit notes?
| View | Content | |
|---|---|---|
|
|
Sales/Revenues | List of all Sales documents concerning quantities or values, where the credit documents will negatively update the columns «gross turnover» and «net turnover». |
|
|
Revenues Journal per VAT rate |
|
|
|
Inventory records |
It presents all the stock quantitative and value transactions. The Credit notes update the columns of “Sales” or “Exports” generally (depending to each format):
|
|
|
Item’s return of sales |
The list of return transactions is available in each Items’ administration form:
|
|
|
Customer’s statement |
In the Customer’s statement (of accounting nature) with detailed transactions and progressive balances, the Credit Notes are updating the Credit, except if the “trade accounts update from "reversed" transactions with NEGATIVE entry of the same sign (D/C)” company parameter is activated (set to “true”) and thus, will appear as negative in Dedit. The same update (but summarized) also occurs to Customers Trial Balance. The Statements and Trial Balances “with turnover separation” give the information of the net and gross turnover information where the credit notes act negatively, as expected:
|
|
|
Accounting |
An accounting entry is created to the Customers, Sales and VAT accounts and it updates the Accounting journals, the Account Statements, the Trial Balances etc.
|


Receipt of a destroyed item from a customer
In case the customer returns a defective or destroyed item which normally bought (and INVOICED), we must issue a Quantity receipt document using the return sale document type:
Appropriate document type: SRN (Goods receipt Note by customer)
- In case we replace the Item, we are going to send it off with a Delivery note
Appropriate document type: SLN (Goods delivery Note)
Appropriate transition: 141. SRN=>SLN (Goods delivery Note from a Receipt Note)
- If no replacement is going to be taking place, a Credit note will have to be issued :
Appropriate document type: SCN (Credit Note for a Goods receipt Note)
Appropriate transition: 117. SRN=>SCN (Credit Note from Goods receipt Note)
In case our customer returns us a defective product which he delivered but NOT invoiced, then ONLY a quantitative return document will be necessary:
Appropriate document type: SRN (Goods receipt Note by customer)
Appropriate transition: 142. SLN=>SRN (Goods receipt Note from a Delivery Note)
In case our customer returns us a destroyed Item which he had received for checking/testing by a Delivery note without charge, then a Quantity Receipt document must be issued:
Appropriate document type: GRN (Goods receipt Note (without value))
Appropriate transition: 139. DWV=>GRN (Goods receipt Note from Delivery Note (without value)
Following that, we might have to replace the Item with a new Delivery Note with no charge:
Appropriate document type: DWV (Goods delivery Note (without value))
The above actions are concerning the transfer to the customer. As for the product delivered, there is the case back to the supplier or may not be possible to return or consumed by another method, so will follow the registration book memo “write-off” of the product:
Appropriate document type: IWO (Materials write-off)

The write off will update the stock quantity and cost in the “Exports” column. If a particular accounting account is entered at header, it will be posted with a credit of the Sales Account of the Item.
Returning defective item to the supplier
As soon as we receive defective items from the customers, we are able to return them to the supplier and receive replacements or a credit document:
Appropriate document type: PRN (Goods delivery Note to supplier)
Item replacement
Appropriate document type: PLN (Goods receipt Note from supplier)
Appropriate transition: 124. PRN=>PLN (Goods receipt Note from Delivery note to supplier)
Credit invoice
Appropriate document type: PCN (Credit note for a Delivery Note)
Appropriate transition: 106. PRN=>PCN (Credit Note for Goods Return to Supplier)
Before deciding on the workflow to follow, it is recommended to be informed about the various types of Shipping to a supplier, by the corresponding Purchases Chapter.
Selling items of special categories
Set/kit
The item sets can be created for two distinguished purposes and different functionality during the invoicing process.
- Easy entering of many Items sold together (Dynamic set)
- Offer of many items in a “package” by special discount/price (Static set)
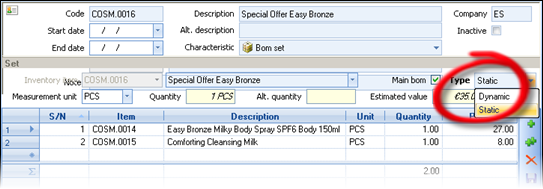
During entering a set Item in the lines of a document, the parts of the set will be displayed below the set line, which will be colored differently:

The set lines are not taking into account to the calculation of the document’s totals (payable amount) and they do not participate to Ledger posting. They are not actual Inventory registers whereas their parts are actual Items in stock. Especially during Sales, it will be produced sale transactions for them, to give turnover statistics. In most statistics they are not taken into consideration and a relevant criterion is not available. In a few reports only, like “Item sales per customer”, a specific criterion exists (visible only to “more criteria”) with a default value that does not include set items, since if they are included, a double turnover will be generated for the involved Items. However, the user could ask only for set items to be reported separately.
As to the behavior during issue a set-item to a document’s line:
If the set is dynamic, the user can alter the items contained in the set and not the set line fields (where the data of lines of their parts are “aggregated”) with an exemption for the Quantity (so that the user could declare the required number of sets). The system will propose prices and discounts in the lines composing the set, only. This way, if the set is taking part in a pricelist, this information will be completely ignored since its data calculated by the “child” rows of its parts.
If the set is static, the user can alter only the set and not any part of the set. In particular, the fields available for editing in the line “set” are the quantities, the price, the discounts and not directly the value. To the lines of the parts the values of set are “distributed” based on a participation ratio of each one to the set. The system will propose prices and discounts (apply pricelists etc) ONLY to the line of the set Item. This way, if the parts of the set belong to a particular pricelist, this information will be completely ignored, and the lines will obtain their values proportionally by the set line. In the static set, if any line (set or part) deleted, after a warning, all involved lines will be removed.


Color and Size
The color-size functionality during sales is quite alike the one valid in Purchases:
- Line handling with a quantity analysis of colors and sizes in a matrix using the F12 key
- Color and size handling on a line level using “color” and “size” columns
- Color and size handling through a matrix with quantities and prices, while at the same time keeping a distinguishing Item line for every color-size combination with Alt-F12
- Copying color-size from the previous line using Shift-F12
To activate the possibility to define prices per color/size, must set the relevant company parameter, otherwise, it will be used the prices of Item itself.


Lots and Serial Numbers
The Lot handling features as well as the serial numbers in the Sales, are alike the ones valid in the Purchases. In this section we are going to be looking at the feature of the automatic lot recommendations or serial numbers for sale (and generally export) based on criteria.
In the “Item control profile” (in the Sales lines), views can be defined (with the required sorting) and their automatic execution can be defined by checking the appropriate checkbox option, beside these fields. If not, the user will have to call on the automatic selection process manually (using F8 key).
If the lots participate to configuration of pricelists this must be declared here, to the “lots define pricing/discounts policy” option field. In a typical case, the re-apply of pricelist or invoice policy, just because Lots added, is useless. E.g. if a user has given a particular discount and the lots are automatically selected, the discount will be remain as it is, unless the setting has been activated, so it will be recalculated.
For the serial numbers, could activate the checks of the Item’s control profile, for compulsory use only of “available” S/N (field in the Serial number) and for verification of S/N’s “location” to be the current W/H from which the delivery is taking place. Also, could define to select only S/Ns of specific “status” (field of the Serial number).
During the sale of a serial number it is possible to activate the warranty for the customer. This will take place by using a specific document, which will also update the starting and ending dates of the warranty in the serial number, in order to enable checking for Service procedures:
Appropriate document type: WSN (Warranty note of serial numbers)


Bailment
An example of bailment is the package containing goods that consist subject of the company’s trading process. In general, items that suppliers provide because they are necessary for carrying the goods, usually function as bailment. Such a case is the bottles used for drinks and soft drinks.
This kind of goods are returned to the suppliers and, on sale, sometimes are also returned by the customers, thus their value will not be paid but returned. This means that it is required to monitor the quantities and values which are “pending” towards the suppliers as well as the customers.
Customization
Those Items (bottles for example) must defined as of type “Bailment” and the sub-page “Related Items” can be used to define their relation to other stock Items that depend on them.
This definition will allow to configure an automatic way to ensure that the transport of all “linked” items would become at the same time.
For example, the bailment item “Empty Bottle 330ml” will have its relation defined with 2 Beers with the corresponding codes and a quantitative relation 1. As a result, whenever a “Beer” of these two is entered, the item “Empty bottle 330ml” will come up as well.

By entering those two Items as relative to the “bailment” Item, the “reversed” relations are produced into those items, automatically:
Finally, there must be done a specific configuration in the Item’s control profile for these items. To the “Binding relationships administration” part of the dialog:
At “binding relation type” field, must define the relation type code for which the automatic generation of bailment item codes is required.
At “auto-apply of relation” field, must define WHEN this automation would be executed. If we want the auto-produced lines to be visible to the user, we select “during data entry”.
If we need the amounts caused by bailment sale to be subtracted from the customer balance, during the Credit Control, then, in the Credit Control Policy used, we could use the “User defined limits”. The pre-configured Field Property Profile “ESBailmentBalance” calculates and stores to the “amount 1” header field the current claim from bailment. After activating this to the appropriate document types, at the “expression editor” dialog of Credit Control policy, could use: 1) the customer’s current accounting balance, 2) the current bailment balance through “amount 1”, 3) the current document’s payable amount, and 4) the current document’s bailment value in order to form the requested actual balance for checking.


Result of this customization
- During the sale:
As soon as the Item “Beer” typed in, the Item “Empty bottle 330ml” will be coming up in a quantity matching the quantity of the source Item.

If we add a new Item containing the same item of type “bailment”, the quantity of the bottle will be raised (and will not created a new line).

Monitoring the turnover and trade account balances
Special trial balances can be used as well as customer and supplier statements, in the corresponding menus, for example Entities/Accounts receivable/Account statements/With bailment analysis:
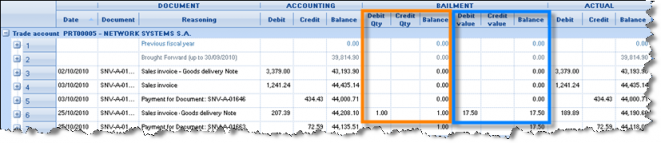
Also, in menu Entities/Inventory/Stock control see the “Bailment per trade account” report that provides information on the turnover as well as quantitative information by trade account and item:

Finally, the dialog with the financial review of trade account, displayed, either by selecting
This is activated by a company parameter in the customization, at Category: Document Management. The default value is NO, so the dialog does not contain this information part.


Items with a recycling tax
Certain items charged with a recycling tax, which included to the final retail price, while, during the wholesale the charge must mentioned separately by piece. For the specialized Recycling companies of electric and electronic equipment, there are specific Sales lists analyzing those data. For the automatic calculation to take place as well as the document printing and the sales listing, the customizations described below should be done:
Customization
- Special accounts
For every different Item category, the following should be created:
- A special account with the following data, to be used at Wholesale and Purchases:
| Type | Charges |
|---|---|
| Depends on | Item |
| Calculation method | Stand alone line |
| Amount type | Price |
| Vat category | 23% |
For the fields “Price” and “Value application quantity”, two cases are possible:
Α. If the withholding can be set directly for a quantity like the Weight, then:
| Price | The amount |
|---|---|
| Application quantity | Weight |
Because the recycling fees are usually expressed into tons and the Item weight is usually expressed in kilos, the price would be expressed per kilo (with 6 decimal digits available).
Β. In case the withholding per piece is specific and calculated per item code and we are looking for a way to avoid the weight monitoring, then a user defined field can be used for this reason, for example “Number 1” followed by the required two actions:
- In the field property profile applied, a line should be added like the following:

This is how we can transfer to the Item line of the Item, the amount per unit (which is the “Amount 1” of the line, copying the “Number 1” of the Item).

In the special account form, define the following:
| Price | lineItem.Amount1 (through the key ) )
|
|---|---|
| Application quantity | Packaging quantity (this means “the quantity in the measurement unit of the line”, for example the piece) |
This implementation will ensure that even if the setting in the Item is altered, in the documents there will be an explanation of the calculation of the recycling fee and thus, it can be recreated if necessary i.e. while modifications done.
Make sure that enough decimals have been set in the general parameter managing the decimals of the numeric fields (like user definable numeric fields).


A special account for use in the Retail sales with the following data:
| Type | Charges |
|---|---|
| Depending on | Item |
| Calculation method | Incorporate into lines |
| Amount type | Price |
| VAT category | 23% |
This way the calculated amounts of the recycling fee will be included into the item line value.
Alternatively, a “stand alone” special account can be used, in this case though, the retail printing forms (if used) must be altered in a way to display the recycling fee incorporated to the price of each item.
- A special account group, containing the above special accounts.
Document types
In any document the recycling fee is applied, the specific special accounts will have to be set as acceptable in the “Charges/Withholding” sub-page.
In all retail documents, we set all the ones “incorporated in lines”, while in the Wholesale documents, we set the “stand alone” ones (depending if they are sales or purchases oriented).
Items’ Customization
For the Items subjected to the recycling fee the following must be done:
- The Special accounts group must be selected in the field “Charges Group”. This can be done through the global modification functionality of views. For example, in all of the “Electric appliances”, the special account “Electric appliances charges” group can be updated, after its creation.
- If a charge per piece is in effect, in the numbering field used for the “Special account”, the price must be entered in the “Number 1” field.
- In case the recycling fee has been set as a particular price depending on weight, then in the Items of that particular category, the weight measurement unit must be set. Also must define the specific relation to the main unit, e.g. if 7 appliances weigh 1 ton and the amount of charge is set to the ton, then the relation will become 1MU = 7 MMU and MU=ton.
Document printing forms
In the wholesale, the Price per piece of the recycling fee must always presented as a separate line along with the net value, the VAT value and the total value. In the retail sales, the fee must be incorporated to the net value and the total value of the item (so, in the price too). That information can be added in the printing forms through the functions:
ESSAL (<special account type>, <account code-criteria>, <field>)
Returns the value of the field set in the 3rd parameter from the special account created by the current line item which belongs in the 1st parameter, its fee matches (like) the criteria of the 2nd parameter. For example:
ESSAL (10,”RECYCLEFEES*”,”Code”)
ESSAL (10,” RECYCLEFEES*”,”Description”)
They return the code and the description of the special accounts correspondingly (actually the first of them, in case they are more than one) which have been created by the current line, which are charges (type = 10) and their code begins with RECYCLEFEES.
ESSALR (<special account type>, <account code criteria>, <field>)
Returns the value of the line of the special account given in the 3rd parameter, reduced as to the net value of the special account contributed by this line. This way, we are able to get the participation of the particular line Item in the net value, VAT value and total value of the corresponding special account line, like the following examples:
ESSALR (10,” RECYCLEFEES *”,”CurrencyVATValue”)
ESSALR (10,” RECYCLEFEES *”,”CurrencyTotalValue”)
Printing Customization of EEM Items
Prerequisites for those printouts, concerning “Electrical equipment” material, are:
Defining the relevant company’s parameters of category “Printing parameters of Items with recycling fee”:


In which Item’s field is the brand monitored.
In which Item’s field is the category monitored, based on which the Sales report is calculated.
How is the “weight per piece” monitored. We enter either one of the user definable numeric fields (number 1-10) or the weight unit or the alternative unit.
In the relevant criteria of both reports (available to menu “information” of Entities/Special accounts), the special charges account monitoring the Recycling fee should be entered
Those special accounts must be declared to be “depending on the Item” and at the same time, in the Items subjected to this fee, a relevant “Charges group” must be entered.
The EEM items should have the “piece” as main measurement unit.
Result of this customization
Retail Receipt
For each Item, the charge calculated based on the “Weight” field:

Checking the charges lines from the “Freights/Reductions” sub-page, we can see the lines distributed to items:

To the totals, the recycling fee is included to the Net value (calculated by item lines).
In the example, “net” prices have been used, which do not include any VAT charge, for comparison to the next example, though the same functionality will be valid in the usual case of prices including VAT.


Wholesale Invoice
For each Item, the charge is calculated, but not distributed to items:

At totals area, we can see that these charges form a separate “charges” amount:



Sales reports
From the menu path: Entities/Special accounts/Information can select the printouts, addressed to the Recycling companies and concern the particular items’ categories of the EEM.
Cancellation Note
The cancellation note is not based on a particular document type, but every time to the type of document getting cancelled.
This function found to the menu “Actions” of the horizontal toolbar of EVERY document:

 Selecting it, a dialog appears for defining the Issuing date, the document series and reasoning.
After a confirmation, a new document is produced with the details and data of the one getting cancelled, reversing ALL of the results in the cancelled document. This way, if for example an invoice that contains cash payment cancelled, the sale entries of all sub-ledgers will be cancelled as well as the cash receipt entry declared into the same document.
In the document lists, the cancelled and cancellation documents are displayed with specific icons, while in the cancelations; the code of the canceled document is also displayed:

To the cancelled document form, a specific icon indicates this status:

The cancelation procedure is regarding:
- The official tax documents where the cancelation can be done under special circumstances, for example in the same day and if the recipient has not gone and take the printed document and the goods.
- The internal accounting Notes, the corrective entries as well as documents displaying process results, many of which do not affect official data (i.e. orders, reservations etc). The cancelation is available in all of the documents in order to allow the easy correction of any mistaken entry, without the need for new document types to be used and customized.
For every document type, the “prefix” of the cancellation series, as well as the numbering series with the “Cancellation” property, is defined.
In any Books, Statistics, Balances, Data analysis cubes, the cancelled document is applied, the effect of the cancellation document is exactly reversed (the same data with a reverse sign).
Especially as far as the matching processes are concerned (“quantitative” that affect the fulfillment level of Orders routing etc. as well as the matching between debits and credits of trade accounts that affect the balance aging), the cancellation documents are NOT taking into account. This way for example, if a Goods Delivery Note that produced by an Order would be cancelled, the Order will become automatically “pending” again. If a Cash Receipt Note connected (matched) to an Invoice would be cancelled, the Invoice will then again appear in the unsettled invoices (open items).
Finally, cancelled and cancellation transactions do not participate to the Stock Valuation process, therefore, documents dated in a prior “stock costing period” should NOT be cancelled. In other words, cancelled and cancelling documents must belong to the SAME “stock costing period”.
Factoring
The factoring of invoices and whole contracts, by which we can receive as financial grant from the Banking factoring agency the value of those claims (by withholding certain fees), can implemented into the system by monitoring specific accounts and run specific processes, to be able to obtain a full overview of the claims and correct financial/cash balances.
Definition of a special accounting category «Debtors – claims in factoring» as well as declaration of this category to the relevant company’s parameter:

For every customer, claims from which we will transfer to the factoring banking agency, must open a new symmetric debit register with the same person as the customer and accounting category, the one specified to the above parameter. It should also be declared the proper G/L account, for example 30.80.
An easy way to do this is to create the new account with “New by copy” and choose (
) the same Person for the customer, otherwise a new Person will be created. The accounting category should be changed and afterwards, could select him in the Customer list, and change the field “Type” by global modification, to “Debtor”. From now on, this will be visible not in the customer list but in the debtor list.

In the TOC (Account credit balance offsets) document type, starting a new series titled “Transfer claims to factoring”
The factoring agency should be opened as a Creditor, with a G/L account of short term Obligations (e.g. 52.00).
Transfer of claims
From the sales document list, by choosing the documents to be transferred, even of different customers or just one or all invoices of a particular contract, and select from the horizontal toolbar, “Actions/Transition” one of the following transitions, configured for this case:
Appropriate document type: TOC (Account credit balance offsets)
Appropriate transitions: 149. SNV=>TOC (Transfer of customer’s receivables to factoring)
143. SIV=>TOC (Transfer of customer’s receivables to factoring)
The result will be the generation of as many documents as the customers. In each of them, in the header will be placed the credited trade account (customer) whose unsettled invoices will be “matched” (reset), while in the lines the corresponding factoring debtor will be charged by analytic lines for every invoice with the proper expiration dates (based on the receivable forecasts of each invoice).
During accounting posting, it will be created a credit to the customer and a debit to the factoring G/L account.

Funds receipt by bank factoring agency
By transferring the Invoices, the bank will supply the amount of grant:
Appropriate document type: CRS (Cash receipt (from suppliers))
In the document header, it will be entered the Creditor opened for the Bank, while at the lines of the document should be entered the company’s Bank account, where the funds were deposited. The customer register will not be affected, and neither will the debtor’s register. This document will be presented in the payments list as a “negative payment”. The available funds will be increased (to the Bank’s account), while the Factoring agency will have a new credit transaction. In the accounting the following entry will be posted:


Expenses charged by the factoring agency
The expenses or commissions charged by the bank will be issued by one of the expenses documents:
Appropriate document type: XPI (Expenses Invoice)
In the header, put the creditor (Bank) and to the lines the relevant expenses. To the same transaction may enter the payment for crediting the bank account (liquidity). The customers and the corresponding debtors are not involved in this process.

The accounting will be updated as follows:


Payment of transferred Invoices
The payment of invoices, since it is not our claim any more, at the same time as the debtors credited must debit the creditor “Bank factoring agency”.
Appropriate document type: TOD (Account debit balance offsets)
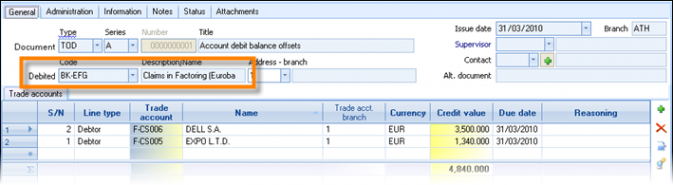
The results of this transaction are:

- In the Accounting, there will be credit of the debtors (“symmetric” to our customer registers) opened for monitor the claims in factoring and debit of the creditor account opened for the Bank:

The creditor’s (Bank factoring agency) statement will contain a debit, reducing the balance
The debtors’ statement will contain a credit, reducing the balance, whereas to the outstanding receivables, the particular invoices are now matched (settled).
How the matching of the customer payments will be correct?
In order to have an exact matching of invoices, could enter the Invoices’ numbers (one line per invoice) as to the TOC document (while transfer the claims) as to the TOD document (while close the claims and the payments declared in essence) to the “Alternative document” column. This element will be used by the automatic matching process (between open and close items) instead of “FIFO” method. Especially to the TOC document this information already exists due to the transition used (to produce it from the source invoices).
Another view that allow to control the unsettled claims, transferred in factoring, per month, is the Cube Balance Aging (Business Snapshot/Liquidity review/Ageing of accounts (receivable/payable)).
Payment by cheque of transferred Invoices
For the correct update of all of the subsystems in this case, three transactions must take place:
Receipt of cheques by: CRC (Cash receipt)
The debtor, the one with the transferred claims, entered to the header and to the lines entered the cheque/s. The result will be a credit of the debtor (balance of the account) and an open item produced for the payment of the cheque at the proper expiration date, so the “commercial” balance of the debtor will not be affected.
At cheques’ expiration: MRN (Mass receivable notes payment)
To the header the Bank (liquidity) account given and to the lines, the paid (expired) cheques selected. As a result, there will be a Credit-Debit balancing to the debtor’s “commercial balance” and a debit to the liquidity Bank Account. What must now follow is a payment of the factoring agency:
CPS (Cash payment)
With this entry, the cheques’ value will be transferred to the creditors’ billing. To the lines of this document must put the liquidity account set as the “payment account” in the cheque. That account will be credited.
All the above means that what will happen with a single document (TOD) in case of a bank payment, will take all these three entries to complete the process, when paying by cheque.
- Could have opened a liquidity account for the loaning and set it as a payment account in those cheques, so accounting-wise everything would be correct without the need for the last payment (CPS), in this case though the Factoring agency account would NOT have the right balance.
Cooperation with many Factors - claims monitoring per Factor
If we are working with more than one Factoring agencies (Banks), then more Debtors must to be opened per Factor.
Each one of them will have to belong to a different accounting category. This is not lead to different G/L Accounts, but must be done , in order to make possible the automation of transferring the claims through the preconfigured transitions for this purpose:
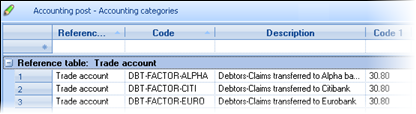
In the TOC document, instead of one document series, must open separate series for each factor. This document is an accounting note (and n a taxable document) and its series can be opened freely according to the needs.
Finally, to the two company’s parameters concerning the process will have to be declared, all the accounting categories (and not just one) of all factors, separated by comma, and all the corresponding document series, with the same order.

At the above example, the 1st accounting category concerns Alpha Bank for which the series “01” opened and the 2nd accounting category concerns Euro Bank for which the series “02” opened. These accounting categories have been declared to the “accounting category” field of the Debtors opened to monitor the factoring. If, some invoices of a customer transferred to one bank and some other invoices to another bank, the “symmetrical” debtors that should be created are TWO, one for each bank.


What is it we succeed through the above customization?
During the transition ”Transfer of customer’s receivables to factoring” creating the document TOC, the user selects the document series and through this, the system recognizes which debtor register will place to the document lines: the one with the corresponding to the series “accounting category” and the “person” of each invoice’s customer.
Following this, can view the transferred (unsettled) claims per FACTOR through e.g. the OLAP “Ageing of accounts receivable” using grouping by accounting category.
Pricelist customization
The needs for pricing and discounts proposal on sales are not standardized but are dependent on the size of the company, its organization, the type of market it acts in, the profit margins, the agreements and contracts made with the customers etc, and all these are factors which form the commercial policy of the company. The system provides the proper functionality to cover the wide variety of needs for every installation.
Basic prices
A simple pricing policy can be covered through static fields in the basic entities of the Item and the Customer, while more complex pricing policies require the use of the pricelists.
Item prices
In the Item’s register screen, in the “Identity” sub-page, 5 available price fields can be found. Those are the Wholesale, Retail, and three free price fields.
As to which of the five available prices will be proposed during sale, it is defined at the customization of the document type in the field “Default line price”.

Item prices per dimension
In case the sale price is defined not only by Item, but also for example by color, the new variety of values will have to be defined in the “Prices by dimension” sub-page of the Item. Using the icon
«Dimensions Development», there are created all of the possible combinations of size and color based on corresponding “pallets”. The price/discount entered here will be proposed during invoicing, while for the combinations not found, the defaults come up from the item itself.
To activate this feature must set the company’s parameter “Activate "Prices per Dimension" in Items” of Category “Stock dimension functions”.


Prices per zone
In case of a simple pricing policy where the company has limited needs for monitoring different price per customer group, the pricing zone can be used. The pricing zone is defined in the customer’s administration screen at “commercial terms” sub-page and is a choice among the 5 available Item sale prices.
Assume that a company classifies customers into small, medium and large and diversify the sales price of the goods as categorization.
In this case, you need to use the 3 by 5 kinds of prices available, for example, the wholesale price for sales to large customers, the price 1 for sale in medium-sized customers and the price 2 for sale in small-sized customers. To each customer must determine the zone he belongs. This will be taken into account when billing for proposal of the appropriate price, regardless of the general proposal of the type of document.

VAT included in prices
In case the price includes VAT charge, like at retail prices, the option “With VAT” must be activated, beside the price field. The VAT part, calculated in the “gross” price is thought to have been based on the VAT category of the Item and of the company’s headquarters VAT regime. This way, in case this price used for a customer of a different VAT regime, a de-taxation take place, applying the new rate for result in the “proposed price”.
Basic pricelist
The basic pricelist contains the prices for all Items and Services. It can be used as a reference to create “discount” pricelists as we’ll be seeing in the following chapters.
The use of pricelists recommended for the pricing compliance (compared to the use of Item price fields), since the pricelists contain significant advantages like:
- Historical data
- Variety of price differentiation criteria
- Abilities for easy, mass re-adjustment
Defining and processing of pricelists will take place through the menu “Tools/Customization/Invoicing policy”
| Pricelist defining |
This is where the basic pricelist data is set, like the code, description, type, etc. The rest of the fields presented in detail to the following, during examining various scenarios of use.
|
|---|---|
| Process Pricelists |
This is where the lines of the pricelists entered. Necessary data to consider a line valid is the pricelist code, the starting validity date, the Item’s pricing category or the Item code and of course the sale price.
|
| Toolbar |
The processing form designed in a way so that the toolbar will support as the easy data entry as a number of useful use-cases for readjustment/processing the already existing pricelists elements.
|
| Full pricelist line |
Selective management of particular pricelist lines can be made possible by proccessing the “Full line” of the pricelist. Double clicking will enable the form display.
|
| Prices per branch |
In order different sale prices to be given per branch, new lines will have to be created in the basic pricelist where the valid branch will be declared. This can take place by using the icon
|
| Prices per customer | If for some customers a special pricelist is in order and since it is defined and customized as mentioned before, it will have to be declared in the field “Pricelist” of the customer register. |
| Prices per customer category |
Sometime the prices are organized and defined per customer category, for example, retail, wholesale etc. In this case as many pricelists will have to be created, as the categories of the customers. For this purpose, must be used the ‘pricing group” field of customers.
During invoicing, if the customer does not have a particular pricelist declared, the pricelist of his “pricing group” will be automatically chosen, otherwise the pricelist of the customer will overrule. Thus, there is no need to analytically enter the pricelist of customers one by one. |
| Prices in foreign currency |
In order to create a pricelist in foreign currency it will have to be declared in the data defining the pricelist in the “currency” field. If that is completed, then by the pricelist processing, the currency entered in the lines will need to be SAME as the pricelist or not entered at all.
During invoicing, the calculation of the Item prices will take into consideration the currency of the pricelist. In particular the following cases are supported:
The conversion of the prices will be done by using the currently valid exchange rate in the day of the transaction. This means that the exchange rate tables will have to be constantly updated by the current valid exchange rates. |
|
During the Pricelist processing as many lines will have to be produced, as the combination of the color-size combinations differentiating the price. Through the Multiple entering action (
Alternatively, the table of prices per dimension existing in the items can be used. |
| Prices per Package |
In case the items monitored packages (units), the ability to declare a price per package is available for use. For example if we are selling an Item in pieces but also in a 12-piece package, the choice for the 12-pack to follow the piece price is available, as well as the possibility for the 12-pack to have a fully different price non-depending on the single piece price. In order to create this kind of a pricelist, every line will need to have a price per packaging unit of each Item. During invoicing the pricelist line matching the measurement unit of the Item line in document, will be in effect, otherwise, it will be proposed a price from another line or from the item register. Any pricelist line that does not have a unit, its price considered to concern the main measurement unit and if, the unit of the Item line in document is different, a conversion of this price will be done, based on the relation of item’s units. |


Discounts on the basic prices
As to the discounts, it may be in force either a simple or a more complex policy of the company. In this chapter, it will be examined some ordinary scenarios and the way they should be implemented.
Discount fields
There is the possibility to assign discounts on top of all base prices. This can be done on the basic entities of Items and customers.
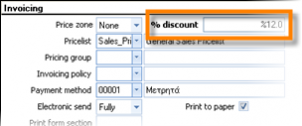 Recommended (fixed) customer discount

In the customer’s administration form, can define a % discount thus, during invoicing, this discount will be proposed to the “%discount” field of document header. The % discount of the header, according to the pre-configured setup of document types, will be transferred to the % discount1 of the item lines.


Recommended (fixed) item discount
In the Item’s administration form, the «%discount» of the Item can be defined and transferred (according to the pre-configured setup of document types), to the % discount 2 of the Item’s line, during the sale.


Discounts based on quantity
The discount policy, which must give a percentage discount on the prices of basic pricelist, according to sale quantity, implemented through “discount pricelist” using quantity scales. Select ”Define Pricelists”, to create a new pricelist:
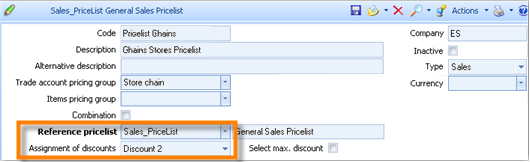

Assignment of discounts: This is where the field, on which the discount is applied, can be chosen. It can be applied directly on the price (the discount will reduce the unit price), or to be placed on one of the three discount fields (to be visible in a discrete field).
Reference Pricelist: Choose as a reference pricelist the basic pricelist (that determines prices). The pricelist will act successive with the discount pricelist.
In the «Pricelist Processing» as many lines will have to be created as the quantity scales. To the “from quantity” field the starting quantity is declared while the “up to” quantity is recognized from the starting quantity of the next line. During the invoicing, the % discount is automatically chosen with its maximum quantity compared to the sale quantity (equal or less).
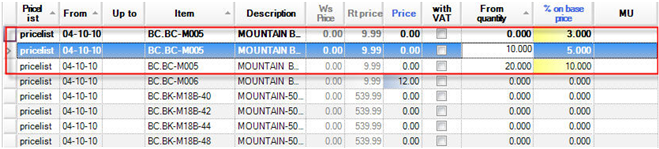

It is reminded that for an easy creation of the lines, the action of the multiple entries can be used using
.
In the area of the dimensions, apart from the pricelist and Item, so can the starting quantity of the scale be used.


Discounts per item category
In several occasions, discounts provided for large Item categories. In this case, it is not required to create analytic pricelists containing all Items. Cumulative pricelists can be created per Item pricing group. To make this clear, we are going to examine certain scenarios:
Different % discount per Item category
In the Item’s administration form, the pricing group field must be defined.

A new discount pricelist is set and we create (“pricelist processing”) as many lines as the item pricing groups. During the invoicing, the discount percentage will be applied in all of the Items that belong to the chosen group.

If there is any pricelist line for the explicit item, THIS discount will be applied instead of the pricing group’s discount. So, the two functionalities (discount per item, discount per group) could coexist into the same pricelist.


Different % discount per item category and additional discount per customer category
In this case, we need an additional pricelist acting additionally to the previous one. This way we will not require maintaining the same information in every pricelist.
Assuming that we have set a pricelist containing the prices and discounts for the Customer pricing group “Store chains”. In this pricelist, we provide a 10% discount to all items belonging to the pricing group “Beer”:

The customers of another pricing group (“multi-store”) must receive an additional discount 5% only or the same items’ group/s and we do not wish to repeat the definition. Additionally we want, if the pricelist changes (e.g. for the previous customers’ group “store chain” the discount increases), the new discounts to be automatically valid for the customers of this group (“multi-store”) as well, without any additional user action. Therefore, the pricelist of the two customers’ pricing groups must be “connected”.
So, we must create a pricelist using the reference pricelist feature.
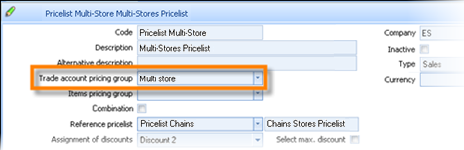
...and in that, we define only the additional discount:

The reference pricelist will act super imposingly in this case, meaning that it is examined => giving a result => If another pricelist is in effect it will also give a result => and this process is continued until the process stops when a pricelist of a PRICE type found. Τhe % discounts of all lines will be applied additionally in the field they affect. Τhis means that if all the superimposed pricelists assign the field “%” in “Discount1”, the final result will be the adding all percentages in that field (in the above result, the items of group “Beer” will have a 10% discount for customers of group “store chain” and a 15 discount for customers of group “multi store” (displayed to the “%discount 2” field of the document line).
If we were declared the “discount 3” field to the “Multi-store” pricelist, the “discount 2” field to the “Store-chain” pricelist and “directly to price” to the “general sales” pricelist (that contains the initial sale prices) then, during invoicing, we would have the following result:
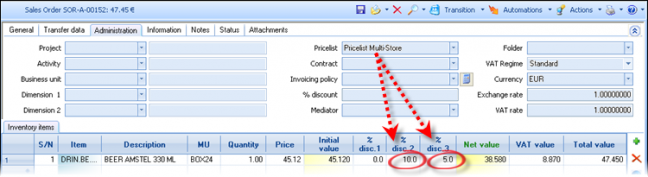


Discount pricelists giving to the customers of a “vertical market” the MAXIMUM discount for the items of this market and REDUCED discounts for items beyond their objective.
For example, in any of the following “markets” there are three (3) pricing groups: retail, wholesale and super wholesale. In every customer or group of customers, a different combination of those prices can be made.
| Vertical market | Discount percentage over pricelist price |
|---|---|
| Furniture | Super-Wholesale |
| Wholesale | |
| Retail | |
| Bath items | Super-Wholesale |
| Wholesale | |
| Retail | |
| Kitchen Items | Super-Wholesale |
| Wholesale | |
| Retail |
In order not to define discounts for all the combination, the implementation of such a policy is achieved through the use of type “combination” pricelists. In particular:
Ακρόαση
Φωνητική ανάγνωση
Λεξικό - Προβολή λεπτομερούς λεξικού
- We use ONE pricing group X Y Z in every pricelist (Retail, wholesale, super wholesale):
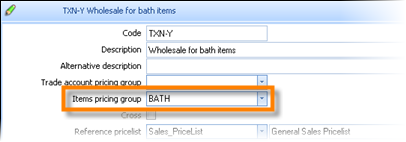
Following this reasoning, we create nine (9) pricelists where the discounts analytically defined per Item or by only one line for every pricing group.
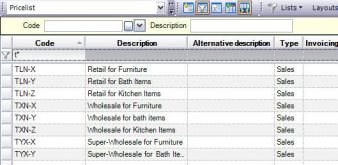


- The next step would be to create the pricelists combining some of the 9 discount pricelists. For example, to the customers with “Furniture” as their main activity, we sale furniture in Super-Wholesale prices, while for all the rest items we sell in “Wholesale” prices:
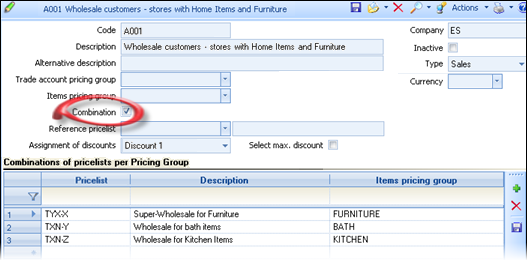
It regards a type of “Bill of material” pricelist, which does not have its own lines, where we enter all of the actual pricelists; those that we need to apply during the invoicing.
The same functionality obviously could be achieved if in every pricelist, we would define all discounts for every item group, but that would have a large maintenance cost, especially when we get:

Large number of items’ groups
Different discounts per branch or
Date discount limits or
Scaling discounts based on quantity
In such cases, we need a definition process of saving statements and minimizing the cost for maintenance and control of the prices/discounts.
Daily, weekly offers
In periods of offers, it is required to cancel all of the possible prices and discounts for a particular “offer package” to be in force. To achieve this, first we must insert a line to the pricelists for the particular validity days for the offer price (so, preferred by the system, compared to other lines that give a price effect over time), and secondly, in order to avoid additional discounts, we must insert to the “discount pricelists” a zero line (no price or discount), with the same validity period. As soon as the offer period expirs, the previously used invoicing and discount policy will be automatically activated.
In the pricelist (for prices) we enter an additional line, dating 20/7- 31/7, with 50 € offer price.
In the discount pricelist we enter an additional line for the same period without filling out NEITHER a price NOR a discount. This line will act as a zero discount and the 20% discount will not be provided. The result in invoicing will be the offer price exclusively provided.

Providing the maximum discount to the customer
As seen before, the method of handing out discounts can be the result of a few different sources, which additionally provide discounts to the final customer. Quite a few times, it is required not to apply all of the discounts but, among all the valid discounts (item, customer, area etc) only the greater one to be applied.
|
|
|
|
|
|
|---|---|---|---|---|---|
|
|
|
|
|
|
|
|
|
|
|
|
|
|
|
|
|
|
This functionality can be achieved through the setting “Select maximum discount” in the pricelist processing.
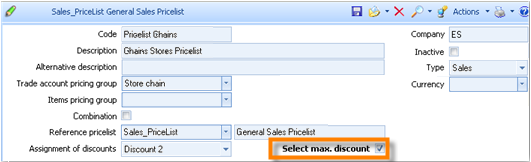
This will lead to a simultaneous processing of all rows that match the line of the document (type, branch, quantity, date period etc) and choose the larger discount than those specified. On the other hand if this field is NOT activated, the system will choose ONE line of all valid pricelist lines with a certain priority: e.g. the item discount will overcome the item pricing group discount, while by activating the “maximum discount” setting, the largest discount will overrule even if it has no priority.
Customization information on the maximum discount
This function has the following conditions to provide with a clear and useful result:

It needs to be activated in the 1st (basic) pricelist applied every time. This means that if a reference pricelist exists, this setting ignored and only the “maximum discount” setting of the main pricelist (having the reference pricelist) will be taken into consideration.
It must be defined in pricelists assigning result percentage to one of the % discount fields of the line (1,2,3) and not to the price field.
No more than ONE percentage field of the line item can be used neither from the possibly overlapping pricelists nor by field property profiles or invoicing policy terms.
A “field property profile” should be customized, accordingly. The default field property profile «ES-1-SALE » will have to be replaced by «ES-1-SALE-MAXPRICE », which does not update both «%disc1» and «%disc2», but only «%disc1» with the larger of the Item and Customer discount. It is imperative to be used in case when the discounts handling made not only through pricelists, but also by using the fields of discounts in the basic data of items and customers.
Application of pricelists during sale processes
Document type
The application of prices and discounts during ordering/invoicing depends on the customization of the document type. The setting “Apply prices and discount rules” (at the “behavior” sub-page) must be activated.
Price choice priority
Prices (or/and discounts) can be defined in several parts of the system, like in the basic Item files, in pricelists and more rarely in the invoicing policy. All those sources of providing prices and discounts examined, made into hierarchies and applied. The source with the highest priority, which can use or cancel the results of previous sources is the Invoicing policy, since it will be applied in the end. The source with the immediately higher priority is the pricelist of the header and finally the basic entities (Item price, customer price zone etc).
Τhe system during the course of tracking a price in the pricelist, it will take into consideration a set of criteria coming from the item line and the document header, which used as a key of finding lines in the pricelist. These criteria are essentially the “dimensions” of the pricelist: Item, Item pricing group, package unit, currency etc. Any change in those fields will cause a recalculation of the price.
The criteria taken ALWAYS into consideration to confine a pricelist set of lines (which will flowingly be checked to find the price) is the item either the pricing group of the item and the date (lines with the closest validity period from and up to the document’s).
Among the pricelist lines “fitting” to the above criteria, the ones taken into consideration will be the ones of the following, that either have a value compatible with the documents’ data or they have NO value: ‘Branch, ‘Business unit’, ‘Measurement unit’, ‘Lot, ‘Color’, ‘Size’, ‘Dimension1’ and ‘Dimension2’.
This process will possibly track and locate a lot of valid lines in the pricelist but will only choose ONE, which will give out a default price or discount in the line. In case of using reference pricelists, one line will be chosen PER pricelist which will add up to the previous valid discounts, unless there is a setting of maximum discount.
This “choice process” will be based on the dimensions (fields) of the pricelist:
Dimension priority
Item
Item pricing group
Branch
Business unit
Currency (if null, considered as the base currency and if the document has another currency, a conversion is made)
Measurement unit (if null, considered as the main MU and if the line has another MU, a conversion is made)
Lot
Color
Size
Dimension 1
Dimension 2
Controlled user access to prices/discounts
For all processes like pricelist or invoicing policy administration (creation, modification etc), for re-adjustment of prices, for access to the discount and prices fields of the basic entities (item, customer), the granting of access rights is done through the general access management system (tools/user privileges).
However, especially for the fields of prices and discounts of documents, the definition may need to be different per type of transactions (sales, purchases, ordering etc) or per branch.
For that reason, a special setting foreseen in the document series, where the access rights defined per user group to allow or disallow certain actions. One of those actions is the prices’ and discounts’ handling.
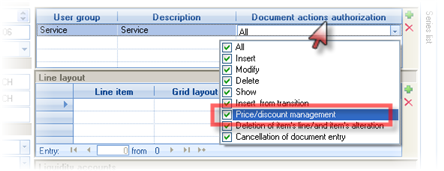

Global processing of selling prices
For a particular inventory item
From the Item’s administration “site”, in the area Pricelist of the context hierarchical tree, we can see all the pricelist lines concerning the Item. Through the actions menu, the ability to process these lines is available.


|
Copy to other dimensions
|
Through the appearing dialog, we can choose which dimension to copy the lines to and provide its value (while the rest of the data will be copied exactly). If we want not to copy price/discount, but define the exact value or the percentage of increase/decrease for the lines to be created, can define the “Action”:
|
|---|---|
|
Insert based on other Item
|
When an Item is new and we have not set prices and discounts, we can always ask for create new lines in pricelists based on another (similar) item. This function does not use the “selected” lines of the grid.
|
|
Assigning values to fields
|
 For all of the selected pricelist lines we are able to alter ANY particular field through the appearing dialog by choosing the field and defining its new value (including the price and discount). For all of the selected pricelist lines we are able to alter ANY particular field through the appearing dialog by choosing the field and defining its new value (including the price and discount).
|
|
Adjusting prices
|
 For all of the selected pricelist lines we are able to readjust (increase or decrease) or directly assign a price or discount. For all of the selected pricelist lines we are able to readjust (increase or decrease) or directly assign a price or discount.
|


To all the above processes, in case of giving percentage, the result may have any number of decimals. The user can define the rounding method, by “number of decimals” and “fixed decimals segment” fields. See next chapter for this functionality.
Mass process of adjustment selling prices
Periodically there is the need to adjust the selling prices in the basic tables (Items and Item prices per dimension), while also in the pricelists. This task is made easy by the process “Readjustment of selling prices” (Periodic processes/Stock updating processes).
| Choosing update type |
If we need to update all prices (basic prices and pricelist prices), the process will have to be executed more than once. |
|---|---|
| Choosing the prices updated |  Depending on the previous step and the choices made, must select the particular items’ prices (wholesale, retail etc) or the sale pricelists in which the adjustment will be applied to. Depending on the previous step and the choices made, must select the particular items’ prices (wholesale, retail etc) or the sale pricelists in which the adjustment will be applied to.
|
| Price update scenario |
In the next step, must define the way of new prices calculation. In particular:
|
| Items selection |
In this step, the inventory items or the pricelist items will appear to a grid, depending on the choice made at the first step. The criteria of the list can be used to pick up the required items, while using the icons After that, the user must confirm the process. |
| Results | In the final step and after the process completion, a result list comes up with the prices after the re-adjustment. The user could print or save this list, for checking. |


Auto-assignment of prices to associated items
When we have items sold to pieces as well as to packages (of multiple pieces), which are monitored in different item registers, then the need comes up of single and mass management of their prices. The main reason that might lead to open multiple Item registers in this case, instead to one single register with many package units is mainly the need to monitor the actual stock for every package unit. For example:
| Code | Description | Price |
|---|---|---|
| 1000 | Soft drink 1lt | 1,5 |
| 1000.01 | Soft drink 1lt X 6 | Unit price * 6 |
| 1000.02 | Soft drink 1lt X 12 | Unit price * 12 |
In the item’s administration form (“site”) there is the “Basic Item” field. All items are “basic”, except otherwise defined. In all connected items (with a quantitative and pricing relation to basic items) this field must be de-activated, thus, the field “Belongs to Item” will be enabled, in order to select there the basic item, with which is connected.

The relations between the items can be automatically generated, since the relevant company’s parameter defined:
In the “Related Items” sub-page, the pricing relation with other units can be defined (apart from the quantity relation). This data used by the process of adjusting selling prices, which assigns the appropriate prices to all linked Items too, taking into account this information (pricing relation).
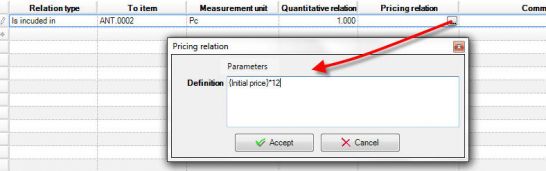
In pricelist processing screen (Tools/Invoicing policy), with the action
Adjust main item prices we can easily make direct assignment of prices or adjustment of previous prices as to “main” items” as to the linked to them items.
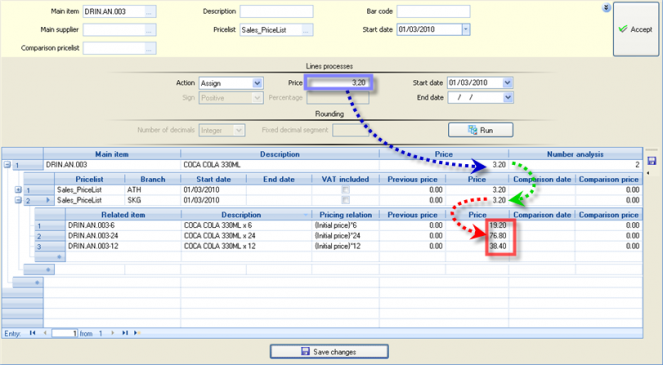
To the 1st part of this dialog, we can define criteria for displaying pricelist lines (items). After run this view (Accept), to the 2nd part of the screen, we can either assign a price for a validity period or adjust previous prices using a percentage. Also, we can define the way of rounding (like to all use cases of pricelists). After we select “Run” in order the new price to be transferred to all items and pricelists used, to the 3rd part of the screen, we can see:
(a) a first level of main items (b) for each of them, in a second level, the relevant pricelist lines, as well as the previous and the new price (c) for each line, the generated “child” lines with the related items after apply the “pricing relation”.
All lines and columns are editable, in order to make changes, and also, there is the possibility to add lines to the bottom of every level (
).
To store the calculation results and/or the changes made, must press the “Save changes” button.


Invoicing Policy
Τhe invoicing policy provide the ability to fully control a trade document, to combine certain conditions and give as a result certain actions e.g. field’s value changes, new lines of all types, gifts and alternative offers etc.
The need for the Invoicing policy to be used results by the fact that the pricelists, through which the pricing and discount policies (by item, customer, group of items, group of customers, quantity scales, date period, business units etc.) are implemented mostly, are only aware of ONE item line at the moment of assignment prices or/and discounts. Thus, we cannot apply a policy based on the overall picture of an order or invoice (e.g. total value, item categories that ordered, total quantity etc.) or even financial data of the customer (line his overall turnover) independent from the particular transaction.
This chapter will examine various business scenarios like the above, as to their use and implementation.
Infrastructure - model
The invoicing policy consists of a number of entities combined to give the desired result for each customer, during ordering or invoicing. This concept will become clear through the following definitions:


| Condition templates |
|
|---|---|
| Condition |
|
| Action |
|
| Term |
|
| Invoicing policy | The invoicing policy contains all the terms through which the final result is produced, during invoicing. |
| Customer |
The invoicing policy is connected to the customer either directly to the field “invoicing policy” or through his pricing group (used at pricelists too).
|
| During the order/invoicing of the particular customer, the invoicing policy is applied, if only at the document type (at the “behavior” sub-page) the setting “Apply prices and discount rules” is activated. |

Configuration
From Tools/Customization/Invoicing policy, we must configure the possible conditions and actions and using them, to “compose” the invoicing policies and connect them to customers.
In the “header” of the Invoicing policy, the following data defined:


| Type | Sales or Purchases |
|---|---|
| Validity period | Its completion is not mandatory. These dates copied to the “terms” lines. |
| Replacement pricelist | If completed, it will overrule as a proposed pricelist in documents (against the trade account’s pricelist). |
| Pricing group | If completed, it will be selectable for the trade accounts belonging to the particular group. |
| Auto run | Selection of document line types where we need automatic executon. Then, a dialog containing the terms will appear (depending on the display property of the terms), automatically as a pop-up, without any action from the user. |
In the area “Invoicing policy terms”, the combination of conditions and actions is defined and when, during ordering or invoicing, one or more of them become valid, then an action (or the actions foreseen) will be triggered.
An important clue of an invoicing policy is not only the achieved result, but also when applied or displayed. In its definition, in the terms area, the Application method as well as the timing of a term application are defined in order to produce the required result.


| S/N | Increasing number which changes by moving the terms from the rigth toolbar (  ) )
|
||
|---|---|---|---|
| Validity period | This term will be applied only in documents with an issuance date in the particular period. If it is not completed, the term will be concidered to be indefinitely valid. | ||
| Term short description | For understanding reasons and taken into cosideration that the content of terms and actions is not easy to translate, so at this point we can type a description of what the term actually does. | ||

|
Selecting this icon from the toolbar on the right, a comment can be given regarding the content of the term and displayed below the term.
|
||
| Condition | Choose the condition of the term. | ||
| Action |
The term result. If we must define multiple actions, for example both discount assignment and a new item (e.g. gift), we enter a line in the 2nd level (
|
||
| Alternative conditions |
The terms can be grouped and applied sequentially. For the terms of the same group, we can define the priority within the group. Among the terms of the same group, the evaluation will become by “priority” and when found a valid term (its condition becomes true), then all the terms of the same group will be ignored, which means that they are mutually cancelled. Such a case is the scale of quantities or values where, when one part of the scale fulfilled, all the rest must deactivated. For this to be clear, see the following example: |
||
|
|
| |
| 1 |
|
| |
|
| ||
|
| ||
|
| ||
| 2 |
|
| |
| 3 |
|
| |
|
|||
| Auto-apply on insert |
If the invoicing policy is strict, then this property must be activated so that by the storing of a new document it is always automatically applied. Intermediately, (as long as the data entry is in effect), the user can ask for the Invoicing policy results by using the keys Alt-Q. This is also useful in cases of telephone orders, or whenever the user feels like informing the customer on discounts, gifts, or if he wants to try different quantities and look at the returning information. And
|
||
| Auto-apply on change | The point here is if the policy will be applied mandatorily during a document modification or if it will not be applied rather than only on demand (Alt-Q). | ||
| Apply on demand |
Activate it, in order to leave it to the user’s discretion (possibly in transaction to the customer) to choose the terms, interactively. This means that only if the user chooses to, the term will be applied, even if the condition is met by the document data. This ability is useful when for the same period alternative offers are valid and during ordering, the customer would choose among them. If in an item line, the user calls on the application (Alt-Q) a dialog appears through which, on the one hand can inform the customer about the valid invoicing policy and on the other hand, can choose the term(s) to be applied (gift, offer, discount that the customer chooses at the time of the briefing. Any terms are already valid, will appear activated to the column “Fulfilled” and to the column “To be applied”. In this column the user is able to intervene: (a) If it is already been fulfilled (b) If it is not fulfilled (to declare that the customer wants it) if only it regards an Item line control and the line map profile has been defined (this profile belongs to the non-visible grid columns and defines the value to take another line field, so that the term will become true). An example If the customer orders 8 pieces and learns that there is an offer valid for 10 pieces, then if the user declares “Yes” in the column “To be applied”, the line map profile will automatically alter the quantity of the line from 8 to 10. The condition becomes true and it can be applied any longer, in order to give the result.
In the above example, the marked term provides one bottle of Wine if the customer buys 5. In the order line, the quantity is a single piece, so it is not “fulfilled”. If here, the user chooses the term (to be applied), the quantity will become 5 automatically, so the gift will be added to the order. |
||
|
|||
| This possibility for the user to define and choose the terms, it is reasonable that is not present when the document created without User Interface (e.g. import, transition, automation) | |||
| Display |
For every term, we can define when it will be displayed. It is meaningful only in policies with at least one term set as “apply on demand” (interactive).
The last choice is about cases when neither the user nor the customer are able to be involved because it might regard salespersons, cost, card points or other results applied on saving. |
||
| Inactive | An inactive term will not be examined or applied. |


Examples
Discounts based on quantity and Item category
Assuming that the company decided to give an additional discount, depending on the total sale quantity of Items belonging to a particular Item category:
| Items | Quantity | Discount |
|---|---|---|
| Category 01 | > = 5 | 3% |
| > = 10 | 5% | |
| > = 20 | 7% |
For the implementation of this policy, we should follow these steps:
We create 3 conditions and 3 actions to cover the above scale:
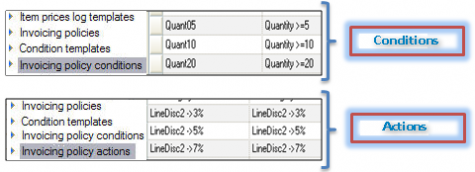
Before creating the conditions, we have to create a condition template. From the library of the available templates, we choose the one containing the relevant fields (item category and quantity in our example).


The «Parameter preview» in the form of template is available only for informative reasons (how the parameters will look like) and not for specific values to be given. This will happen to the condition form.
We create 3 conditions that need to be true in the document, according to the above policy. For every condition, we enter a code and a description and in the condition clauses* we choose the condition template of the previous step and define to the “parameter definition” the data that must be checked:


The quantity field: we set “Quantity”
Value field: we enter « > = 5» meaning the checking value.
Calculate quantitative field: on all selected rows or per line. Here, “selected” means the lines of items belonging to the particular categories.
Categorization field: we set the field “Category” of the Items
Categories: we type or select (by F3) the particular values of field “category” (01 according to the example).
* Obviously, the condition clauses may be more than one, based on different condition templates, connected with AND, OR, etc. to create a logical expression but here we need only one.
Similarly we make 2 more conditions for «field value» > =10 and > =20 according to the example.
Correspondingly, we create 3 actions which we need as a result.
In every action, we type a code and a description, as well as we define the particular result that must produced, if the condition is met. In our example, the action will be “Assign to item lines”:
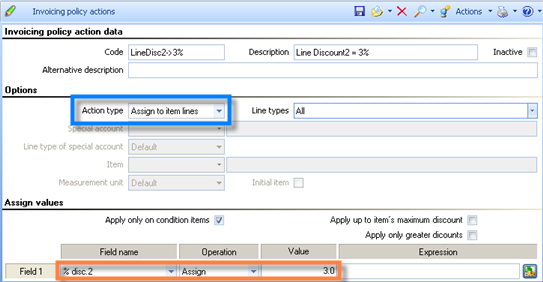
Next, we set the discount needed.

Field name: Assuming we want the field «%discount 2» of the line
Operation: We have the ability to either replace the field value by choosing Assign either to add to the existing discount percentage value (e.g. from pricelist), the present percentage by choosing Addition.
Numeric value: We set 3 for a 3% discount
Finally, in the same screen, the following are set:
- Apply only in the condition items: If activated, in the example, the discount will only applied to the Items of the category “01”, while if deactivated, the discount will applied to all the items in the document.
- Apply up to item’s maximum discount: The system checks in this case the maximum discount of every item (possibly configured to the item’s register) and it will place not necessarily the «3%» (IF that along with the existing line discounts goes higher than the Item’s maximum discount but the difference up to creating the maximum discount as a percentage (%).
- Apply only greater discounts: If the field set in the Invoicing policy (e.g. % disc2) already has a value, either from the Item, or from the header, or by typing, or by pricelist, then the Invoicing policy is applied only if the discount formed is equal or greater than the one already existing to this field.
We create an Invoicing policy where actions and terms are connected in the terms grid:

We match the Invoicing policy to the appropriate customers through the global modification functionality.
Result during invoicing
In the document, the invoicing policy is recommended and saved. Assuming that the document contains the following information:

Asking for apply invoicing policy by pressing ALT+ Q or
next to the field, the invoicing policy will affect the lines 3 & 4 with items belonging to the category stated and not the lines 1 & 2 with items of a different category. The quantity checked (to be greater than 10 in this case) is the total quantity of the items of category “01”.
If however had declared “per line” to the conditions’ parameter field “calculate quantitative field” (instead of “all selected rows") then, the line #3 would take 0% discount and the line #4 would take 3% discount because its quantity is greater than 5 (the 1st condition would be true). So, the check


Additional discount due to payment method
Extending the first example, assuming that the company decides to offer a further 2% discount, as motivation to the customers who pay in cash. For the implementation of this policy, we will have to follow the steps below:

We create or choose a condition template “Based in payment method”:
We create a condition where the template and the parameters are set with the payment methods («00001- cash»).

We create an Action where as a type of action we choose “Assign to document” and in the header of the document will add a discount of 2%.

Finally, in the Invoicing policy we add one more term (with this condition and this action) and we define that it belongs to a different group.
If now we have taken care of the % discount of the header to be transferred e.g. in the «%discount 1» of the lines through a field property profile, we have achieved the required result.
Providing gift due to order quantity
Suppose that a minimum order of 3 boxes earns a gift of the Item coded 004.
| Items | Quantity | Gift |
|---|---|---|
| All | > = 3 boxes | 1 piece of item 004 |
For the implementation, we follow these steps:
The Items are monitored in pieces but we declare an alternate measurement unit for the boxes, where the relation between the units is also defined. For example 1box = 12 pieces

Creation of a condition template where in the parameters we chose “Based on Quantities field line”


Creation of Condition where the condition template is chosen to the “condition clause” line. In the “parameter definition” in the Quantity field we choose «Quantity in alternative MU» and as value we set > = 3.

Creation of Action of type «Insert stock item» where we choose the item given as gift. We also define in the field Price, receiving the value «0» by assigning action.

We connect the condition with the action in an Invoicing policy term.
Result -Application
During the invoicing, if an item sold by 3 or more boxes, the result is the automatic addition of a gift item (with quantity 1 and price 0).
Charging installation services of particular items
Assuming that a company trading heating items, wishes the customer to be charged during sale by installation fee depending on the item category.
| Item category | Service item |
|---|---|
| Air Condition | Installing Air Condition |
| Radiator | Radiator Installation |
For the implementation of the invoicing policy, we must the below customization:
Create a condition template with condition parameters “Based on Quantity field and Item category”.
If such a condition template already used by another Invoicing Policy, we use the same one.
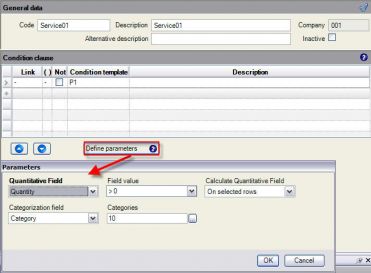 Create two conditions, one for each Item category. Because the action (charging the service) is independent of quantity, in the field value we choose above zero (>0).
Create two actions. As “action type” we chose «Insert Item» and in the field “Item” we choose the charged service.


We create the invoicing policy combining the conditions and actions based on the example table. We do not define group or priority because they are not “Mutually exclusive terms”. They all must be applied, since the conditions become true. This means that if the client buys an air conditioner and a radiator, it must be added automatically to the document, the both two services of installation.

Result - Application
As a result during Invoicing, if the customer buys Items of the category Radiator, he will be charged with “Radiator installation” while buying Air-Condition he will be charged with the “Air-conditioner installation service”.

Charging insurance fees to sales abroad
Let us assume that in every sale abroad, taking place in specific delivery terms, there is a charge of insurance of 100.00 euro.
In this case, we need automatic adding of a special account. We have to proceed to the following customization:
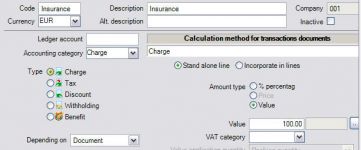 We first create a special account of type charge where the automatic application is disabled, because we do not want his to be applied always, unless specific delivery terms are met.
In the relevant document types (invoices, orders) we add this special account to the sub-page “Charges/Withholdings”.
Create a condition template choosing parameters “Based on delivery terms”.


Create a condition and in the parameters panel, we choose the delivery method for which applied the charge.

Create an action, where, as action type we choose “Insert special account”. This will activate the field of the special account where we pick the account we created.

Create a term in the Invoicing policies we are interested in, with the condition and action.
Result - Application
In trade documents with the particular delivery term and if the customer has this Invoicing policy, the charges account will automatically be added to the special accounts sub-page, increasing the total payable amount.
Discounts by combining quantity scale of many categories
Assume that the company is trying to sell products of a category for which there is a large stock. In order to promote their sale, it will activate an offer where if the client buys Items of this category combined with another category, an extra discount can be provided.
|
Discount |
|---|---|
|
3% |
|
5% |
|
7% |
This is a scenario where the Invoicing policy needs to combine different quantities and categories in one condition. Implemented as follows:
Create a condition template with parameters “Based on quantity field and Item category”.

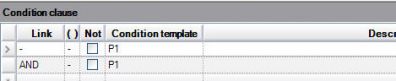 Create Conditions. As in the previous examples, as many conditions will need to be created as the lines in scale based on the table of the example. Here in every condition, two parts are set, where we choose the same condition template joining the lines using the AND link operator…

In the first line we choose one category as well as the quantity range value. To the “comparison” field we choose “..<=..<=..” in order to may enter two values (for define the range).
In the next line, we enter the second category of values for the same condition template.

We create 3 actions for the 3 discount percentages, based on the table of the example.
As in the previous examples, we connect the conditions to the actions in terms of invoicing policies. Exactly because the terms are mutually exclusive, we define that they belong into the same group and declare the priority of the terms in descending series. This will mean that the term we need applied first will be the one with the largest discount.
Result - Application
During sale, if the document items belong to these categories and the quantities of each category is in the particular range, we result in getting the corresponding discount.
Sales discounts controlling
A display that allows us to have a more global and complete knowledge of the discounts given to the customers, is the Sales Discounts Justification (Business snapshot/Sales Statistics/Customer sales Statistics).

This list allows us to check WHICH discounts our customers have gotten and HOW (incorporated to invoices due to item, due to customer agreement or over credit discount invoices/rebates).
On the 1st level, the customers with the basic turnover information appear, while in the next columns it is analyzed for the “Starting turnover” (amount beginning with), as well as in regards to the discounts given (“on invoices” and “due to turnover”, that is retrospective discounts. The average percentage of discount is being calculated along with the “scale” of the average % (1-100 by 10% intervals), in order for anyone to be able to handle a categorization of the customers.
On the 2nd level, we can see a DISCOUNT TYPE (“Origin”). The amounts that have been granted, separated into 2 basic categories: “Invoice Discounts” and “Retrospective Discounts” while all the displayed data allow access to the related invoices. It has been assumed that the “price” is not decreased by discounts, but they are placed to the discount fields:
In «%Disc 1» the customer discount (header),
in «%Disc 2» the “Item Discount” and
in «%Disc 3» the user Discount
We’ll also be able to see:All of the Discount type special accounts, which have possibly been used with their title in the “Origin”. As an effect, if discount special accounts are in use, the title of the special account, will be displayed here, as a reasoning of the discount (e.g. “3% due to payment method”, “5% due to invoice revenue”). Especially the “autonomous” accounts (which don’t affect the turnover) will be displayed only to the 2nd level distinguished by the coloring of their line, for informative reasons.
The Discount Credit Invoices for the selected date range, one by one
- Any “no charge” Invoices will not be displayed either in the starting turnover or in the Discount amount either a price = 0 or a Discount = 100% has been used.
Sales and distribution performance indicators
A summarizing presentation of Sales processes indicators is being displayed by the Sales and distribution performance view (Business Snapshot/Performance Indicators). Those “indicators” cover a wide range of the Sales process and allow us to locate problematic spots in general and also allow us to see if the Ratios are being improved or getting worse ( in correlation to the same month a year before):

The Customer & quotations administration is in the 1st part:
- New Customers created, based on the 1st Trade Document entered for the customer (offer, order, invoice)
- Prime Clients Ratio: In the “Advanced” parameters (
 ) the % of the turnover considered to represent the Prime customers can be set. The 80% is recommended in this case and the indicator will display HOW MANY (in number) customers have reached the 80% of the turnover,
 - Average Quotation close time, which in a later state became an Order.
- Lost Offers Ratio, using the “workflow step” of offers (could updated through a transition “in-place”), which is configurable to the parameters () with a proposed value “LOST”.
- Lost Sales Ratio, which updated by the “lost sales quantity” (if used the transition “Discard sales order)”.

In the 2nd part, the average “Order fulfillment cycle”:
- Average order routing time: Time taken between the order and picking. The document SRC is recommended for the picking and is defined in the “Advanced” parameters.
- Average order preparation time: Time taken between the picking and the actual delivery of the order, where the “Delivery” based on closing entries of the picking process.
- Average order shipping time: Time taken between the order and the delivery, where the “Delivery” based on closing entries of ordering process.
- Average order delivery delay time: Comparison between the actual delivery date (date of issuance) and the scheduled delivery date (of entries that the delivery “closes”, e.g. picking or order).
Retail sale points
The functionality of the Retail Sales, as to the behavior, the concepts, the sub-ledgers update and the configurability resembles the Sales cycle in general.
A large differentiation found in the User Interface because in Retail case, the screen will need to contain the minimum required data that the user would most likely need. At the same time, all the Actions will need to be gathered so that the user will be easily trained, and also complete every transaction in the minimum time. The proper dynamic forms should designed and implemented, covering the aspects and needs of the business. Ideally, the ESRetail ™ should be used, which is addressing to this type of market, covering and resolving matters of usability and speed in the best way.
In this chapter, we are going to examine some special functions and customizations of Sales addressed mainly to the Retail points (either we refer to occasional retail sales or to intensive Retail). More information on the functionality of the fields, discounts, invoice policies, dimensions-sizes etc. see in detail to the previous chapters about Ordering and Invoicing.
Simple retail Sale (intensive)
Appropriate document type: RCR (RETAIL NOTE - DELIVERY NOTE)
This document does not update the Accounting. The accounting is being updated through a packing procedure of the retail slips which creates a summarized entry, to be posted by series and date.
In the example, we see one of the many alternative forms that retail receipt may have.
- The document series is automatically proposed, based on the user and its access to series.
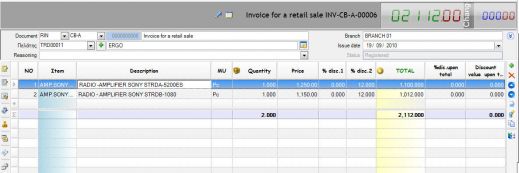 The customer usually is a “General retail customer” which is defined in the document type or in the Branch of the Series (in the “Retail customer” field)
- The user has no access to the date unless the series is manual. Otherwise, the date is the login date.
- The gross prices of the Items used in the retail receipts (the Item price + VAT charge).

Those may contain special charges of any tax type if it has been defined as a special account of the “Tax” type depending on the “Item” and they are of % type applied on the initial (net) value.
- The easiest way for the user to provide a discount is by pressing Alt-F7
- If an Item line is concerning a returning Item, use Shift-F4 to declare this, while the line itself will appear with a different color, for visible distinction.
- For the completion of the transaction, the user must enter the payment. In order to move from the Items tab-page to the payment page, press F6. See details for payment, during retail sale, in next chapter.
Retail sale to a particular customer
If an Order is entered previously or the customer had an advance payment or, in general, if the customer presents a receipt of an advance-payment, instead of the General Customer, the particular Customer is the one who should be declared to the header. There are cases of Retail Sales, which do not have an intensive rate, for example Jewelry stores or Electronics stores, where for Customer Relationship Management reasons, the identification data of the customers are used and stored.
In case the customer has already been entered, it will be searched by one of the known search methods (based on the name, phone number etc). On the other hand, if the customer is not found, it will be immediately entered using the  icon and a dialog containing the minimum entering requirements will appear, in order to create the customer’s register.

Payment methods
The payment can take place in a number of different ways. Through the (general) customer, the payment method must be proposed in the retail receipt, and this must be a “mixed payment method”, so that all payment types to be covered. The receipt is configured to disallow the storing, printing or exiting without having completed the total payable amount in the payment part.

If the total amount given to the “Cash” line, the entering has been completed showing the change as well (if the receiving amount is greater than the payable amount).
If the user attempts to store, a dialog confirming the total amount in cash appears (with the ability to choose the individual coins received).
Using the virtual keys showing notes and coins, we are able to interact with the “Receipt” field and according to the amount, the change is also calculated. The coins and notes displayed are the “available” ones for the currency of the document (Tools/ Customization/Organizational parameters/Currencies/Notes- Coins)

If the payment method is by credit card, the user will choose the type of credit card in the “Credit Card” line. This way, the relevant liquidity account will be filled in, and the maximum number of installments of the card type will be used. If the card corresponds to more than one clearance banks (in effect more than one liquidity accounts) the proper one will have to be chosen by the user.
If an advance payment has been entered, or a credit balance is valid, then in the “Credit/Advanced payment” line we’ll have the following:
- If the receipt is concerning a particular client, the Ctrl-Y can be used in the “Amount” column. This shortcut causes the proposal of the customer’s credit balance (if any) to the column “amount”.
If we need to maintain the information of the matching (in case that advance payments are more than one) and need to avoid the typing of a specific receipt, we are able to use the alternative document column pressing F3 to search and select among the available outstanding credit documents. By pressing “Accept”, the amount updated with the open amount of this transaction.

If the receipt is about a retail customer, the amount should be typed, and to the “alternative document” column to enter the exact receipt code that the customer carries (in order the correct matching to be done).
In case the payment has been given to an order, by choosing this document, it will be added automatically to the “related documents”, so that an automatic closing of the ordered quantities to be done also, without the need for any further actions by the user.
What is generally recommended, is the advance payments to be entered in the Order (which is the Order of the Inventory Items as well as the collection receipt) and not in independent Cash Receipts, which contain no description of the reasons they were entered.
Goods return and buy options
When the return policy allows no returns but only changes, the way to enter the return is by returnable Items in the Retail receipt itself, with which the customer buys new items.
For declare the returning line we use Shift-F4 and the payable amount will be the difference between the sold and the returning Items.

If the change cannot take place or the customer does not want it and the company’s policy allows it, we can always enter a Credit Document for the customer:
Appropriate document type: RCN (Credit note for a retail sale) or RSC for mass posting, after packing process
In this document, the money return can be entered in the payment part of screen:

If no money is returned, as usual, this document can be used at the future (buy option), for example at the next season. The way to use this later as a “payment method” has been explained before.
Electronic signature per receipt
This functionality is extremely useful in shopping stores on which more than one salesperson work on the same terminal (computer). It provides us with the information of which salesperson / user served how many customers, no matter who logged in (an employee often takes the place of another without re-logging).
The activation of the electronic signature can implemented as follows:
- We create all the users to the users table (General/User administration)
- Activate the “Save key” and guide the users to type in the key (which must be unique, because through this, the identification of the user will be done, whereas the login password just used to authorize the user entrance to the system and it can be anything).

In the document series in which this functionality is required, all we need to do is activate the relevant field:

The result will be that in every attempt to store the document, in the document types where we activated this setting, the mandatory typing of the “Save key” will be enforced. This way, the user typing the password will be identified and authenticated so, instead of the login user, the user to which this password belongs is used as the document “creator”, during saving process. Later this information can be used in views, for example in “Retail Documents” list, which contains such a filter (“created by…”).
Retail posting process
The purpose of this procedure is the packing of the detailed Retail receipts into summarizing documents for posting to General Ledger.
Appropriate document types: RSR (Summary note for the effected Retail sales)
RCS (Summary Credit note of Retail sales)
The procedure groups the retail receipts (RCR, RSC) by date, branch, VAT status, and cancellation status. Furthermore, there is the possibility to define grouping by trade account, document series and grouping of the payment lines per Liquidity account (e.g. for cases that in Chart of Accounts monitored the credit cards by Bank). A scheduling utility is also available so that the process to run completely automated every certain period of time, for example daily or weekly.

The documents produced contain a SINGLE item line per “Accounting category” and “VAT category” (instead of the actual sold items). The reason is that the ONLY updating concerns the Accounting (which never may be updated by RCR, RSC even if a posting process runs, by mistake).
The procedure updates the “reasoning” of every produced document with the limits of the issued retail receipts (in the form “Numbers of receipts RSR -Α-00001 up to RSR -Α-00105” etc.). In case there are any cancelled receipts, they are grouped and cancelled automatically producing one cancellation document, listing the numbers of cancelled Retail receipts (separated by a comma). In the original Retail receipts, the “Alternative document“ field is updated with the number of the Summarized Document (RSR -ΧΧΧΧ) where they participated, and they are “locked” so that they will not be able to take part in this procedure again.
The trade account of the produced Summarizing Document is the one declared in the Branch (“retail customer”) or in the document type (used, when no grouping by trade account has been chosen).
The series choice of the produced document is done automatically: either by the unique branch series or based on the same series code with the grouped retail documents (source documents).
In particular:
- If a grouping by series has been chosen, for every Retail document series a corresponding one must exist (with the same code) in the summarizing Retail document type.
- If no grouping has been set, the summarizing Retail document type will have to contain the definition of ONLY ONE series per branch (1 normal and 1 cancelling) which will be automatically traced.
If any error occurs, the Summarizing Documents can be deleted and the process can be executed again using “NO” in the question: “Exempt the processed”
Cash counting
Opening (cash receiving)
In the beginning, the user counts the cash received of the current cash register (issued through “Cash/Notes/Money transfer).
Appropriate document type: CCN (Cash counting entry)

In this form, the current balance of every Liquidity Account – Cashier (in its own currency) is available (as it is calculated of all system transactions). If there is a difference between this balance and the counted amount (surplus or deficit), it is calculated to the last column, using color indications for the “sign” of difference.
Being in the “Counting” column, we can use the “Coins counting” button to easily enter and sort all of the quantities of the different types of notes and coins. Based on these quantities, the counted amount is calculated and pressing “Accept” the main display will be updated.
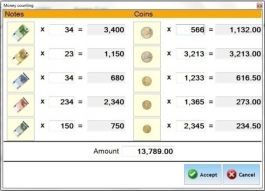
Until the storing of the current document, the cashier would remain closed and inactive, to avoid mistakes during the counting process.


Closing (cash delivering)
During the closing and delivering the cashier from one user to the next, a counting is taking place again. The procedure should always be done and the handling is exactly the same as in the opening of the register.
Until the storing of the document, the register should remain closed and no transactions should take place in it.
Following those simple steps, we can solidify the fact that during any shift (while the register is accessed by one user in a specific time frame), the full history of the receiving’s as well as the source (day, time and user) of any differences.
Cashier deficits and surpluses
Through every counting document, the updating of possible deficits or surpluses is available by the use of the first button on the bottom left “closing of cash counting differences”. The best practice in this case is to run this process immediately or at least before the next counting takes place for that particular cashier.
This action will call the transition:
202. CCN=>CCD (Cash deficits-surpluses from counting)
This transition will produce the document:
CCD (Cash differences)

In every Liquidity Account which shows a counting difference, a corrective entry is entered which will balance the account.
The posting of this document will use the G/L Account entered in document’s header,


Store statistics
The path: Business snapshot/Sales statistics/Branches statistics leads us to a number of relevant views on the branch activity.
Stores’ sales statistics (online)

This view contains sales and receipts data by branch. It is configured to be able to self “refresh” every 10 minutes, making it useful for someone to keep an eye out from a central site, on the actual activity of each branch in real time. The proposed time period is current day. It presents the Net and the Gross (net + VAT) sales value, as well as the actual cash receipts, with a constant display of the time passed from the last receiving and the last sale.

Sales per Store by hour
This cube addresses mostly to installations having a large number of sales throughout the whole day and need to have a solid view on the data about the turnover and quantities sold by hour. Some additional dimensions like the salesperson, item grouping, geographic region, year, month day and business unit, are also available.


Average transaction value per store by hour
This cube addresses to installations of a large number of sales during the course of the day, in cases of intensive retail and contains information on the:
Total number of transactions per hour (without cancelled or cancelling documents)
The total net turnover per hour
The average value per transaction (taking into account only the “positive” transactions, without credit notes)
There are some additional columns too, to move to the visible ones from the “data” list of the cube:
Positive transactions value: Displays the value of transactions without taking into account the cancelled and the credit documents
Number of positive transactions: Just like before, it takes into account only positive transactions. It is used to form the “Average value per transaction” indicator.
Dependency of sales by weather conditions
This cube displays the sales value and quantity in relation to the weather conditions in each store at the time the sale was made.


- A periodical update of the weather conditions in every branch can be scheduled by using the «Update METEO data» (Tools/System- Database management). The weather is coded in 5 values (Fine, Rainy, Snowfalls, Erratic, Very warm), which are “dimension values” for the cube. The requirement for this procedure to function correctly is to first run the “Update Postal codes file” (Tools/Maintenance tasks) so that, the unique key used of every area to be updated properly.
Visits per store over time
This printout provides us with information about the way the visiting is progressing through the hours of the day per month and year. The printout displays the summarized result for all the recording cameras of the company, and then, in more analytic levels for every store in particular.
This printout connects sales data (value and number of transactions) to the number of visits, as recorded by the visit recording cameras installed. Grouping the results is possible to do by year, month, day, store and geographical region, in order to get valuable conclusions on the store traffic.


- In order to acquire this type of information, the proper equipment recording the visits is necessary to be installed and the relevant customization of the application should be done.
Stores’ audit view
Displays in a “Dashboard” way, information on the sales related to the stores and also the company as a whole:
Total turnover, Turnover per salesperson , Top selling items
Stores’ sales in the current week, month, and quarter compared to the corresponding previous year range.
Average transaction value average number of items per receipt
Sales value compared to the stock value
Providing Services
The documents used for the cases of Services provision are available through the Sales options (of menu and toolbar).
Services rendered Invoice
Appropriate document type: SSI (Invoice - Services provision)

| Document type and series | Those are the mandatory data for the authentication of the document. Usually they are automatically proposed, depending on the user and his access rights to the series. |
|---|---|
| Date | The login date is proposed |
| Customer | The search takes place either by code or by name. If a customer is located, he is automatically displayed with his data (T.R.N., Address), otherwise using the icon, a new one can be added at that time.
|
| Payment method | The customer’s payment method is proposed. |
| Services | In the line part, the services entered along with their quantity and value. The quantity used in cases of services that measured in a time unit (hours, days) with a charge by unit. This value may be depending on the pricelist of the customer or proposed based on the whole-sale price of the item-service itself. Discounts can be proposed here, by the way as which is valid for the sales cycle, in general. |
The services can be part of the other Sale invoices (e.g. SNV), as long as the services line type activated in the document type used.
Services rendered Receipt
Appropriate document type: SSD (Receipt for a retail sale - Services provision)
Issued in cases of Customers - Physical Persons instead of a services Invoice.
The difference is that the proposed selling price is the “retail price”. A payment can be entered at the same time.
Various revenues (interests etc)
Appropriate document type: BXR (Various revenues Note (with payment))
Used like the services invoice or receipt, for small expenses that paid at the same time. The customer is not updated, so, the payment must be entered anyway.
Service repair Invoice – Items’ shipping with no charge
This document used after repairing Items that have been received from the customer through a “Goods receipt Note – without value” (GRN), that is a pure quantitative document (without an invoice pending. After checking or repairing, the Item returned to the customer while charging for the work done.
Appropriate document type: SIQ (Delivery Note – Services provision)
The Items sub-page of this document has got a ZERO value and the update of the Inventory is only regarding the quantity, like exactly we would entered a SPC (Goods Return Note (without pending Credit Note)) document. The Services sub-page will be acting just like the SSI (Invoice - Services provision) document. The total amount charged to the customer is the value of the services.
Service credit Invoice
It is issued when a mistake has been made and the Invoice cannot be cancelled.
Appropriate document types: SCS (Credit note - Services provision)
SSC (Credit note - Services provision (reversal))
Retail service credit Note
Appropriate document types: SCP (Credit note for a retail sale - Services provision)
SCR (Credit note for a retail sale - Services provision (reversal))
All of the Service documents can accept a payment or money refund. The handling of those monetary transactions is exactly the same with the one used in the Cash invoices.
How we check the results of issuing Services provision documents?
| View | Content | |
|---|---|---|
|
|
Sales/Shipments | List of all Sales documents concerning quantities or values |
|
|
Invoicing documents | A list of the documents creating Turnover. |
|
|
Services Trial Balance & Transactions Register |
|
|
|
Revenues Journal per VAT rate |
|
|
|
Customer’s statement and Trial Balance | The customers are charged by Services Invoices and we can check their balance through Trial Balances and their detail transactions through Statements. |
|
|
Outstanding receivables |
|
|
|
Accounting | An accounting entry is created to the Customers, Services and VAT accounts and it updates the Accounting journals, the Account Statements, the Trial Balances etc. |

Collection management
This chapter will examine the process of receiving the claims from customers in different ways (cash, credit card, cheques, deposits), as well as the organizing and scheduling of the receivables.
The instructions and examples given are mostly based on the proposed customization, as far as the documents, the screen forms and the informative tools are concerned.
In order to issue a Receipt, the following procedures can be used:
|
|
|---|---|
|
|

|
|
|
|
|
|


Collecting cash
Appropriate document type: CRC Cash receipt (from customers)

| Document Type and Series |
|
|---|---|
| Date |
|
| Customer definition |
|
| Alternative document |
|
| Payment lines |
|

How we check the results of issuing Cash Receipts?
| View | Content | |
|---|---|---|
|
|
Receipts | A list of the collection documents entered, along with a classification of the amount in Cash/Deposits, Credit Cards and Cheques/Notes. The list contains receipts not only from documents like the above, but also from Retail Sales or advance payments through Sale orders etc. |
|
|
Cash check statement |
A list of receipts and payments sorted by branch, user and payment type:
|
|
|
Receipts-Payments | Information like the previous, but providing the layout and the analysis functionality of the cubes. |
|
|
Accounts Receivable Trial Balance | The receipts are displayed in the Credit columns of the Trial Balances and the corresponding Detail Ledger Statements. |

Cash Invoice
Within a Sales Invoice, it is possible to declare the customer’s payment without create a separate Receipt document. There are two ways to declare the payment in an invoice:
 Choosing the payment method “Cash” and asking “Apply” (
 ): a payment line will be produced (for the total payable amount). If this payment method is set as “auto-apply” then, during storing of the document, the payment will be produced (and update the proper sub-ledgers) without any user’s action. The selection of the payment method is enough in this case.
- The user fills out the payment data. If the payment method is null or it is NOT an “auto-apply” payment method, the user can maximize (
 ) the footer area and fill out the cash register and the amount manually. If the Cash (liquidity) account of the current Branch has been set as an “automatic payment” account, it will be automatically proposed, and the user would only enter the payment amount.


Possible cancellation of the Invoice will also cancel the payment.
Collecting by credit card
For using credit card for payments, the necessary customization of the Liquidity accounts must have been done. As far as the payment takes place during the issuing of a retail receipt, there is specific information available in the corresponding chapter. In case that the payment issued by using a separate receipt, the recommended document is:
Appropriate document type: CRC Cash receipt (from customers)
 After filling in the customer’s details, must select “payment method” action button.

 Having customized properly the payment methods (to be applicable to the collection receipts), in the appearing dialog, we select a payment method that contains “credit card line”, we define the amount and the number of installments and press the “Accept” button:
Customer deposit in our bank account
The deposit made by a customer in one of our bank accounts can take place in the exact same way as the cash collection (using the CRC document), filling out our bank account in the “Liquidity Account” column.

This can be useful in cases where we receive a deposit receipt by the customer and we need to immediately update his balance.
In case “Valeur Days” have been set to the account, they will be added to the Issue Date of the Document for calculate of the payment “due date” which will in turn update the cash flow (this is the date when the cash will be available).
Usually the customer deposits entered in mass, based on the Bank’s statement, which may scheduled to take place daily or in any periodical basis. In this case, either manually or via a pre-configured import procedure, we enter one document for many customers’ deposits:
Appropriate document type: BCR (Remittances from Customers)

In the header, we declare:
- The bank account
- In the alternative document, the Bank’s statement number
In the lines
- The customers, along with each deposited amount
There are two methods available for the outstanding balance to be correctly updated as well as the cash flow which is depending on the “Due date” (Valeur):
- For EACH DAY the statement displays transactions, we enter ONE document. If there are “valeur days” declared to the bank account, they will be added to the issuing date, producing the “Due date” on which the money will be available in our account.
- We enter ONE document in which the issuing date is the date that we received the bank’s statement and for each line, we enter the due date (valeur) which is stated. From an accounting point of view (trial balances, transactions statements), in this case the Ledgers will be updated by the “Issue date” (on which we enter the document), the matching of our customers though, their Pay-out ratios as well as the Cash Flow will be correctly updated by the “Due date”.
Collecting by a customer’s cheque
Appropriate document type: NRE (Note receipt from customer)
To take receivable cheques (or other receivable notes like sights drafts, day bills, trade bills, etc.) from a customer, we can use the document type CRC (which covers all payment methods) from the sub-page “Notes” either this special document:

For the cheque details to become available for filling in, we must use the icon for insert a new line  , which will activate a dialog allowing the full cheque details to be entered. The required fields are the following:
| Note Type | Defined at Customization and contains data needed for the posting process. | 
|
|---|---|---|
| Code | It might correspond to a code segment of type auto-numbering, so the user not to have to type it. | |
| Note No. | It is the printed out number of the cheque, useful for its identification, and the updating of the Notes Receivable Records. | |
| Issue Date | The date when the document issued | |
| Due date | The expiration date defines the date of the claim (for cash flow) and it updates the Notes Expiration List. | |
| Payment Liquidity account | The Liquidity Account “Automatic Payment” is proposed. It can be altered, if we know which bank the cheque will be given to. | |
| Nominal value | It is the amount of the cheque. It is possible for a cheque in a foreign currency to exist, thus both amounts are available in both currencies as well as the exchange rate. | |
| Assignor | The Trade Account from the document header will be placed here automatically. | |
| Beneficiary | This field will not be completed while creating receivable notes, it is our company. If a transfer to a supplier takes place, it will be automatically updated by the system with the supplier possessing it. | |
| Issuer | The Customer is set by default, but it can be altered (see Collection using a 3rd party cheque). | |
| Guarantor | The possible existence of a guarantor is stated here, via the “Persons” archive. | |
| Status |
The status “Open“ is proposed (not settled), due to the customization.
|
|
| Holder-Position | The company’s branch (of the document’s series) is filled out here. | |
| Remarks and user defined fields | Several fields of reasoning, remarks, comments and other types of fields for free use are available for any need. |
Collecting by a 3rd party cheque
To take from customer cheques, which have not been issued by him, we use the same steps as if the cheque was indeed issued by him.
The difference lays in the completion of the field “Issuer” of the cheque’s form.
The issuer might be a customer, a supplier, a debtor, a creditor, a person, or in some cases the issuer might not have been entered into the system at all.
- If he has been entered into the system, we can use many ways to search and locate him.
- In the “Code” field, we can type any of the following information, partially or as a whole, and search the database: Code, T.R.N, ID card, Phone number, Mobile number.
- In the “Address” field, we can use part of his address to run the search.

If he has not been entered into the system:
- In the “Type” field we can choose “Person” and to the next field we can Right Click Insert to enter him into the system.

- In “Type” we can also choose “Other” where we are able to freely type the name and address and avoid entering the person into the system.
Due to the fact that the Issuer of the cheque which we collect, matters as far as the risk for its payment is concerned, the use of Credit Policy ( ) in which lays a setting which checks the issuers of the cheques, is recommended.
How do we see the results of collections with cheques entries?
| View | Content | |
|---|---|---|
|
|
Notes receivable records & Expiration List | Status of the cheques, which we have collected from Trade Accounts and have not yet expired. |
|
|
Notes Receivable Trial Balance
|
Status sorted by Position (Portfolio by branch, in Banks by Bank and Transferred by 3rd party):
|
|
|
Outstanding Customer’s Cheques/Notes |
In the management screen of the customer, we can locate the Outstanding Cheques/Notes divided into his issuing and the issuing of 3rd party (his customers etc.)
|
|
|
Customer trial balance (with commercial balance analysis) | Balance with credit and debit columns of cheques, which complete the actual (commercial) balance, due to the fact that the Outstanding cheques are included as part of the customer balance. |

|


Transferring Cheques to the bank for guarantee
This is referring to the process during which we transfer cheques to the bank, the total amount of which can be granted to us as a short-term loan. The whole procedure consists of some typical steps:
Loan collateral account
In the Liquidity accounts, we create the Loan Account. It corresponds to a short-term Liability G/L account (e.g.52.00).
Receipt cheques by customers
The cheque collection is issued by using the CRC or NRE documents types
Assigning cheques to the bank
The assigning of cheques to the bank can be done by following the path: Cash-Notes/Transfers of notes
Appropriate document type: NBT (Note transfer to Bank)


- To the header’s field “From branch” we fill in the Branch (portfolio) and to the “To Bank” field we enter the Bank to which the transfer made.
- The “Open” cheques with the particular branch as a “Holder/position” are available in the search function in the lines of the document. After selecting the cheques, we can enter to the “liquidity account” column the Loan account in respect of which the assignment takes place.
The status (02=> “to the bank”) and the position (the particular bank) are both updated, to the cheque’s register.
Granting from the Loan bank account
The granting from the loan account, using cheques as guarantees, is issued through the path Cash-Notes/ Money transfer:
Appropriate document type: BCT (Cash deposit)
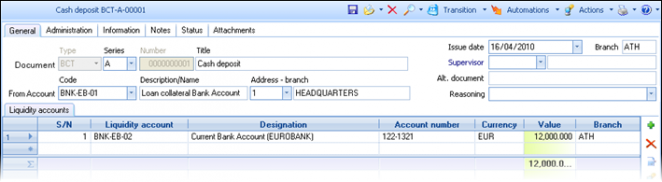
To the header’s liquidity account, we fill in the Loan Account and to the lines, the Current Bank Account (or the cash account) in which the money became available.


Depositing funds in the Loan bank account
The deposit of funds in the Loan account is issued through the path Cash-Notes/Note Payment & other Changes:
Appropriate document type: MRN (Bulk payment of cheques receivable)


To the header’s liquidity account, we fill in the Loan Account and to the lines, we select the cheques.
Whenever a cheque reaches its expiration date without being covered as to the corresponding amount, the appropriate workflow consists of the following steps:


Canceling the grant
Appropriate document type: CRP (Cancel notes receivable payment)
This particular document is issued through the path: Cash-Notes/Notes payments & other changes. The Loan-Account is entered into the document header and the cheque itself selected to the lines part, without any change of value.
Returning the cheque, from the Bank back to the company
Appropriate document type: NRB (Note return by Bank to Portfolio)
This particular document is issued through the path: Cash-Notes/Transfer of Notes. To the header’s fields “From Bank” and “To Branch” the user select the appropriate data and fill in the cheque itself in the lines below.
Returning the cheque to the customer
Appropriate document type: NCR (Note return to customer)
This document can be found in the path: Cash-Notes/Receipts. The customer is defined to the header’s “trade account” and the cheque is entered in the document lines.
The posting process for the above workflow, will take place as follows:
| Document | Debit account | Credit account | |||||
|---|---|---|---|---|---|---|---|
| CRC | Cheque receipt from customer | 33.90 | Cheques in the Portfolio | + | 30.00 | Customers | + |
| NBT | Transfer cheque to Bank | 33.93 | Cheques in the Bank | + | 33.90 | Cheques in the Portfolio | + |
| BCT | Cash deposit | 38.03 | Current Bank Account | + | 52.00 | Loan Account | + |
| MRN | Bulk payment of cheques receivable | 52.00 | Loan Account | + | 33.93 | Cheques in the bank | + |
| CRP | Cancel receivable Notes payment | 52.00 | Loan Account | - | 33.93 | Cheques in the bank | - |
| NRP | Return Note by Bank to Portfolio | 33.90 | Cheques in the Portfolio | + | 33.93 | Cheques in the bank | + |
| NCR | Return Note to customer | 30.00 | Customers | + | 33.90 | Cheques in the Portfolio | + |
Repayment of cheques/notes receivable
There are two ways available for the repayment made by the customer to be issued at the expiration of the receivable cheques or other receivable notes (sights drafts, day bills, deposit bills, trade bills, letters of credit, etc.):
- With a receipt to customer
Appropriate document type: PNR (Repayment of receivable note)
This document is issued through Cash-Notes/Receipts and is used the same way as in case of receiving cheques (CRC). In this case, we can search for the particular cheque (with “assignor” the customer of the header) to the document lines part, while the entry of a new note disallowed.

The user can change the proposed amount (nominal value) to a smaller one (partial repayment). The column “Payment Account” should be checked to make sure that it is the account where the payment was actually made.

Bulk repayment of several customers’ cheques
Appropriate document type: MRN (Bulk payment of cheques receivable)
This document is issued through Cash-Notes/Receipts and is used the same way as in case of receiving cheques (CRC). In this case, we can search for the particular cheque (with “assignor” the customer of the header) to the document lines part, while the entry of a new note disallowed.

The Liquidity Account, entered to the document’s header, will be copied to the lines of cheques to be selected below. The partial payment is always an option in this document as well. This procedure is usually followed for cheques, which have been transferred either to the bank or to a third party.
Both methods produce exact the same result:
- The status and the outstanding value of the notes are updated
- The Cash (or Bank) Account is debited
- The Customer’s commercial balance is reduced
Even when the cheques have been transferred to suppliers and if there is no sign of a problem, we must enter a repayment of the cheques. The reason for that is simply that both the Customers commercial Balance (of those who have given us the cheques), as well as the Third Party commercial Balance (of those we have given them to), have an Outstanding value which can close up ONLY by such a payment transaction.
Replacing a customer’s cheque
The replacement of the cheque will have to be declared in the system by using two separate documents, for returning the one to the customer and receiving from him a new one (or more than one). This would happen usually for lack of ability to pay on the particular expiration date, by the customer. Therefore, he asks a “lengthening” of payback’s time.
Appropriate document types: NCR (Note return to customer)
NRE (Note receipt from customer) (new cheque/s) or CRC

The customer is entered to the document header and the cheque/s returned to the lines part (selection among his outstanding cheques).
The returning document (NCR) appears as a negative in the Receivables as well as in all of the monetary lists concerning notes:

In the Customer’s transactions statement (commercial layout) (and to the corresponding Trial Balance), the “Accounting” balance is raised by a new debit, while the “Commercial” Balance will be the same:

Customer’s advance payment
Stand alone receipt
The advance payment handles no different from any other receipt on account. The documents available for use are the ones used for the Receipts.
Appropriate document type: CRC (Cash receipt – (from customer))
Within the sale order
As in various trade transactions supporting payment at the same time (e.g. Retail, Cash invoices) so when Ordering certain items which the customer wants to reserve, is likely to give (or require) an advance payment. The order CAN BE used as a Collection Receipt too.
Appropriate document type: SOR (Sales Order)
A properly customized payment method should be used, to activate the payment lines for typing by the user.
Handling information on two working payment functions, can be found to the chapters Cash Invoice and Retail payment,The 1st one is about the “Payment analysis” grid, which does not require any particular customizing to be functional in any document type:

The 2nd one is about the “Payment” grid, which assumes a customization technique which automates the Credit card installments and is a much easier way of input:
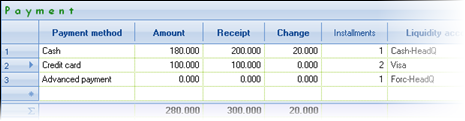


Collection management processes
The search for the gathering of outstanding receivables usually begins from a Trial Balance or a Transactions’ Statement. Knowing, however, the actual requirement of customers to settle their debts at particular time, results in the “open balances” sub-ledger rather than the “accounting balances”. In the following few chapters, we will see how we can use this information to communicate with the customers, complete the collection procedure and to issue automatically the collection receipts.
Collecting outstanding receivables
This process (Transactions/Cash/Notes/Collections Planning) can be used to easily issue the collection receipts. It will be guiding the user through a series of steps before the automated generation of receipt documents takes control, making sure that the information about the "matching" (which debts are being settled), is easily declared and found:


In the 1st page we declare the customer. The open invoices appear and we can choose that or those to be paid.
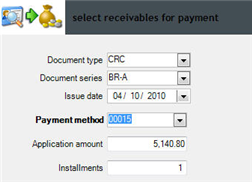 In the 2nd page we define the payment method. The document type, the usual payment method and the amount of the chosen debts are proposed.
The user chooses the document series and alters the amount if necessary. In case a credit card is used, should define the number of installments.
In the next step, the receipt document is generated and its number appears as a link.

On mouse click, the document will be displayed for printing and checking.
The payment has been matched with the invoices chosen in the 1st step.

Customizing information on the collection of open receivables
- The payment method must contain a line or more, with a value in the field "Apply to document" one of the document's properties of document type used for collection.
- The document type used for the collection as well as the usual payment method will have to be defined in the corresponding parameters of the category "Task Flows/Processes":

The reason that the customer payment method is NOT recommended, in favor of the “usual method” for this process is that in the trade account the payment method contains a settlement for the commercial transactions (credit days) while does not contain lines for “payment” document types (see 1).
Processing outstanding receivables
This procedure (Transactions/Cash/Notes/Collections Planning) is quite useful in investigating the customer debts as well as to scheduling them.
A list of open invoices grouped by Collector and Customer appears (the collector is brought by the customer register and is the responsible party in the accounting department for collecting the debts of a customer group usually).
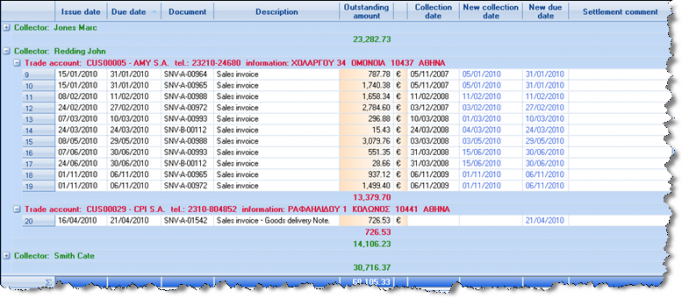
Inside this list, the user is able to intervene (by typing in line level) in the following columns:

- New collection date: This date is updated automatically during invoicing, based on the payment method and defines the day BEFORE the expiration of the claim, when we must contact the customer or maybe arrange a visit or take a cheque etc. and it is a criterion in this particular list. During communication with the customer, may have to note the day of next contact.
- New expiration (due) date: Editable column, for cases of consensual transfer of payment date of particular invoices. ΑκρόασηΦωνητική ανάγνωσ
Λεξικό - [λεπτομερούς λεξικού]
- ουσιαστικό
- elaboration
- finish
- milling
- Settlement comment: This is the comment used for the collecting process. It may have already some content, if it is entered in the payment method line (used while invoicing) and will be available for editing here.
After the changes (if any) we pick out some lines (or all of them using Ctrl+A) and use the "Update settlement data" function from the Actions menu:
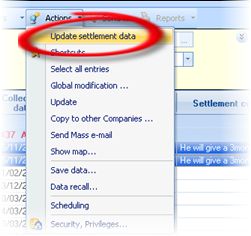
In the dialog that appears, the user can finally update the chosen transactions either by providing directly a date or a "relative to previous date” followed by a comment OR to choose to apply the values typed to the grid lines (“new collection date”, “new expiration date”, “settlement comment”).


Transfer of the expiry date for all of the chosen to 2 months after the current due date of invoices
Definition of a certain “collection date” for all of the chosen entries, for next contacting the customer
Updating with the content of the "Expiry date" column, which has been typed by the user at each line
Assigning the "Comment" of the chosen entries "To be reviewed by Mr. Smith"
Collector journal
Using this view (found in the same path (Transactions/Cash/Notes/Collections Planning) the user (collector) can check all collections that have been scheduled for a particular date range:

Contracts
The contract is monitoring the several elements of a trade agreement between company and a specific trade account and describes terms and rules of invoicing, collection, sales forecasts and relevant rebates, as well as information about the relationship between the two parties. It may concern customers or suppliers, associates or sub-contractors and is an element of ALL OF the system documents, as a point of reference.
New trade contract
The administration form of a contract contains a series of tab-pages used as a sort of grouping of available information:

In the General data of the contract, the starting, ending, signing and renewal dates defined. The Trade account and his branch (if a specific branch is concerned) as well as several persons involved (salesperson, mediator, related person etc) are also basic data of a contract. If needed, the “horizontal dimensions” are defined here. In case the contract is concerning a particular "Project", this is also selected to the contract, which will from now on be displayed in the "Contracts" list in the Project’s management form.
As far as the trade transactions, whatever might have been declared in the trade account, every contract defines SPECIFIC TERMS which applied in all of the transactions concerning it (like payment method, pricelist, retroactive discount policy, a fixed discount which could be agreed, the credit days which is taken into consideration for calculate the expiration dates of the debts).
Furthermore, a link can be established between the Contract and a trade document of "Blanket order" which is:
- Either a tight trading framework (in goods and quantities that will be bought), so that every delivery is produced by transition from this "Blanket order"; As a result, the outstanding part of the order (as well as the contract’s) can always be checked.
- Or, a framework model for the agreement that will be used for control (e.g. Items or Fixed Assets which the contract is covering if it involves support, maintenance, insurance) and might contain particular Serial Numbers.
For informative reasons, we can attach documents to the Contract and fill out a number of user-defined fields, notes and comments in the 1st tab-page.
The tab-pages in the lower part of the page contain data based on what is filled out in the General data of the Contract:
- Items, from the blanket order
- Payment method, the lines of the payment method used in the contract
- Pricelist, the lines of the Contract's pricelist with prices & discounts
- Commercial terms, the terms of the invoicing policy selected to the contract, containing rules for provide specific discounts, gifts or cause extra charges, during invoicing
- Commercial agreement, the rebate plans with the scale/efficiency as a 2nd level
- Documents, categorized in Trade and Payment documents and a particular category for “Credit discount invoices” which have been produced based on the commercial agreement, stated in the Contract
Several contracts can be made for the same trade account, each one containing its own terms. Those displayed in the "Contracts" tab-page of the Trade Account’s administration form.
Invoicing based on a contract
The activation of the Contracts during ordering/invoicing, takes place by the user or the salesperson. By searching the appropriate contract to the relevant header’s field, the available contracts are:
 (a) Active contracts of the context trade account, and
(b) Active contracts of other trade accounts (for cases of central agreements with a Corporate Group for its members or for cases where NO trade account defined on the contract, because it might concern an entire class of customers for example).
By choosing the Contract during invoicing:
- If the Contract defines a particular branch of the trade account, this will replace the one already proposed or entered.
- If the Contract defines a particular payment method, business activity, project, % discount, invoicing policy, salesman, those data will replace any that have already been entered (by other mechanisms) into the document.
- If the contract defines credit days, this information will be taken into account during generation of forecast entries for the settlement (as to the expiry date of debt) or during apply the payment method.
- If the Contract contains a blanket order with a "strict item check" (property of the contract), it is checked so that no items can be accepted, apart from the ones in that blanket order are included.
Information on customizing the function of the Contracts during the Invoicing
- In all of the documents where the Contract will be required to be entered (if exists), the most recent (in relation to the issuing date of the trade document) can be proposed to the corresponding field, by activating (adding) the Field Property Profile «1-CONTRACT» to the document types.
- If the storing of the document is meant to be prohibited in cases where the Contract is Inactive, the Field Property Profile «1-CONTRACT-ACTIVE» can be activated (added) to the document types.
Open items monitoring
The monitoring of open receivables and payables is a critical process, parallel with trade accounts “accounting” balances monitoring, having its own separate analysis and functionality. The aim of this process is to enable the definition (in the course of a co-operation between the two companies having a customer-supplier relationship) of the monetary settlement that will be applied, and based on this, to launch the receipts and payments and to monitor the compliance of the agreements. It will also enable the calculation of the delays and payout ratios by giving in this way, a full overview of the actual open balances in company’s Credit Control process.
Forecast of inflows & outflows
Document with "automatic forecast" activation means all invoices or other transactions that (should) CREATE FINANCIAL CLAIMS or LIABILITIES. They create, along with the records in the accounting view of trade accounts (payable, receivable) and forecast entries as well, in order to monitor “open” balances.
In order the right forecasts to be created by the application (as to WHEN the claims and liabilities will be paid) PAYMENT METHODS describing the settlement must be designed. The created payment methods must incorporated to the suitable trade accounts.
The forecast entries are on-line updating the cash-flow and trade accounts’ Ageing of Balances, helping us in this way to know their ACTUAL BALANCE at the right-agreed time. This is NOT illustrated to the ACCOUNTING BALANCE.

Settlement with customers
The definition of payments agreement-settlement with customers done within the customer register and can be configured in different ways, depending on each case needs and specifications.
Credit days
We enter the days of settlement e.g. “60” for 2 months payment. This element used also by the credit control process. Additionally, the system produces payment forecasts from the customer invoices, based on this settlement (after these days since the invoices’ issue), except if a special “payment method” has been designed and is applied during Invoicing.
Matching methods
The usual matching method between claims and payments (for the correct update of the “Ageing of balances”) is «On account», this is FIFO per day (each payment settles the older invoice).
Another available option is the «Based on rule» concerning special payment processes e.g. per project, where the “matching rule” must is declared to the next field of customer register.
Finally, we can prevent the matching process, in order to only occur through user selection or just not to occur. Through any of the 2 previous options, the matching is automatically occurs on-line as along as documents issued.
The automatic matching is a strongly recommended process, in order some of the most significant system views and printouts to be taken.
Matching rule
The matching rule allows mapping to indicate the way AUTOMATIC connection of “opening” and “closing” entries, through various functionalities, leading to limit or completely avoid the interference by the user for defining the documents settled through each collection.
The matching rules defined through the Tools/Customization/Liquidity menu.
Payment method
The payment methods, during issuing trade documents, can create either a receipt/payment entry (since it is cash or credit card) or a forecast entry based on the agreement (settlement) since it is “on account” (credit). If payment methods are correctly defined, they provide full and easy monitoring (by value and date) of the receivables and respectively, of the payables. You may create complex payment methods in order to implement your agreements (Customization/Liquidity).
The payment methods are directly related to the Credit Policy. During defining Credit control policies, the documents’ behavior in relation to payment methods, can be properly customized.
The payment method has a header and many lines (payment terms).

Payment method’s basic data (header)
| Auto-apply | When activated, and during documents save, the forecast or payment entries are automatically created without any user action. The nature of the documents where this is in force, it is defined to the lines-terms of the payment method. |
|---|---|
| Accounting category | The accounting category defines up to 4 segments of the ledger account code, which can be used by the configuration of posting in order to “compose” the ledger account. So, in cases where specific Accounts monitored per payment method (e.g. sales accounts analysis in the 4th degree -> 01 in cash 02 on credit etc.), then, defining this field, the generation of the correct Account code becomes feasible. |
| Grouping type | The selection made here, defines the grouping field based on which the payment terms will be defined. The horizontal dimensions, (Business unit, Activity, Dimension 1 and 2) as well as the items grouping fields (Family, Group, Category, Sub-category and Table 1 up to 10) are available. It gives the very important functionality of settlement differentiation by item’s category, for instance. |
PAyment method’s details (lines – payment terms)
In «Lines list» sub-page are displayed all the defined lines…

To the «Detailed line data» sub-page, we use the icons

to create or delete a line and to the fields below, we can define the details of every payment term:
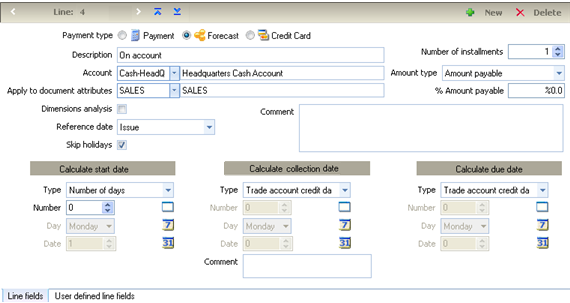


| Payment type |
|
|---|---|
| Account |
|
| Grouping Code |
|
| Dimension analysis |
|
| Apply to documents’ attribute |
|
| Reference date |
|
| Skip holidays |
|
| Number of installments |
|
| Amount type |
|
| % Amount payable |
|
| There are three areas as to the payment method date estimation. | |
| Start |
|
| Collection |
|
| Due (expiration) |
|
| All these three areas contain the following fields | |
| Type |
|
| Number/Day/Date |
|
| Comment |
|
|
Creation of a “dynamic” payment agreement (chain of payment methods) There is the functionality of creating a “dynamic agreement” of payment with a combination of payment methods based on a value limit e.g. we give to a customer a credit of 60 days for sales up to 10.000€ whereas for amounts which are greater than the limit, the credit is increased in 90 days. |
|
| Amount limit | To this field, the user defines the maximum value of the amount for which the payment method is valid. It concerns all the payment method lines. |
| New payment method | Since the value of the “Amount limit” field has a value, a different payment method must be selected to this field, in order be used (replace the current payment method), when this limit is exceeded. |

Payment methods per item category
We can create payment methods PER DIMENSION, selecting one among the system’s horizontal dimensions (project, activity, business unit, dimension 1 & 2, branch), and other items grouping fields (family, group, category etc).
In this way can be implemented agreements where each group follows different settlement terms e.g. for items of category A credit period of 45 days, for items of category B credit period of 60 days etc).
For the implementation of such an agreement, it must:
- To the “grouping type” field one of the fields to be selected e.g. item category.
- To the detailed data of the lines, it must be completed the ”grouping code” field, from the related table values e.g. a particular item category. There must be created as many lines as the table values which have different payment terms, and a last line recommended to be created with empty “grouping code” for the remainder.
It should be noted that the payable amount is not exclusively made up of items’ values but also from any special accounts. The application calculates the right “proportion” of the payable amount for each item category and applies this proportion to the final amount, according to the configuration of payment method.
Use of dimensions to payment methods
During payment method apply, there is the possibility of automatic dimensions development based on the company parameters, for the dimensions that we want to monitor.
This functionality concerns the payment methods that DO NOT ALREADY use analysis based on a grouping field. If a payment method line concerns a particular category or a business unit or a project etc. cannot at the same time to be defined as monitoring “dimensions analysis”.
If grouping is not used, any selected type (forecast to particular days, forecast to card account, cash payment), during payment method selection, then the proportion of the payable amount calculated from the ITEMS lines dimensions and this is resulting a split of the final amount payable per dimension. The results are as previously to be able to have open receivables (or payables) BY DIMENSION, without the necessity of using special payment methods (per category).
The parameters activating this functionality found in «Document administration» category:


Caution! The dimensions must be defined with their exact names to the DB scheme: fProjectGID, fActivityCode, fBusinessUnitCode, fDimension1Code, fDimension2Code
Definition of payment method for credit cards
The payment with credit card demands the proper customization of the Liquidity Accounts, the relative Debtors, and the types of Credit Cards. In order to also operate as a payment method, it must:
- A payment method with AT LEAST one line (term) to be created, the one that is characterized as credit card to the “type” field. It may exist other lines e.g. cash etc., for cover a mixed payment method.

 In documents types, the «Payment» segment to the Total options of the “header” sub-page, to be activated (when it concerns a trade transaction e.g, Retail Receipt, etc).

IT IS NOT RECOMMENDED the simultaneous activation of «payment» & «payment analysis» within the same document type. The «Payment analysis» is the Liquidity accounts grid and since generated through the “terms”, the users may be confused.
At the same time, in these documents types, the payment methods lines concerning credit card (and any other lines might co-exist to a credit card transaction) to be added to the «Payment terms» sub-page:
The “Payment terms” grid which is activated during sale in this case, allows to easily define the payment as described in the case of Retail sale. The payment method based on the terms’ data, produces «Liquidity account lines» (with the appropriate amounts, installments, accounts etc) that will update the various sub-ledgers (Open balances, Cash flow, Debtors).

Common payment methods for many cash desks
In cases of branches having more than one Cash desks, for which the balance is monitored, there must be opened different Liquidity accounts, one for each Cash desk. Although the “automatic payment” account can be only one, there is the possibility to set default payment account on a document series level, so, could configure COMMON PAYMENT METHODS and each time a different Cash Account to be AUTOMATICALLY recognized and suggested. In order to implement this feature, we need to define Liquidity accounts of “automatic payment” to the document series (but also of “automatic forecast”, if we want to differentiate the forecasts per series). According to this definition:
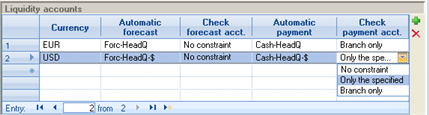

The Liquidity Accounts which are available during selection, are those who EITHER refer to this series’ branch OR does not belong to a particular branch (their “branch” field is empty).
Not allowed to a line to have left both of the two Liquidity accounts fields without a value
Not allowed to define different Liquidity accounts for the same series and the same currency
NOTES
- The exploitation of the above information is achieved in all documents supporting a Liquidity Account proposal, where if such a definition found to the SERIES for the particular currency, it is suggested the particular Liquidity account, if not, it will be suggested the default «automatic payment» account and the «automatic forecast» account, respectively.
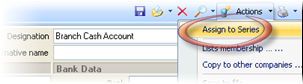 To facilitate the information of the default cash accounts per series, we select the “Assign to Series” operation from the “Actions” of the Liquidity account. This process enables (makes easier) the Liquidity account definition process as of automatic selection BY document series.
- An important reason to define this information to some documents is that the system does NOT bind* in any other way the use of a liquidity account of a different branch compared to the current transaction’s branch. Thus, a user could by mistake define a cash account of another branch and create wrong data.

* This happens because there are business scenarios where this should be useful, so the exclusion shall be subject of customization ONLY and not of a programming (domain) check.
Examples of payment methods design
- On Credit: In 60 days the 70% and in 90 days the remaining 30% of the document amount.
For the implementation of this agreement, a payment method of TWO lines will be designed as follows:
In the 1st line:
Payment Type -> Forecast
Account -> It is not completed
Apply to-> We complete the sales documents attribute e.g. SALE
Reference date -> Registration date
Amount type ->Amount payable
% Amount payable->70%
In the 3 days estimation area, to the «Start» and «Collection» we do not complete anything. To the «Due date» area we define the Type -> Number of Days and Number -> 60
In the 2nd line we define the same data and to the «% Amount payable» field we give 30% whereas in the «Calculate due date» area to the «Number» field we give -> 90.
VAT in cash & net amount on credit: The VAT amount paid in cash and the remaining amount within 120 days.
For this agreement implementation, a TWO lines payment method will be designed:
In 1st line:
Payment type -> Payment
Amount type -> VAT
% Amount payable ->100%
In 2nd line:
Payment type -> Forecast
Amount type -> Net payable
% Amount payable ->100%
To the Due Date calculation area, Type -> Number of days and Number -> 120
Matching processes
Matching debits/credits
The matching process connects the Closing entries (of receivables or payables) with the Opening entries (of receivables or payables). The meaning of the opening and closing entries for the system of the OPEN BALANCES, is shown through examples in the following scheme.

The system executes On-line matching, based on the older balance, provided that the «Automatic matching» setting in document types is activated. The matching entries management achieved through three methods:
1st: Automatic matching. It is the «FIFO» matching method, based on the older balance
2nd: Matching based on rule. It is the matching (which is also occurs automatically) based on the rule defined to each trade account. Grouping fields can be selected to the matching rule. For instance, in case we want to group the entries by some dimension (project, business unit etc.) and run matching separately, we select as a grouping field to the rule this dimension, so, the process will match the entries based on this field. It will not match entries of a different dimension.
3rd: Selective matching. In this case, the user selects which invoices should be “closed” during payment for instance. This process is achieved through the Actions/ Matching menu of document’s form or trade account’s form.
In the appearing window (at the left part) found all the opening & closing entries of the trade account. To the upper part, there are filters concerning the dates from which we want the entries to appear as well as if we want all or just the “open” ones. We select the closing and the opening entry that we wish to connect. By pressing
the matching (link) entry will be displayed (with the value covered) to the right part of the screen. The matching (coverage) amount can be altered (up to a maximum value, which is the minimum common open part of the two entries). In the entries grids, the system dimensions (project, business unit etc) are available columns, in order the user to be able to undertake selective matching based on this information.


Matching recalculation
In case that modification made to the dates or the values of documents involved, a recalculation process of all matching entries should run. The function can be executed through Tools/Maintenance tasks/Recalculation (Recalculate Account matchings) for all trade accounts or for a particular trade account through the “actions” menu of the account’s administration form. In both cases, we may select any period as the beginning of the calculation, even if this period belongs to a closed Fiscal Year. The process excludes the “selective” (manual) matching entries (it will respect them). There is also the time-scheduling option, which recommended to be activated, as any alterations or deletions to documents that concern matching will influence ageing of balances. The process could run on a periodical basis (at non-working hours).

Exchange differences
- Automatic ON LINE Calculation
During issuing a payment document, the document is automatically matched with a receivables document (invoice). At the time of the matching, the system calculates the value of the exchange difference possibly occurred in base currency. The calculation is accomplished based on the documents’ exchange rates differences. Thus, it is necessary that documents’ exchange rate (field of the document’s header) to be correct, otherwise we will get wrong results. The process of exchange rates differences calculation does NOT create the corresponding documents in order to close the balance (in base currency) to the trade account register. For these corrective documents creation, the process «Exchange rate differences closing» must be executed.
- Control Of exchange differences
We use the «exchange differences» statement (Entities/Accounts receivable-payable/Balances check). Due to exchange differences on-line calculation, this statement is always available and enables the control of these values BEFORE finalization and producing of the relevant documents.


Automatic Closing Of Exchange Differences
The process is accessible through the Periodic Process/Exchange differences menu choice. The SXP & SXN documents (for profits and losses respectively) which used in order the Trade Accounts and the Accounting to be updated, creates debit or credit to Trade accounts, depending on the sign of the difference, whereas the Accounting is updated using the header’s G/L Account. This Account would declared to the document types, in order to be suggested automatically.
To the appearing dialog, must be entered the G/L Accounts (since they have not been declared to the document types), the date up to which we want to post the differences, and the registration date of documents to be produced.
After the documents creation, the matching entries (that were taken into account) are BLOCKED (consequently and the documents that produced the relevant open & close items) for modifications & deletions. If for any reason, there are modifications that must occur, THE EXCHANGE DIFFERENCES DOCUMENTS MUST BE DELETED and continuously the process run again (after any changes to the source data).

- Caution! CANCELLATION to an exchange differences document is PROHIBITED. The only case of withdrawal of its restrictions is the DELETION.
- Period Of Exchange DIfFerences Valuation Of Open Balances
To the fiscal year definition, there is a special field enabling differences calculation from open balances at the end of each period. If it is not activated, open balances valuation is only occurs once at the end of each financial year. All the intermediate exchange differences just calculated for the paid receivables/payables (settled), and not for the “open” ones. By activating this option, what will happen during running this process, any payment occurred to next month or any receivable/payable (open item) was open at the end of every month, it is valued with the exchange rate of the end of the month and an exchange difference is considered.

- Example Of Exchange Difference formation
Suggesting that the Euro - Dollar exchange rate is 1,3745. During the purchase the amounts are configured as follows:

Through the “Balances check in currency”, we see:
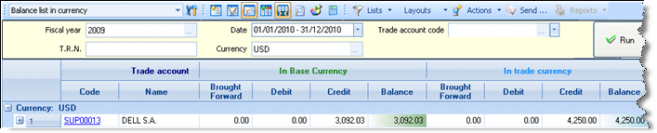
We pay the whole amount payable of 4.250,00 $ at 31/5 when the exchange rate is 1.2601.

The “Balances check in currency” shows now a zero balance in dollars and a credit balance in base currency (euro) of 280.72 € value:

We run the Exchange Differences calculation process:
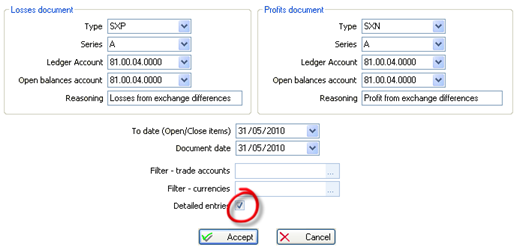
…and it will be created a “Losses from exchange differences” transaction of 280.72 € value. By activating the “detailed entries” option, this document will contain as many lines for each trade account as the matching entries are, and the corresponding document codes (open-close item) appear to the column “matched documents”. If the option is inactive, there will be as many lines as the trade accounts are.

The “Balances check in currency” shows now a zero balance in base currency (euro) too:


Open balances control
Monitoring of all the above information results in a rich and reliable set of views and reports, about open balances. More particularly, in the «Entities/Accounts receivable/Balance check» menu (and the respective to the “Payables” menu) the following reports provided:
Ageing of receivables/payables
It is useful to monitor the history log of outstanding receivables and payables (that is SINCE WHEN the claims are pending). The “age” is calculated based on the date-criterion “Reference date”. The current date proposed in order to check the expired debts up today. The delayed debts (out of date based on the «Reference date») displayed in six (6) columns of EQUAL periods, the “length” of which can be defined to the relevant criterion “Ageing period” (month, week, 2 months etc). The future debts (based on their “due date”) displayed to the column “Not expired”.
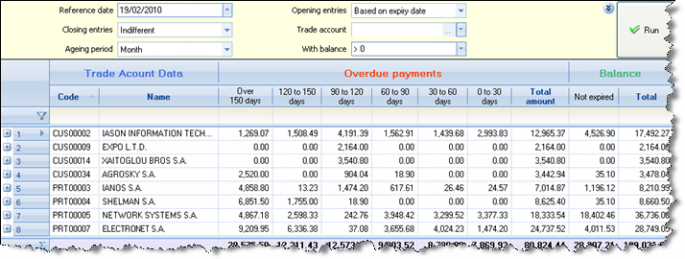
The criteria of filters section, give the following functionalities:


 Checking the current “Book” (accounting) balance either the “Commercial” balance (which includes the pending cheques and notes) through the “Origin“ filter (visible in “more” filters
  ):
):


If “cheques/notes” activated, there will be also included the claims for which we received notes not yet expired (taking as “total” balance, the trade account’s “Commercial” balance),
Otherwise (with the default value “other claims”), those claims will be considered as settled, according to the definition of a “Book” balance.

 Ageing of receivables based on their Issuance or on Expiry date, through the “Opening entries” and “Closing entries” filter. The default value is “expiry (due) date” for the opening and “indifferent” for the closing entries. That way, we can take the actual balance ageing over the time, whereas selecting “issuance date” we can take an “accounting” view (as balances illustrated to the Trial Balances and Transaction Statements). Here, there is an exception: The reconciliation for a particular past date/month to the Trial Balances is feasible only if the matching entries did not deleted neither recalculated in a way that produced different matchings. An example is the use of NCR, RSN documents that delete any matchings in order to release the receivables that settled to an invalid (now) cheque.


In the 2nd level (
), the particular transactions creating the open amounts of each date range are presented.

Reminder letters (mail-merge)
After run “Ageing of receivables” and display of results, in the “Actions” menu, you can create reminder letters and labels for the selected customers (rows).

A dialog comes up to select the Word document template, containing the letters’ customization:

Based on a ready template (to the saving folder of this view) «Reconciliation Letter Template.doc»), you may create other document templates with the desired text and layout.
The result will be the creation of a text ready for print…

To the same («Actions») menu, there is the corresponding «Create correspondence labels» action and the «Create letter of balance agreement in currency».
Balances justification
This view justifies the origin of the trade account balance. It presents grouping per trade account columns with the initial and the open debit and credit amounts. The total of the open entries (debit minus credit) equals to the trade account balance.

By pressing the (ctrl +) buttons combination, the documents that have been matched to the current transaction appear. In order to view the customers’ commercial balance (with the unexpired cheques & notes included) must also select the «Cheques/Notes» value to the «Origin» criterion.

Pay-out ratios
This is one of the main reports for use in Credit Control processes. It calculates the customers Real Average repayment time (Days Sales Outstanding) by excluding the credit documents or the cheque replacements that often, alter the customers’ balance history.
It shows per customer, the total receivables, the settled amount, the delayed amount and the not yet expired one. For the settled (paid) amount there calculated a) the average delay time (distance between invoice’s due date and payment’s valeur date, b) the average repayment time (distance between invoice’s issue and payment’s valeur date and c) the average collection time (distance between the invoice’s issue date and the payment’s issue date). For the delayed amount, there calculated the average delay time (distance between the invoices’ due date and the “overdue comparison date” given to the filters).
All indicators expressed in days and are weighted by values.

To the Paid section:

Average delay time: (Amount paid * Delay days)/ Sum of the customer paid receivables
Average repayment time: (Amount paid * Repayment days)/ Sum of the customer paid receivables
Average collection time: (Amount paid * Collection days)/ Sum of the customer paid receivables
To the “Delayed” section:
Average delay time: (Outstanding amount * Delay days)/ Sum of the customer delayed receivables
To the “Unexpired” section:
Average unexpired period: (Outstanding amount * Delay days)/Sum of customer receivables not expired yet
The “Overdue comparison date” criterion (used to the calculation of delay days) allows to run this report for successive dates and to have a possible future funding picture if payments will NOT occur.
Interest on arrears
This view presents the customers’ financial behavior as to the repayment period of the receivables & estimates the interests value as to the payments delays.
For the description of the columns content, see the PAY-OUT RATIOS.
To the “delayed” section, there calculated the additional column “Interests”:
| (Delayed amount * | Interest rate | ) * | Average time of delay |
|---|---|---|---|
| 100 | Days of the year |
The interest rate appears to the 2nd level for every invoice, based on the “Delay interest rate” profile, which declared to each customer and customized through Tools/Customization/Liquidity menu. In this profile can defined the days of year, as a calculation basis.
Automated invoicing of interest on arrears
Through the automation found to the previous view’s toolbar menu, we can ask the automatic producing of invoices (of services provision) to the selected customers, with the calculated interest amount:
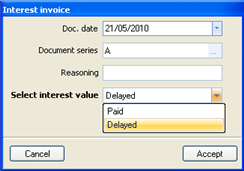
To the appearing dialog, the issuance date must be defined, the document series, a Reasoning, as well as the amount which is about to be invoiced (“paid” for the interest value due to delayed payments or “delayed” for the interest value due to not paid overdue receivables).
By selecting «Accept», the documents will be produced and displayed to the Sale documents views (for control, print etc).
To the company’s general parameters, in «Task flows» category, two parameters must be defined, that concern this process: the document type that will be used and an item-service for charge the interest amount. The document type could be an actual invoice (SSI) or a temporary document (e.g. SOR) for checking only and decide later if invoices must be issued.

CAUTION: This procedure does not control mistakes of possible REISSUING of the documents. SUGGEST beyond the use of this view for information, when it is about to be used for invoicing, the criterion «Receivables with due date» or «Receivables with issue date» to be properly entered, despite what the default value is “this year". So for example, if quarterly billed interest, run this report at the first 10 days of each quarter selecting “last quarter” in the date criterion.


Customer statement with analysis of open receivables
It is a combined view of customers’ balances with transactions analysis, and a drill down functionality to the open claims, at the same time. It is usually taken at the end of months as a part of the credit management process & receivables collection or during the communication with the customers for the exact investigation of the transactions.
At the 1st level, the customers balances presented, in a Trial balance format.
At the 2nd level, the transactions of the selected date range presented with the ageing of the receivables, based on the “due” date, as well as the received cheques (of future expiration).


Credit Control
The Credit Control procedures consider the creditworthiness of customers, the current 'total exposure' in relation to it, and the timely settlement of their debts. Although these procedures implemented with different requirements, organization, intensity and depth in the Enterprise, they are CRITICAL to ensure liquidity, avoiding unforeseen events (bad debts), and the respect of outstanding balances to levels that are able to finance.
Credit limits
Customers are categorized according to various criteria of creditworthiness and based on this categorization, we assign to them a "credit limit", the amount that we allow to remain 'on credit'. In the course of our relationship with each customer, these limits and the way we handle this relationship in general, probably is changing.
The system provides the functionality for simple or complicated credit control rules definition.
Simple credit limits to customer register
In customer management screen, in «Financial data» page, we define the credit limits:
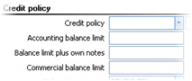

| Accounting balance limit | It is the debit balance (debit-credit). |
|---|---|
| Commercial balance limit | It is the sum of the accounting balance and cheques/ notes have not been paid yet (unexpired). |
| Balance limit plus own notes | It is like the previous one but it takes into account only the self-issued cheques/notes (by our customer and not by a third party issuer) |
 When one of these limits is exceeded, when documents have the credit control activated in the document type, the application, when there is a “Credit policy” (see below), will react according to those settings, but if there is NOT, will react according to the value of the related parameter found in «credit control» category:

Credit control policy
By creating a Credit policy, we define various credit limits, the method that these limits will be checked by the system, as well as a number of settings related to the consistency and the quality of customer repayments:

The «Control method» setting operates in the same way for all of the relevant controls:

| Warning |
|
|---|---|
| Prohibition |
|
| Message with excess option |
|


The additional controls (except of the credit limits of the customer register) are:
| Maximum amount per transaction |
|
|---|---|
| Overdue time and threshold amount |
|
| Reliability control method |
|
| Notes expiration & kind of overdue check |
The maximum time of delay defined, may consist, at the same time, the limit for the allowed EXPIRATION of cheques and other notes. This check only activated, when the choice is any but “not at all”. The maximum time of delay could refer to the older claim or could be an absolute number for notes expiry (defined to the “Overdue check based on” field. For example, suggesting that we have agreed to a 3 months payment (90 credit days)
|
| Risk limit & Orders‘ workflow step for risk control |
The customer’s risk is:
The rebates can be calculated and registered to the system as “forecasted” credit documents, through the “commercial agreements” functionality. |
| User defined balances & limits | Through expressions, we can create different controls, give a name, and define the LIMIT and the CONTROL METHOD of each control. To the dialog of expression creation, there is possibility to use either “ready” or “user defined” numeric fields of the trade account and of the documents. |
| Check source |
Concerning the credit limits, we can select among three sources of limit that will be taken into account:
This last option allows to monitor a dynamic rolling credit margin, as long the trade account increases his purchases. |
| Intercompany control | As to the balance limits (“Accounting” and “Commercial”), we could activate the intercompany control, which means that in a possible excess of the margin, it is the balance of the trade account in ALL companies, that will be taken into account (e.g. customer registers with the SAME code to all the companies of the system). |
| Control in person level | For the same limits (“Accounting” and “Commercial” balance), we could activate a CONSOLIDATED control for all registers of the same “person”, e.g. if a company is customer and supplier at the same time, the respective registers’ balances are consolidated and the limit is checked against this consolidated balance. If as customer owns X amount and as supplier has a claim of Y amount, the consolidated balance will be the X-Y amount. If at the same time, an intercompany control is also activated, then, will be examined ALL the registers of the same person in any company. |
Concerning the payment methods that may be used to customer transactions:
In «behavior per payment method» tab-page, it can be defined whether a payment method will be acceptable or not to transactions of this customer (or group of customers where this policy assigned). For each payment method we select if the credit policy controls will be applied or not. This is useful when, for instance, we want to define a credit control not to occur when the payment is by cash.
The document behavior, as to the payment methods NOT defined to this list, is determined to the “Behaviour as to the other Payment Methods” field. If it is “activated”, means that all Credit Policy controls are properly functioning, whereas if it is “deactivated”, means that the controls do NOT function and consequently the Credit policy will ONLY function when the payment method is one among to the defined into this list.
The payment methods defined as not allowed to the credit policy, do NOT appear as a possible selection to the payment methods list, during issuing documents of these trade accounts.
As far as to the documents are allowed to be used and the way that the credit policy controls function:
In the «behavior per document» tab-page, it can be defined per document attribute e.g. sales, orders, receipts etc. if allowed to be used e.g. if the customer is not reliable, “sales” could be prohibited but “receipts” allowed.

For the documents permitted, we could differentiate the control method (warning, prohibition etc.) for each one of the credit policy’s controls (compared to the control method defined in the 1st page). In this way, we can for example define that the controls during Ordering will be of “Warning” type, whereas during Invoicing, will be of “Prohibition” type.
The document behavior, as to the control type of Credit policy for transactions (document properties) NOT defined to this list, is determined to the “Behaviour as to the other document properties” field. If it is “activated”, means that all Credit Policy controls are properly functioning, whereas if it is “deactivated”, means that the controls do NOT function and consequently the Credit policy will ONLY function when the document property is one among to the defined into this list, so the use of all the others would be free.
As to the Cheques & Notes received from customer, it can be defined the maximum limit per issuer:
In «Notes limits per issuer» tab-page, for particular issuers, it may be defined (it occurs searching to PERSONS) the open notes limit allowed. In this way, the Excess of open notes limit control may be now specified in issuer level. There are three available options:



Of the particular assignor: This means that the limit is in force for the document’s customer (consequently to notes “assignor”) and the issuer defined to this line. E.g. if the limit defined to this point is 1000€ and our customer has given us a cheque of this issuer of 600€, trying to register a new cheque of the same issuer and the same value by this customer, we will then have the limit excess.
Total of the issuer: This implies that, independently who the open cheques’ assignor of the particular issuer is, these are summarized and compared to the defined limit. Thus, if the limit defined to this point is 1000€ and customer has given us a cheque of this issuer of 600€, trying to register a cheque of the same issuer and the same value by the same or any other customer, we have limit excess.
Issuer intercompany total: This means that the calculation will also occur independently of the assignor of this issuer notes, but also INDEPENDENTLY OF THE COMPANY. Thus, if the limit defined here is 1000€ and a customer has given us a cheque of this issuer of 600€, trying to register a cheque of the same issuer and the same value by any other customer of any other company, we have a limit excess.
Because this information is general and is probably desirable to be copied to other credit policies, we can do this, through the icon
of the vertical toolbar. To the appearing dialog, select the credit policies to which we want this information to be copied and run the process.

The limits per issuer control method defined to the “notes limit“ field of the Credit Policy 1st page:


Implementation of credit policy during transitions
During transitions execution, the functionality of credit control depends on the setting “check credit policy” of the transition rule:
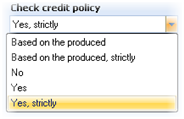

No Deactivates credit control
Yes The credit control activated and in case of excess, if the control method is “prohibition” or “message with an excess option” the transition STOPS (since the on-line overshoot functionality requires User Interface, otherwise is equivalent to “prohibition”), whereas if the control type is “warning” the transition PROCEEDS normally (since all the warnings ignored by bulk processes).
Yes, strictly The credit control activated just like in case of “YES”, but the control method “Warning” becomes “Prohibition” only in the context of this particular transition. So, in case of excess, the transition always STOPS.
 Based on the produced The functionality is identical to the option “YES”, but the activation depends on the setting “Check credit limits” of the document type to be produced (if there the setting is inactive, neither the transition performs credit control).
Based on the produced, The functionality is identical to the option “YES, strictly”, but the activation depends on the

strictly setting “Check credit limits” of the document type to be produced (if there the setting is inactive, neither the transition performs credit control).
If, on this basis, a prohibition occurs, the transition will be cancelled with an error. In this case, may be declared a "workflow step" which will go to the (original) document that failed to be transformed:
If an excess occurs, any control method (warning, prohibition, Message with excess option) of the Credit policy functions as a prohibition and the transition is cancelled with an error. In this case, it can be defined a “step” in which the failed document will be transformed:


When we disable credit control in a transition to a document that normally concerns credit control?
When produced by a (source) document that has ALREADY passed credit control check, e.g. from an Order.
On-line approval of Orders
 This operation is activated through any Credit Policy control defined to occur through a “Message with excess option”. This means, that in case of a credit limit excess, we want to be asked for an on-line approval from authorized user/s, in order for the process to continue, otherwise, the control will be prohibitive.
 In order this process to operate in the correct way, in the Credit Policy general data, must declare an authorized users group, which will be in position to undertake such an approval:
 The result will be, during issuing an order or an invoice entry causing a credit limit excess, to appear a message stating the limit excess and enabling to ask for a approval (excess of the prohibition):
If continuing (yes), to the appearing dialog:
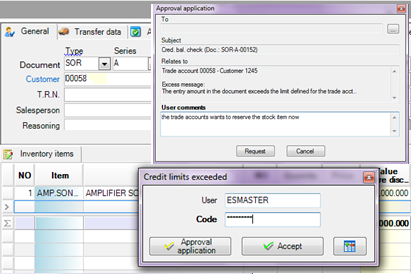 A username and a password (for the approval) can be given (in case the authorized user found to same area and not in another terminal).
- We can select “Approval application” and to the appearing dialog select the user from whom we ask the approval (in the “To” field) and a comment, if necessary. That user must belong to the authorized user-group:

By selecting “Request”, the following dialog is presented to the authorized user. The authorized user has two options:

|
|


Posterior approval of Orders
The on-line remote approval process of the Credit Limits excess is not applicable in some cases. The credit control supervisors may not be available, the ‘request for approval” messages sent but returned without a response and the Orders cannot be stored for future examination since, if there is not a approval, the control equals to prohibition. Thus, an alternative process recommended which massively examines the Orders afterwards, for a possible Credit Limits excess.
Preconditions
The preconditions in order this process to operate as far as the organizational part is concerned, are:
All the invoices go through the Order stage.
All the orders go through the Credit Control stage.
All the orders to be invoiced must get a specific “workflow step” participating to the customer’s risk calculation.
Workflow example
|
Unexecuted orders which have not been processed:
|
|---|---|
|
Execution of «Credit Control» transition:
|
|
Some orders are approved from the Credit Policy and some other failed by obtaining a specific “step” (HOLD) for recognition and further control.
|
|
Only the approved orders sent.
|
|

|


Customization guidelines for posterior orders’ approval
- In documents concerning Deliveries and Invoices, you must exclude to the SERIES the functionality of being created through typing. They must be only generated through transition (from Order).
- All the orders during creating must obtain the “INITIAL” value to the “Workflow step” field. This can be simply accomplished, through a field properties profile in the ORDER.
- Credit policies control type must set as a «warning», in order the Orders to be saved by just displaying a message and to be later examined.
- To transitions rules from Orders to Delivery Notes or to Invoices (e.g. SOR=>SLN, 112. SOR=>SNV, SOR=>SRC, SOR=>POR, SOR=>PNT) you must define “W/F step of sources” = «ΟΚ», in order none of the orders to be proceeded unless, it is approved.
- In the CREDIT CONTROL transition rule (which is only intended for approval) you must insure that “W/F step of sources” = «INITIAL» and “W/F step of target document” = «OK». The “W/F failure step” is «HOLD». This transition transforms the step to «ΟΚ» when «passed» through Credit Control, whereas transforms it to «HOLD» when it has not passed (credit control Failure step).
- In the «SOR=>SRO» transition rule, you may define «W/F step of sources after transition» = «HOLD» in order not to be displayed in the unexecuted orders list.
Possibility of promoting Sale Orders having "HOLD" step
It can be designed an additional transition rule, in the same way as the “CREDIT CONTROL” having the credit limits control deactivated, with the «HOLD» as the sources’ step and «ΟΚ» as the targets’ step, which should correspond to special users group. In this way, will enable the approval even of orders that, according to Credit policy ought not be approved.
Transfers and Inventory Corrections
This unit will examine the Warehouses management processes, the stock control, the quantitative transfer processes, the Third Parties’ warehouses, as well as the information provided, for a complete review of the Warehouses’ contents.
Physical inventory
Register of stock counting in warehouses
Appropriate document type: ICN (Stock Counting Entry)
The particular document does not create transactions to any sub-ledger. It is useful in order to insert to the system the counting of warehouses, occurred in a particular point in time. The stock found will be typed in the items’ trading measurement unit. During typing, the SYSTEM registered stock of the current Warehouse, as well as the stock of all Warehouses calculated and displayed, as well as the immediate formed stock difference to the items lines (shortages or surpluses).

Header Data

| Series | The series usually suggested, based on User privileges to the series. Based on this, it is suggested the Warehouse, concerning the counting. |
|---|---|
| W/H | We confirm the Warehouse. |
| Issue date | We complete the date of counting. The system stock quantities, as well as the counting difference will be calculated based on this date. |
Items Line DAta
| Item |
|
|---|---|
| Stock in W/H |
|
| Total stock |
|
| Counting |
|
| MU |
|
| Difference |
|
| Difference Type |
|
Update the not counted items
In order the process to include the counting differences of items not found but having a not-zero stock quantity into the system, we use the «add items not found» button from the toolbar on the bottom screen part. To the appearing dialog, the items with any stock different than zero (calculated by the registered transactions up to the date of counting) that DO NOT EXIST in counting sheet, are presented.
This means that all counted quantities must be firstly entered and continuously all the not counted to be selected.
How to enter stock counting from external sources
Import lines from Excel
You may undertake the counting in an excel sheet and to wish to enter the counting into a ‘ICN’ document in order the differences to be automatically calculated. The file must necessarily contain the Counting quantity and a column as an item Indentification (item code, Barcode, multiple codes, supplier code). If the item monitors Dimensions there should be found the corresponding dimensions columns and when in the same file are included counting from different warehouses, there must be the corresponding column as well.
For the correct data insertion, is provided that the excel columns that we will copy, will have the same order with the document columns.

Then we copy the data from the Excel sheet to the clipboard (without the headers) and through the document, we execute “Import lines from Clipboard” through the “Actions” menu.

Insert lines from other external sources
If the counting occurs to another system e.g. PDA, it can be created a repetitive data transfer process to our system’s documents. The processes and the transfer tools vary depending on the access method to the other system’s data.
If we have access to the external system’s database (e.g. SQL Server, Access etc.) it may be used the “Import Data (Advanced mode)” tool, for design this process.
If the data from the external system may be exported to ascii, excel files, it may be used still the ”Import Data (Advanced mode)” tool, for design the process from ascii, xls, xlsx, etc files.
If the external system has the functionality of data export to XML with specifications determined from Entersoft, then, it can be used the process of “Import from XML files”.
In addition, through the Counting document, we can execute the ”Import lines from external source” action where we can execute “EIM” scenarios of lines import into the document through excel files or from an application’ view. These scenarios can created through the “Tools/Data Import-Export/Imports from file customization» path.
Corrections and differences recalculation
After counting typing, there may be found differences due to e.g. omission of some documents entry and as a result, the counting differences will need to be recalculated based on the current stock.
After we complete the missing transactions, without changing the counted quantities, we can execute the «Stock quantities refresh» button automation through the ICN document’s toolbar (to the bottom screen part). The result will be the differences recalculation based on the new stock, after all corrections.
IF we find differences due to e.g. omission of issuing some In-house transfers and we enter these (with an “ITN” document), in order to eliminate the differences, then, for the same counting, we want all of the remaining data to be recalculated. E.g. A counting of 100 to WH 1 with stock of 200 and counting of 120 to WH 2 with stock of 220, and thus a shortage of WH 1 = 100 & a surplus of WH 2=100. By inserting the ITN document between these Warehouses of quantity = 100 and by executing «Stock Refresh» in ICN, the differences in our example, will become ZERO.

Update of shortages-surpluses
Since any counting differences between the “system’s” and the “actual” (counted) stock occur, there must be registered shortages or surpluses, in order the system to be updated and provide correct information from now on.
Appropriate document type: ISD (Differences due to Stock Counting)
Appropriate transition: 440. ICN=>ISD (Finalization of differences due to stock counting)
By executing the above transition (we use the “Finalization of Differences” button through the ICN document’s toolbar (to the bottom screen part). It will produce the ISD corrective document which updates the inventory. The differences updated based on the «Difference TYPE» column of each line.
Especially the surpluses will negatively update the “exports”.
This process must be executed before any next counting process to the same warehouse.

Special cases
Stock variations monitoring
For the items that monitored by variation (e.g. color-size), these variations/dimensions must be declared on a line level (by transferring the relevant columns to the visible ones) and NOT with F12, this means that the counting must occur to a separate line per combination of variations. In this case, for the selection of the not counted items, select the appropriate view “per variation”.
Inventory per packing unit
For the items that monitored to one or more “packaging” units, there is the need to be counted per package and then, a calculation to be accomplished for aggregate the quantities to one line in the “trading” unit of each item. Then the differences could be calculated and posted correctly.
In particularly, in items lines of the Stock Counting document, by using the Ctrl-Alt-F12 combination, a dialog comes up with the packing units to a matrix type grid, where, in lines, can only be selected items having “packages” and the packages are presented as columns (as many as the different packaging units found). For each item, we can enter the counted quantities to the appropriate “package” columns.
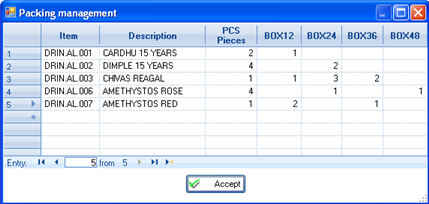
All these quantities inserted to document’s lines with a “reverse” line type and, selecting “accept” to this dialog, those lines are “packed” to ONE line per item (with “normal” line type) by converting the package unit to the main unit and summing the counted quantities (after conversion).

As for the lines, which generated through this process, we must know the following:


Through the deletion of a detailed “reverse” line, the total quantity of the relative summarized “normal” line, changes.
The deletion of a summarized (“normal”) line causes the deletion of all the related detailed (“reverse”) lines.
The correction of a summarized line as to the counted quantity not allowed.
The W/H change of a summarized line provokes the same modification to the detailed lines.
Customization Information
In document type, to the ‘summing packing quantities’ field must be declared the field used in order the sum of packing quantities to be stored (in ICN is the «Amount 5» field).
There is a specific line layout used to ICN document type, which differentiates the display of normal and reversed lines.
In the ‘ICN=>ISD’ transition rule, a lines’ filter declared in order to exclude the “reversed” lines.
In-house transfers
Order a transfer from another site
It is used when a branch needs items found to another branch or warehouse. If the two sites monitored into the system, this is the most convenient way for the products to be asked and transferred.
Appropriate document type: IWOR (Intra-warehouse transfer Order)

In the POSITION, we enter the Branch and the Warehouse FROM where we ask the transfer, whereas into the DESTINATION, we enter the Branch and the Warehouse, which is in lack.
In lines, we give items and quantities and view the stock in the Warehouse FROM where we order. By altering the POSITION, we may find a site, which has enough stock of the particular items.
If the items monitor dimensions, we may use the functionalities described in Sales and Purchases, in order to define these dimensions.
This document updates the Orders «to branches» from the warehouse ‘POSITION’ and the Expected «from branches» for the warehouse DESTINATION:

There is a special document in order to undertake a reservation to the Warehouse where we order:
Appropriate document type: SRI (Stock reservation for Intra-warehouse transfer)
The difference from the simple Order here is that in the POSITION of the warehouse, there is a reflection to the RESERVED by reducing the AVAILABLE BALANCE (and not to the «Orders to branches»).


Transfer between warehouses
Appropriate document type: IWH (Intra-warehouse transfer)

The handling is the same as with the Order In-house transfer. If there is an Order for the particular transfer, the document must be produced by a transition, in order to avoid having wrong pending Orders’ quantities:
Appropriate transition: 443. IWOR=>IWH (Intra-warehouse transfer from Order)
If the transfer concerns reserved stock to the source site for the destination one, then:
Appropriate document type: IWR (Intra-warehouse transfer of reserved stock)
Appropriate transition: 431. SRI=>IWR (Intra-warehouse transfer from Stock Reservation)
The transition result is the update of the Exports to the POSITION warehouse and the negative update of the Exports to the DESTINATION warehouse.
Import (Debit) to the Inventory Record, cannot occur to the target warehouse, rather than just quantitative, since Stock valuation process cannot (and must not) run separately for each Warehouse. The above suggested documents will cause the update of definite transfer cost (to the generated transactions), by the Stock Valuation. Thus, just in order for this cost to be available PER transaction, the use of particular documents recommended.
Despite these, two other documents provided for optional use:
ITN: In-house transfer
Updating only quantities (positively to the Imports and positively to the Exports)
IWI: Intra-warehouse transfers (Cost of Others Imports)
Updating quantities AND costs (positively and negatively to the Imports)
Especially the second one (IWI) updates costs that will NOT be altered or recalculated by the Stock Valuation process but it is considered as definite ACQUISITION cost for both of the Warehouses. It is necessary to be used, when one of the two Branches has INDEPENDENT RESULTS (books keeping).

Third parties warehouses
The stock items of the company which are found TO THIRD PARTIES e.g. to customers for demonstration, sampling, testing or to an exhibition or to a supplier for repair, are monitored in special Warehouses (“logical warehouses”) and it is REQUIRED to monitor them PER TRADE ACCOUNT. We need to create ONE warehouse PER Branch. Such a warehouse:
- Participates to the Stock Valuation so, as to the cost handling, it does not differ from any other normal warehouse
- The opening fiscal year transaction (Inventory) must be detailed per trade account
- Receipts and Purchases occur normally using the document types used for any other Warehouse
- In-house transfer TO such a Warehouse FROM another company’s Warehouse, must ONLY occur through a specific for this purpose document, that allows to declare the trade account too. At this document series the Third parties warehouse must have been declared as the “Default WH”.
Appropriate document type: DTE (Goods delivery Note to Third Parties W/H)


- In-house transfer FROM such a Warehouse TO another company’s Warehouse, must ONLY occur through a specific for this purpose document, that allows to declare also the trade account. At this document series the Third parties warehouse must have been declared as the “Default WH”.
Appropriate document type: RTE (Goods receipt Note from Third Parties W/H)


- No transaction must be entered to such a Warehouse without ensure that the relevant Trade account (THIRD PARTY) is completed to the items lines.
The Warehouses with THIRD PARTIES’ items, monitoring merchandises which are NOT property of the company but belong to Third parties e.g. Service Warehouses or Third parties’ merchandises for preservation etc:
- Must have the «Not to be valuated» field activated (company sites data)
- The opening fiscal year transaction (Inventory) must be detailed per trade account also
- Purchases and Sales NEVER occur there
- For Transitions FROM and TO these warehouses, can be used the same documents or documents of pure quantitative update:
Appropriate documents types: DTW (Goods delivery Note to Third Parties W/H)
RTW (Goods receipt Note from Third Parties W/H)
- No other transaction must be entered to such a Warehouse, without ensure that the relevant Trade account (THIRD PARTY) is completed to the items lines.
- How does a sale occur to a final customer from a warehouse to third parties?
During Sale, the items are exported from the Third Parties Warehouse, but their transactions have as trade account the FINAL CUSTOMER only. Unless there is some special handling, the materials are not released from the THIRD PARTY to the premises they located.
In the Third Parties Warehouse, the goods have been delivered, either with a DTW or a DTE document (if we get the Third party warehouses’ overview with costs).
When the sale occurs, there are 2 alternatives:
- To use a transition
Appropriate transitions: 147. DTE=>SNV (Invoice – Goods delivery Note from Third parties W/H)
131. DTW=>SNV (Invoice – Goods delivery Note from Third parties W/H)
The document series to be used for issuing those Invoices (declared to the transition dialog) must belong to the Branch, where the Third parties W/H belongs too.
The result will be that the “Third Party” is placed as the customer to the produced Invoice and as the “Assignor” at the same time. Then, we must proceed to Invoice MODIFICATION and define the final customer to whom the sale was addressed, to the “Customer” or “Trade account” field of the header.
To insert through typing the Invoice-Goods delivery Note by defining the customer and the items in detail and by selecting as location of delivery (document header “W/H” field) the Third Parties W/H from which the goods delivered. In this case, the application is automatically places to ‘Assignor” the document customer. We must now CHANGE the value of this field by placing the Third Party to the Assignor field.
The result in both cases will be the generation of 2 additional items’ transactions for the “Assignor”. In the Inventory Book those transactions cancel each other in the same WH (similar to the in-house transfer), whereas in the Third party warehouses overview update the “Third Party” trade account with the correct quantities.

Stock replenishment based on shortages
Based on the «Review of stock reordering needs» report (Entities/Inventory/Stock control):

The Report presents the stock shortages in summary for all the Warehouses PER Items’ Basic Supplier.
- From the «Sales date range» criterion (it is suggested «last year» by default) the «Sales» column is updated within this range. This quantity may consist a criterion for the replacement quantity.
- The «% Stock» column displays the % of Sales (see previous column) for which the current stock is enough at the moment. By completing the «%Stock» criterion, could isolate the items having smaller % coverage of a specific threshold e.g. which items have %stock < 50% of the last year sales
- There is an additional «layout» available (through toolbar menu), where INSTEAD of the Sales column, there presented the sales quantities of the last 3 years.

- To a second level of this view, can check the Sale & Purchase Orders as well as the Orders from/to other sites of the company:

In the «To Order» column, the user may type the desired order quantity (by changing the system proposal based on the safety limits). Based on this, AN AUTOMATIC ORDER to suppliers is generated for the selected lines:

 By selecting this functionality, after the date and the document series confirmation to the appearing dialog, there will be produced documents (as many as the suppliers are) containing the desired quantity, defined to the “to order” column.
The document type used to this process, is defined to the «Task flows» category of general parameters:

If you do not want to influence any of the Inventory quantities (expected from suppliers) and just to store this information as a “proposal”, could change the default value of this parameter to e.g. (POF – Offer).
Production & Assembly
Bill of material
The Bill of material regarded as the mechanism, which describes how a final or a semi-finished product created. It defines the components/ingredients that must be consumed, expenditure incurred and any potential co-products or by-products arising from the production process.
Basic structure

| Generally | Selection of BOM kind “Bill of Material” |
|---|---|
| Date range | Duration of BOM; It can also be used for system checks that would be implemented with additional development. |
| Customer | In the case of Make-to-Order production process, we define the customer for which the BOM is for, especially if the process includes certain specificities for him. |
| What is produced | As for the selection of the produced item, the items that are available for selection are those characterized as “produced” . Produced quantity by this specification as well as the measurement unit must also be defined. . Produced quantity by this specification as well as the measurement unit must also be defined.
|
| Basic bill of material | Each item may have many alternative bills of material. By activating this field, this BOM will update the item’s “basic BOM” field and from now on, it will be suggested as default during the Production documents issuing. |
| Consumptions |
All main and auxiliary raw materials consumed during the production process of the item must be declared.
|
| Co-products & By-products
|
When it comes specifically to the scrap, a standard cost price MUST be declared, and as for the Valuation method, it MUST be “Standard cost price”. During the Cost Determination Process, the (fixed) cost value of these products reduces the total consumption cost to be allocated to main products and co-products. |
| Expenses |
Potential costs (services & expenses) that regard the execution of the particular BOM along with their forecasted costs and the Phase that concern, can be also inserted in this section. This declaration made only for informative reasons and for printing to BOM’s book.
The actual costs that the Cost determination process will take into account, defined through documents. |


Where can I print BOMs?
By selecting from the main menu “Entities/Inventory/Production Books/Bill of Material Book”, the user can have an overview of the BOMs registered (with development of possible BOM levels), based on various criteria.

Try “print preview” functionality to take a printable layout of this view.

Forecasted cost calculation
Many times during the production process the forecasted BOM cost calculation is regarded necessary, in order to be updated according to the new cost prices. The recalculation process is accessible through “Tools-Maintenance/Maintenance Tasks/Recalculation/Recalculate Cost of BOM”.
On the appearing dialog, may selected the cost price based on which the recalculation will be accomplished:
The official cost price is the one calculated by the last execution of Stock Valuation process.
The standard cost price is the one declared to the material’s register.

Massive replacement of contents
The procedure addresses needs of global replacement of a particular material or ingredient with an equivalent one, for various reasons e.g. due to a code substitution by a supplier without significant difference or due to a stock lack to items that cannot be replenished any more. To initiate the process, select “Periodic Processes/Stock updating processes”.
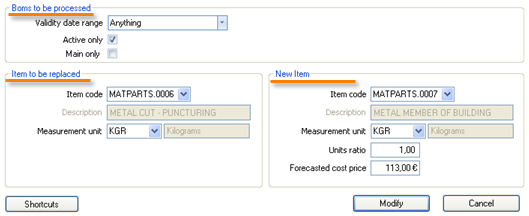
The BOMs that will participate to this process may be selected by validity date and can be only the active ones and/or only the product’s main ones.
To the ‘Item to be replaced’ area, the user selects the Item to be replaced and the corresponding measurement unit. This means that the replacement process will take into account only Items using this particular measurement unit into the BOM line.
To the ‘New Item’ area, the user selects the Item that will replace the initial item (“to be replaced”) used in the selected BOMs. Moreover, we define:

The measurement unit that will be used during the replacement process
The unit ratio between the new item, and the item to be replaced. If for example the user declares a value of “5”, this automatically equals to the fact that for every single unit of the item to be replaced, 5 units of the new item are inserted.
The forecasted cost price of the new item: if no price entered, the standard cost price of the new item is automatically selected.
In the end of this procedure, the old item will have been replaced by the new one, and the forecasted cost value of each BOM will have been recalculated.
Assemblage
Assembly Note
Appropriate document type: ASN (Assembly Note)
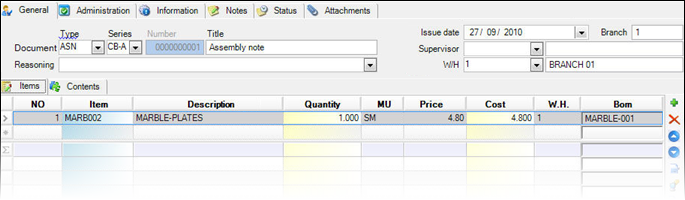

| Document Type & Series |
|
|---|---|
| W.H. |
|
| Items |
The Items to be assembled, are selected.
|
| Contents |
As for the management of the BOM levels, as well as, for the dimension management (color-size), find information in chapter ”Special Issues”. |


How do we see the results of issuing Assembly notes?
| View | Content | |
|---|---|---|
|
|
Assembly Documents | List of all assemblies for check, modifications and management can be found from the main menu “Transactions/Warehouse/Assembly” |
|
|
Control assembly materials |
The quantity of the assembled item as well as the quantity and cost of the materials consumed for its assembly are depicted in the following way:
|
|
|
Inventory Stock Books (detailed format) |
In the column “Production” and “Consumptions” of the Inventory Records, there presented the quantities and the costs of the compositions and consumptions.
|


Difference between assembly & production
Actually, during the assembly process there is only consumption of materials (Raw material, asset parts, packing material, merchandise etc.).

If throughout the product formation process, apart from the material consumption, there are additional expenses, and produced by-products or if there is need to monitor different production phases, in this case the approach must be via the ‘Production Process’ and not the ‘Assembly Process’. The distinction between the two processes concerns mainly the final cost of the product. When the product cost does not include other expenses apart from its ingredients’ costs then its management must be allocated via the ‘Assembly Process’. In the opposite scenario, when there is more added value to be included in the cost determination procedure, the cost must be managed and monitored solely from the ‘Production Process’ system.
Assembly based on Sales
If the composition takes place instantly because of a sale, it means that usually there is not stock available and thus the products composed in tandem with the buying demand. In this case:
The Item Control Profile of the assembled items must permit ‘negative stock’.
At the end of each working day, an “ASN – Assembly Note” must be inserted; in this document, all items together with the quantities needed to be assembled can be selected from the view “Sold Items to assemble” which is accessible by pressing shift+F3, while in the lines of the document:


Disassembling
Disassembling process is the process of destructing an item, in order to insert its components back to the warehouse.
Appropriate document type: DAN (Disassembly Note)
Example: Disassembling a PC central unit:
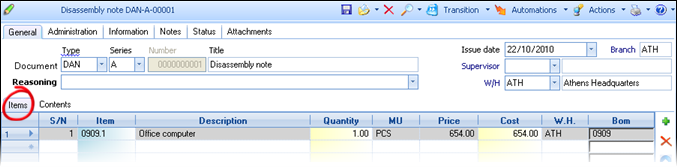


Disassembling Implementation Guidelines
- Items that are bought or imported and are about to be disassembled, such as a PC central unit for instance, must be characterized as “Produced” and a respective BOM must be declared for them, along with their components.
- The purchasing (acquisition) cost of an item to be disassembled (consumed), is distributed to its components by the application system; subsequently, these are the (primary) costs, according to which the components are inserted in the Warehouse.
- The disassembling MUST NOT BE USED to cancel of assembling items and thus, returning the respective components back to the Warehouse. For this case, the system provides a specific document for this purpose:
Appropriate document type: ANC (Cancel assembly Note)
The assembly cancellation process cannot be used, if the “stock costing period” in which the respective assembling process (ASD) took place, has ended (exactly like the case of an invoice cancellation).
If that happens and need to cancel an assembly of prior “stock costing period”, then, must use the disassembling ('“DAN”).
All the above are necessary, in order the Stock Valuation process to run seamlessly and to result in correct calculation of “grant” costs..
Production Order
A typical production process usually begins with a Production order.
Appropriate document type: PNT (Production Order)

|
They are required fields for document identification. Usually, they automatically take values, depending on the user and his access to the series. |
|---|---|
|
Can enter the customer involved. In case the initiation point is a customer’s Order and the production order derives from the transition mechanism, then the respective customer automatically updated. |
|
This is the Warehouse where the Items are produced. |
|
The Items to be produced are selected, along with the production quantity.
|
|
As for the dimension management (color-size), find information in chapter ”Special Issues”. |
|
In this section the user can declare an other costs that relate to the production process. This declaration results in the pre-cost determination process of the production order. |


How do we see the results of issuing Production Orders?
| View | Content | |
|---|---|---|
|
|
Current Stock Availability |
The Production Orders update the column “Expected from Production”
|
|
|
Customer’s pending Orders |
If the Order regards a specific customer, it can be visible via the pending orders, in the customer’ register screen.
|


Based on customer order (make to order)
This process concerns the case where production is actualized for a customer’s account (make to order), initiating from a Sale Order and forwarding it to the Production department.
The customer’s order is registered via the Sales system, with all goods and products that the customer demands. Next, the following transition execution must take place, so that the Production Order is registered:
Appropriate transition: 439. SOR=>PNT (Production Order from Sale Order)
The field “Customer” of the Production Order is automatically updated by the Customer of the source Sale Order



The Production Order entails only the “produced” items from the total items requested by the Customer Order.

Destined for stockpiling (make to stock)
The purpose of a ‘Make to Stock’ production process is the replacement of stock based on the demand expressed from the sales orders or the forecasted demand, that is estimated according to the Sales that have taken place in the past. Finally, the system, by taking into account the safety limits defined to each product, results into the requested quantity to be produced, so that the stock can be appropriatelly substituted.
The form that suits most for this purpose is the “Review of stock reordering needs”. While registering the Production Order (PNT), by pressing Shift+F3 on the item lines, the user can open the above view and insert products massly, as well as the respective quantities that must be ordered from the production department.
Material adequacy control
During the registration process
Implementing the stock control of raw materials, during creation of a Production Order, can be achieved by using the appropriate “Item Control Profile”. To the relevant profile line (which concerns Production orders), must select “Reverse lines” to the “Run at lines” field.
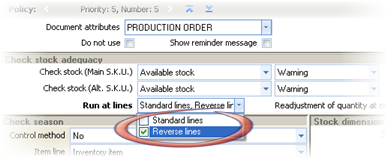
The actual purpose of this process is the provision of relevant information at the time of the Production Order registration.



Based on non-executed production Orders
For control the shortages, use the view “Check Material Adequacy” through “Entities/Inventory/Production Books”:
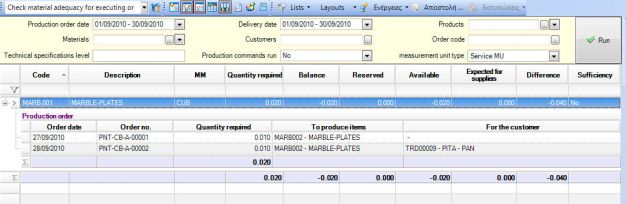
Based on the pending Production Orders, this report estimates the availability of raw materials compared to the required quantity, for all consumptions that have to be done. This assists to:

Forward all Product Orders for which THERE IS satisfactory adequacy.
Organize the necessary purchase Orders of INSUFFICIENT materials.
Ordering & receiving raw materials
Processes of material’s Supply Orders as well as their delivery processes executed by the Purchases. Find more information in the relevant chapter.
Appropriate document type: POR (Purchase Order)
By receiving the materials that were out of stock and by using afresh the report “Check material adequacy for Production Orders”, all inadequacies would be solved.
In case the materials must be transferred in another area (i.e. subcontractor’s place or worksites) the processes that ought to be used are In-house Transfers.
The Production Orders can be forwarded and the monitoring of this can be viewed with the use of “Workflow step” (i.e. ‘initial’, ‘awaiting material’, ‘developing process’ etc.).
Production – Consumptions update
Simultaneous declaration of production & consumptions
This procedure updates the Warehouse simultaneously with the IMPORT of products and the DISPENSE of materials:
Appropriate document type: NPC (Production - Consumptions Note)
Appropriate transition: 435. PNT=>NPC (Production - Consumptions Note from Order)
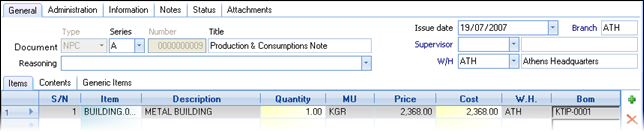
Alternatively, if the production order concerns a particular customer:
Appropriate document type: PCC (Production - Consumptions Note for customer)

Appropriate transition: 441. PNT=>PCC (Production - Consumptions Note from Order)
This procedure recommended when the technical specifications (BOMs) are fixed – stable and wish a direct update of raw materials.
The management and the possibilities provided by the system are the same as the ones of the Production Order.
Customization Information
In the default transitions’ parameterization, the consumptions transferred identically (there not generated through BOMs, but just copied from the Order). In the opposite case, i.e. when we need to produce consumptions according to the current BOMs, and not to copy them from Orders:

There must be activated the “Expansion of BOMs into target document” setting in the respective transition rule.
There must be activated the ”Line filters” ONLY for regular lines (inventory items) so as to exclude the source’s consumptions (reversed lines).
Production & posterior declaration of consumptions
As for the declaration of products’ insertion to Inventory, when the production completed, a specific document will be used, that updates only acquisitions (and the respective forecasted cost) from the Production Process.
Appropriate document type: PNC (Production Note)
Appropriate transition: 445. PNT=>PNC (Production Note from Order)
If the user wishes to add any co-products or sub-products (that were not included in the BOM), the related item can be inserted in the 1st page and by pressing Shift+F6 it can be linked with the main product while also determining the appropriate type of relation. See details to the above chapter about Production orders.
In the page “Contents”, we can see the forecasted consumptions, just for informative reasons, since they DO NOT update the Inventory.
This method is recommended in cases where the technical specifications do not exist or where consumption is not constant and declared independent and (usually) aggregated.
As for the declaration of the consumptions, based for example on an actual consumptions sheet implemented during the production process, the following document is used:
Appropriate document type: CON (Consumptions Note)
Instead of manual input of this document, if we wish the consumptions declared in the Production Note as forecasted (either they were brought forward via the production Order or through an intervention and correction of the Production Note) ought to update the Inventory, the following transition can be used:
Appropriate transition: 447. PNC=>CON (Consumption Note from Production Note)
This Note updates the consumptions quantity and the respective estimated cost in the Inventory Book.
Usually the Consumption Note is summary (if same materials used for the production of various products). The method of their allocation to the products’ cost, during the Production Costing can be customized (i.e. either based on the material synthesis in the BOMs or based on the weight of the produced items etc.) through the parameterization of the production cost determination process.
Consumptions by stock counting of production site
Often, according to the needs of the company, a physical inventory (counting) of all Warehouses actualized. Issues regarding the Stock Counting Process presented more analytically to a previous chapter, about Inventories. In this section, the focal point is the way of handling potential stock counting differences in case of raw materials used by the production process.
During the inventory process, the following imbalances appear on the Physical Inventory Note (PIN):
1st method update of consumptions differences by Distinct transactions
Appropriate document type: ICN (Stock counting entry)
Appropriate transition: 440. ICN=>ISD (Finalization of period physical inventory differences)
If the type of difference selected at the lines of this counting document is “consumption”, then the Inventory will be updated through the new transactions created by “ISD” exactly as it would be by using a Consumption Note (“CON”).
2nd method update of consumptions differences by modifying the declared consumptions
The procedure “Allocate counting differences to consumptions” (Periodic processes/Stock updating processes) results in the distribution of differences in already registered (by NPC, CON notes) consumptions, without the need for create new. In the appearing dialog, certain criteria regarding the calculation must defined:
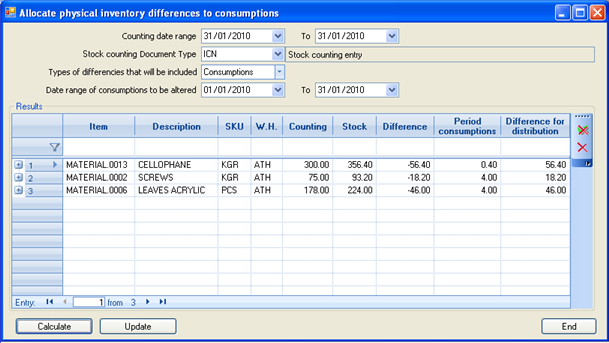

The date for the counting register to be taken into account
The Stock counting document type that was used (“ICN”,”ISC”)
The differences types that will be included in the process (consumptions, shortages, surpluses): This refers to the column “difference type” declared specifically in the “ICN” (where the shortages could be declared as “shortages” or as “consumptions”). The surpluses must be selected either ways (as to the “ICN”). In terms of “ISC”, this criterion ignored.
A date range for the consumptions intended for modification
The user selects the “Calculation” button and, in the 1st level of the ‘Results’ section are presented all differences found, while in the 2nd level presented the particular consumptions in which the difference will be distributed.
By selecting certain lines in the 1st level, the user may press
to delete (exempt) them from the process, or press
to exempt all the rest (non-selected) lines.
The process is completed by pressing the "Update" button. The consumptions quantities already registered will be increased if there is a shortage (negative differences to be distributed) whereas they will be reduced if there is a surplus (positive differences) which is equal to “negative consumption”.
After the end of this procedure, there must be a “stock quantities refresh” in the Stock counting Notes BEFORE the counted Warehouse is open and active, so that the consumptions differences eliminated, avoiding this way the danger of creating (by ISD transition) deficits-surpluses for the 2nd time.


Verification of consumptions registered
The process (Period processes/Stock updating processes) checks if, in a selected date range, there are any consumptions for items that do not belong to a “Production Element Cost Type”. This means that
either incorrect items used
or incorrect cost element types used
or the customization of Production costing is incomplete
If a Production costing Process during this date range is executed, then it WILL NOT take into account the consumptions of the pre-mentioned items.
Production expenses
The expenses registered into the system through the respective documents, as described to the relevant chapter. The allocation of expenses that concern the production processes may occur:
- Either using “dimensions” and methods of distributing expenses to the relevant cost centers (analytical document lines), as it is mentioned in the ‘expenses’ section
- Or by the use of distribution processes into Cost Accounting through specific accounts for each cost center
Depending on the method of the distribution that has taken place, appropriate rules are used; firstly to allocate certain expenses to the appropriate productions and secondly to determine the final Production cost into an item and item’s transaction level. This procedure described in detail to a next chapter about Production Costing Configuration.
Outsourcing production
When the production process includes stages developed by third-party units/subcontractors or is fully implemented by third-party units/subcontractors (outsourcing) the workflow entails some particularities based on the existing need for information as far as the Subcontractors’ sites, and thus the whole process has to be parameterized and organized appropriately.
Subcontractor registers
The monitoring of subcontractors is provided by the Creditors’ system, which suggests that for each subcontractor the company contracts an agreement with, a new Creditor must be registered. As for the financial relationship between the company and the subcontractor, it will be monitored by the Expenses & Payments system.
Subcontractor warehouses
In order to monitor materials transferred to subcontractors for product processing, a Warehouse must be registered.
In this warehouse, the characterization “Third-Party W/H” is enabled so as to supervise the particular inventory in the specific Warehouse (ONE for all subcontractors) per individual subcontractor.
Furthermore, all material transfers must be issued using special documents that will ALSO require to enter the trade account information, so that the Third-Party Warehouses Overview can correctly updated.

Work Flow
- In the Delivery Note SERIES regarding Third-Party Warehouses (SLN) the user must declare as suggested Warehouse the “Third-Party W/H” that was created for this purpose. The numeration of SLN can be common with the one used for all the other Delivery Notes.
- In the material Delivery Note destined to the subcontractor the user must also declare the Warehouse from which materials are transferred into the field “Position” and the Subcontractor in the field “Destination”.
- As far as the Production Note, can maintain the same numeration with the one used for Quantitative Receipt Note. The number of the initial contractor Delivery Note will be entered to the “Alternative Document” field.
- Regarding the CON (Consummation Note), the Third-Party Warehouse must be declared as Warehouse selection and to the field “Trade Account” of the lines the user must insert the Subcontractor in order for him to “reverse-charged” of the materials he received.
Production through dissolution
Dissolution is the procedure used to “split” a specific item while inserting some or all of its ingredients into the stock. Such examples are met in the meat processing sector, the pharmaceutical industry etc.
Appropriate document type: PND (Production Note through dissolution)
The process concerns purchased of imported items the “acquisition” cost of which, is distributed into the “produced” ingredients (via its “consumption” during the dissolution process). The figures below depict the reverse procedure (regarding the production costing) compared to the regular Production procedure:

The system does not support dissolution of Items been formed by the Production process within the same “stock costing period”, in order their ingredients to be returned back to Warehouse.
If there is such a case, must be used the following documents, designed for this purpose:
Appropriate document types: CNP (Cancel Production Note)
If the Production occurred by NPC, PCC which ALSO update the materials
NCP (Cancel Production Note)
If the Production occurred by PNC which updates only the produced items
The above cancellation cannot be used in “stock costing periods” subsequent to the Production process (as happens with a cancelling Invoice).
If there is need to cancel a Production process that took place in a previous stock costing period, must use the (PND) dissolution process.
Dissolution customization
Items that are purchased or imported and are about to participate to a “Dissolution” task, resulting into their ingredients, must be characterized as “Produced” and a “Basic BOM” has to be declared including the items’ contents. A BOM DOES NOT have “direction”.
The field “BOM Management” located in the document type (available values presented are “Production” or “Dissolution”) provides the option to declare if the operation will follow the approach of “concentrating” ingredients’ cost to the produced item or “allocating “ dissolved item’s cost to their ingredients.
Production in Progress
The need for monitoring productions in progress is met in production processes where product manufacturing remains incomplete while result depiction time limits (costing process) are exceeded as well as not being able to apply ‘semi-finished item approaches’ for the intermediary production stages. Such examples are wine-making process, dairy product manufacturing, publishing procedures, etc.
How to declare the production-in-process
In order to initiate a Production in Progress the following document is provided:
Appropriate document type: NPP (Production in Progress Note)
In this document the user inserts the codes of the final products that are to be manufactured. If the code of the product to be manufactured (not yet formatted product) is not known, then the product must be regarded as “semi-finished” intended for the Production of one or more “final” products.
When will the production-in-progress be declared
A Production costing process will be executed (actually, this happens every month) by declaring the Production in progress, in the end of each period.
The reason behind this, is that the Production costing process will automatically cancel the previous Production in progress. Thus, the REMAINING quantity “in progress” must be declared every time.
Production-in-progress Inventory at fiscal year end
The production-in-progress balance that has been declared during the end of the fiscal year, will be automatically transferred to the next year, via the fiscal year closure process. Throughout the 1st Stock Valuation process of the new Fiscal Year, this inventory will be automatically cancelled as it happens for every previous period in the beginning of the next one (in this case, the “previous” period is the “opening” period).
In order for the Fiscal Year closure to function properly, the “balance-in-progress” that is to be declared at the end of the Fiscal Year must be LESS than the total balance of the product in the same Warehouse. That is to say, there MUST NOT be any Transfer (of the quantity-in-progress) into another Warehouse after declared the Production-in-progress at the Fiscal Year End; such a transfer can take place only in the new Fiscal year. This limitation allows the Production Quantity in Progress to be inventoried separately from the rest of the quantity of the item (“final product”) with neither of them resulting in a negative value.
How could negative balance and problems to the fiscal year closure occur?
Supposing that Warehouse 01 facilitates 100 kg of product X (based on the transactions) and a declaration is made as well that 200kg of X are “in-progress” (by NPP on the 31/12). If any transfer takes place >100kg i.e. In-house transfer of 150kg of X from W/H 01 to W/H 02, then:
The fiscal year closing process will transfer to the next year this item’s stock into 2 separate parts: “final” and “production-in-progress”. Thus, the system will attempt to transfer:
In W/H 02 150kg final product (IOP)
In W/H 01 200kg product-in-progress (OPP) and 100-200kg (negative) final product (IOP)!!!
How to see the results of the Production-in-progress registration?
 The control of the Production-in-Progress data is made possible by checking on the detailed format of the ‘Inventory costing balance’, ‘Monthly statement of Stock Book’ and the ‘Inventory transactions Book’.
Special production issues
Color & size based production
The special functionality examined below, regarding the management of color-size, allows:
The economic rationalization of BOMs
The consumptions automation of the suitable ingredient color and/or size, depending on the variations of the produced item
The means to define appropriate consumption quantities, conditional on the variations of the produced item
From customization menu (Inventory Items/Variations) can define the “Stock variation set map”.
In the appearing window, there must declared the source and target variation sets (e.g. color pallet, size pallet) in order to correspond their values. The “From Stock Variation Set” used for the produced item and the “To Stock Variation Set” used for the consumables.
If selected color pallets for example, must fill the “from” color to the 1st column of the appearing matrix and the respective “To” color to the 2nd column. In the example above, the colors “From” regarding primary material (fabric) correspond to specific “To” colors of buttons (placed to shirts).
Τhe stock variation sets “From” and “To” may concern different variations.
Apart from the correspondence of the VARIATION VALUES, the user can define also the requested consumption QUANTITY (defining up to 3 quantities to produce the final quantity). This demands the monitoring of quantity variables >= 1 to the material measurement units.

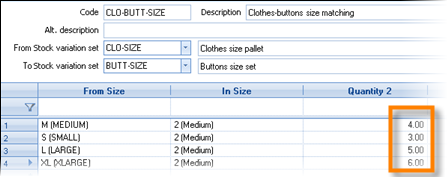 For the production of one medium-sized top 4 button items are needed (quantity 2=4), whereas for the production of the same top but XL-sized there are 6 button items needed (quantity 2=6)
- For the production of a 2.5 meter-sized door there is a need for 3 hinges of 5cm (quantity 2=3 & quantity 3=5), while for a 3 meter-sized door 4 hinges of 7cm are needed (quantity 2=3 & quantity 3=5)

After defining the stock variation set mappings, we must declare them into the consumption lines of “Bill of materials”, depending on the monitored variations of products and of materials.
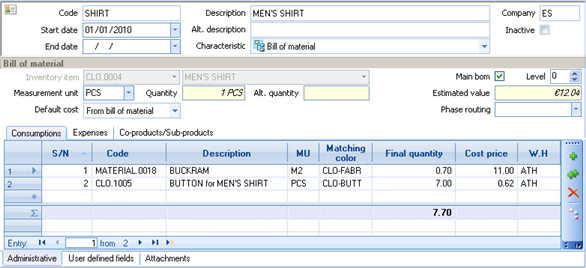
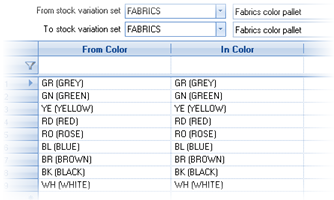
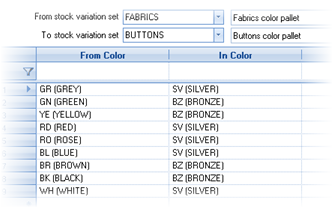


- Τhe ”matching color”, “matching size”, “matching variation 1”, “matching variation 2” columns may become visible “add-remove columns” functionality to the grid layout of materials
The result of the above customization will be the following:
During the registration of the produced item by a Production Order, a Production Note or an Assembly Note, the automated creation of consumables, according to the selected BOM will take into account the variation declared to the produced item and will select the appropriate variation of the materials and the relevant quantity that derives from the stock variation set mappings, defined into the BOM:




Management of semi-finished products
Semi-finished products are monitored in two ways:
- Semi-finished as ‘product in Warehouse’ for which stock is monitored, it is produced individually and either it is consumable in another product’s specification or it is sold in the semi-finished state.
- Semi-finished as ‘intermediary stage’ for analytical monitoring of the Production process. In this case there is no stock monitoring, it doesn’t acquire any transactions, but created as code so that it can be declared into BOMs.
Declaration of semi-finished into the BOMs
To the column “Next BOM level” of the Consumptions page the user can declare the BOM of the semi-finished.

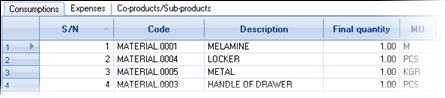
The hierarchy of managing semi-finished items is defined by ‘Levels”. The lower level corresponds to the final product (Level 0) and in every semi-finished product’s BOM, the appropriate level defined according to the production process sequence.
Example:


In order to manufacture the final product A (final product) consumption of product B (semi-finished) is demanded.
In order to manufacture product B (semi-finished) consumption of product C (semi-finished) is demanded.
In order to manufacture product C (semi-finished) consumption of product D (semi-finished) is demanded.
For this process, the BOM levels should be defined as in this figure:
Operation of semi-finished products during the production process
The operation of semi-finished products during the production process depends on the approach (products in stock or auxiliary items for declare intermediary stages) which leads to the appropriate customization of the Production document types:
- If a transactions register kept for the semi-finished (product in stock), the option
 (in the section “lines” of document types) must be de-activated. This means that during production, for these items it will be created a consumption transaction, while a distinct Production Note must be issued, allowing the system to monitor actual and available STOCK for these items.


- If the semi-finished item is used for monitoring the intermediary stages, the option
 must be activated. To be precise, during the registration process, the development of ingredients takes place based on the BOM by a hierarchical progression regarding ALL levels defined by the semi-finished items. As for the “semi-finished item lines”, they CANNOT create a Production inventory transaction simultaneously with a Consumption; they will be ignored during update procedures.

By using the exact SAME technical specifications as to the previous example and by changing the option of the document type, the outcome follows below:
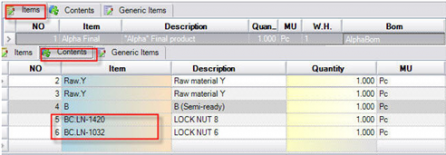
To the pre-configured documents, the 2nd monitoring approach is promoted (without stock observation).

Production phases
The monitoring of phases during the production process not only provides information concerning each execution stage of the product formation, but also enhances the capability of cost per phase summary as well as its further analysis and evaluation.
From the main menu Tools/Customization/Production, the user is able to define the phase routing along with the phases from which the item production goes through.

During the phase definition, the system gives the option of hierarchical description; either it is for informative or cost determining reasons. In such a case, according to the existing needs, there must be declaration of all selectable levels (higher/lower) during the Production processes.
The definition of phase hierarchy done through Tools/Customization/ Task categories, by choosing the category declared to the general parameters concerning the production phases (default: “PROD_PHASES”). It is noteworthy that before all these take place, there must be a definition (via the “Phases” selection) of all Production phases that compose the Production process.
The Phase Routings defined through the Tools/Customization/Production menu and they contain the respective number and order of phases for a particular production process.

Into each Bill of Material can declared the Phase routing plan, thus, in the material and expenses lines, the user can select the phase (among the phases of phase routing plan) where occur the particular consumptions and/or the particular expenses.

The Phase is an element of Production document lines and either is automatically updated from the Bill of Material or it is inserted later on. It can be also used by the Production costing configuration as cost allocation criterion.
When the cost centers monitored in the Cost Accounting and specific accounts summarize the expenses of production line per phase, then, in order these accounts to be used to the cost allocation rules, the concerning PRODUCTION PHASE must be selected to the respective field of the account (to the “administrative data” sub-page).
The results of the Production costing process can be analyzed per Phase (through the appropriate customization of production costing) and also it is available in all Production Cost control reports.


Production costing configuration
This chapter examines the basic cost configuration mechanisms along with their essential customization elements regarding the Production Costing Process.
Costing folder
For each Cost determination period, a “Production Costing Folder” is automatically created, the code of which is the date limits of the costing period for which the process executed. This folder contains all PRODUCTION transactions as well as the respective COSTS, and allocates costs to products, resulting in the final production cost, according to the rules configured for the Production costing.


In the page “Cost units” all productions presented that “received” cost via the Production costing process, whereas
In the page “Cost Data”, all consumptions and all related expenses (labor and manufacturing costs) presented, which have been allocated to the productions (“cost units”), by using different sets of criteria.
Essential Folder Customization
From “Tools/Customization/Cost Folders/Folder Types” menu, the user must create a folder type that obtains PRODUCTION as selection to the field “unit type for cost determination”.
In the general parameters, the user must enter the code of that Costing Folder Type, to the parameter “Production costing folder type” (category “production cost determination”).
Cost element type
The cost element type describes the mechanism through which the user can determine WHICH cost categories will actually be allocated to the productions as well as HOW will they be distributed to the productions of different items.
Every material (primary or secondary, semi-finished etc.) that is consumed and every expense taking place (either it is monitoted to the expense sub-ledger or to the accounting chart) during the production process is “connected” to a cost element type, in which the allocation concept defined. The method of determining the allocation criteria is providing maximum flexibility so as for the user to easily customize any Costing scenario.
A common concern is the number of cost element types that are ought to be created. This number is directly connected to the number of different cost category allocation criteria that are implemented in the particular Production process. There must be AS MANY cost element types AS the allocation criteria to be described.
Another essential criterion is the desirable range of production cost analysis. For instance, while different costs such as labor costs and some manufacturing costs may be allocated using the same criterion, there is need for DISTINCT depiction in various cost control reports. This leads to the creation of different cost element types (using the same allocation criterion) for these specific cost categories.
The cost element types created through Tools/Customization/Production/Cost Element Types:


| Code & Description | The identity of the cost element type. |
|---|---|
| Distribution Type |
The allocation method of this cost category. The choices are:
In order the allocation to occur in a rational way, if defined a criterion based on (any) quantity, that quantity should be monitored to the same measurement unit for all products involved. |
| Distribution field or expression | The content must lead to a numeric result that will be the “weight” to be used by the allocation process of direct or indirect costs. |
| Distribution field or expression for Co-products | This field is used to declare the distinct co-product criterion. For example, to a “user definable field” of the items might exist the % percentage of the total cost, which should be allocated to the co-products. |
| Cost elements’ matching field |
Completed when specific costs should be allocated to specific productions (via “matching” process). Select the field (or expression) of the expense or consumable document line (or its related entities), that consists the “cost element distinction field”. Supposing there is a need for consumptions distinction based on the line field “Table 1” (i.e. by which the system monitors product groups), thus, select it During the Production Costing Process, there will be a distinction of cost entries (detailed cost lines that destined to be allocated to products) based on the content of “Table 1” of the registered consumptions as shown in figure:
|
|
Cost units’ matching field |
Completed when specific costs should be allocated to specific productions (via “matching” process). Select the field (or expression) of the production document line (or its related entities), that consists the “cost unit distinction field”. Supposing there is a need for production distinction based on the line field “Table 1” (i.e. by which the system monitors product groups), thus, select it During the Production Costing Process, there will be a distinction of production entries based on the content of “Table 1” of the registered production lines as such:
The output of customizing these two fields will be the allocation of consumptions value of every group to the productions of the SAME group ONLY.
|
| Group |
|
| Allocation to all the items |
|
| Same document priority |
|
| Allocation based on consumptions cost |
|
| Cost categories |
In the line section, the user can define the cost categories that will be allocated throughout the production process.
|


Production costing process scenarios
In this section there several classic production scenarios are examined. The main topics presented concern the production process management approach as well as the production costing configuration means. Purpose is the comprehension of the production sub-system and the cost computation mechanism.
Allocation based on material participation in BOMs
Suppose that the production process based on specific technical specifications. At the end of the day or a period defined by the production manager, all productions and consumptions that have taken place during the process, are updated based on the reviewed data.
The cost of each product derives from the consumption cost of the materials participating in its production, according to the BOM selected and the participation share of each material in the total production.


- Production process management
Updating Bill of Materials: For every product included to the production process, a Bill of Material must be defined.
Updating of actual Productions and Consumptions: In order to register the actual data into the system, the PNC (Production Note) & CON (Consumption Note) document types must be used.
- Production costing customization
A Cost Element Type must be created with the following settings:
To the “Distribution Type” field, must select ‘Based on BOMs’ (thus all the other fields are de-activated and are not needed) and
To the “Item grid” section, must select all materials (inventory items) participating in the production process.
Allocation based on the products’ weight
Suppose that the production process has no technical specifications defined for it. At the end of the day or a period defined by the production manager, all productions and consumptions that have taken place during the process, are updated based on the reviewed data.
The production costing must be based on the produced items’ Weight. The consumptions cost will be allocated according to the weight (Kg) of each product, compared to the weight (kg) of all products.
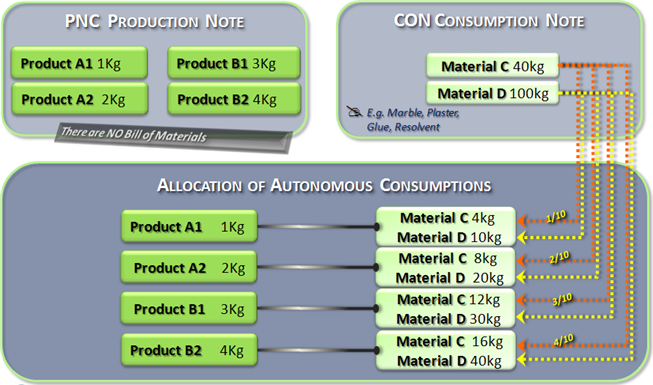

- Production process management
For updating the production and consumptions the system provides the PNC (Production Note) & CON (Consumption Note) document types.
To EVERY production declaration (item line), the user must enter the WEIGHT, even if the measurement unit selected for a particular entry is different. Null Weight results in Null Cost!
- Production costing customization
A Cost Element Type must be created with the following settings:
To the “Distribution Type” field, must select ‘Based on Fields’
To the “Distribution Field”, must select ‘Item Line-Weight’, among the presented available fields
Activate the “Allocation to all the items” field
Finally, to the “Item grid” section, must select all materials (inventory items) participating in the production process.
Allocation based on production Orders
Suppose that for the production process, there are no technical specifications declared. The initiation point of the Production process are the Production Orders.
Production Orders are registered along with the items that are to be produced and their consumables, leading next to their routing and execution by the production department.
The criterion, based on which the costing process will be executed, is the production Order (PNT).
The cost of consumptions that occurred in the frame of each production Order will ONLY charge the products of the particular Order. If the Order contains more than one products, the consumptions cost allocation will be based on the products’ weight (kg) (instead of using weight as allocation criterion, any other numeric field of production lines can be used).
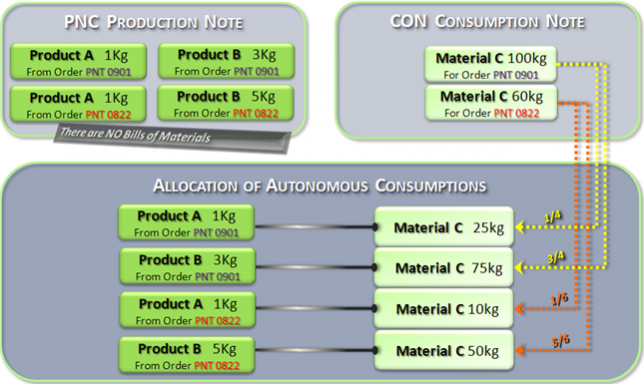

Production management
For updating the production and consumptions the system provides the PNC (Production Note) & CON (Consumption Note) document types.
The production Order code must be entered to a field of the header or of the lines (i.e. ‘alternative document’) of all Production and Consumptions documents. If these documents derive by transition (PNT=>PNC, PNC=>CON), the transfer of this information to the appropriate field must be done by the transition mechanism.
To EVERY production line, the WEIGHT must be entered.
Production costing customization
A Cost Element Type must be created with the following settings:
To the “Distribution Type” field, must select ‘Based on Fields’
To the “Distribution Field”, must select ‘Item Line-Weight’, among the presented available fields
Activate the “Allocation to all the items” field
To the “Cost elements’ matching field” field, must select “Adjustments Document – Alt. doc.”
To the “Cost unit’s matching field” field, must also select “Adjustments Document – Alt. doc.”
Finally, to the “Item grid” section, must select all materials participating in the production process.
By this approach, the cost allocation of consumptions, regarding specific production Orders, will occur to products derived only from these particular production orders.
Costing process of outsourcing production
Suppose that the production process is (completely or partially) being manufactured by subcontractors. The starting point of the production process is the production Order. After Orders with the produced quantities as well as the required consumptions are registered, the routing and execution process from subcontructors is launched.
There are several scenarios for allocating outsourcing service costs to products. The most common scenarios are the ones that include allocation of service value into specific products or specific production (receipt) Notes.
1st Scenario Allocation of Outsourcing fees to specific products
Supposing that there is an outsourcing task that refers to a specific product group; the cost of the services provided for the particular process will only be allocated to the products of a specific group based on the production quantity.
- Production process management
An expense/item is to be created for this outsourcing task and we use one of the grouping fields (i.e. “table 1” renamed to “Job grouping”) to define that group of products charges this kind of expense.
As for the products, the group-related information (which is also a cost receiving criterion) is already updated (in the field “Group”).
The product receipt is registered using the NPC (Production & Consumptions Note) document.
The outsourcing service fee is registered by the use of XPI (Expenses document) document.


- Production costing customization
A Cost Element Type must be created with the following settings:
To the “Distribution Type” field, must select ‘Based on Fields’
To the “Distribution Field”, must select ‘Item Line-Quantity’, among the presented available fields
De-activate the “Allocation to all the items” field
To the “Cost elements’ matching field” field, must select “Item-Job Grouping” (“Item-Table 1”)
To the “Cost unit’s matching field” field, must select “Item-Group”
As far as the “Item grid” section, there must be a selection of the outsourcing expense that will charge the products.
2nd Scenario Allocation of outsourcing fees to specific production
Suppose that there is an outsourcing task that refers to specific production; the cost of the services provided will be only allocated to the products of a specific production Note, based on the production quantity.
- Production process management
An expense/item is to be created for this outsourcing task.
The outsourcing service fee is registered by the use of XPI (Expense Document) document
The product receipt is registered, using the NPC (Production & Consumptions Note) document.
The Expense Invoice code referring to this specific production, must be entered to the field “Alternative document” located in the header of the Production Note.


- Production costing customization
A Cost Element Type must be created with the following settings:
To the “Distribution Type” field, must select ‘Based on Fields’
To the “Distribution Field”, must select ‘Item Line-Quantity’, among the presented available fields
De-activate the “Allocation to all the items” field
To the “Cost elements’ matching field” field, must select “Trade Document-Code”
To the “Cost unit’s matching field” field, must select “Adjustments Document – Alt. Doc.”
As far as the “Item grid” section, there must be a selection of the outsourcing expense that will charge the products.
Indirect cost allocation based on activities
In an hypothetical food production process, the production may be implemented through different departments such as “Pasta department”, “Pastry department”, etc. The indirect costs are summarized and monitored by the relative Cost center of the Cost Accounting “92.00 Production Operating Expenses” which are allocated to the products, via the Production costing procedure.
The labor salaries and costs (that are monitored to the account “92.00.00.0060 Production line personnel’s payroll and expenses”) must only be allocated to the products of each department, based on the production quantity.
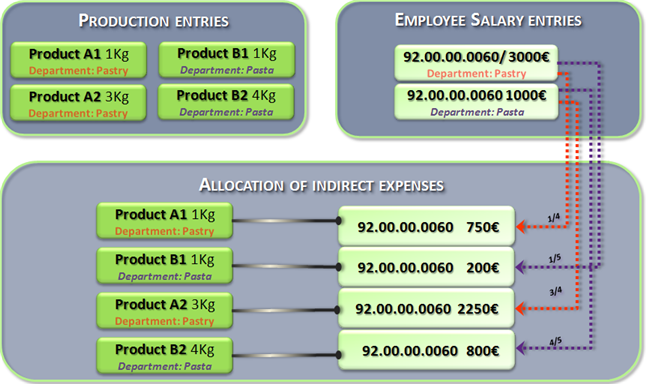

- Cost Center management
The monitoring of the Departments can be implemented by using one of the available Corporate Dimensions, i.e. Activity.
For every product, the Department via which it is produced, must be defined to the field “Activity”.
When it comes to insert Productions and Consumptions, the suitable documents may be used (NPC, CPR-CON).
- Indirect expenses allocation in Cost Centers
As for the entries of the cost account “92.00.00.0060 Production line personnel’s payroll and expenses “, there must be a definition of the exact department (“activity”) that each registration (ledger entry) is related to. This can be achieved through the allocation procedures.
- Production costing customization
A Cost Element Type must be created with the following settings:
To the “Distribution Type” field, must select ‘Based on Fields’
To the “Distribution Field”, must select ‘Item Line-Quantity’ (or another quantity field, common for all products i.e. weight) among the presented available fields
De-activate the “Allocation to all the items” field
 To the “Cost elements’ matching field” field, must select “Cost element-matching value”. The values of this specific field given by the output of column GroupField of the view “Cost element accounts”. For the above example, the distinction field is “Activity” (produciton department), so, we can select “edit view” and modify the expression of “group field”, defining as content the “Activity”, as shown to this figure:

Then, the view must be stored so, in this way, the link of the “activity” to the required cost allocation matching criterion is achieved.
To the “Cost unit’s matching field” field, must select “Line Item - Activity”
Finally, as far as the ‘accounts grid’ section is concerned, the criteria selection must include the account 92.00.00.0060.
This is how the accounting entry of every Activity/Department is succesfully allocated only to the productions of the individual Activity/Dapartment.
Default scenarios
When it comes to the customization of the production costing, there are default scenarios available that the user can select and implement easily and quickly. The scenario selection can take place either from the “Actions” menu or by pressing the appropriate button for this procedure which is located next to the distribution type selection.
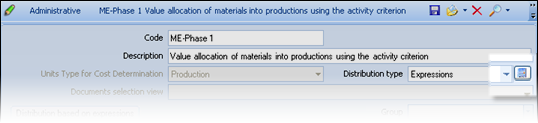
This leads to a dialog for selecting costing scenarios, that includes analytical comments describing all implemented criteria along with the respective distribution approach.
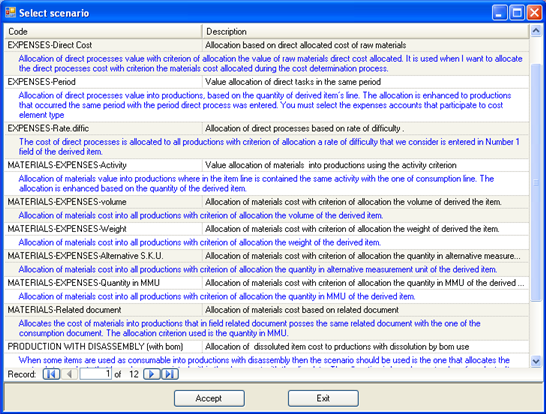


Cost determination process & output
Production costing execution
Production costing customization - related information
Before the execution of the production costing, the company’s parameter values that concern this procedure (found at “production costing” category) must be issued and/or confirmed:
Activate production cost determination process: The process is executed if only this parameter is activated.
Activate production analysis of consumptions based on the Stock Variation-Set mappings: If Stock variations-set mappings are in use, then it should be activated.
Recalculate production documents following cost determination process: If the pre-configured document customization has not been altered, there is no need for activate it.
The main aim of this procedure is to update the Production Cost according to the customized costing rules.
If the “cost determination period” length is one month, the cost updating is actualized immediately to the primary transactions, which update monthly item elements (cost and quantities), Inventory Book, etc, while the full analysis of the Production cost origination is available in the “Production Costing Folder”.
If the “cost determination period” exceeds that of a monthly period, the primary production transactions are NOT affected (as it happens moreover to all the rest cost-related inventory transactions) but indeed, new “differences” transactions are created, so that we can reproduce any previous Inventory Book, resulting in the same output.
Each later cost alteration (a typical issue regarding most of the Production processes) is gradually monitored in the next balances whereas, on the contrary, it is directly available in the Production Costing Folder PER primary transaction.
Production costing book
The production costing outputs are presented in the Production Costing Summary Book. For each product, there is a depiction of the quantity produced in the selected period, along with the cost and quantity of the production in-progress. The analysis of costs that has been allocated to each product, can presented either in a brief or in an analytical outline view.
The brief outline is the 1st level of this view, containing 5 different columns, the name and content of which is parametrically defined, according to the desirable cost category grouping.
The analytical outline is the 2nd level of this view (
), presenting all Cost element types based on which the cost allocation occurred by the Production Costing Procedure.
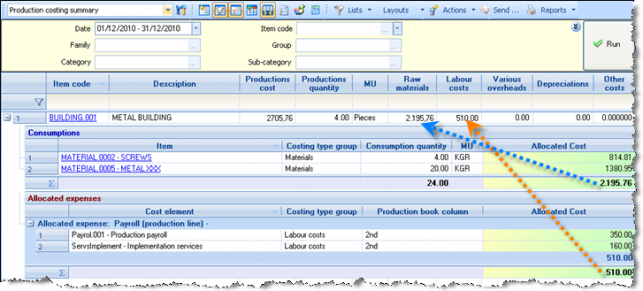
Through “Reports’ choice of the toolbar, can take the same output via Crystal Reports layout.

Production Costing Book customization
The definition of titles of the 5 columns of the Production Costing Book can be done to the respective company’s parameters (category “production cost determination”.

To the “Groups of cost data types” (Tools/Customization/Production), can define a grouping of “cost element types”, that will be available for reporting while asking analysis of production cost’s origination. For every group, the appropriate “production book column” must be declared. The minimum customization requires to create at least 5 groups since pre-defined Book columns are also 5.

Finally, the above grouping can be matched to each Cost Elemect Type.

Production cost overview
In this OLAP (Business snapshot/Cost analysis), the results of the Production Costing are illustrated, regarding a selected time period.
The OLAP presents the production quantity and its cost per product, as well as the analysis of cost per cost element type.
As far as the OLAP “Dimensions”, Cost Element Groups, Production Phases and Products’ grouping fields are also available. Through the dimensions, the user can investigate particular group item costs as well as specific cost “sources” by just selecting the appropriate configuration.
By using the OLAP “Layouts” could create alternative layouts i.e. by reversing lines and columns (and saving it as a layout) the user can investigate the way a specific cost element has been allocated to products or group of products.


Estimated vs. actual production cost
This view presents the total of all consumptions per material plus the overhead and overall expenses for the selected production date range.
The difference between the actual and the estimated consumption is defined as wastage. In case of a non-acceptable divergence there is high chance either that certain consumption entries were registered incorrectly or that corrective entries must take place along with the reiteration of the Production Costing Process.

The column ‘estimated consumption’ shows the amount of consumptions being registered in the production Order from the transition of which the consumption Note derives from.
If consumptions are not registered by using an Order-based transition, then the BOM registered in the produced item is used so as to identify the estimated consumptions. The search process of estimated consumption quantities within the BOMs takes into consideration the semi-finished items as well (up to 6 levels). All quantities are converted to each item’s main MU.

Balances & Registers
The production registration results along with the Costing process results monitored by all Inventory reports of type Balance and Transactions Registers:
Inventory costing balance (detailed format)
Monthly statement of Stock Book (detailed format)
Registers (Inventory records) (detailed format)
The verification process of production costing, can be done as follows:
Column ‘Production Cost’ = Column ‘Consumption Cost’ + (Debit – Credit) of Expenses Balance
The Expenses can be controlled by the Item-Expenses Trial Balance or by the Accounting Trial Balance (by Cost Center), whichever system was used as a source of those costs.

Production costing folder
The Production Costing Folder is a comprehensive tool for recording and monitoring the cost structure and production costing results. For each “cost determination period” the system automatically creates a folder, with the period range of every run as its “code”. The Folder provides information regarding the following:
Costing units. By using the search criteria, can check analytically for each production the source of the allocated costs to it. The view presents the consumptions and the expenses that were allocated to each transaction.


Furthermore, the system provides the ability to monitor the Phase in which the expenses and consumptions occurred as well as the Quantity that was manufactured (the “equivalent production quantity” is an estimated factor for assessing the TOTAL PRODUCTION QUANTITY deriving from the allocated costs of each production). The depiction of this quantity is available (and makes sense) on a product level (only at “group totals”).
Cost Elements. To the “cost data” sub-page, a check may be done of all allocated costs. The columns are valid, according to the cost element type (the ‘account code’ for checking cost sources from Cost Accounting, ‘Item code’ for checking raw materials etc.). Using the filtering columns feature, you can isolate information and search the detailed reasoning of cost allocations.

Posting to cost accounting
 Purpose of this procedure is to create the appropriate ledger entries to Cost Accounting for monitoring production cost, by using the Production costing process results. The procedure can be executed by the ‘Actions’ of the Production Costing Folder.
To the appearing dialog, must select the date of the ledger entries to be created, define whether IAS posting (for International Accounting Standards) will occur (besides NAS posting – for the National Accounting) along with a possible content for “Reasoning” field.
By activating the key “Posting” the procedure is executed, resulting into the creation of the following accounting documents:
|
|
||
|---|---|---|---|
|
|
|
|
|
|
|
|
Production Cost Posting Customization
 The posting uses four (4) company’s parameters of category “Production cost determination”, that define the ledger entries format for each one of the 4 entries to be created (filler profiles for customize the fields’ content):

To the category “IAS” there 4 more parameters for the respective filler profiles for IAS posting.
These filler profiles are available for customize their contents by selecting “Production cost posting parameters” through “Tools/Customization/Production”.
Moreover, there must also be a definition of an Accounting document type in order to initiate the numeration and the other fixed elements of entries.
Accounting Groups Definition
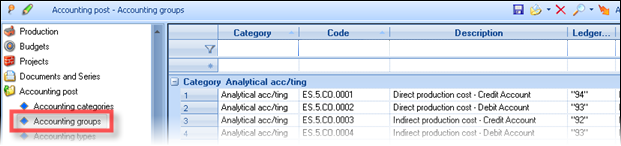
The accounts used during creating the costing ledger entries must be customized.
Supposing there is a food-related production process, the production of which includes the existence of different units (i.e. pasta, pastry, etc.). In order to monitor these units separately the system provides a business dimension named “Activity” in which all different production units are registered.
The production cost development that takes place in the account 93 of the Accounting Cost is utilized based on the unit and the cost category where:

| Accounting code | Account description | Activity/Department |
|---|---|---|
| 93.00.00.0060 | Production Payroll of Pastry Unit | Pastry Unit |
| 93.00.01.0060 | Production Payroll of Pasta Unit | Pasta Unit |
| 92.00.00.0060 | Production Payroll | Concerns both Units |
The differentiation of production units can be monitored by the 3rd level.
As for the part of the code that depends on the Activity the code suggested is “Code G.L. 1” in which the user can define the content of the 3rd level.
Both production documents and payroll (expense) documents are characterized by their concerning Activity according to which the cost determination (and posting) takes place.
Based on the above, the Account Group that will debit the indirect production cost “ES.5.CO.0004 Indirect Production Cost Account for Debit” will be defined as such:


The Group concerns Cost Breakdown entries
Group Type Definition of segments
Account Form
1st Unit Unit Type: Constant & Constant Value: 93.00
2nd Unit Unit Type: Field Content where the user selects Accounting code 1 of Activity from the item line
3rd Unit Unit Type: Constant & Constant Value: 00 (the first 2 characters of the 4th level.) and (because part of the level is defined) activation of the option ”Connection to next accounting segment without using separator“
4th Unit Unit Type: Field Content where the user chooses the field Ledger Account from “Analysis entries/Cost element” and in the From - To Digit the user is able to define the desirable amount of characters (i.e. from the 12th to the 13th digit).
In this unit the user defines the 2 last characters of the 4th level which derive from the 2 last characters of the 4th level of the indirect expense account the value of which is transferred in to the 93. For example, if the value concerns the expense 92.00.00.0060 then the unit will adopt the value of 60.
Production process Indicators
The Efficiency of production process view presents a brief reflection of the overall Production Process (Business Snapshot/Performance indicators). These Indicators provide PP-related processing times along with general cost and profit data related to the produced items while simultaneously offering an overall view to define whether the Indicators are improving or not compared with the previous year or the previous respective month:

1st Section. Indicators concerning the Production Operation:
Average Time to route Order to Production (based on the transition process from customer orders to production orders)
Production Orders Completion Cycle (based on the transition process from Production Orders to Production Notes)
Average Customer Order Delivery Time (based on the transition process from Customer Orders to Delivery Notes or Invoices including the involvement of a Production process)
2nd Section: Indicators regarding the Cost Determination Process:
Gross Profit Margin on Products (based on the Production Costing and Stock Valuation results)
Total Cost of Finished Products (the final production cost)
Total Cost of MTO (Made-To-Order) Products (an illustration of the produced items’ cost destined for customers; based on the fact that there was a transition process from customer orders to production orders)
Relation of MTO Production to Total Production (an illustration of the % of the production destined for customers compared with the overall production)
Variation from Estimated Cost (compares the production orders’ cost and the actual production cost)
Stock Valuation
The cost of inventories is of the main requisite of the system, since, according to this, OFFICIAL RESULTS identified, and also the most important part of MANAGEMENT INFORMATION provided, regarding to profitability and its sources. This chapter will examine cost accounting concepts, stock valuation and calculation of cost of goods sold processes, as well as the method of controlling and reconciliation of the results.
Definitions
Stock valuation
Periodically, the stock valuation process is executed, aiming to define the Inventory’s cost value, that is the cost of quantitative stock at a point of time, as well as the cost value of grants (cost of goods sold and other exports cost), based on:
The acquisitions’ data (purchases, productions, etc) and
The stock valuation method that has been chosen
Through these elements, the valuation process will result in the official COST PRICE of every inventory item.
Stock valuation methods
- Weighted average price
It is the quotient A/B:
A= initial inventory cost in the beginning of costing period + cost of acquisitions for current costing period
B= initial inventory quantity in the beginning of costing period + quantity of acquisitions for the costing period
- Floating cost price (or circulative weighted average or method of sequential balances)
It is the quotient A/B:
A= inventory cost prior of each import (acquisition) + acquisition cost of this import
B= inventory quantity prior of each import (acquisition) + acquisition quantity of this import
- FIFO (method of stock items running down)
In order stock value, as well as the cost of goods sold, to be estimated using the FIFO method (First In First Out), a process of calculate REAL ACQUISITION VALUES is carried out (after been charged with posterior value transactions such as credit Notes of discounts). On the other hand, a process of matching acquisitions cost to the grants (exports) is carried out on a date line FIFO. This will result in the calculation of stock value by the “non-matched” acquisitions.
- LIFO (method of reversal stock items running down)
It is the same process as described above, but it differs to the correlation process (acquisitions to grants) that will be performed in reverse date order.
- Standard price
The remaining stock is valued using the fixed and predetermined cost price that was stated by the user at the item’s level.
- Last acquisition price
The remaining stock is valued using the price of the LAST acquisition (purchase, production, etc.). It is not included among the acceptable stock valuation methods.
Costing period
Costing period is a CLOSED period of time, independent of others concerning cost processing which works for Stock Valuation just like “Fiscal Year” or all the other ledgers. This means that the Inventory cost value from which the calculation begins is the REMAINING STOCK at the beginning of the costing period and not progressively upon all the acquisitions (Year To Date). The “length” of the costing period is defined to the company’s administration form, for every “Fiscal Year”.
The starting Inventory for the stock valuation is determined by the starting date of costing period. Thus, in case of a “3 months costing period”, suggesting that 1st quarter’s stock cost and quantity had been calculated, these data will consist the quantity and cost for starting the calculation of 2nd quarter. In case of a “yearly costing period”, every time the calculation starts from the beginning of fiscal year, the calculation performed YTD (Year To Date) and the only starting inventory which is considered to be “acquisition” is the starting period balance of the fiscal year.
The ending date of costing period determines the date of costing transactions, which derive from stock valuation process. Consequently, it defines the date that we can have the “agreed Inventory Costing Balance”.
Under special conditions, we could define especially to some inventory items a monthly costing period, whereas the costing period is greater (12months) for all the other items.
Acquisition cost
Acquisition cost is the value which occurs from the purchases or any other “import” transaction such as the starting inventory or the production or the assembly etc. The total of the imports value configures the acquisition cost which is definite and indisputable (that is, the valuation process does not affect it).
Grants cost
The grants cost is the cost of the items which have been exported from our warehouse either for sale or for any other reason (consumption, gift, destruction etc.). As long as the stock valuation process hasn’t been completed, grants cost is updated (based on documents parameterization) through the “cost value” field of these transactions, based on current cost price (spot cost).
While the stock valuation process takes place and depending on the stock valuation method used, this “temporary” cost is reversed and calculated/registered the new official grant cost. These “costing” transactions aggregated per item, in order their immediate post to cost accounting, to be feasible.
Stock value
To the inventory monthly data (table “Item periodics”), the stock value stored as DEBIT VALUE – CREDIT VALUE. These values are updated from the various documents during the daily operations, and by the documents created through the Stock valuation process.
In fact, the concept of debit generally illustrates the events concerning the INVENTORY Accounting group (to the General Ledger), whereas the credit concept ALSO includes the credit from the grants costing which is illustrated to the INVENTORY COST Accounting group (to the Cost Accounting). All measures (quantities and values) monitored to a “Trial Balance”, give for each inventory item the full overview of the ITEM REGISTER.
The debit and credit analysis in further factors is as follows:
Debit = Opening Stock Value + Purchases Value + Production & Assembly Cost + Cost of other imports
Credit = Cost of Sales + Consumption Cost + Gratuitous dispenses cost + Cost of other exports
In the following figure we can see these concepts to an Inventory Trial Balance as well as the concept of the HORIZONTAL AGREEMENT of the INVENTORY COSTING BALANCE:
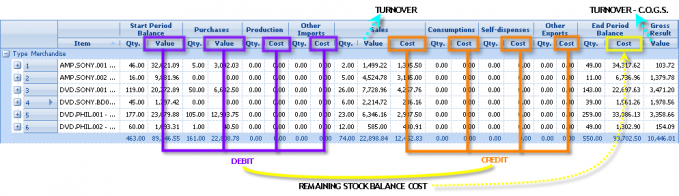
The difference between Debit and Credit that results AFTER the process of stock valuation has been completed ensures the known equation of yearend Balance sheet with Gross Result per item:
Ending inventory cost = Starting inventory cost + Imports cost – Exports cost
Or Stock value (debit) (credit)
Gross profit = Sales value (turnover) – Cost of goods sold

Branches’ independent results
When branches do not have independent results, then, stock valuation execution is single for all branches together. This means that, to a simple case with only purchases and sales, these are processed all together and not separated in order to derive a different cost price for each branch. The purchases cost, independently to which branch occurred, is being attached to all the sales transactions and ONE stock valuation price PER ITEM is extracted for the company as a whole.
If a branch has independent results (indicated to the page “addresses-branches” of the company screen), then, the stock valuation process calculates independent official cost price for this branch and creates corresponding entries.
|
|
Prerequisite for sound process functioning, Intra-Transfers Notes between such Branches/Warehouses MUST be treated as acquisitions. Thus, for the in-house transfer example, it should NOT be used documents of simple quantitative in-house transfer, but the IWI document (In-house transfer Note – cost of other imports). |
In NO case an independent stock valuation price is extracted per warehouse!
Forecasting entries
If the stock valuation process starts and still there are pending quantities as to their value aspect (the purchases cost or sale value) due to Receipt or Delivery Notes not invoiced, forecast entries are automatically created with the missing value (a kind of «temporary invoicing»), in order the RESULT for each item to be able to be calculated: the ACQUISITION COST which corresponds to the actual STOCK and the PROFIT corresponding to the actual sales quantity.
During the execution of successive calculations (each month, 3 months etc.) the forecast entries are reversed and new are created, in order the DIFFERENCE of the actual Invoicing compared to the Forecast entries that may have occurred to previous period, to appear, in the period that we are found, each time.
As far as their posting and their role to the Inventory Books is concerned:
When we have short term results in the middle of the fiscal year, the forecast entries should be posted to the appropriate accounts “forecasted purchases” and “forecasted sales”; at the end of the fiscal year such entries do NOT exist.
When we are not obligated to intermediate results, the generation of these entries is still needed in order to achieve correct calculation of the stock value, however, it is not necessary to have an accounting entry and thus can be «hidden» to the Inventory Record (there is such functionality available to the reports).
The agreement of the Inventory Trial Balance with the Accounting can be supported in accounts’ 2nd degree level, as the system maintains separately the forecast values, despite the fact that the Trial Balance presents the total values summarized:

For example, if in General Ledger these values monitored separately ( “20.01” -> “Purchases” and “20.99” -> “Forecasted purchases”), then, using a setting available to all Inventory Books, could achieve reconciliation:
The Goods receipt Notes & delivery Notes which are not invoiced, affect the results of the Stock valuation process and thus:


- These must be checked BEFORE the execution of the stock valuation process through the “Not-invoiced quantitative documents” view, in order to be sure that the data are correct and to avoid any possibility of an invoice entry omission:

Do NOT leave the quantitative Notes and especially the purchases Receipt Notes without value. There, when we have the receipt of a new item, the application possibly does NOT set a default cost price and thus, if a grant (sale) occurs before the invoicing, the Stock valuation process will be problematic. Complete the expected value.
Use the correct documents for each case. If, for a transfer that does NOT concern invoicing e.g. samples, receipt for service etc., used the usual Receipt Note (which creates «pending invoicing value» which will reversed only if invoiced actually), then, it will be created an "incomprehensible" forecast. The same will happen if there is an invoiced value by an Invoice for which a Receipt Note does not exist.
Use the table of contents of this manual in order to find the case you are about to enter.

Assumptions
- Items that are simultaneously produced and purchased are not considered as substantial. Apart from that when these items consumed, the accounting update is not possible and the creation of additional code is recommended.
- Items which are produced and assembled at the same time are not considered as existing. If produced, even when there is not an additional cost, must be defined with normal Production (which is a «superset» of the assembly as a process).
- Transactions of value concerning (“invoicing”) a quantity which was issued with a prior (“quantitative”) document, consider that include this quantity. For instance, a purchase Invoice which concerns a Goods receipt Note, in the “quantity” column has the quantity of the Receipt Note.
- Clear quantitative transaction without cost update should NOT be considered as a possible scenario, EXCEPT IF it is IN-HOUSE TRANSFER and concerns NON INDEPENDENT branches; consequently, the import quantity equals to the exports quantity. The system provides documents that could be used for both cases (with or without cost update in imports or exports column), but, if the default parameterization altered, must take into consideration the abovementioned rule.
- The 1st time that the stock valuation process will be executed within a fiscal year, it presupposes that the starting Inventory that has been undertaken, is inserted both for value and quantity. Any modification of the Inventory must lead to re-execution of the Stock valuation process. When the inventory of the Stock is finalized, “period closing” must follow for the opening period, in order to make sure that it will not be altered by accident.
Transactions to be taken into consideration
The items’ transactions that are taken into consideration by the Stock Valuation Process, are:
A. Definitive acquisitions
They are transactions updating BOTH «valuated acquisitions quantity» AND «acquisition cost»:
|
|
|---|---|
|
|
|
|
B. Forecasted acquisitions
These are transactions updating «valuated acquisitions quantity» AND «acquisition estimated cost». When we have the case of not invoiced Quantitative Receipts, when stock valuation is undertaken, it automatically generates such transactions, in order to determine the correct cost and to attribute value to any grants (sales etc).
C. Definitive cost transactions For Distribution
These are transactions updating ONLY acquisition cost. The process faces these transactions as distributable. For FIFO – LIFO – Floating Cost Price stock valuation methods, the distribution needed in order to compute the REAL COST of EACH acquisition, whereas as far as the Average Cost Price these transactions just affect the Cost Price, without distribution to be necessary for one by one acquisition. Such transactions are:
Purchases Debit Notes (supplementary charge invoices)
Discount Credit Note for purchases or Turnover Credit Notes (rebates)
In documents, in «status» sub-page, there is the date range reference information, where if completed, it is taken into consideration during allocation. Thus, in FIFO stock valuation method, if we have 2 invoices of Α and Β value respectively, and a credit discount document of C value with «date range reference» where only the 1st invoice belongs, its cost value will be calculated as A+C instead of value C to PROPORTIONALLY reduce the value of both invoices (thing that will occur, if the date range reference remains empty).
D. Grants For Cost Determination
These are transaction updating quantity AND value or/and cost (invoiced) sales, self-dispenses, consumptions or other exports. When these transactions entered, the real cost is unknown and in this case the cost update is “temporary” in order to give a spot management information. So, the process ATTRIBUTES COST (to the “valuated cost value” field of these transactions), while at the same time, creates reversal documents for the temporary cost and new documents updating grants definitive cost (e.g. VSL documents). Such transactions are:
|
|
|---|---|
|
|
|
|
Transactions to be ignored
The Stock Valuation Process does not take into account:
- Any transaction of a Warehouse which is «Not valuated» e.g. Third parties warehouses, service etc.
- Items “set” (to the field “characteristic”)
Stock Valuation Process
How to launch the process
The process called from Periodic Processes/End of period processes/Stock valuation and presents the following dialog:
Number of periods for cost determination: It depends on the definition of the cost determination period to the “fiscal year” and it cannot be changed through this dialog. In our example we have annual cost accounting.
Up to period: Defines the last financial period up to which the process will be performed. If there is a monthly or three months costing period, cost calculation will commence from the beginning of costing period (e.g. start of quarter), whereas if there is an annual costing period, calculation process starts from the beginning of fiscal year.
Update customer gross profit: Customers’ gross profit at their transactions can be updated, ONLY if the temporary (spot) and the definite cost are NOT separately monitored (by activating the parameter “Update primary estimated grant cost information”, that leads to replacement of temporary by the definite cost).
In this case, by activating this option, customers’ transactions will be recalculated as well.

- It should be pointed out that the control of gross profit that is enhanced from Profitability reports of menu “business snapshot”, as well as the reports “Items sales per customer” or “Company’s overview” etc. do NOT use this information, but the one that arises from the properly updated items transactions. The cost (and profit) mentioned above, presented ONLY in “Sales Statistics” through the menu “Accounts receivable”.
Since this update process slows down the stock valuation process, you can execute this function AFTER the completion of Stock Valuation Process, through the same menu option “Calculate gross profit of Customers”.
Select Start button in order to begin the process. If for the same COSTING PERIOD the process is previously executed, the produced by the process documents will be CANCELLED (in order to may reproduce inventory reports for previous months), while if the process is previously executed for the same month (FINANCIAL PERIOD), the produced by the process documents will be DELETED.
 NOTE !
If the parameter “Updating primary estimated grant cost information” is activated, in both cases of previous documents' cancellation or deletion, the grant’s cost value is AFFECTED since this happens in terms of a “costing period” and does not concern the way that documents are created. Thus, if the columns “cost” and “gross profit” are printed in the monthly Statement of Stock Book report, you will NOT be able to have identical report, after the next run of stock valuation process for the same costing period.
Processing basic steps
|
|
** They are inventory corrective transactions for updating costs reported to Costing Balance and may be posted to Cost Accounting. Any execution may be cancelled and repeated, if errors detected.
These steps are analytically described in the following:
Defining Acquisition Cost
It is calculated the quantity and the “starting” cost at the beginning of the costing period where the «calculation period» belongs. This is a transaction of Α type (see “transactions to be taken into consideration”)
Any forecast transaction from previous costing period is reversed.
It is estimated the difference of the sales and purchases quantities from the corresponding “invoiced” quantities. Then, transactions are created per item (and independent branch) with the corresponding value of the «Pending invoicing», these are transactions of Β type (see “transactions to be taken into consideration”). This value is updated through the Purchases Receipt notes, Sales Delivery Notes and the Returns respective documents.
In FIFO-LIFO stock valuation methods, the acquisition value of the C type transactions is allocated (e.g. Purchases Credit Discount Documents and Purchases Debit Notes) to the other acquisitions.
In FIFO-LIFO stock valuation methods, the “negative” transactions (returns credit notes) close (in quantitative terms) with the “positive” transactions (invoices), in order the cost to be determined from the “real” valuated acquisitions.
Definition & Update Of Acquisition Price
The acquisition cost is defined (for not produced items only) and based on this, in all items’ monthly data the field OFFICIAL COST PRICE is updated, with the maximum accuracy. Independently of the stock valuation method (where the «official price» corresponds), the AVERAGE PRICE especially, is calculated and updated to ALL items (even if they have a different valuation method, for informative reasons).
The Sell-out price is checked, for a possible replacement of the calculated price. More particularly, the official cost price is compared to the given sell-out price and if the official price is less than this or zero, it is replaced with the sell-out price (according to the National but also the International Accounting Standards).
It is checked the existence of the Desired cost price in each item and if it is defined (non zero value) and at the same time, we have POSITIVE quantitative balance, it replaces the calculated price, by creating an appropriate “difference” transaction (to «VER» document which will be later examined), in order this value not to provoke a disagreement to the Inventory Costing Balance.
The case which may need such an intervention (definition of “desired cost price”) is when errors in documents use have occurred and we are not interested in or cannot correct them. At the same time we ensure that these errors will not be repeated from this costing period on.
Allocating Cost To Grants
Based on the detected acquisition cost, the final «valuated cost» of all the grant transactions (based on the stock valuation method) it is attributed to the D type transactions (see “Transactions to be taken into consideration”) and to the lines of the respective documents FOR ALL THE ITEMS which are not PRODUCED.
Costing Documents Creation
The temporary grants’ cost of current financial period is reversed
The grants cost transactions of previous period are reversed
It produces final grants’ cost documents per grants category, summarized per item and independent branch.
Assemblies Costing
The final (acquisition) cost of all assembly transactions are calculated and updated based on the respective consumptions cost that already calculated. For the assembled items, the steps 2-4 are executed.
Production Costing
The Production Costing process is executed in cycles of interim-final products and the steps 2-4 are repeated for the produced items.
Transition Costing
The Transition Costing process is executed (calculation is based on items’ grants cost from the customs regime) and the steps 2-4 are repeated for the imported items.
If the price of stock valuation that arises is 0 (for instance, the process begins with zero “inventory” and there is no purchase entry) whereas there ARE grants (such as in the case of sales return from previous fiscal year for instance, to an item that did not exist at the beginning of the fiscal year and it was not purchased again), the standard cost price of the item is taken, from the closer fiscal period (which is updated by the user to the “cost prices” of each item but also by the fiscal year closing process). In the 1st fiscal year, the user may enter there, the official cost price, derived from the results per item of the previous fiscal year.
Cost difference transactions
For all the below mentioned cost difference transactions, the items involved MUST BE EXAMINED (via the “stock valuation documents” view) since there is a possibility of WRONG TRANSACTIONS (except probably from small differences regarding the rounding in “VER” documents, that should be ignored).
- For every item, there produced transactions of stock valuation cost differences (in column “debit” or “Cost of other imports”) if the following equation does not apply:
Thus, any transaction occurred using a not proper document (i.e. “acquisition” that did not update the Debit or “Grants” that did not update the Credit) as well as any values ignored due to step 6 where a quantity was entered with a value that later was extracted with another value), are detected and registered as debit or credit stock valuation differences. The produced documents are VSL & VDC.
Relevant control for the agreement of assemblies cost and the consumptions cost is undertaken and via documents VAS or VDA the assemblies cost is being corrected (assembly cost should not be updated through any documents except of “assembly” since it is being correctly calculated only by stock valuation and after the cost valuation of their components).
For each item, there created transactions of grants differences cost (to the «credit» column, to the cost of exports cost, with the VER document) if the following equation does not apply:
Thus, any differences of self-dispenses cost or forecasted costs or rounding errors (by comparing the official stock value to the product “quantity*cost price”) or other similar cases, are detected and registered, having the “reasons provoking differences” presented to the “Remark” field, according to the following coding...
| 01 | Negative stock value | 05 | Differences of not invoiced purchases |
|---|---|---|---|
| 02 | Zero quantity with non zero stock value | 06 | Differences of not invoiced sales |
| 03 | Corrections of self-dispenses cost | 07 | Difference of stock valuation price |
| 04 | Corrections of other exports cost | 08 | Other reasons |

In document lines the user may select the update method to the Inventory Balance, by editing the «Update column» column. If the field is left empty, it updates “the cost of other exports”.
CAUTION! By not updating the «other exports», we may avoid the presentation of these amounts to the audited data. However, with the exemption of some small rounding differences cases, e.g. 0,01€, (it will not occur a problem), there is the need to investigate ALL THE REASONS having provoked these entries and if necessary to undertake corrections and to re-execute the stock valuation. If we check these transactions at the end of the Fiscal year for the 1st time, it will not be always feasible for the data to be corrected. These documents, containing possible errors, are available to the “Valuation documents” view.

Cost determination per lot
 For the items that are monitored PER LOT and for the Weighted average stock valuation method, it may be defined that the analysis of Stock valuation method per lot to the respective item field, is desired. In this case, all the grants of the lots (consumptions, sales) will be taken cost only by “their” particular acquisitions (purchases, inventory, production etc) at the 3rd step of processing. The costing result is taken from the “Profitability by lot” cube (Business Snapshot/Profit analysis).
In the special case where in an “acquisition” document e.g. of a purchase, there are more than one lots with a different cost, there must be inserted separate lines, in order the cost to be defined (value, discounts, additional expenses) to the value fields of the line, either when it concerns the typing from the user (e.g. purchase) or a cost determination process (e.g. costing folder distribution, production costing).
Process errors recording
- In case of stock valuation process failure or termination, this is recorded as information to the «run failure» column of the stock valuation history table «ESCOValuationLog».
- In the beginning of the process, it is checked the agreement of the “measures” cost of acquisitions and the quantity of acquisitions between the detailed transactions and the monthly (periodical) data. It is possible for someone to change an “entry type”, while there exist transactions with this type, by SKIPING to EXECUTE re-calculation of transactions (by mistake). This is reflected as wrong result by the stock valuation process which cannot be explained. Thus, this check DETECTS this case and as long as there is a problem, it is recorded to the .etl file, as an ERROR but without the stock valuation process to be interrupted.
Control and results
To the Periodic processes/End of period process/Stock valuation menu, it can be found a number of tools enabling the control of Stock valuation results. We recommend to be used each time that the process is undertaken. This will eliminate problems that may occur at the end of the Fiscal Year, when it will be difficult or impossible to be corrected ESPECIALLY within official documents.
- === Valuation Documents ===
Within this list, the documents created from the «DIFFERENCES» stage, are presented with red color in order to be investigated. By using «+» at a 2nd level, all item lines are presented.
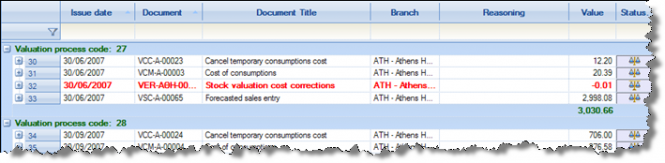

- === Official cost prices per period ===
In this report, we may see the stock valuation price (“official” price) per item and month, and the stock value based on it. The “Period cost price” can be also checked (per month).
The period cost price can possibly differ from the valuation price in case where costing period IS NOT MONTHLY (it is not identical to the financial period). Then, the stock valuation RETAINS the calculated per financial period price, whereas it updates the “official price” (to a different field) for all months, in order to be able to take results with any of the 2 values, using the respective parameter.
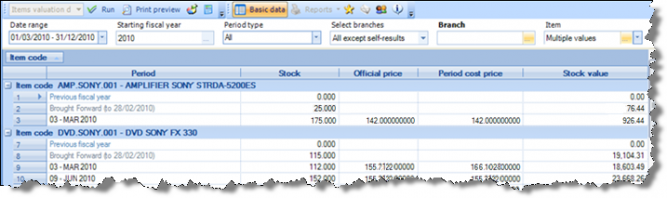


- === Compare official cost prices ===
It is useful for controlling the official cost price’ variance between TWO SUCCESSIONAL periods. If cost variance is high (not expected), this could lead to investigate and detect errors (on value typing) or possible omissions for instance, to the purchases documents. It is grouped per supplier, to enable the investigation of particular invoices of each one of them, that may contain wrong values:


- === Inventory trial balance columns justification ===
Through this view, we may invenstigate through which documents the particular columns of Trial Balance have been updated. By using the view’s filter line, may select the particular column to be examined.
For each column, we can see to the 1st level the various documents types found, with their total amount and number. To a 2nd level, the list of actual documents presented by date and he 3rd level presents the included lines.


- === Trial Balance & Registers for cost control ===
In these reports some extra columns included, which enable the results’ investigation and mainly, reasoning of the possible forecast entries to be created by the Stock Valuation process:

As much to the Purchases as to the Sales, besides the “quantity” columns presented as well to the Inventory Trial Balance and Transactions Registers, the «Invoiced quantity» and “Not-invoiced quantity» columns are available:

- The «Invoiced quantity» is updated through value entries CONCERNING quantity. A “PNV” or an “SNV” document displayed in both “quantity” and “invoiced quantity” columns, while a “PIV” or an “SIV” document will show the quantity FOR WHICH it was issued only to the “invoiced quantity” column. A Discount credit document will not update any quantitative column.
- The «Not-invoiced quantity» is updated through the Delivery or Receipt Notes and the respective “Forecasted value” column shows the value of the transaction to be created by the Sock Valuation Process, if these (quantitative) Notes remain pending at the end of the month. To the other Stock Books these two values presented as a sum to the “value” column, except otherwise defined to the respective criterion (“Values content”).
- === Transactions affecting cost ===
In order to check the transactions of cost origination and to detect possible omissions or errors, this view is provided, that presents all transactions of A, B or D category (see “transactions to be taken into consideration” by the Stock Valuation process).


- === Cost balance justification (FIFO\LIFO\FCP) ===
For as many items have one of these stock valuation methods, there is the functionality for recording the “matching” between acquisitions and grants, occurred during the Stock valuation process. Based on this recording, this view presents all the acquisitions with the following columns (5 quantitative and 6 of value):

Initial quantity
Credit notes quantity
Actual quantity (which can be granted)
Grant quantity (which was granted, was matched with grants)
Open quantity (the one corresponds to STOCK QUANTITY)
Initial cost
Reductions from credit notes
Allocated values (the value that was allocated to acquisitions of purely value documents e.g. credit discounts notes)
Actual cost (which can be distributed to grants, forming their cost e.g. sales cost)
Cost allocated to grants (which was actually distributed to grants, the one which corresponds to the COST OF SALES, when it concerns the final-sold product)
Inventory cost (not allocated cost, the one corresponds to the STOCK VALUE)
Some transactions may appear without content to the “document” column. This means that they are the virtual transactions of the starting costing period (opening quantity and value) which are created by the stock valuation process.
If we have a 12 months costing period (annual), we may select the whole fiscal year and as a result to take the right cost (as the «start» transaction will always be ONE, the one of the fiscal year start). However, if we have a costing period equals to 1 (month), we must select a particular month, if it is a 3 months period, to select the months of the particular quarter etc. in order the start entries each time, to be unique.
For each purchase, to a 2nd level (
 The « Save valuated cost allocation »company parameter must be activated, in «Stock valuation» group of parameters.

- === Grant cost justification (FIFO\LIFO\FCP) ===
In correspondence with the previous report, based on the matching recording occurs by the stock valuation process, this view provides a reasoning as the origin of the cost of goods sold (or in general, of the grants cost).
All the grants presented per item (sales, consumptions etc) with the cost taken. This cost value is consistent to the COST OF SALES. If there is a Production, depending of the grant type, it is consistent to the respective exports cost column of the Detailed Trial Balance:

For each grant, there is analysis (
For each of these imports (purchases or «acquisitions» in general), there is analysis (
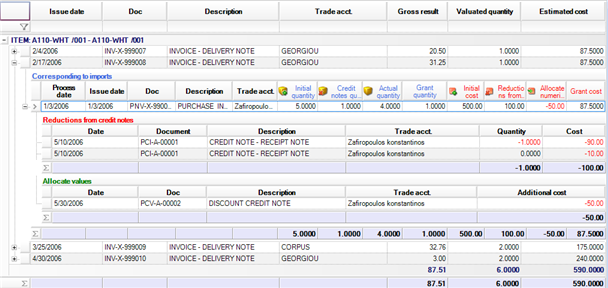


- The « Save valuated cost allocation» company parameter must be activated, in «Stock valuation» group of parameters
- === Documents’ effect to stock valuation ===
Informative view which shows a) the documents affecting cost (stock valuation price), meaning that these are acquisitions for the stock valuation concept and b) the documents receiving cost through the specific automated procedure of allocating cost, defined as “grants”:
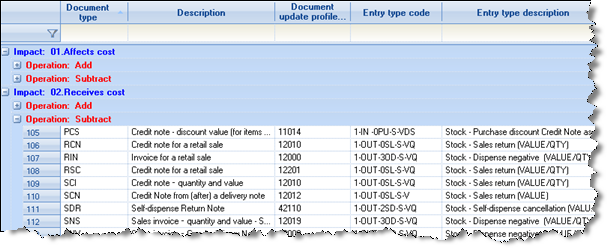

- === Review of updating Inventory ===
Cube which presents HOW documents update the Inventory Trial Balances columns, based on their parameterization.
These information are generally useful, but are NOT adequate in order someone to alterations of default updating rules. In order to do this, must have been trained and to FULLY understand the mechanism of documents, transitions & updates.
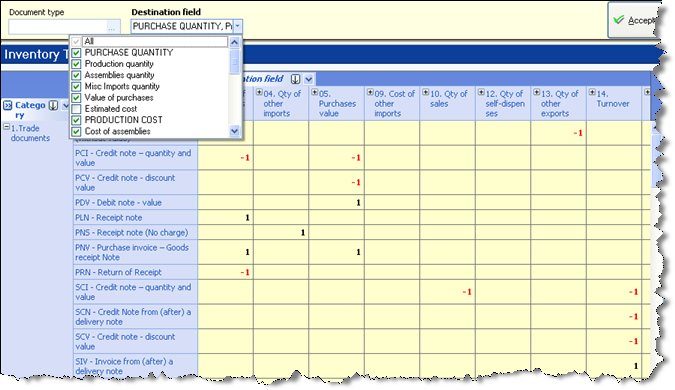

Management information
The Stock Valuation Process:
- It produces transactions with the total cost of goods sold, enabling the cost posting functionality and
- It updates ALL the grants transactions (e.g. Sales) the final, calculated cost value in order the COST and (thus) the PROFIT to be available on a transaction level. The particular field (“Valuated cost value”) is the main source of the MIS Reporting.
In order the abovementioned to be explained, let’s take an example, where the indicative (temporary) cost price which gave an indicative cost value to a sale transaction was 100,00€, whereas after the stock valuation, this was calculated as 90,00€.

The «official data» column to the above figure, successively updates (with the 3 example transactions) the items’ monthly totals (at “periodic” table) as well as the Inventory Balances and Transactions Books, whereas the “Valuated cost value” field does not update anything, it is just used for management information.
If we have to make views/reports using as a criterion EXCLUSIVELY the items, without the need for grouping by customer, branch, area, business unit etc, then, it is just needed to sum from the Items Periodic table the «Cost value» and comparing to the “Turnover” to present various reports, cubes etc for the Profitability (with the correct calculated by the Stock Valuation cost). These reports will be more performing, compared to those using detailed transaction.
If we have the need for «cost PER sale transaction» use, e.g. items sales per customer, items categories and customers categories, sales per branch (cases where the stock valuation has not effectively imprinted results, which means that it has not produced cost corrective transactions PER branch, PER salesperson etc), THEN, we must use the detailed sales transactions, selecting their “Valuated cost value” field (with the appropriate “sign” e.g. the Turnover sign), being able to group them now in any way.
The above simple rules fulfilled to all the preset statistics for sales and profitability analysis.
Fixed Assets Life Cycle
Fixed asset receiving
Appropriate document type: PLN (Receipt note)
The process is similar to the one of inventory items receiving. Having created the fixed asset code (register), we can select it to the “Fixed Assets” sub-page of the document:

This document does not concern the fixed assets registry report. The «depreciable acquisitions» which are the objective of the fixed assets sub-ledger, is only created through registering a VALUE carrying document (as to the pre-configured updating rules).
It is just displayed in the Fixed Assets’ detailed transactions.

Fixed Asset Invoice
Against receipt note
Appropriate document type: PIV (Purchase Invoice)
Appropriate transition: 102. PLN =>PIV (Invoice from Purchase Receipt note)
This process is similar to the one of the Invoice receipt for the inventory items. The fixed asset is displayed to the “Fixed Assets” sub-page of the document.

After the Invoice entry, a depreciable acquisition is created and as result, the fixed asset is displayed to all the accounting statements with its acquisition value (Fixed assets registry, trial balance etc)


Invoice-receipt Note
Appropriate document type: PNV (Purchase Invoice - Receipt Note)
This process is similar to the one of the Invoice–Receipt Note for the inventory items. The fixed asset is displayed to the «Fixed Assets» sub-page of the document.
Invoice of additional charge
Appropriate document type: PDV (Debit Purchases Note)
Used in case of an Invoice of additional charge, because of a prior wrong Invoicing. It increases the acquisition value of the fixed asset (particularly, of the depreciable acquisition). If the error occurred to the initial Invoice requires a reducing value document, then, it will be issued a credit invoice from the Supplier, which must be then registered into the system as a Discount Credit Note (PCV).
Fixed asset from abroad
The process does not differ from the one followed for the goods, materials etc, for import from abroad. The depreciable acquisition is created by the IFC document which is generated during costing (folder closing).

Stock asset capitalization
Appropriate document type: SAC (Stock asset capitalization)
It is used when the goods transferred to the Fixed assets registry, for our own use.

Another case where this process may also be useful, is when for instance, it has occurred a receipt-invoicing of many fixed assets “parts” which we do not wish to illustrate to the Fixed assets registry as separate entities (e.g. parts of a bookcase). We then select to open inventory items, to proceed to assembly and finally, to register the “capitalization”.
In order to keep the information of the initial purchase document, its number and date can be typed to the “alternative document” and “alternative document date” fields of the Capitalization Note.
The values of the two segments (Items & Fixes Assets) must be equal. To be sure that there will not occur any significant change to the “grant” value of the inventory item, it is recommended to run first the Stock Valuation Process and then issue this document, in order to transfer the correct value to the Fixed Assets Register.
Fixed asset return to supplier
Appropriate document type: PRN (Return Note)
The document can be used if the fixed asset lines within the document, are activated. It works just like the respective document for the inventory items.

The quantity and the acquisition value of the fixed asset will be ONLY be updated after issuing the Credit document receipt.
- If the fixed asset is (partially or completely) depreciated, this process can NOT be used.
Credit Invoice
Due to return
Appropriate document type: PCN (Purchases Credit Note)
Appropriate transition: 106. PRN=>PCN (Credit Note from Goods return Note)
The document can be used if the fixed asset lines within the document, are activated. It works like the respective document for the inventory items. Decreases the quantity and the acquisition value.
Discount of fixed asset’s purchase
Appropriate document type: PCV (Discount Credit Note)
The document can be used if the fixed asset lines within the document, are activated. It works like the respective document for the inventory items. Decreases the fixed asset acquisition value.
Fixed asset cost center alteration
Appropriate document type: FAT (Fixed Asset Accounting Transfer)
Through this process, can be registered various changes of fixed assets monitoring:
Transferring part of the fixed assets quantity to ANOTHER BRANCH with simultaneous transfer of values proportionally (acquisition value and depreciation value).
Transferring of depreciable acquisitions or part of these to ANOTHER FIXED ASSET when for example, the financial substance of the fixed asset changes (as it happens during the completion of fixed assets under construction).
Separation of a depreciable acquisition into TWO parts of the “basic fixed asset” e.g. for sale
Transfer of the whole or part of the fixed asset acquisition to another COST CENTER

The user selects the fixed assets and the specific acquisitions must to be transferred (may select many acquisitions of the same fixed asset, as well as particular serial numbers) and then, after defining the transferred quantity, must select the lines and, through the Ctrl-M buttons combination (or through the use of the “Fixed asset transfer” command from the vertical toolbar) to define the data for the transfer to the displayed dialog.
In this dialog, can be selected a new fixed asset (as «destination») or a new branch or another cost center. Such an action will automatically insert new lines containing the appropriate data, with connection to the existing lines, which are about to be transferred.
Additionally, the «Direct Depreciation» can be activated, when depreciations for the transferred fixed assets have not been yet calculated. The result will be the automatic calculation of the depreciations, in order the transferred depreciation values to be determined (before save). This can be achieved also, through the
(direct depreciation for the selected fixed asset) command, from the vertical toolbar.
Finally, we can avoid the quantity transfer by deactivating the «quantity transfer» setting of the dialog. This is useful in cases where the fixed assets unit is not common as e.g. while transferring from/to an intangible fixed asset. If deactivated, then, the initial quantity is ignored, and the new lines obtain quantity=1 and the MU of the new fixed asset.
The lines of fixed assets acquisitions to be transferred have the “standard” line type, whereas the new lines (acquisitions to be created) have the “reversed” line type and presented with a different color.

After this process, the Fixed assets registry, the Trial balances, the Registers etc. can be taken PER BRANCH (by modifying the «Grouping» criterion) illustrating the correct results (quantities, values), since new “acquisitions” are created to the related Branches or to other Cost Centers.


Fixed asset sale
Appropriate document type: SNV (Sales Invoice – Delivery Note)
The process is similar with the one of Goods Selling. The fixed asset is displayed to the «Fixed Assets» sub-page of the document.

After the Depreciable acquisition selection, you will need to check the correctness of the «Cost value» column. This value will be taken into consideration during the calculation of the “reversed” depreciations, which will be automatically updated after the document is saved. These are the part of the remaining depreciations, that will NOT occur any more, since the fixed asset is sold.
 In order the calculation to be correct, the depreciations must have ALREADY occurred.
If depreciations have not already occur, this can be automatically achieved to this point:
A dialog will automatically appear, which will suggest the instant calculation of the depreciations. You must select “start calculation” button and, as a result of the procedure, a new document (FAD) will be created for register the depreciations calculated.
The fixed asset will be presented for last time only to the Fixed assets registry of the Fiscal year in which the sale occurred. Continuously, it will NOT be registered (inventory), and will never participate again to the Fixed assets registry.
The specificity of a fixed asset’s sale lies on the accounting posting:
| Document | Account | Amount |
|
|
|
|---|---|---|---|---|---|
| SNV |
|
|
Sale Value + VAT |
|
|
|
Sales Value |
| |||
|
VAT Value |
| |||
|
|
Reversed Depreciations |
| ||
|
Reversed Depreciations |
|
|||
|
|
Sales Value |
|
||
|
Sale Value – (Acquisition Value – Reversed depreciations) |
| |||
|
Acquisition Value – Reversed depreciations |
|
|||
|
|
Sales Value |
|
||
|
(Acquisition Value – Reversed depreciations) – Sales Value |
|
|||
|
Acquisition Value– Reversed depreciations |
|
|||
| FAD |
|
|
Depreciations Value Depreciations Value |
+ | + |
Return of fixed asset sale
The fixed asset return from customer to whom it was sold, is not handled through the default documents’ configuration.
In order to be implemented, the following methodology is recommended:
- Create an Inventory item with the fixed asset’s designation
- Enter the «standard cost price» field of that item, with the cost that the fixed asset will be re-inserted to the Fixed assets Register
- Return-Credit Document using that (inventory) item
- Stock asset capitalization with the fixed asset and the «symmetrical” inventory item, having as a value in both pages, the standard cost value. The (NEW) depreciable acquisition that will be created for the fixed asset, will be separately depreciated, from the initial one (that was depreciated in order to be sold).
- Execution of the Stock valuation process
Fixed assets depreciations
The term "depreciation" is meant to reducing the value of assets due to damage sustained over the time, either because of their use in operating activities, or due to technological obsolescence. In this chapter, we will examine the way depreciations are customised and calculated.
When depreciations calculated?
Compulsory
Each time the corporate results are published and since we are not obliged for short term results, once at the end of the fiscal year.
BEFORE EACH SALE or other EXPORT (destruction etc.)
Optionally
Monthly. The monthly calculation is recommended in order to be able to export results (P&L) from Accounting (for Management Information purposes), independently if the results are officially published.
Depreciations categories
In the Depreciable acquisition screen (which is automatically updated through each purchase/acquisition) the different types of depreciations, are illustrated:
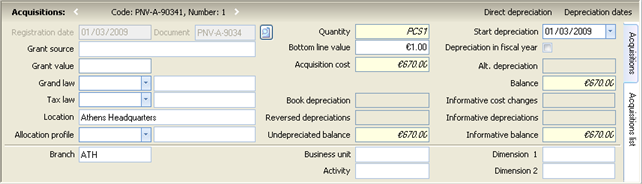

| Book depreciations | The official depreciations updating the Fixed assets registry of the company (for tax purposes), of three types (standard, additional and inactivation-time), enabling separate ratio and calculation process each. |
|---|---|
| Alternative depreciations | The depreciations used by a different, parallel and independent depreciations plan for managerial reasons. |
| Informative depreciations | Supplementary (positive or negative) depreciations, updating the IAS statements. They act as “differences” upon the Book Depreciations and give a different undepreciated balance. |
| Reversed depreciations | Is the part of the acquisition cost that will be never depreciated, due to e.g. a fixed asset sale or destruction etc. |
| Depreciations of grants value | The depreciations attributing to the amounts of grants. The amount of grant (when exists), is defined to the homonymous field of the depreciable acquisition («Grant amount»). |
The data of the Depreciable acquisition influencing the depreciations calculation, are:
| Bottom value | This value is not depreciated, but it remains as long the fixed asset belongs to the company. Its value is usually 0.01* Acquisition quantity, but the user may change it. Its default value (assigned during automatic creation) depends on a company’s parameter value (“Suggested fixed asset bottom value per quantity unit”). |
|---|---|
| Start depreciation |
It is the date from which the system will start to calculate the depreciations for the particular acquisition. It is automatically updated according to the “Default Depreciations Start Date” company’s parameter.
|
| Depreciation dates |  The last depreciation dates are automatically updated through the system, during calculation of various types of depreciation. They are taken into account by the calculation process in order to start from the correct date. The last depreciation dates are automatically updated through the system, during calculation of various types of depreciation. They are taken into account by the calculation process in order to start from the correct date.
|
| Depreciation within fiscal year | When activated, the depreciable acquisition is wholly depreciated within the same fiscal year, whenever was obtained in this year. |

Due to the various depreciations’ categories, there occur THREE undepreciated balances:
| Undepreciated balance | The official (for tax purposes) undepreciated balance arises through reduction of the acquisition value by the “Book” depreciations and the Reversed depreciations. |
|---|---|
| Alternative balance | The undepreciated balance (for managerial use) occurs by the possible alternative depreciations plan and it arises through reduction of the acquisition value by the “Alternative” depreciations and the Reversed depreciations. |
| Informative balance (IAS) |
It is also parallel (but based on differential transactions) to the official undepreciated balance (for monitor IAS) and arises from the following equation: Acquisition value + Informative cost modifications – Accounting depreciations – Informative depreciations – Reversed depreciations. |
Depreciations rules
Through depreciation rules, it can be described the method of calculation of depreciations values. The calculation method depends on the depreciation method and the type (based on rates or based on lifetime) selected in the depreciation rule. Each fixed asset may contain up to 3 depreciation rules (book/official, alternative and informative depreciations).
Depreciation Methods
Within each rule, we initially must select one of the following depreciation methods:
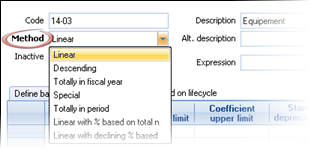

Linear or Fixed: In this method, the depreciation rate is constant each year, and the calculation is always based on the initial acquisition value and thus the annual depreciation amount is every year the same. Example : If the value of the fixed asset is 1.000,00€ and we have defined a rate of 20% for each year or a 5 years lifetime, the amount of the annual depreciations will be 200,00€ (approximately, due to bottom value).
Descending : In this method, we define a rate applied on the remaining value. The calculation does NOT occur on the initial acquisition value but on the remaining balance after the deduction of the current depreciations Example : If the fixed asset value is 1.000,00€ and we have defined a rate of 20% for each operating year, in the 1st year, the depreciation value will be 200,00€ whereas in the 2nd year, it will be 160,00€ and 128,00€ in the 3rd year, until the fixed asset is fully depreciated.
Linear with % based on total numbers & Linear with declining % based on total numbers: By defining years of lifecycle, the applied rate is increasing (in the linear with %) or decreasing (in Linear with declining %) based on the type: remaining years/total number of years. Example : for 5 years with the 1st method of increase, for the 1st year the rate will be 1/15, the 2nd 2/15, the 3rd 3/15 etc. (where 15 is the sum 5+4+3+2+1). For the same case, with the 2nd decreasing method, the rate for the 1st year will be 5/15, 4/15 for the 2nd, 3/15 for the 3rd year etc.
Totally in period or in fiscal year : It means that the whole acquisition cost will be depreciated into the period or the fiscal year, in which the fixed asset was obtained.
Types Of Definition
When we create a depreciation rule, after defining the method, we need to select the type of definition:
Define based on coefficients: In the «Define based on coefficients» page of the depreciation rule, we can define per fixed asset or for all the fixed assets having the particular rule, the appropriate depreciations rates.

| From operating year |
|
|---|---|
| Upper & Lower coefficient limit |
|
| Standard depreciations rate |
|
| Additional depreciations rate |
|
| Inactivation-time depreciation rate |
|
| Annual variance |
|
| Fixed asset |
|
Define based on lifecycle: This page is available only if there is no line to the page “based on coefficients” (and vice-versa). We can define per fixed asset or for all the fixed assets having the particular rule, the calculation to occur based on the fixed asset lifecycle.

| Fixed asset |
|
|---|---|
| Lifecycle units type |
|
| Lifecycle |
|
| Standard Depreciations rate |
|
| Valid from date |
|
Using
(copy coefficient) button, the fixed assets list is displayed where we can undertake mass fixed assets selection and create equal numbers lines to the depreciation rule. From the current line, the suggested rates are taken. The user may undertake modifications per asset.
Customization issues of informative depreciation rules (IAS)
When we have an estimated configured statement which gives per Fixed asset or Fixed assets category, the estimated lifetime, then, we only need to properly define the depreciation rule in order the calculation process to return the expected depreciation amounts.
If lifecycle is defined (either for particular fixed assets or without a fixed asset definition, this means for all of those following this rule), then, during the calculation of the informative depreciations (which implies that the «book depreciations» are ALREADY calculated), the application will automatically calculate the proportional amount (either through linear or descending method), by making sure that it will be depreciated EXACTLY at the LIFECYCLE that the rule defines.

If there declared inactivation of fixed assets, and the definition occurs based on the lifecycle, no depreciation will be calculated for the inactivation period, thus, the lifecycle must have taken into consideration ALSO this time range.
If the definition based on RATES, these can be either ABSOLUTELY or DIFFERENTIALLY defined, according to the respective company’s parameter of “I.A.S.” category:

The «absolute» or «differential» concerns the relation between informative depreciations rate and book depreciations rate.
Suggesting that we have a 11% rate for standard depreciations and that, for I.A.S. the rate must be 15%.
We will either make a «differential» definition, by placing the 4% to the informative depreciations rule or we will make the «absolute» definition by placing the 15% to the informative depreciations rule.
In both cases the result calculated to the depreciation amount is the SAME, however, the process of DEFINITION differs.

Depreciations during the export
Before the export of a fixed asset due to a sale, destruction etc. it must occur a depreciation calculation for the undepreciated value, in order the depreciations that will not take place any more, to be correctly calculated.
To the export document, after we select a fixed asset and a particular depreciable acquisition (if the fixed asset has only one, it is then automatically completed), the following dialog is automatically opens for immediate depreciation of the acquisition. The same dialog is called from the actions of the document line.
We confirm the date up to which the depreciations will be calculated (it is suggested the last date of the document period) and we select «Start calculation». Since for the particular depreciable acquisition, no depreciations were calculated concerning the particular period, depreciation documents will be created after calculation, which will decrease the undepreciated balance. Finally, during document saving, the reversed depreciations (that will must not occur anymore) will be calculated and update the remaining value, that must become null.
To the fixed asset’s administration screen, we can see the depreciations calculated directly through that process from within sale document (before posting) and the reversed depreciations calculated and updated after posting, resulting to a zero remaining value of the fixed asset.


The reversed depreciations calculated through the following formula:
Cost Value – Cost value * existing depreciation value
Initial acquisition value
As cost value in the document line, is suggested the acquisition value that corresponds to the line quantity:
Initial acquisition value
Initial acquisition amount * Document quantity
Depreciation for particular fixed asset
Through a particular fixed asset, we can calculate depreciations for the whole fixed asset or for a particular fixed asset “depreciable acquisition”.
To calculate depreciations for the whole fixed asset, select “direct depreciation” through the horizontal toolbar:
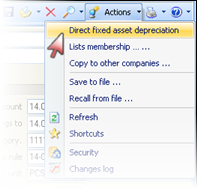
To calculate depreciations for a particular acquisition, select “direct depreciation” through the toolbar of the section of acquisitions:
To both appearing dialogs, we can calculate depreciations for the whole remaining value or for a part of this, by defining the Percentage of value or the respective Quantity.
The calculation will occur up to the specific date declared to the dialog, per Acquisition, for those acquisitions that have no depreciations for the particular period. Updating of fixed assets will occur through the depreciation documents that these processes create.


Mass depreciations
Through the «Periodic Processes/End of Period Processes» menu, the “Depreciation calculation” can be executed. This is the most frequently used method to run depreciations, since it allows the mass (usually monthly) calculation for all fixed assets.
The appearing screen has two sections. To the upper section, we define the type of depreciations to be calculated and to the bottom section, a fixed assets view presented, to select those for which the calculation will occur.

| Calculation from- to period | The period for which the depreciations will be calculated. The depreciations documents that will be created by the process, will have the “to” date, as registration date. It is suggested the starting and ending date of the current period. |
|---|---|
| Select calculation | Select the type of the depreciations that will be calculated (Book/Official, Alternative, Informative, Grants). |
| Recalculate existing depreciation |
We select how the process will respond in case there already exist depreciations for the selected calculation period.
|
| Depreciation posting | This choice leads to the selection of the appropriate document types for registering the depreciations. The difference between the “forecasted” and the “standard” depreciation documents is the accounts used, during posting. The documents of forecasted depreciations, use specific accounts and do not affect the “fixed assets” group of accounts. |
To the fixed assets view section, can enter criteria, run the view and select the fixed assets for which the calculation will occur. Select «Start calculation» in order the process to begin.
The calculation is executed for all the selected fixed assets acquisitions and takes into account:
The company parameters concerning fixed assets sub-ledger
The depreciations rules defined to each fixed asset.
Acquisitions data, such as acquisition value, bottom value, grant amount, depreciations value, inactivation period, the «Depreciation within fiscal year» setting, the Branch and the Cost centers
To the created by the process documents (presented through Transactions/Fixed assets/Depreciation documents menu choice), we can see the calculated depreciations amounts per fixed asset and depreciable acquisition.

The “Comment” column updated by the process with useful information about calculation (type of calculation, date range of each calculation, depreciation rule, rule line from which the rate was taken).

Company’s parameters affecting depreciations calculation
In «Default Depreciations Start Date» parameter, select the way that the system gives default value to the ‘depreciations start date’ according to the acquisition document’s dates.
The «Depreciation based on twelve portions» parameter affects the “allocation” of the per month depreciation. If YES selected, it will occur an EQUAL DEPRECIATION per month (if we don’t have inactivation), whereas if NO selected, the calculation will be based on the number of days, varying per month.
The depreciations calculation processes generate documents, based on the respective parameters:

How to see the results of the depreciations calculation
| View | Content | |
|---|---|---|
|
|
Fixed assets registry, detailed Fixed assets registry and Fixed Assets Trial Balance |
Detailed period and brought forward data, for acquisitions and depreciations values.
|
|
|
Depreciation analysis |
Analysis of depreciations per type (standard, additional etc).
|
|
|
Annual depreciation snapshot |
Analysis of book (official) depreciations per month (months as columns)
The same report is available for the alternative depreciations too. |


Accounting Tasks
Accounting customization
Journals
From Tools/Customization/Accounting, we must define the Accounting Journals that will be used for ledger entries, and set the method of operation, the required checks during editing, and the users access privileges to these.


| Type negative values | If selected, it is allowed the inclusion of entries with negative values, otherwise, an error message will be appear in negative values given. |
|---|---|
| Check correlation rule | To activate a check, according to which an accounting document cannot contain multiple lines to both «signs» of update, for instance, if it contains many debits, it should only contain one credit and vice versa. This rule ensures that the “Trial balance of accounts matching” can be taken. It presents for each account, by “what other” accounts its amounts are originated. |
| Gaps in dates prohibited | If activated, then the recording of definitive entries having a date which is earlier of the last final entry for the journal, is not possible. The option protects the users from wrong issuing of older ledger entries. |
| Check accounts |
It is useful when many journals are in use e.g. In a “Sales” Journal, a “Sales” account to be included anyway, or to a “Cash” Journal not to be used a “VAT” account etc. |
| Check accounts nature | If activated, and the nature of the accounts used is NOT “Mixed”, but it is “Debit” or “Credit”, the system should consider the sign of their entries to the specific Journal as compulsory, e.g. a “Debit” account’s entry to be only “Debit”. |
| Insert definitive entries |
The options for the “type” of the accounting documents’ created to this Journal, are:
|
| Retrospective entry days No. |
Defines the days BEFORE the date of the last definitive entry, on which a definitive entry will be allowed (based on the login date). If the “Gaps in dates prohibited” setting is activated, then a prior entry would not be allowed anyway.
|
| I.A.S. entries | If it concerns adjustment entries to the International Accounting Standards. |
| Related closing period type | The type selected, determines the modifications prohibition based on period closing. Period closing process is not “single”, but it occurs according to “type” selected e.g. “Sales”, “G/L Accounts” etc. |
| Layout lines | It concerns the grid format of ledger entries of the accounting document’s screen, valid if only a layout has not already defined to the “accounting document type”. The documents posting, moreover, generates accounting documents WITHOUT an “Accounting document type”, so, this Journal’s layout will be in force. |
| Branches | To the “Branches” sub-page, the valid company’s branches must be defined that the Journal concerns. If we have no specific Journals per Branch, then, must select ALL branches to ALL Journals. |
| PRIVILEGES |
In this sub-page and for each user group, must defined the privileges for the particular Journal, to the column “document actions authorization”, using a (multiple) select among the following:
|

Document type
From Tools/Customization/Accounting we can the documents types that will be used for autonomous accounting entries, meaning that they will NOT be generated through the documents of the various sub-ledgers (sales, purchases, cash etc).
For the entries that are directly inserted to Accounting, it is recommended the use of document types (this is not compulsory), in order the entries to be organized, grouped by category and to take numbering based on this. Additionally, it facilitates the completion of some necessary data, since they set by default.
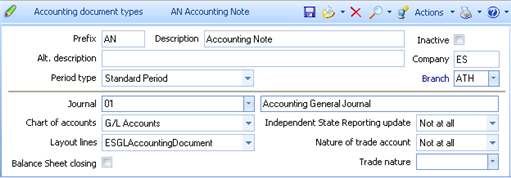

| Prefix | This code will be used as a numbering prefix of this type, accounting entries (the remaining “document code” of the entry, will be simply a s/n). |
|---|---|
| Period type | Select of it concerns Opening, Closing or Standard (normal) period. See to the Introduction Manual the concept of periods that the system monitors, in order to organize the Balances of different sub-ledgers and the autonomy of the Fiscal Years. |
| Branch | Registration default branch |
| Journal | The default journal. |
| Chart of accounts | The chart of accounts which concerns (General Ledger, Informative, Analytical or Cost Accounting). Each ledger entry may contain entries of only ONE chart of accounts, to ensure balancing within the same accounting plan. |
| Balance Sheet closing | If it concerns the closing period type, we define whether it concerns balance sheet closing entries (field activation) or end of Fiscal Year settlement entries (field deactivation). These two types of “closing” entries updates two different kind of “totals” to be able to update the respective End Year Trial Balances. |
| Layout lines | It concerns the grid format of ledger entries of the accounting document’s screen. The 1st time in such an accounting document, must change the columns and save using  , thus, it will be saved to this name and automatically used in the future. If not defined, it is the Journals’ layout that will be used. , thus, it will be saved to this name and automatically used in the future. If not defined, it is the Journals’ layout that will be used.
|
| Independent State Reporting update | In some rare cases, the Accounting department decides to monitor the expenses through Accounting, independently to the other sub-systems, so, a trade account is entered and a State Summary Reporting entry is created (usually, all the State Summary Reporting entries generated through the Purchases, Sales and Expenses documents). In order to do this, you need to activate this field. |
| Nature of trade account | Concerns the case where we have an independent State Reporting update and thus, the trade account is either concerns the Purchases and Expenses Report (payable) or the Sales Report (receivable). |
| Trade nature | Concerns the customization of a possible external accounting package. |
Chart of accounts
The chart of accounts is set by default. Its management occurs through the “Entities/Accounting” menu.
General data

| Identification data |
|
|---|---|
| Summary |
|
| Nature |
|
| Groupings |
|
| Currency |
|
| VAT & STATE REPORTING Fields Section |
|
| VAT Periodic Statement |
|
| Balance Sheet |
|
Administrative data

| Target entry |
|
|---|---|
| Allocation step | Its completion is a NECESSARY CONDITION in order for a “distributable” account to participate to the mass allocation process. It is a grouping field for the accounts concerning allocations and covers the update necessity to PHASES (e.g. 1st phase from general ledger to auxiliary cost centers, 2nd phase from auxiliary to main cost centers and 3rd phase results formation). In order for two allocation stages to be executed within one process (the one after the other), it is necessary to have a continuous Seq. No. |
|
Matching account |
Used if a particular costing account is always surcharged by this account’s transactions e.g. expense accounts that directly go to only one cost center. It can be used as a “variable” to the Allocation profiles. |
|
Contra account |
Select the contra-account that «balances» the allocation entries f this account, in case that Analytical Accounting is used for Costing/P&L (that is, a “double-entry” Ledger). It can be used as a “variable” to the Allocation profiles. |
|
Allocation profile |
If defined, the account always participates, to the automatic (on-line) allocations, since you have not set the Target entry = “prohibited”. The ‘Allocation profiles’ (Customization/Accounting/Allocation Profiles) define how the original entries of the account will be allocated, to which cost accounts (destination) and the conditions under which will be either debited or credited. |
| Use of dimensions |
For each one of the corporate (horizontal) dimensions, can define its relation to the particular account, based on two characteristics: USE
DIMENSION VALUE It is completed when for a dimension, the “default value” is in use. |
| Budget group |
|
| Balance Sign |
|
USER DEFINED FIELDS
In case we need more fields, additional static fields of various types provided (dates, comments, numbers, flags, tables) for free use and for accounts grouping/print, the name of which is configured through Tools/Customization.
Accounting documents


|
|
|---|---|
| Document type |
|
| Chart of accounts |
|
| Journal |
|
| Document code |
|
| Reasoning |
|
| Registration date |
|
| Type |
|
| Related document code | If the document has been primarily issued by another issuer, here, we type the number of the source document. When the document generated through accounting posting, the “alternative document” is transferred to this field, except of cancelling documents when in this field, it is transferred the document number which is cancelled through this. |
| Related document date |
|
| Trade account |
|
| Branch |
|
| S/N |
|
| Journal S/N |
|
| Dimensions |
|
| Cancel indicator |
|
| Origin |
|
| Period type |
|
| Origin account |
|
| Approval No. |
|
| Forecasting |
|
| Balance Sheet closing |
|
| Intercompany |
|
| Currency & Exchange rate |
|
| Check, Approval, Official print flags |
|
| Remarks | Informative field which is printed to Statements/Journals with (“concatenated” to) the reasoning field. |
| ACCOUNTS DEBITS CREDITS |
|


Accounting document Template
Beyond the “manual” entry method, an accounting document could produced by applying a “template”. In the templates, some typical kind of ledger entries can be described like Balance Sheet closing entries or Closing / Settlement of monthly VAT obligations etc.

In the general data of the Template, we complete the Accounting document type which gives values to some important and necessary data of the entry (chart of accounts, journal etc)
To the draft lines section of the template entry, we define the method and the form of the created entries. It has 2 sub-pages: “Lines” (where we can see all of its lines) and a “Current line” (where we can see the detailed data of each line). The insertion or deletion of a line can be achieved through the horizontal toolbar of this section. In each line we define:
| Account Mask |
|
|---|---|
| Mask expansion |
|
| Reasoning |
|
| Horizontal Dimensions |
|
| Calculate |
|
|
Expression. Through this option, could create a “query” to the accounts monthly financial data or to use the other lines of the template so, to “dynamically” define the amount of the entry. In this case, it must be selected the action button
For example, the amount of another line could be used (by selecting “line amount”) and in this case, to the right part of the dialog, the Seq. No. of that line it must be given. If “related line amount” selected, the Seq. No. will be relative to the current line. If “lines total” or “related lines total” selected, then, a range of line numbers must be given (from-up to). After the definition to the right part of the dialog, it is necessary to select the “Accept” button, thus, it will automatically be created the expression to be executed during the application of the template. With “Accept” to the bottom part of the dialog part (where the actual expression presented), the definition ends and we return to the previous screen of the line’s definition. Especially when an “ACCOUNT BALANCE” is selected, to the right part of the dialog, must enter the appropriate values to the requested parameters in order the system to read the correct amount from the account monthly financial data (e.g. balance, debit, credit, Progressive Debit or credit, what type of entries must be taken into account, etc.). |


The accounting document templates are configured through Tools/Customization/Accounting menu and they are selectable and applicable through:
- The “Actions” menu of a new accounting document
- The “Transactions/Accounting documents” menu
- The Fiscal Year Closing process, during executing Phase A
Corrective transactions of trade accounts
For errors correction that might have occurred during documents’ issuing, corrective documents will be possibly needed. The following documents, can be used:
For debit or credit correction:
Appropriate documents types: SJD (Receivables debit note)
SJC (Receivables credit note)
PJC (Payables credit note)
PJD (Payables debit note)
To the header of these documents, in order the appropriate accounting entries to be correctly created, a G/L account must be given to the header (to “balance” the accounting document to be created).
For debit or credit correction with simultaneous entries to another trade account, of reverse sign:
Appropriate documents types: TOD (Account debit balance offsets)
TOC (Account credit balance offsets)

To the 1st document, the debited trade account defined to the header and the credited to the lines.
In the 2nd document, the credited trade account defined to the header and the debited to the lines.
It can be used trade accounts of any nature, receivable or payables, just selecting the correct “line type”.
Accounts of taxes & withholdings
A special account is an ITEM as to the system (a service provided or an expense) which participates to invoicing procedures and...
Has no quantitative substance, but only VALUE
Defines rules of AUTOMATIC CALCULATION, depending on the values of the main items
Can be automatically incorporated to item lines or to participate as a separate line
Special accounts management
The method of update due to special accounts participation to the different transactions, depends on their type.
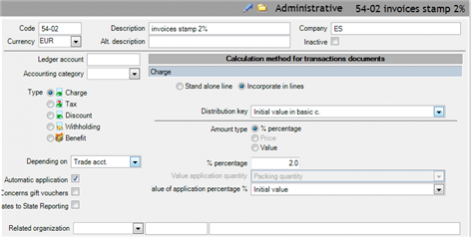
Especially in the trade and cash transactions (where there is an automatic calculation), in order for the special accounts to be able to be used, they must have been declared as “acceptable” within the documents types, in the “Withholdings/Charges” page.

This can be also achieved through the special account administration screen (from the “Actions” menu):
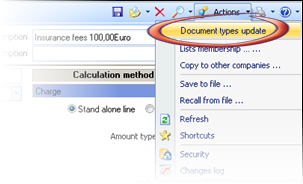
If the calculation of a special account depends on an item or/and the trade account of the document, it must:


Be incorporated to a SPECIAL ACCOUNTS GROUP depending its type (Tools/Customization/Special Accounts/Groups)
This group, needs to be defined to the related item group or/and to the related trade account (e.g. a charge to be incorporated to a “charges” group and to be defined to the “charges group” of the appropriate items or customers etc.). We could also use the mass modification functionality of views (as an example, you may study the implementation of the Recycling tax).
Special accounts the value of which is incorporated to the items
These special accounts:


Participate to the items net value calculation
Their VAT is calculated based on the %VAT of each line item
The Discounts are summarized to the “DISCOUNT 4” of the lines, and reduce the value
The Charges and the Taxes are summarized to homonymous lines fields and increase the value
The taxes of % type depending on “Item” can be included to the Retail prices
Withholdings and Benefits are NOT incorporated to lines
Stand alone special accounts
These special accounts:

- Have their own % VAT and independent VAT calculation
- Are separately updating Accounting
- Do not participate to the Items’ turnover or purchases cost
- Discounts and withholdings reduce the value, charges and taxes increase the value. The benefits does NOT affect the value
 Can “progressively” calculate their value (e.g. 3% withholding on the value, after the application of the previous withholding)

On line amount. The calculation based on the value of the previous special account of the same category.
On running-total. Will be calculated based on the document value and the value of the special accounts that have preceded this line.
1st Withholding: 20% on the net value (100*20%=20€).
2nd Withholding: 2% on the previous line, this is 2% of the 20€, the result will be 0,40€.
3rd Withholding: 2% on the running total, this is Net value=100 minus the previous 20,4€ thus 79,60*2%=1,59€.
Obviously, the application of the continuous calculation method, depends on the special accounts sorting within the document. If you have such cases, you need to be very careful when entering (sorting) the special account, checking the “Line number”. During an automatic application, the system takes into consideration the special accounts’ line number, among the “acceptable” of the document type. You can alter this order to that point, using the moving actions (
,
).


Documents posting
The posting creates accounting documents for every sub-ledger document, concerning Accounting and properly customized, in order to update Accounting.
Method of execution
The process is executed through the Periodic processes/End of period processes/Postings menu:
To the appearing dialog, the user defines a date range and the accounting Journal/s for which the accounting entries will be produced, based on the posting configuration of the document types. The process can be executed separately per branch and document type.

The “Document review” button option, displays the documents list that have not been yet posted.
Through the “Periodic posting scheduling” button, can be defined when and how often the process will being executed, without the user intervention.
With the “Shortcut” button, we can add the task to the current Shortcut List.
The “Confirm” button option causes the automatic documents’ posting for the criterions selected, provided they are not posted yet.
Customization method
The pre-configured posting customization of the document types, included to the system, take into consideration:
- The accounting categories as they are suggested and matched to the various entities e.g. items accounting category “merchandises” to all items which are “merchandises”, accounting category “domestic customers” to the customers etc.

The accounting groups with the format of the proposed accounting plan of 4 degrees, which represent a specific development per account, according to what is monitored by this account.

The particular accounts which defined to some entities e.g. expenses, cash and Bank accounts etc.

The accounting Journals defined to document types.


The standard reasoning as proposed per “source” (e.g. Document header, item line etc.)
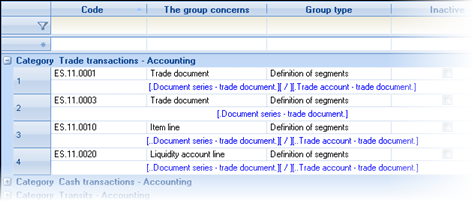

ACCOUNTING GROUPS
The accounting groups describe ONLY the logic of the chart of accounts, meaning that for each accounting group, that is used by documents' posting process (the same group used mostly to many documents), we define how the account code (which either debited or credited), will be formed (each segment of it) based on the document's data or the related entities' data.
The accounting groups use the accounting categories. For each accounting category, there are 4 codes (“accounting segments”) selectable to an accounting group, in order to create (forming) the account code.
The same 4 codes provided to all the system’s code lists (like category, business unit, region, department, etc) in order to be able to participate to an account code’s formation (which describes each accounting group).
Through "Tools/Customization/Accounting post/Accounting groups", the display features of the accounting groups list, make obvious the way these groups are already defined, by the preset posting configuration:
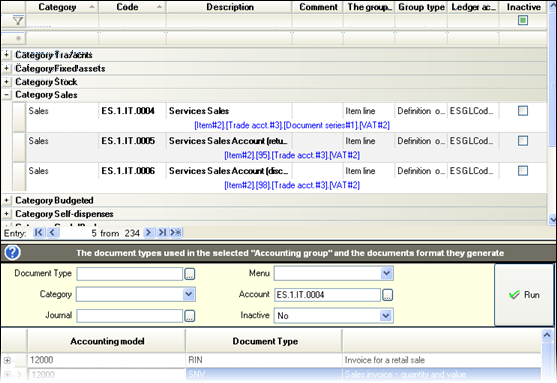
For each group, the defined account code format is displayed, based on the proposed chart of accounts (ZeroDB).
By moving to an accounting group, to the bottom part of the screen, we can see the documents, for the posting of which, this accounting group is used. When we ask
, we will see how exactly this group is used. To the example on the side, the sales account selected:
Especially to this example, we can see that:


- The sales account of the Invoices-Goods Delivery Notes (SNV)is updated with CREDIT by the NET VALUE
- The format of the Sales account is:
[Item#2].[Trade account#2][Document type#1].[00].[..branch.Accounting segment][VAT#3]
Which means:
[Item#2] To the 2nd segment of the items accounting category (e.g. 70 merchandises)
[Trade Account#2] To the 2nd segment of the trade account accounting category (e.g. 0 domestic)
[Document type#1] To the 1st segment of the document accounting category (e.g. 0 wholesale)
[00] Constant digits 00
[..Branch. Accounting segment] The content of the “accounting segment” field of the document’s branch e.g. 00
[VAT#3] The 3rd segment of the accounting category of VAT category e.g. 23
All code segments are separated with ‘.’ except the 2nd and the 3rd and the last 2.
The result is the formation of the following account code -> 70.00.00.0023
With double click to the group or through the
icon, we can see and modify this description.
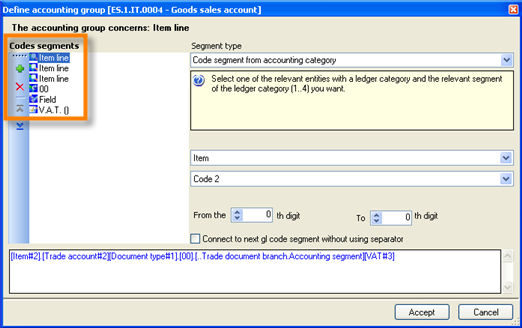
When any change has occurred (compared to the customization proposed by the system), the appearing of the accounting group changes (becomes bold) in order the modifications to be visible.

With the
icon, we can RECALL the default (system) content to the selected accounting groups.


ACCOUNTING ENTRIES CONFIGURATION
If the accounting document, that has to be produced by a document type, needs to be different than the default which provided by the system, an accounting model may be defined through the document type’s administration screen, in “Accounting” sub-page.

During posting of documents, belonging to a document type where a model is declared, the default model will NOT be applied, it will be replaced by the user’s model.
With “right click”, through the “insert” option, the accounting document contents may be designed, in a screen similar to that of an actual accounting document. The system’s proposal is automatically displayed (in order to either undertake changes or proceed to a primary design, after deleting these lines):


In this model’s lines, all the fields of the ledger entries are available all the fields of the accounting entries transactions. Besides the default appearing columns, through the “add/remove columns” functionality, you may transfer any field to the visible columns, and save this layout through the icon on the right.
The columns of the model grid are:
| Segment | Depending on the document type, a “source segment” selection displayed, through which the entry will be created e.g. to the NBT (Note Transfer To Bank), the segments’ options are displayed to this figure: | 
|
|---|---|---|
| Segment type | Depending on the selected “Segment”, it can be defined a special type in order to define different update for different types e.g. on an items’ line => standard, reverse or on a note’s line => Cheque, Promissory note etc. | 
|
| Account Type | Here, we may either use “accounting group” (which defined for general use by many documents, through segmented description of the account’s levels structure, as seen before) or DIRECTLY an “account” or an “expression” or finally, accounting groups which directly give code (“constant”) or have been defined as “expressions”. | 
|
| Account |
Depending on the “account type”, we may undertake search to the groups by selecting one, or to the chart of accounts, by selecting a child account or to define one by direct typing. If at this point we need to open a new accounting group or a new (missing) account, may use one of the buttons to the bottom part of the dialog, allowed the direct handling of these:
|

|
| Reasoning: | In this field (as with any similar column e.g. remark, alternative reasoning, etc.), we may directly type something and also to use the option of the document related fields through the  available icon. After a field’s selection, if we type “+” and continue with a new field through the same icon, we can make a COMPLEX REASONING. The fields have been grouped to usual , other and attached (linked fields e.g. of the Item through the line, or of the customer through the document’s header etc.). In case we want to type something specific, this must be entered within quotation marks (”) e.g. ”loan payment” available icon. After a field’s selection, if we type “+” and continue with a new field through the same icon, we can make a COMPLEX REASONING. The fields have been grouped to usual , other and attached (linked fields e.g. of the Item through the line, or of the customer through the document’s header etc.). In case we want to type something specific, this must be entered within quotation marks (”) e.g. ”loan payment”
|

|
| Debit-Credit | According to what entry will be, we enter to the respective column (debit or credit) the amount field (or the expression) among the document’s data fields that must be the content of the debit or credit amount field of the accounting entry. Similarly to the reasoning column, it can also be used the for the selection between the available fields. The numeric fields are also grouped to usual , other and attached.
|

|
| Sign | After defining the amount’s content, we can select the default sign (positive or negative). In case of a negative amount, we could either select “negative sign” or to put (by typing) a MINUS (-) in front of the selected numeric field (or expression). | 
|
| Automatic | Activate this column, if you want the particular entry to BALANCE the entry (consequently, the entry’ “sign” and “amount”, ignored). |

If you need to define more than one accounting documents, you need to use DIFFERENT GROUPINGS to the lines of the SAME ACCOUNTING MODEL. Select the “Document grouping” column (add/remove columns) and give a different value to the lines set, which constitute each “accounting document”.
The “grouping”, is a table of classifying accounting entries (available to the menu Tools/Customization/Accounting post). For every line of this table, a “Packing code” can be declared, which determines if the ledger entries of this group (line) will separated or not from the others. Every “packing code” to the same documents’ resulting entries, will finally lead to a separate accounting document.
Thus, for example, , in a sale document which includes a cash payment, we can set the following model:

The first 4 lines describe the “invoice” accounting entries and the next 2 the “payment” accounting entries, all produced by the same sale document.
The defined grouping, to the groupings table, are shown below...

If the default “Packing code” remains the same (ALL groups have packing code=01), then the created accounting document will be ONE, including all the entries. But if for example in 050 group (payment within trade transaction) put another content, then, in the above example, there will be generated two accounting documents.
To the “Check accounting post design” view, the accounting models presented (those created by the abovementioned process and also the system’s ones derived through the “document update profiles”) and, through expanding functionality ( ), can check their contents:

APPLYING POSTING RULES RETROACTIVELY
This functionality is useful when the verification and the possible (differential) alteration of accounting posting occurs, AFTER issuance of actual documents into the system.
The process will update all registered documents of this type which either have not been posted yet or they have been posted, but the linked accounting documents have not yet been finalized.
In order to execute this process, you need to select the action button “reapply”
:
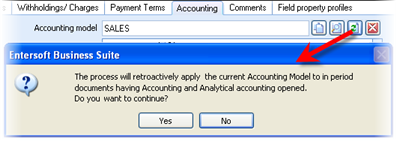
If the documents were already posted (having created temporary accounting entries) then, after completing this process, can check the new accounting entries that replaced the previous ones, according to the current posting rules.


Ledger entries finalization
In regular time ranges, it must occur finalization of the accounting entries, in order to avoid possible modifications, by mistake. This process is executed through the “Periodic Processes/End of period processes/Journal finalization” menu option.

To the displayed dialog, must select the Journals whose entries we want to finalize and the date up to which the finalization will occur.
Next to each Journal code, are found additional information such as the date of the last definitive entry, the date of the 1st and the last entry for finalization, the marginal date as well as the number of entries for finalization. To the bottom part, there are additional information about the dates of the temporary transactions to be finalized.
After defining the marginal date of finalization, the process proceeds and the result is that the accounting documents obtain the type “definitive” and the unified numbering per Journal and fiscal year, which printed to all detailed Journals and Account Statements.
To all the Official Reports (Periodic processes/End of period processes/Official reports) included only the finalized (definitive) accounting entries.
Fiscal Year Closing
Preparation actions
Before Fiscal Year Closing, you need to go through some preparation actions for the reconciliation and finalization of the fiscal year’s data. These actions can be done gradually until balance-sheet’s closing limit.
Α Inventory – Sales & Purchases
Physical inventory and update for surpluses and shortages on the fiscal year’s closing date.
Control for possible negative stock. If exists, will not be transferred to new fiscal year inventory.
Imports Folder Closing. When possible, final closing must be done. Otherwise, a temporary closing must take place. In this case any differences will appear in the new fiscal year.
Closing of pending quantities
Delivery Notes Invoicing
Credit notes for customers Returning Notes
Debit notes for Self-dispenses Delivery Notes
Invoices and Credit Notes (from suppliers)
Issuing or Customers Rebates and Receipt/Issuing of suppliers’ credit Discount Notes.
Stock Valuation and Production costing and control-confirmation of the results through the respective reports.
For items that are possibly monitored per Color, Size or Lot, a CROSS-CHECK of stock reporting per Item and per variation. If these are not the SAME and simultaneously POSITIVE for the end of fiscal year, the variations will NOT be transferred to next year balances. The agreement must be done per item and warehouse.
Inventory reconciliation as for the closing date of fiscal year. The official inventory reports must not necessarily be printed at this time of the process; however, it is essential that previously an agreement of quantities and values has been accomplished.
Verification of pending documents (orders, reservations) because during the next fiscal year, they will not be available for modifications.
Β Trade accounts
Trade Accounts Balances Control (customers-creditors-suppliers-debtors) at the end of fiscal year and Accounting reconciliation for the respective General ledger accounts, through trial balances at the end of year.
Settlement of exchange differences as well as of any corrective transactions e.g. reversal of very small debts. If last period in Accounting has already closed, we suggest to be issued:
In accounting, with concentrated entries, using the “Balance Sheet Entries” Journal.
To trade accounts sub-ledgers, with corrective documents, that will NOT be posted.
C General sub-Ledgers control
Ending of fiscal year documents posting, of those produced through a massive process, such as stock valuation or rebates etc., or those entered by the user during examination of each sub-ledger e.g. cost of goods sold, corrective transactions, cash deficits-surpluses, interests etc.
Control Reports for ALL sub-ledgers for the ending of fiscal year date e.g. Customers & Suppliers ending balances, Fixed Assets Registry, Inventory Balance, Special accounts, Liquidity accounts ending balances.
Corrective Transactions in cases of errors detection or failure of accounting reconciliation
Examination of non posted documents
Fiscal period closing for all sub-ledgers (not obligatory for continuing with the fiscal year closing process)
D Accounting
- Control of Journals’ detailed transactions
- Control of non allocated entries to Cost Accounting and execution of the Allocation Process
- Reconciliation between General and Cost Accounting through the use of Trial Balances
- Finalization of temporary accounting entries until the end of fiscal year
- Closing of the last “standard” period (e.g. December)
IMPORTANT NOTE concerning all financial reports
DEALING WITH INVENTORY during the PARALLEL FUNCTIONING IN TWO FISCAL YEARS
In all financial reports of Register/Trial Balance type to every sub-ledger, as well as in Accounting, the application sets by default the older fiscal year which is open e.g. 2009. This gives the actual (expectable) opening balances that will arise for the 1/1/2010 date, after fiscal year closing.
The other columns (except “balance” column) within these reports such as sales, purchases in the Inventory Trial Balance etc. DO NOT reflect the carried forward balance that will arise after fiscal year closing (since these columns reflect running totals from previous fiscal year), HOWEVER BALANCES are correct and can be checked, instead of creating temporary-useless opening entries (by any method, even automatically).
In case we want to get official results, we need to change the suggested (default) fiscal year into the current fiscal year, such as in 2010 and in this way the “temporary” opening balance will not be included. For instance, the General and Detail Ledger trial Balance must be presented WITHOUT an indicative opening balance of the start of 2010 year (provided that in 1/1/2010 it does start a new fiscal year). Only after results are definitive and fiscal year closing occurs, can use the opening balances in official reports.
PERFORMING «MANUAL» (temporary) STARTING BALANCES before fiscal year closing
CAUTION! Since the system provides the “temporary” starting balances just using the abovementioned functionality, the attempt of manually creating the starting balances is NOT intended, is NOT necessary and it may cause ERROR in data. These transactions will be created through the automatic fiscal year closing. However, as we will see, fiscal year closing DOES NOT PROHIBIT for such ”manual” transactions to exist, and it furthermore offers the capability to EITHER abolish them OR to “respect” them.
For instance: If the Cash Accounts’ starting balances are entered manually (since they are final at the end of year) , during fiscal year closing, there is an option either to RE-CREATE them or transfer balances only for those accounts that have no such transactions. To the second case, it is clear, that it is the USER THAT TAKES THE RESPONSIBILITY concerning the correctness of the typed starting balances.
General information for the process
The process is accessible through “Periodic Processes/Fiscal Year Closing Processes/Fiscal Year Closing” menu entry.
It consists by TWO basic PHASES:
- Α PHASE
During this phase are performed processes such as, settlement transactions in Accounting, Closing journal entries and transfer of balances in Results. Results are checked and their correctness is been reassured. We suggest you to proceed with printing the last updated Financial Reposts even though, it is not an necessary process for continuing with the fiscal year closing process.
- B PHASE
At this phase, the OPENING BALANCES automatically created for all Sub-ledgers and for Accounting too.
The dialog of fiscal year closing appears below:

In order to continue to B’ PHASE, the A’ PHASE must have been completed (Balance sheet closing). However, if any sub-ledger should be precede to this closing procedure or if, the balance sheet closing entries have ALREADY been accomplished by any other method, the A’PHASE process is not of your concern, thus:
You need to activate the «Phase A completed» option to the following dialog:

After a confirmation, you will be allowed to continue with PHASE B. You may ignore the following guidelines concerning the PHASE A and to continue directly to PHASE B.


Α’ Phase of closing
guidelines for creating settlement entries
Settlement transactions are not usually fixed and issued into the system independently from this process (of A’ PHASE). However, we present information concerning their entry as they constitute a part of the fiscal year closing process.
- Opening of documents types
In order to make the entry of these documents easier, take automatic numbering etc, you need to create the proper accounting document type (Tools/Customization/Accounting/Accounting Documents Types):
ACS-GL Closing Accounting Entry (Settlement)
It must have period type “Closing” and a specific “Balance Sheet” Journal. The setting “Balance Sheet closing” must be deactivated.
The respective action must be also taken for the Informative Accounts and for the Analytical accounting.
- Issuing of settlement transactions of Fiscal Year Ending
These transactions should be registered through Periodic Processes/Fiscal year closing processes/Balance Sheet Operations. The system imposes these kind of documents to have the end of fiscal year as registration date.
By completing these entries, you may have (any time, before or after the following steps):
- Last Interim Trial Balance (Settlements)
This report used for controlling settlement transactions. It presents debit, credit & balance columns for previous period (up to 31/12) while to the “period” columns, it presents debits ad credit only of settlement transactions.
Last Interim Trial Balance (Computerized)
This report contains exactly the same amounts but the format differs; It only presents columns of debit & credit balances. It enables the export of the results to file with an acceptable format from the State Authorities. This functionality is available through the
to the toolbar.
Actions to be taken for the preparation of the automatic closing of accounts
After completing all the transactions resulting to the Last Trial Balance, a number of typical “closing” documents must be registered for the constitution of balance sheet closing account. These closing transactions can be configured and executed automatically and massively. For this purpose, accounting documents types and accounting document templates, will need to be prepared.

- Opening of documents types
In order to make the entry of these documents easier, take automatic numbering etc, you need to create the proper accounting document type (Tools/Customization/Accounting/Accounting Documents Types):
ACC-GL Closing Accounting Entry (Closing Balance Sheet)
It must have period type “Closing” and a specific “Balance Sheet” Journal. The setting “Balance Sheet closing” must be activated.
The respective action must be also taken for the Informative Accounts and for the Analytical accounting.
- Creation of TEMPLATES for ACCOUNTING CLOSING
Through accounting document templates, you may set up the closing process in control STAGES. In order to define these STAGES go to the menu Tools/Customization/Accounting and define the appropriate accounting document templates per group of accounts using a) the document types created and b) the logical closing stages.
Example of 60-Payroll accounts closing:
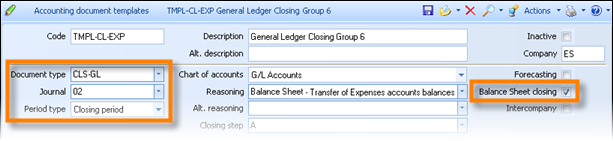
After defining the appropriate header fields, we define two lines with the expenses account masks, in order the debit and credit balance of ALL the 60-Payroll sub-accounts to be reversed, as well as a 3rd line for document balancing to the balance sheet results account:

Line for credit expense accounts having a debit balance
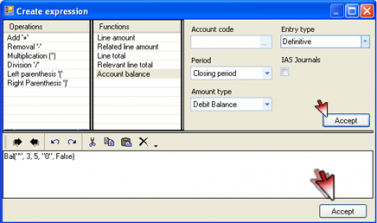 In “mask” field enter “60*”
Activate the field “Expand mask”
In “amount type” choose «expression»
In “sign” choose “credit”
Choose “create expression”
Select “Account balance”
Leave the “account code” empty
In “amount type” choose “debit balance”
In «period» choose “closing period”
In “entry type” choose “definitive”
Select “ACCEPT” to the upper section and respectively to the section below
Line for debit expense accounts having a credit balance

Create a new line like the previous BUT
In “sign” choose “debit”
In “amount type” of expression choose “credit balance”
Balancing line of closing entry to the 80.00 account
Create a new line with the following definition...
In “account mask” type the closing account e.g. 80.00.00.0000
In “amount type” choose “balancing”
In “sign” choose “automatic”
IN THE SAME WAY CREATE ALL THE ACCOUNTING DOCUMENT TEMPLATES for closing and transferring accounting groups balances.
Alternative method of closing accounts
The account that will be either debited or credited, is defined to the “account mask”. The account of which the balance will be derived, defined to the expression to the “account code”. This enables to have SUMMARY CLOSING ENTRIES. For instance, with the use of, 60.97 account (transfer of 60 1st degree account to the 80.00 results account) and the rest of the accounts respectively 61.97, 64.97 etc. So, might significantly decrease the number of the closing entries. Such a template document for group 6, would be like this:
Execution of phase a
From the fiscal year closing dialog , after having prepared the CLOSING SCENARIO, we may continue in massive creation of balance sheet closing transactions, using the button «Automatic Entry Generation»...
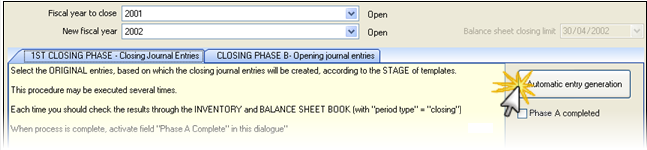


Here used the general function “Apply template accounting documents” of menu “Transactions/Accounting documents”. The ONLY templates appearing to this point are those concerning CLOSING (period type=closing) and those having a CLOSING STEP.
We select using «Ctrl-click» as many templates we wish to be applied or we use the filter line in order to choose the templates of the particular closing STEP.
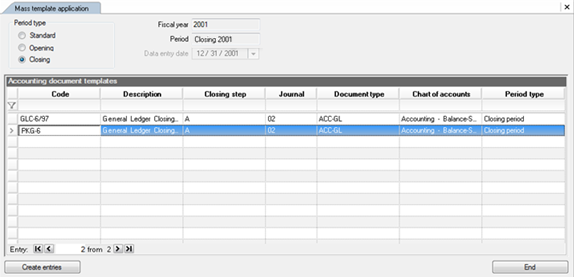
The process can be executed AS MANY TIMES AS YOU WISH for various closing stages, in order medially results to be checked (accounting documents, trial balances).
By completing these entries, you may have (any time, before or after the following steps):

Final annual trial balance (Closing entries)
This report used for checking closing transactions. In “brought forward” columns, it presents ALL regular and settlement transactions (up to 31/12) while to the “period” columns, it presents debits ad credit only of “balance sheet closing” transactions.
Final annual trial balance (balance sheet period)
This report used to check the whole “closing period”. In “brought forward” columns, it presents ALL regular entries, whereas to the “period” columns included ALL transactions in closing period (settlement and balance sheet closing).
Finally, the “Phase Α’ completed” field should be activated in order to be able to proceed.
B’ Phase of closing
actions to be taken for the preparation of PHASE b’ of fiscal year closing
Creating documents types for Opening Balances
Similarly to fiscal year closing transactions, the document types for the opening balances’ transactions to be automatically created, must be defined for each Chart of Accounts, through Tools/Customization/Accounting menu.
AOE-GL Opening Accounting Entry
It must have period type “Opening” and the specific “Balance Sheet” Journal. The setting “Balance Sheet closing” must be deactivated.
As a next step, declare these document types to the respective parameters:

Characterization of accounts that will participate to Opening Balances
ALL the child accounts that must participate to Opening accounting entries must be characterized as “Balance Sheet Accounts”. In order to achieve this (if it is not already updated), you may use an accounts list of only the not “summary” accounts (child accounts), and use the “global modification” functionality, from the “Actions” menu.
Definition of Opening Balance Sheet Accounts
In general parameters, you need to define the opening balance sheet account through which the opening accounting entries will be created. The opening account balances “split” per 1st degree account (each opening accounting document contains accounts belonging to only ONE 1st degree account) so every time, the Balance Sheet opening account is used to “balance” the document created.
After the completion of the Opening Accounting Documents’ creation, and, in order to the progressive totals of the Last Balance of ending Fiscal Year to be the SAME as the brought forward totals of the new Fiscal Year, the system creates ONE MORE accounting document REVERSING the total debits and credits of the Balance Sheet Opening Account using a “contra-account”.
You may define the same account as “contra” account, but then, it will obtain a zero balance, zero debit and credit so, so it will not be visible on a Trial balance basis so, only through the Account statements, the entries’ correctness can be controlled. If you define a different account as “contra”, then, in A degree you will have 0 balance but this will be justified, through its child accounts.

Creating series for the sub-ledgers’ Opening Document types
All document types used by the Fiscal Year Closing for register starting balances must have the “Automatic series generation” field activated, in order not an interrupt occurs if for any branch the respective document series not found. This field is already activated to all these pre-configured document types. If for any reason, a new one created, be aware of the above.
The automatic series generation (per branch) will occur, provided that the user executing the process belongs to the users group defined to the related company’s parameter.

Database ΒACK UP
Execution Of Phase B’
Returning to Fiscal Year Closing dialog box and provided that you have chosen “Phase A completed”, the system allows to continue with starting balances creation, by Phase B.
- Definition of the opening transactions’ registration date
To the bottom part of the dialog, you need to enter the date on which the opening transactions will be registered. This has no effect in Balances and Account Statements, they only appear into Detailed Journals. The system proposes the current date (if it is within the permitted time limit), otherwise, it suggests the date of closing limit e.g. 30/4 (defined to the fiscal year’s data into the company’s administration screen).
Stages selection
The B Phase, as already explained, will transfer to the new year’s “opening” period all definitive balances of all sub-ledgers. This procedure is performed in discrete stages, technically independent to each other. Therefore, could ask only a few particular stages to be executed, if the respective sub-ledger or detailed data are final and verified. The next time, these stages will be “marked”, so, should avoid to run them again, or, on the other hand, if any alteration occurred, should re-execute them (as many times needed).
Select the stages using Ctrl-click:
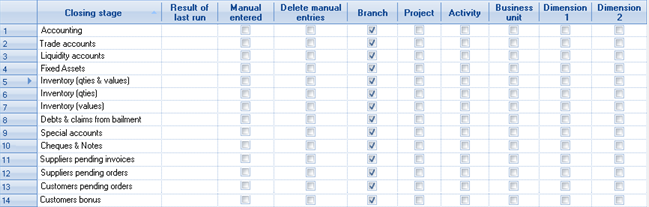

|
When errors found, (e.g. not closed costing folders, series not existed etc.) an informative message appears, otherwise, the message is: “Completed successfully” |
|---|---|
|
Activating this column means that the relative opening transactions entered already by another method and so, it must be NOT automatically undertaken. DO NOT JUST AVOID SELECTION of this stage, because the process is not considered to be completed. Selecting the stage and activating this column, the system updates the stage as “executed”. |
|
|
|
For system ‘s horizontal dimensions (Branches, Project, Activity, Business Unit, Dimension 1 and Dimension 2) there is the choice of get the opening transactions' analysis per dimension or not. You cannot affect the inventory analysis in Inventory and Fixed Assets. |
As to the Generic Items (Services and Expenses)
Not included to the closing stages , they will not be transferred.
As to the Special Accounts
Only “Stand alone” special accounts will be taken into consideration, during closing process.
As to the Fixed Assets
Their opening transactions will obtain the “branch” and the other dimensions’ values, that their acquisitions had at the fiscal year ending.
As to the Cheques and Notes
Their open values will be included into opening transactions of relevant payable and receivable accounts, in order to update the "commercial" balances. The cheques themselves do not participate to this process, since their data are maintained through the time and do not monitor information depending on “fiscal year”.
As to the Stocks
There may occur EITHER per quantity AND value through the same opening transactions (IOP) OR separately opening quantities (IOQ) and values (IOV). These two scenarios cannot coexist. The option is provided because quantitative inventory needs often to pass to the new fiscal year much earlier than the value inventory.
Items of Negative stock IGNORED.
The stock to Third Parties Warehouses (set as
 ) is undertaken PER TRADE ACCOUNT. The stock to Third Parties Warehouses is undertaken PER TRADE ACCOUNT. If the rules of using Third Parties W/H (through specific for this purpose documents) have not been fulfilled, it is possible that negative stock to be found for some Items per trade account, thus, it will be ignored !!!
If stock quantities per Color, Size, Lot are not identical to the respective Items’ stock (as a whole) per W/H, these variations will NOT be included to the Inventory transactions. This may have occurred by omitted variations' issuing into registered documents (or even into the previous year’s inventory). You should do this detailed check BEFORE the execution of PHASE B.

For executing the process of final closing, choose the button “Automatic entry generation”. This process may run many times, repeatedly. It may be executed, for control purposes, selecting one stage at a time, or, it can be executed many times for the same stage (the previous results automatically deleted every time), in case you have corrected data (if preparation actions had not been carefully executed) and you need to repeat the closing process, based on the reviewed data.
When all inventories are successfully completed (this can be ONLY be examined by Inventory Registers and Trial Balances reports), YOU NEED to activate the field .
At this point, the fiscal closing year process...


Transforms the “Closing” fiscal year to “closed”.
Transforms the “Opening” period of the new fiscal year to “closed” so no one to be able to interfere inventory.
Recalculates the “current balances” of Items and of Trade Accounts, in order processes that need quickly and directly the current (spot) value of balances to be performed (like credit control, stock availability control etc.).
Calculation of current balances
The current balances of Inventory Items and Trade Accounts are calculated based on the starting balances of the new year. This is the default year selection and there is no reason to alter it.. Although, this possibility provided for cases where a modification of creation of the opening transactions occur without correcting the prior year’s data. Attention! In this case, there cannot be any reconciliation between the two sequential years (ending balances of the one to be identical to the starting balances of the next) and it is the user that must proceed to this arrangement, if needed.

The same process is available through an independent menu option from Tools/Maintenance tasks/Recalculation.

Official reports
After completion of the Closing Fiscal Year’s Phase B, all the relevant reports can be taken for the closed fiscal year, by the appropriate selection of the “starting fiscal year” criterion of BITs (Transactions Registers, Trial Balances). Among all the other reports that considered to be used for verification during closing year processes, the following two accounting reports for the start and the end of a fiscal year, are included to the “Periodic processes/fiscal year closing processes” menu:
Balance Sheet Opening Book
For the closed fiscal year. It presents columns of debit and credit ending balances of accounts.
Journal of opening ledger entries
For the new fiscal year. The process of accounting entries finalization must be occurred, for the “Balance Sheet Accounting Journal”. The numeration of the accounting documents produced, will start over again from 1. The detailed Journals (through menu Entities/Accounting) have not the proper specifications to present the detailed opening entries, so must use this particular report through Fiscal Year closing processes menu.
Finally, through Periodic processes/End of period processes, you can take all needed official reports for each sub-ledger, for the end of the year: Inventory & Fixed Assets Books, Payables & Receivables Balances, Liquidity & Cheques-Notes Balances.
Balance Sheet & results statement
The functionality of Balance Sheet is based on export scenarios to EXCEL. The accounts’ balances reported according to their “Balance sheet group” field. The possible values of this grouping implemented upon the (suggested) Unified National Chart of Accounts and the final formatting has been implemented to an EXCEL worksheet.
Calculation & appearance
To the appearing dialog (Business snapshot/Accounting/Balance Sheet), the following criteria presented:

Fiscal year. The selected fiscal year considered as the “current” year in a Balance Sheet’s terms, whereas the just prior one will be presented to the respective cells of Balance Sheet for “previous” year.
If the selected year is the 1st fiscal year monitored, a warning will appear and the process will proceed, however, to the previous year data, the data of current fiscal year will be repeated.
Up to period. The selected period affects the calculation of both current and previous year’s data, in order them to be comparable.
Entry type. Multiple selection between definitive, temporary and audit type, that will be taken into account during calculation.
After confirming the above parameters, select the “Start” button in order to launch the calculation process and the final presentation of results.
During this process, it will instantaneously displayed snapshots from calculations (e.g. execution of trial balances) and snapshots from Excel so many times as the Excel worksheets that must be updated. Once the process is complete, you receive the balance sheet in its final form.
Parameterization
The parameterization tasks are grouped in selecting “Updating balance sheet parameters“ through Tools/Import-Export menu. It includes three steps:
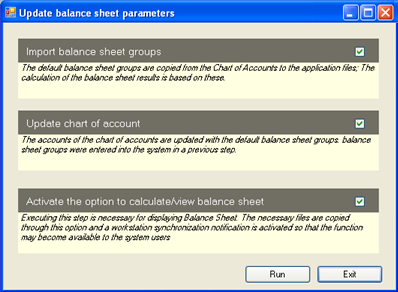
Import balance sheet groups
Through this option, the preconfigured balance sheet group values will be updated into the proper table.
To the “description” field, the account/s that this group concerns, have been declared. For example, the group E-E-2 concerns the account 36.00 (according to the National Chart of Accounts) and this account must be obtain this specific value to its “Balance sheet group” field.
If any alterations must be done (in case of a different accounts’ coding), just only select this 1st step and then, make the appropriate changes to the “description” field (the “+” character declares that a new account, to be updated, will follow).
Update of chart of accounts


This step is a massive update of the appropriate accounts with the appropriate value in the "Balance sheet group” field.
Activate the option of calculation/view of balance Sheet
Through this step, it will be transferred the pre-configured Excel spreadsheet, which contains the proper parameterization for reading the accounts’ balances, calculating final amounts and presenting them to a “balance sheet” format.
Attention!
This process can be executed only through the Application Server, since it performs a copy of the appropriate files into the folder CSExcel and it creates a new “custom” version in order to cause a synchronization of all clients, so to activate the presentation capability of Balance Sheet, to them, also.
Customization of Balance sheet spreadsheet
To understand both the method of implementation and the way of intervention (if needed) to the data of the balance sheet, see to the following, the necessary information about the structure of the worksheets used.
The depiction of the Balance Sheet occurs through the Excel file BALANCE_SHEET_MODEL.xls, which located into the root application folder "CSExcel". This file contains the following areas:
| Worksheet name | Description | Calculation | |
|---|---|---|---|
|
|
Balance Sheet | It is the presentation sheet | |
|
|
Data Actual Year | Current year’s amounts including the “balance sheet closing” entries | Execution of Accounting balance BITs, using a grouping by “Balance Sheet Group” |
|
|
Data Previous Year | Previous year’s amounts including the “balance sheet closing” entries | |
|
|
Data Actual Year Normal | Current year’s amounts excluding the “balance sheet closing” entries | |
|
|
Data Previous Year Normal | Previous year’s amounts excluding the “balance sheet closing” entries | |
|
|
SALESCOST | Cost of goods sold for current and previous fiscal years | Execution of a view of Monthly Totals of Inventory Items and Fixed Assets |
All worksheets except “Balance Sheet” are auxiliary and updated through an “Excel scenario”. Detailed information about making such scenarios, find to the “Presentation and Printing Tools” Guide.
How to recognize which Balance Sheet Group updates each cell of Balance Sheet Worksheet
Supposing we want to check the information that updates “Land and Buildings” cell.
This information presented to the ASSETS area, to the section C. FIXED ASSETS, to category II. Tangible Assets to the line 1. Land and Buildings. The results of the accounts having as a “Balance Sheet Group” a code containing the first letters of the above sections, meaning A-C-II-1 will update this cell.
The formula used for calculation of the amount, for the above case is:
=(IF(ISERROR(DAY_A_C_ΙΙ_1_DebitBalance);0;DAY_A_C_ΙΙ_1_DebitBalance)-IF(ISERROR(DAY_A_C_ΙΙ_1_CreditBalance);0;DAY_A_C_ΙΙ_1_CreditBalance))
meaning:
Debit minus Credit of the current period’s balance for the Balance Sheet Group A-C-II-1
Into this formula, we can see that there is a reference to the area DAY(DataActualYear) of the Excel. This area found to the worksheet Data Actual Year where recorded, by the execution of the excel scenario, the results of the “BIT” General and Detailed Ledger Trial Balance for the selected fiscal year, grouped by Balance Sheet Group.
There is a respective area named DPY (DataPreviousYear) for results of previous fiscal year.
Using the above method, the Groups and thus, the Accounts could be recognized, which update each cell of this template of Balance Sheet, provided there is a full correspondence between the Balance Sheet Group values and the codification of Balance Sheet lines.

Remember that the Accounting Balances, resulting the original information, provide grouping capabilities and could use this to take results BY Balance Sheet Group and Account. So, a reconciliation may occur for each line of the Balance Sheet.
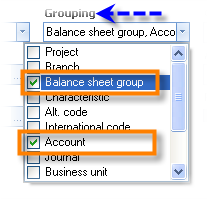
The last part of Balance Sheet is the “Results Statement”. The results are available only after fiscal year closure, and until then, a few only primary data presented e.g. costs, sales etc, but not all the required amounts.
Especially as to the “Cost of Goods sold”, it is not derived by some “Balance Sheet Group”, but by the results of the view “Balance Sheet COGS” located to the areas SALES_COST_DAY & SALES_COST_DΡY for current and previous fiscal year respectively.

Consolidated reporting
Through the menu “Business snapshot/Consolidated reporting”, we can take a number of reports allowing to select multiple companies and view consolidated results e.g. single customer’s balance, provided that the customer is monitored by the same code to all companies.
Especially the “Trial Balance with no intercompany transactions” (Accounting) excludes any transaction between companies of the same group. So, in an Accounting Balance level, can take “group of companies” net results, then, export this information to MSExcel, and produce more financial reports.
How the intercompany transactions monitored into the system?
The field “intercompany” is:
- Available to all transactions of all sub-ledgers
- Visible and editable by the users to the documents’ header of all sub-ledgers and to the accounting documents’ header:


Available column to the views “Documents list” and “Accounting documents list”
Privileged item to the Users’ Access System
This field is generally deactivated by default, however, to Trade (Sales, Purchases etc.) and Cash (Payment receipts) documents, this field will be activated if the trade account of the document’s header is also (through the “person” linked) a system’s company. This is the method of automated recognition of “intercompany” transactions. Furthermore, during intercompany transitions (e.g. a sale invoice transferred to another company of the group as a purchase invoice), this field is also correctly updated.
The information (intercompany transaction or not) is transferred to accounting documents through posting process, and thus, the Intercompany results can be extracted.
A consolidated Trial Balance that includes the intercompany transactions is also available, for reconciliation purposes.
Purging of fiscal years
This process (Tools/Maintenance tasks) enables mass deletion of older (closed) years’ documents, maintaining at the same time the transactions and monthly data tables, in order to …
Decrease the size of Database
Improve the system’s performance
Preserve the possibility to take Balances and Transactions statements, Journals, Sales statistics, Comparative views between years, Budgets reviews etc.
The documents and documents’ lines used only to views for “short-term” use like “pending orders”, “delayed arrivals” etc, and to a few only statistics like sales by color-size, lot, etc.

The processing «steps» must be ALL executed. The selection possibility provided here, just allows to control the execution timing (could divide the process to smaller duration steps, check that performed successfully and run every next step after completion of the previous one. The process is rather time-consuming.
The «sub-ledger» is a document types’ grouping that allows to choose if must deleted or not. It is possible to keep quotations, orders etc. and delete the numerous Retail Receipts for example.
The fiscal year for which this process is about to run, recommended not to contain facts yet to be “arranged” like deliveries without invoices, etc. If there are such cases, then the transactional data involved to "links" with older documents (belonging to those closed financial years) will be LOCKED as to changes and deletions, even if they themselves are open to use!
We suggest to maintain into the same Database only as many financial years, as you actually use to comparisons, statistics etc. with their full data (e.g. at most 3-4 years) and to perform this process periodically, in order to decrease the size of Database and thus, the daily processes to be executed faster.
 This process is irreversible, therefore it is essential to take backups before it runs.
Another reason to get backup is to keep somewhere the full details of the older fiscal years, that into the LIVE Database longer limited (after this process) to only transactions and monthly financial data.
Management information tools
Through the menu option “M.I.S. central administration” (Business snapshot), the key-users should seek the most important system’s views and reports, in order to be informed about their purpose and content, as well as to see samples of them, in various layouts. Finally, they will decide which are the more appropriate to use.
Into this tool, reports, views and cubes have been included, that serve the majority of workflows, the duties before the law, and also the information needs of management. They are categorized by focusing on the users’ roles and tasks. A user might simultaneously perform multiple roles or request information on more than one task types.
For every report, a description provided about its concept, its contents and its alternative formats, as well as to whom addressed, the time frame that is usually taken, for what purpose, the module it belongs, and finally, one or more typical samples presented. Furthermore, the possibility of direct execution of it, based on the actual data, is available from this point.

To effectively use this tool, should:
- Select the user’s role/s (1)
- Select the task type/s you are interesting in (2)
- Select a report among those found for the above purposes (3)
- Check detail comments for the selected report and the sample attached (4) or view an alternative format through area (5) of the screen.
For example, choosing “Inventory management” (role) and “Stock replenishment” (task) all reports facilitating this process presented, like Review of stock reordering needs, Stock availability, Compare suppliers’ offers etc. or, choosing “General Management” (role) and “All” (tasks), the most important business reports presented, like sales & profitability analysis OLAPS, performance indicators, balance age analysis, cash flow, payment policy evaluation, Τοp 10, Worst 10, Inactive stock, consolidated reviews etc.
The roles are defined based on traditional corporate functions such as CEO, CFO, Commercial Director, Store Manager, Credit Control Officer, etc., while the tasks are divided into 5 categories (Accounting reconciliation, Official reports, Daily monitoring, Preparation of processes and Audit Control). Especially in the “preparation of processes" are included very common to all companies procedures like Communication with customers, Invoicing, Payment of debts and also some more advanced tasks like Orders approval, Stock replenishment etc.
