EntersoftWMS-UserGuideEN
Entersoft Business Suite® | Entersoft WMS®
User guide & Implementation tips
Περιεχόμενα
- 1 Identity
- 2 Copyright
- 3 Symbols in use
- 4 = Introduction
- 5 Scope
- 6 Solution
- 7 Integration with EBS ERP & Expert
- 8 Interfacing with other ERPs
- 9 Starting-up
- 10 Main entities & business concepts
- 11 Company & depositor
- 12 WMS operation properties
- 13 Warehouse layout and storage location
- 13.1 Distribution center & warehouse
- 13.2 Buildings & storage areas
- 13.3 Storage systems
- 13.4 Sectors & aisles
- 13.5 Storage location coordinates
- 13.6 Location zones and zone types
- 13.7 Storage location profile
- 13.8 The transit location
- 13.9 Storage location codification
- 13.10 Create and maintain storage locations
- 14 Stock item
- 15 Container
- 16 Physical dimensions
- 17 Stock balances
- 18 Request & Action
- 19 Algorithms
- 20 WMS Item Control Policy
- 21 Documents and integration
- 22 Shipment
- 23 Users & resources
- 24 Inbound operations
- 25 Introduction
- 26 Activate expected receipt orders
- 27 Receipts monitoring
- 28 Physical receipt
- 29 Check physical receipt deviations vs expected
- 30 Complete receipt
- 31 Sorting
- 32 Putaway
- 33 Special use cases
- 34 Goods inspection
- 35 Receipt print-outs
- 36 Correct receipts
- 37 Update ERP
- 38 Outbound operations
- 39 Introduction
- 40 Shipment orders routing
- 41 Request generation process
- 42 Stock shortages management
- 43 Picking list print-out
- 44 Picking
- 45 ESRF Replenishment (shipment context)
- 46 Packing
- 46.1 ES Touch® Packing Station
- 46.1.1 Open packing request items selection criteria
- 46.1.2 Create new or select existing container
- 46.1.3 Insert packing container action items
- 46.1.4 Actions on packing container and container contents
- 46.1.5 Packing print-outs
- 46.1.6 Weight and volume measurement of packing containers
- 46.1.7 Packing to multiple containers per item
- 46.1.8 Packing remaining quantity handling
- 46.2 ES Touch® C2C Packing Station
- 46.2.1 Open packing request items selection criteria (C2C)
- 46.2.2 Create new or select existing containers for nesting (C2C)
- 46.2.3 Insert/delete container action items (C2C)
- 46.2.4 Actions on C2C containers
- 46.2.5 C2C print-outs
- 46.2.6 Weight and volume measurement on C2C Containers
- 46.2.7 C2C Packing to multiple containers per item
- 46.2.8 C2C Packing remaining quantity handling
- 46.3 ESRF Packing
- 46.1 ES Touch® Packing Station
- 47 Staging
- 48 Loading
- 49 Invoicing
- 50 Shipment routing orders cancellation
- 51 Shipments monitoring
- 52 Returns
- 53 Buyback process
- 54 Storage and Facility Management
- 55 Stock transfer
- 56 Stock transformations
- 57 Physical inventory, stock initialization and stock adjustments
- 57.1 Inventory plans
- 57.1.1 Configuration
- 57.1.2 Create inventory list and stock counting work packages
- 57.1.3 Generate stock counting requests per storage location
- 57.1.4 Lock storage locations and start counting
- 57.1.5 ESRF Stock counting per storage location
- 57.1.6 Check differences per location and start a new stock counting
- 57.1.7 Generate stock counting requests per item
- 57.1.8 Lock items and start counting
- 57.1.9 ESRF Stock counting per item
- 57.1.10 Check differences per item and start new counting
- 57.1.11 Stock counting finalization process
- 57.1.12 Inventory plans monitoring
- 57.2 Real time stock counting
- 57.3 Stock initialization
- 57.4 Compare WMS stock to ERP stock
- 57.5 Stock adjustments
- 57.1 Inventory plans
- 58 Off-time replenishment
- 59 Advanced distribution processes
- 60 Cross-docking
- 61 Value-added services
- 62 Serial Number management
- 63 Variable weight and volume management
- 64 Production stock monitoring
- 65 Introduction
- 66 Activate production orders
- 67 Production
- 68 Consumptions
- 69 ESRF Replenishment (production context)
- 70 ESRF Transfers to production area (light production)
- 71 Reverse productions and consumptions
- 72 Complete production orders
- 73 Update productions and consumptions to ERP
- 74 Ad hoc productions and consumptions (no document order)
- 75 Appendix – ESRF Android app
- 76 A. Entersoft RF Android App – Touch
- 77 Appendix – Print per resource and location
- 78 Printers
- 79 Reports
- 80 Assign printers to locations and/or resources
- 81 Associate printing reports with action types
- 82 Appendix – Interfacing with other ERPs
- 83 A. Introduction
- 84 B. “From” ERP “to” WMS data
- 85 C. “From” WMS “to” ERP data
- 86 Appendix – Interfacing with Warehouse Automations
- 87 A. Integration with VNA forklifts
- 88 Appendix – Integration with ES Service module
Identity
Document Version 1.0.0.0
Software Version Entersoft Warehouse Management System
Last Update October 2020
Copyright
© Copyright 2021 Entersoft S.A. All rights reserved.
No part of this work may be reproduced, transmitted, stored, or used in any form or by any means, without the prior written permission of the publisher.
Regarding the present content …
- It may be altered at any time.
- It serves exclusively informative goals.
- No guarantee whatsoever is handed out for the possible existence of mistakes or the wrongful use or non-wanted results produced by the use of processes hereby followed and recommended.
Symbols in use
| Symbol | Denotation |
|---|---|

|
Attention |

|
Recommendation |

|
Note that… |

|
Example |

|
Configuration |

|
Parameter |
| Menu | Menu items/ Commands |
= Introduction
Scope
The scope of this document is to describe common and advanced scenarios of warehouse operations with the use of Entersoft WMS®.
The functionality described in the document spans across the areas of:
Inbound operations - receiving directly into inventory, receipt inspections, label printing, putaway, opportunistic cross-docking
Reverse logistics - buyback processes, returns from customers, recall processes, etc.
Outbound operations – picking and replenishment, sorting, packing, loading and shipping
Advanced distribution processes - Cross-docking, value-added services
Storage and facility management – intra-organization replenishments, cycle counting and physical inventory
Stock handling – stock dimension transformation, stock arrangements, repackaging


Figure 1: Basic Warehouse Operations
Special reference is made on the Production Stock Monitoring module, an advanced tool for stock handling optimization within the production site designed to meet the manufacturing process requirements.
Solution
Entersoft WMS® is a state-of-the-art software solution consisting of three major applications.
- Use the WMS BackOffice application (ESMainApp) to:
- activate operations and modules according to implementation requirements
- define the logistics network – distribution centers, warehouses, manufacturing sites
- set up the warehouse layout and storage location behavioral patterns
- apply logistics data to master entities – stock items, customers, suppliers
- determine user rights as well as resource roles
- design report and label print-outs
- define barcode resolving rules for items and containers
- plan and monitor daily warehouse tasks
- manage resources
- configure rules and algorithms for directed picking, putaway and replenishment
- schedule shipments according to capacity limitations and optimal routing algorithms
- Use the WMS Mobile application (ESRF) to:
- execute daily warehouse tasks using mobile scanners and printers
- customize embedded operational workflows using the WMS Workflow Server®
- design and implement custom scenarios and solutions
- track and record operation start/end time and resource
- create, identify and validate GS1 barcodes

|
Note that… |
|---|---|
| The appropriate details and technical specifications on how to set up custom scenarios and workflows will be documented in ESRF Technical Guide (under construction). |
- Use the WMS Touch applications (ESKiosk) to:
- support packing and production receipt flows when mobility is not feasible
- create nested containers (e.g. multiple packages on a pallet) with full visibility on their contents
- print labels, contents list and courier vouchers upon container closure or on demand
- measure and record weight and volume for each produced container
- scan and resolve item and/or container barcodes
- check picking errors and take corrective actions
- track and record operation start/end time and resource
- adjust UI per user/installation requirements using the ESForm designer
Integration with EBS ERP & Expert
Entersoft WMS® interfaces with any known ERP system – yet fully integrates with Entersoft Business Suite ERP & Expert.
Integration refers to the full package, where several modules of a solution are already connected or built on the same platform and share data and updates between those modules based on specific actions and reactions.
Interfacing refers to the linking of systems through point-to-point data transfers and allows you to compile a set of tools that give you the right functionality for your business, while the scalability and performance of each component matches the exact requirement.
Entersoft WMS® is built on the Entersoft Business Suite (EBS) platform.The key components of integration with EBS ERP & Expert are:
- Same database
- Shared entities (customized or extended with WMS data) such as: company, branch, warehouse, trade account, stock item, storage location, measurement unit, document, task, users and resources
- Embedded processes to activate WMS requests based on ERP document orders
- Embedded processes to update ERP balances and workflow steps based on WMS actions
The integration components and required configuration are thoroughly described in this document. The structure of the documented warehouse operations follows the Order – Plan – Execute – Update pattern.
- Order is defined as the set of external requirements that should be met by the warehouse operations at a specific time interval with the use of source documents. Examples of source documents: advanced shipment notice or proforma invoice used as an expected receipt order, a customer sales order used as a shipment order, etc.
- Plan is defined as the set of warehouse requests (and work lists) that fulfill the order requirements at the right time and at the right cost.
- Execute is defined as the set of warehouse actions that fulfill planned requests and orders.
- Update is defined as the process of updating ERP balances by creating target documents as well as handling source document process states based on WMS actions. Examples of target documents: purchase receipt documents, delivery notes or sales invoices, etc.
Interfacing with other ERPs
When Entersoft WMS® is implemented as a stand-alone solution the interfacing specifications should be clarified per case to meet the exact business requirements. The EBS platform provides a range of entities and tools to interface with other systems. Detailed specifications are documented in suitable manuals.
Applied interfacing scenarios are presented in III. Appendix – Interfacing with other ERPs.
Starting-up
Activate Entersoft WMS
Login to Entersoft ERP application and activate Entersoft WMS® per company using the following company parameter:

|
WMS_ACTIVATED |
|---|---|
| Category: WMS company parameters |
Zero parameterization
You should, then, login to the WMS application and run the following start-up processes:
Import Master Config files: Field property profiles, Document Types, Transition Profiles to ensure that WMS related data are loaded. Run the process through Configuration > Import/export data > Import from Entersoft XML.
Import CRM zero parameterization to ensure that WMS relevant task types are loaded. Run the process through Configuration > Import/export data > Import data (advanced mode)….Make sure to define the right source space from the application folder.

Import WMS zero parameterization through Configuration > Import/export data > Import data (advanced mode)….Choose the ESWMSZerodb.emi file to import and run the process – no source space needs to be specified. Zero parameterization for both CRM and WMS are imported in all existing companies of the same country at once. You do not need to rerun the process per company.

After zero parameterization is imported, you should mandatorily re-cache the application server.


ESRF initial set-up
ESRF WMS Mobile® application configuration requirements are fully described throughout the document. This section describes the basic configuration parameters, the requirements for the device (mobile scanners or emulator) settings as well as the general guidelines concerning customization.
Device settings
In the login screen, select Settings.
 Server URL: define the server url with which the application communicates.
- Branch: the login site (branch)
- Subscription ID: the subscription name defined in the config.json file, located in C:\inetpub\wwwroot\xxx\App_Data path. You can leave it blank as long as there is only one subscription ID defined.
- Subscription Password: the password for the selected subscription ID.
- Application ID: the folder name where .xaml files are saved. The default path is ESRF\WMS.
- Platform type: define the device platform – Windows Mobile 6, Desktop and Windows CE.
- Device type: use it when a .xaml file should be used only by a specific device or user. For example, if left blank the application uses the file Keys.xaml, which maps the application function keys with the device function keys. If a device type is specified (e.g. Motorola, android, etc.) the application uses the corresponding Keys.xaml file (Keys.Motorola.xaml , Keys.Android.xaml, etc) as long as they exist. If they do not exist, the application uses the general Keys.xaml file regardless the device type.
- Login type: use the “clean credentials” option to clear user name and password at each new login session. Clean password and retain credential options are also provided.

Customization guidelines
The .xaml custom files should be saved in the \CSRF\ApplicationName path. The ApplicationName folder should not differentiate from the ESRF folder name. The name used by default is WMS. The application gives priority to the custom files if exist in accordance with all EBS applications.
When customizing .xaml files, pay attention so as the views of the customized files do not have the same name with the system’s views – typically use a prefix to differentiate. Note that the system functions at view level and not at file level. Therefore, when the same view names are used in the custom .xaml files conflicts might occur. When customization overrides an existing system .xaml file, you should not differentiate the view names.
If you wish to create a new .xaml file at customization level, WF.xaml should also be customized declaring the new .xaml file name (e.g. NewFile) at the end of the WF.xaml by writing: <Include Source=”NewFile”/>.
As far as Config.xaml and Resources.xaml files are concerned, these should be saved in the \CSRF\ApplicationName\Modules\MyConfig folder path. The customization of these files refers only to the properties for which you wish to differentiate. These declarative files do not contain any logic.
The Module folder, which should be created in the \CSRF\ApplicationName path, is used to group configuration files based on business logic, if appropriate.
To apply a custom menu per user group you need to create a new Menu View with ID the assigned User Group ID. This view can be added either to the existing Menu.xaml (saving it in the customization folder path), or in a new custom menu file. For example, the User Group ID “Pickers” refers to the Pickers View ID and if it does not exist, the default view is shown with the View ID “HomeMenu”.
To make custom views and flows visible to the users, you need to enable the following ESRF Config.xaml parameter:
|
|
IsCustomVisible |
|---|---|
| Common |
ESRF Config parameters
The Config.xaml file contains the configuration declarative information that determine the system’s behavior. The file consists of four basic parameter categories:
- Workflow configuration: these parameters are divided into further sub-categories depending on the workflow context. The workflow configuration parameters are described in the relevant context sections of the document.
- Common – the generally apply to all workflows unless otherwise stated.
- Receipt (and special receipt use cases)
- Cross docking
- Production receipt
- Return receipt
- Import stock
- Export stock
- Stock movements
- Real time picking
- Sorting
- Guided picking requests
- Inventory
- Replenishment
- Raw materials picking
- Raw materials consumption
- Putaway
- Loading
- VNA flow
- Quick exit: use the quick exit parameters to declare the view that opens when the FK26 is used (maps with F6 by default).
|
|
QUICKEXIT.RCRQ_ReceiptMenu, QUICKEXIT.SI_Mode_Menu, QUICKEXIT.IP_ST_MAIN, QUICKEXIT.RP_MAIN |
|---|---|
| Common |
- EBS Configuration: these parameters concern the master data, such as container classes, action types and request types used in the ESRF Workflows. It is not recommended to differentiate, unless otherwise stated in the document.
- Debug Configuration:
- ESCountersEnabled: enables counters regarding system using metrics, such as how many times a user logs in the picking menu.
- DebugEnabled: enable this parameter when investigating issues in order to view the variable values, the View IDs involved, etc.
- DBG_SSCC_VALIDATION: refer to 10.3.2 SSCC resolving.
- KILLERS_LIST: declare the User IDs that can see the menu item Connection Exit.
Main entities & business concepts
Company & depositor
Entersoft WMS® fully utilizes EBS company entity to:
- Configure WMS functionality with company parameters
- Set up integration mappings using the company depositor entity
- Monitor company branches and warehouses in WMS
- Make use of company dimensions data for reporting purposes and for driving behavior rules to WMS transactions
WMS company parameters
Entersoft WMS® has its own company parameter category, the WMS Parameters. The system may also use company parameters from other categories, especially for common functionalities, such as item barcode processing parameters. You should set the appropriate company parameters for each company if you wish to run WMS on a multi-company environment.
Use WMS company parameters to:
- Activate WMS operations, workflows and modules
- Define storage location proposal and stock allocation algorithm strategies
- Set up barcode and codification rules
- etc
Relevant company parameters are referenced throughout the document as part of the configuration process.
Depositor
A Depositor is a legal or physical person who deposits its inventory to a Company Assignor. The Company Assignor is a 3PL (3rd Party Logistics) company. A 3PL company is a warehouse or group of warehouses managed on behalf of the owner of the stock. The type of activities and how a 3PL operates can vary according to the type of organization it is. A 3PL could operate as a fulfilment services provider or as managed warehousing facility.
Entersoft WMS® uses the Depositor entity to meet 3PL business requirements. The depositor is a company where the associated legal or physical person is characterized as depositor. 3PL business configuration is beyond the scope of this guide.
The depositor entity is also used for integration mappings between WMS and ERP. This applies for all implementations - 3PL or non- 3PL. The following paragraphs describe how these mappings should be configured.
The WMS zero parameterization process characterizes the database’s registered company person as depositor.

The zero parameterization import process also inserts a new depositor entry, which can be located either in the Horizontal menu > Information > Depositors, or in the Configuration > General > Depositors. The process will create as many depositors as the database’s companies. You cannot create more than one depositor for the same reference company.

Action types – document types mapping
Use the depositor entity to define the mapping between action types and document types. This configuration is mandatory for all integration processes of ERP update from WMS actions except the Shipment Order Invoicing.

You can define more than one entries for each Action Type as long as uniqueness is ensured between Action Types and Source Document Types combinations.
 Example
Action Type RCPT (Receipts) is mapped with the following source and destination document types:
- PPI (Proforma) to PLN (Receipt Note)
- IWB (Intra-warehouse transfers TO branch) to IBW (Intra-warehouse transfers FROM branch)
You should not set:
- PPI (Proforma) to PNV (Invoice – Goods Receipt note) since the combination of source document type and action type is not unique.
In this case, it is recommended to differentiate on the source document type (e.g. use a custom Proforma document type).
It is not mandatory to define source document types. This applies to integration processes where WMS - driven actions update ERP documents, such as Stock Additions, Ad hoc Stock Movements, etc.
Warehouse – branches mapping
Use the branches and warehouses mapping to define which company branches and warehouses are monitored by WMS.
In the following figure, the Warehouse with code W1-3 (3rd Party Warehouse) is excluded from WMS operations. Transport actions from and to this warehouse are considered as stock imports and exports accordingly.
Refer to 8.1. Distribution center & warehouse for further set-up guidance.

Company dimensions
Entersoft ERP® supports five horizontal company dimensions to monitor and report financial data for all sub-systems:
- Project
- Business unit
- Activity
- Dimension 1
- Dimension 2
Company dimensions are used in Entersoft WMS® as reporting information in:
- Shipments routing view
- Monitoring views, such as Shipment monitoring or Receipts monitoring views
- Lists of items and current stock views
The use of these dimensions in WMS depends on the impact they have on warehouse operations.
- You can set company dimensions as a grouping factor during shipment routing documents generation. The set-up is described in 33. Shipment orders routing.
- You can map company dimensions with request user defined fields per operation property. The mapped dimensions are taken into account as a grouping factor during requests generation. Refer to 13.9 Request and action user defined fields.
- You can also set up container integrity rules based on the company dimensions of the fulfilled documents. You cannot mix, for example, stock related to different business units on the same pallet during receipt. Refer to 10.2.Container control policy.
- Enable the following ESRF Config parameter should you wish to use Business Unit as a login filtering criteria for all ESRF workflows:
|
|
USER_BUSINESS_UNIT_ENABLED |
|---|---|
| Common |
WMS operation properties
Zero parameterization inserts the WMS operation properties, found in Configuration > Warehouse Management > Property. Properties are used to assign the warehouse operation per action type and request type as well as to define the context under which these operations are reported. For example, shipment context operations involve picking, packing, sorting and loading operations.
A warehouse operation property may be combined with more than one context properties. For example, replenishment operation is conducted in the context of internal stock movements, in the context of shipments or in the context of production.
The following table lists the WMS operation properties and their relevant context properties.
Table 1: WMS operation properties
| Context Property | Property | Definition |
|---|---|---|
| ctx_INVENTORY | STOCK_COUNTING | The physical verification of the quantities and condition of items held in a warehouse |
| STOCK_EXPORT | The act of removing stock from the warehouse | |
| ctx_PRODUCTION | RECEIPT | The physical inbound movement of manufactured products into the warehouse |
| LOADING | The physical exporting movement of raw and packaging materials to the production machine (consumption) | |
| REPLENISHMENT | The process of inventory moving from a replenishment storage location to a consumption storage location based on destination storage location proposal algorithms | |
| ctx_RECEIPTS | RECEIPT | The physical inbound movement of goods or materials into the warehouse against Advanced Shipment Notice (ASN) or Receipt Note documents |
| PUTAWAY | The process of inventory moving from a receipt storage location to a picking or stock storage location based on destination storage location proposal algorithms | |
| SORTING | The process of categorizing bulk stock in receipt ramps according to the destination putaway location and placing it to the appropriate sorting containers so that putaway operation is executed efficiently | |
| ctx_RETURNS | RETURN | The physical inbound movement of goods into the warehouse due to customer returns or returns from other company branches |
| PUTAWAY | The process of inventory moving from a return storage location to a picking or stock storage location based on destination storage location proposal algorithms | |
| ctx_SHIPMENTS | PICKING | The process where individual items are picked from warehouse storage locations to satisfy customers' or orders or orders to other company branches |
| PACKING | The process of packing all the items for one or more orders into an appropriate container before shipping it to the recipient. Typically consists of choosing appropriate materials and an appropriate container to pack the products, weighing the package, and labeling it with the relevant packing list. | |
| SORTING | The process of categorizing picked items according to shipment destination criteria, Sorting can be executed as a single operation (usually with Sorter Warehouse Automations) or at the same step with picking or packing operations (pick-to-cart or pick & pack). | |
| REPLENISHMENT | The process of inventory moving from a replenishment storage location to a picking storage location based on destination storage location proposal algorithms | |
| CROSS-DOCKING | The process of moving goods from the receipt ramps to the shipment ramps ready for loading | |
| LOADING | The physical export of goods from the warehouse shipment ramps. | |
| ctx_STOCKMOVEMENTS | STOCK_MOVEMENT | The physical movement of warehouse items from one storage location to another within the warehouse premises |
| WH_STOCK_MOVEMENT | The physical movement of warehouse items from or to a warehouse facility (of the same branch) that is not monitored in WMS | |
| REPLENISHMENT | The process of inventory moving from a replenishment storage location to a picking storage location based on destination storage location proposal algorithms | |
| ctx_TRANSFORMATIONS | STOCK_TRANSFORMATION | The process of changing item stock attributes, such as stock dimensions, reservation or disposition reason code marking |
Context property WMS transactions are reported in the relevant menu item:

Stock menu reports context properties of Stock Movements and Stock Transformations.
Properties are also used to assign a specific behavior to action or request types. An example of these properties is the COMPLETE_UPDATE and PARTIAL_UPDATE properties, which are used in the integration to ERP process.
The WMS company parameters regarding operation and context properties are shown in the figure below. Changing the default parameterization is not recommended.

Operation properties are used in Item control policy and Container control policy lines to define different behavior and rules per warehouse operation. Refer to 15. WMS Item Control Policy and 10.2. Container control policy for set- up instructions. The operation properties also determine which action types and request types should be used per WMS Mobile workflow.
Warehouse layout and storage location
By the end of this chapter, you will be able to:
- Understand the semantics of the intra company distribution network, warehouse layout and storage location components
- Apply context behavior to the storage location with zone codes
- Apply rules and constraints to the storage location with location profiles
- Enable physical dimensional data monitoring
- Create new storage locations with three different ways: create new/new by copy, mass create with location wizard, bulk import through file
- Create and maintain parent storage locations (beams)
Distribution center & warehouse
Distribution centers (or distribution points) are the foundation of a supply network, representing one or more company warehouses according to geographical and/or business criteria.
The warehouse entity in logistics terminology represents the physical space in which goods are stored and handled. In that sense, you can use the words “warehouse” and “distribution center” interchangeably.
To set up a distribution center in Entersoft WMS® enable the “Distribution point” flag in the Company Site form.
Menu > Layout > Sites/Warehouses: double click to open the company site form
 Figure 2: Activate distribution points
A distribution point is a branch – the head office/branch flag should mandatorily be enabled.
A distribution point can also be a warehouse itself – in this case, the warehouse flag should be enabled.
A distribution point consists of one or more warehouses. Each warehouse should refer to a branch/distribution point, using the Warehouse branch field in the Company site form.

Figure 3: Set up of branch warehouses
The warehouse entity, apart from the physical storage area, also represents the logical repository of goods. For example, during the inspection upon goods receipt, damaged packages physically remain in the receipt area of the warehouse building; however, the damaged stock is logically placed in a “disposition” warehouse, so that this stock is handled as appropriate in both ERP and WMS systems.
To define the relationship of a logical warehouse with a physical warehouse, use the reference warehouse (or main WH) in the company site form. Each logical warehouse should have a reference warehouse. This is important for the WMS system in order to integrate with EBS ERP or interface with other ERPs.
 Figure 4: Set up of reference warehouse
Example
The set-up represented in Figure 4:

Figure 5: Example set-up of intercompany distribution network
is represented in the following intercompany logistics network diagram:

Buildings & storage areas
Buildings and storage areas depict the spatial segments of a physical warehouse. Examples of storage areas are floor compartments or special storage condition areas, such as ambient, freezer and refridgerators.
Menu > Layout > Location dimensions > Storage areas to create or update storage areas

Figure 6: Storage areas
 Menu > Layout > Location dimensions > Buildings to create or update warehouse buildings
Figure 7: Buildings
Storage systems
Choosing the right storage system in warehousing depends on the capacity and the layout of the warehouse, the available equipment as well as the type, the volume and the homogeneity of the goods stored. The main storage systems according to logistics theory and practice are:
- Area (stacks – layers)
- Back-to-Back shelves
- Standard aisle
- Narrow aisle
- AS/RS (high bay)
- Drive in – Drive through shelves
- Live storage shelves
- Cantilever shelves
- Multiple Depth shelves
- Mobile shelves
- Carousels
- Bins (small parts storage)
- Ramps (receiving, shipment)
- Silos and funnels (used for storing bulk materials, such as cement, flour, salt, powders, etc.)
Some storage systems are fully or semi automated, running their own software to identify locations and/or container barcodes. Applied scenarios of Entersoft WMS interfaces with warehouse automated storage systems are described in IV. Appendix – Interfacing with Warehouse Automations.
Select Menu > Layout > Location dimensions > Storage systems to create, update and configure storage systems

Figure 8: Storage systems

|
Configuration |
|
Refer to 12. Stock balances for better understanding the storage system configuration settings effect on balances.
Refer to 11. Physical dimensions for better understanding of the physical dimensions semantics.
Sectors & aisles
Sector is the set of shelves between the rack uprights. Sectors are often part of the Storage Location codification in racking systems. They do have their own codification, a typical example is to select the conventional entry of the aisle and assign numbers to the racks beginning with 01 in ascending order with odd numbers on the left side and even numbers on the right side

Figure 9: Sector layout and codification in BackToBack storage systems
Menu > Layout > Location dimensions > Sectors to create and update sectors.
Apply different priority per sector and use it appropriately in stock allocation and/or picking sequence rules.
Aisle is the physical corridor between two opposite racks. Aisles are commonly used as part of the Storage Location codification in racking systems. They can also be applied in systems with no use of racks (areas) to differentiate virtually between the various storage areas and systems in use.

Figure 10: Aisles in warehouse layout
Menu > Layout > Location dimensions > Aisles to create and update aisles.

Figure 11: Aisle configuration grid
Apply different priority per aisle, should you need to use such functionality in stock allocation and picking sequence rules.
Define the ordering of the columns at the right side and at the left side of the aisle. The ordering definition is used in the Warehouse Layout Visualization tool.
Storage location coordinates
Storage location coordinates in a typical racking storage system are depicted with columns and levels. Columns define the horizontal axis coordinate (distance from the rack upright) while levels define the vertical axis coordinate (distance from the floor).
|
|
Note that… |
|---|---|
| Storage location column is not necessarily identical with the actual column of the rack. The distance between two rack columns is called beam. This is particularly useful in BackToBack storage systems. Each beam has a capacity of either three EURO pallets or two GMA pallets. Each storage location has a capacity of one pallet regardless the type. |

Figure 12: Storage locations and beams in B2B systems
Columns and levels usually take part in the storage location codification. You can also apply column and level codes should you need to use alphanumeric codification.
In cases where small parts are being stored in bins in specific segments of the BackToBack rack, you may need to apply a further segmentation to the beam (by height, width and depth) with the use of sub-column, sub-level and depth coordinates.
You can also define Geolocation coordinates X, Y, Z per storage location for future use in interfacing with warehouse automations and augmented reality (AR) technology solutions.
Location zones and zone types
Apply the appropriate zone code (or codes) per storage location in order to define its context behavior. Context is determnined by the zone code type.
There are 14 available zone types, the context meaning of which is described in the following table.
Table 2: Zone types
| Zone type | Algorithms (requests) | Execution (actions) |
|---|---|---|
| Picking |
Stock allocation for picking algorithms Storage location proposal replenishment algorithms Storage location proposal putaway algorithms for bulk storage |
Picking execution use cases to validate “from” storage locations Replenishment execution use cases to validate “to” storage locations Putaway execution use cases to valideate “to” storage locations |
| Putaway | Storage location proposal putaway algorithms for container storage | Putaway execution use cases for container to validate “to” storage locations |
| Replenishment | Stock allocation for replenishment algorithms | Replenishment execution use cases to validate “from” storage locations |
| Receipt | Receipt execution use cases to validate “to” storage locations | |
| Shipment |
Loading execution use cases to validate “from” storage locations Picking execution use cases to validate “to” storage locations Sorting execution use cases to validate “to” storage locations Packing execution use cases to validate “to” storage locations | |
| Production | Production and receipt from production use cases to validate “to” storage locations | |
| Sorting |
Pick to cart execution use cases to validate “to” storage locations Group picking execution use cases to validate “to” storage locations Sorting execution use cases to validate “from” storage locations | |
| Packing |
Picking execution use cases to validate “to” storage locations Packing execution use cases to validate “from” & “to” storage locations Staging execution use cases to validate “from” storage locations | |
| Return | Return execution use cases to validate “to” storage locations | |
| Buffer |
Storage location proposal two-step replenishment algorithms (first step) Stock allocation for two-step replenishment algorithms (second step) |
Replenishment execution (first step) use cases to validate “to” storage locations Replenishment execution (second step) use cases to valiate “from” storage locations |
| Staging |
Packing execution use cases to validate “to” storage locations Staging execution use cases to validate “to” storage locations | |
| Consumption | Stock allocation for consumption algorithms (in the context of production) | Consumption execution use cases to validate “from” storage locations |
| Picking buffer | Picking execution use cases to validate “to” storage locations | |
| Other | Use as appropriate in stock allocation algorithms (custom scenarios) | Use in custom execution cases |
Refer to 13. Request & Action for better understanding of from / to storage locations semantics.
Context algorithms for stock allocation and storage location proposal are thoroughly explained in the relative sections of the current document.
Menu > Layout > Location zones to create, update and configure zone codes.

Figure 13: Zones
You may create as many zone codes of the same zone type as necessary and apply priority number. This is particularly useful when you need to separate areas of the same zone type and set different priorities for use in stock allocation and storage proposal algorithms. The higher the priority number the higher the ordering of the storage location. Zone priority is also taken into account in execution sequence (e.g. picking or replenishment execution sequence).
You can also apply zone priority per storage location zone code. One storage location can belong to more than one zones of the same or different type. In the example of Figure 14: Storage location zones, the storage location “A1.F1.01.01.1” participates in picking and in putaway processes.

Figure 14: Storage location zones
Storage location profile
Use storage location profiles in order to apply allow/prohibit rules and capacity limits regarding:
- Packing (measurement) units
- Container types
Menu > Layout > Storage location profile to view, create, delete or update storage location profiles
Examples
A typical example of a BackToBack pallet location profile is to set up that the location can allow only one container of type EUR or one container of type GMA.

Figure 15: BackToBack single pallet location profile
A typical example of a BackToBack beam location profile is to set up that the location can allow either 3 containers of type EUR or 2 containers of type GMA or one of each. To declare the maximum capacity of the location for two (or more) different container types, use the Combined Quantity Upper Limit.

Figure 16: BackToBack beam location profile
You can also apply capacity constraints per packing (measurement) unit allowed. This configuration is recommended for homogeneous stock items, since the capacity of a packing unit in a storage location strongly depends on the item’s physical dimensions.
When setting capacity limits per container type/measurement unit, you also define that the storage location allows only the specific container types/measurement units.
Yοu can also set up allow/prohibit putaway rules per:
- Item categories, sub-categories, groups and families
- Specific item codes
- Color, size, stock dimensions 1 & 2
You can set as many allow/prohibit rules as possible on the same profile. However, you cannot set mixed allow and prohibit rules on the same profile. An error message will occur as depicted in Figure 17: Setting up allow/prohibit storage location profile putaway rules.

Figure 17: Setting up allow/prohibit storage location profile putaway rules
When setting up allow putaway rules, then everything else is prohibited, and vice versa.
You can also define uniqueness rules for:
- Item – only one item is allowed to be in stock (no matter which item, as long as it is only one)
- Lot – only one lot is allowed to be in stock (no matter which lot, as long as it is only one)
- Multiple lots with deviations on expiration dates
If you choose lot with deviations then you must mandatorily set the date variance type. You have two options, either choose lots to expire within the same month, or define the number of days (+/-) of allowed deviations on the expiration dates.
You can combine allow and uniqueness putaway rules, as demonstrated in the following example.
Example
Suppose that a storage location should allow two item categories, e.g. Non-Food and Small Parts. For Non-food items only one item is permitted to be stored at a time. For small parts items there is no such a constraint. Set up the storage location profile as follows to meet the requirements.

Figure 18: Combine allow/prohibit and uniqueness putaway rules
The transit location
 Stock in-transit is defined as the stock between two storage locations during an internal movement action. During the movement process the stock in transit might be anywhere in the warehouse, Tracking stock-in-transit enhances stock visibility and optimizes algorithm results.
Entersoft WMS® uses transit locations to depict stock-in-transit. The system automatically applies a transit location between starting and destination storage locations. Stock is placed into the transit location once it is removed from the starting location and until it is transferred to the destination location.
To enable the functionality you need to create one transit storage location per distribution point/branch.
Figure 19: Transit location
To create a transit storage location:
- Select Menu > Layout > Location management and click on the Add new button
- Assign a Code and the Branch as appropriate
- Activate the “Transit location” flag
- Do not apply any storage location zones
|
|
Note that… | ||
|---|---|---|---|
|
Even if you assign further layout information (such as building, storage area, etc.) the system’s auto assign transit location algorithm will not consider it. Transit locations can be used in context use cases (such as pick-to-cart, production replenishments through pipes, etc.), In such cases, you need to assign location zones in order to differentiate between user defined (within a context) and automatically assigned transit locations. You can still use the company parameter:
to declare the automatically assigned transit location code, as long as there is only one active distribution center. This is optional however; it is taken into account if completed only to ensure compatibility with past implementations. |
Storage location codification
Every enterprise has its own unique layout and structures. A good location code acts like a funnel, starting with the general and moving to the specific.
Some key considerations before choosing the right location codification model are:
- Storage location codes (or barcodes) should be unique. No two locations should ever have the same identity code.
- Every physical space in your facility should have a location code, even if you do not currently store anything in that space.
- Where practical, every location should be labeled.
- If you have more than one area or system in use consider using area and storage system codes as part of the storage location code.
- Within a storage area/system, location names should ascend from top to bottom and from left to right using aisle/sector codes, and storage location coordinates
If you have more than one facility, your location codes might start with the facility name – where facility stands fro a distribution center, a warehouse, a building.
Storage locatin codification number of segments may differ from one storage area to another. For example, if BackToBack and Area systems co-exist in the same warehouse, then you might use a five- segment codification for BackToBack locations (Building | Storage Area | Aisle | Column | Level) and a two-segment codification for area locations (Building | Storage Area | Counter).
In Entersoft WMS® you can set the storage location codification rules and create storage location codes and barcodes using the Business Rules engine.
Storage location code uniqueness per company is ensured by the domain.
When storage location barcodes are in use, barcode uniqueness is ensured by activating the system’s business rules on the Storage Location entitiy: Check Barcode existence by branch and Check Barcode existence by company. Both rules are by default disabled.
|
|
Note that… |
|---|---|
| Why to differentiate storage location codes from barcodes? The purpose of a storage location label is to be scanned and be uniquely resolved. In cases where location codes are using alphanumeric or delimeter characters that cannot be resolved from the barcode readers, then you can use readable barcodes in the relevant field without modifying the actual code of the location, |
Create and maintain storage locations
Select Menu > Layout > Location management and click on the “add new”  button to manually create a new storage location.
The storage location form
General

- Code: it is a mandatory field, either use ad hoc codification or apply codification rules as explained in 8.8 Storage location codification.
- Barcode: optional field – for further information refer to 8.8 Storage location codification.
- Inactive: set the inactive state when you wish to exclude the storage location (and its stock) from stock allocation and location proposal algorithms. You can transfer, import/export stock from and to inactive storage locations as long as you scan or choose one from a dataset, however you cannot search (investigate) an inactive location.
- Physical dimensions monitoring: activate this flag when you wish to monitor available volume/height/weight per storage location according to current and future stock dimensional data. For further information, refer to 11. Physical dimensions.
- Locked: the activation of this flag means that all actions (towards and from the location) are prohibited, unless it is allowed on specific action types (refer to 13.3. Action types for more information about the configuration of action types).
- Lock reason: when a storage location is locked, use this field to declare the reason. Select Configuration > Warehouse Management > Layout > Location lock reasons to define the applicable lock reasons. Zero parameterization inserts three typical location lock reasons: inventory count (used by the system’s physical inventory process), cleaning, maintenance.
Characteristics

- Branch: it is a mandatory field – you can only set branches that are configured as distribution points and belong to the login company
- Warehouse: this is not a mandatory field. If a storage location holds stock for different warehouses then you should not dedicate a warehouse on it. For example, inbound and outbound ramps are set with no warehouse in case when more than one reference (main) warehouses share the same receipt and shipment locations (for example free regime and customs warehouses that share the same building).
- Building, Storage Area: refer to 8.2 Buildings & storage areas for further information.
- Belongs to storage location: use this field to assign the storage location to a parent storage location. More specifically, you should set a parent-child relationship to assign:
- BackToBack storage locations to beam locations (see 8.5 Storage location coordinates)
- Packing stations to buffer pack locations (see 39. Packing to understand the meaning of buffer pack locations)
- Sub-buffer replenishment location to parent buffer replenishment locations (see 14.2 Destination storage location proposal)
- Sorting container: assign storage locations to sorting containers (carts) for use in pick-to-cart workflows. You may find the details of setting up sorting container locations in 37.1.4 Pick-to-cart).
- Beam: activate this flag for beam storage locations (see 8.5 Storage location coordinates). A beam storage location is a parent location to the actual stock carrying locations. It is used only for checking capacity availability in location proposal algorithms and in destination location input during warehouse actions. In order for the system to perform capacity availability checks you need to apply a relevant storage location profile (see 8.7 Storage location profile) and/or capacity data (see 11. Physical dimensions).
- Storage system: refer to 8.3 Storage systems for further information.
- Profile: refer to 8.7 Storage location profile for further information.
- Transit location: refer to 8.8 The transit location for further information.
Zones
Use this grid to apply zone codes and priorities per storage location. Refer to 8.6 Location zones and zone types for further information.
Coordinates
Use these fields to apply location coordinates such as aisle, sector, columns, sub-columns, etc. Refer to 8.5 Storage location coordinates for further information.
Capacity
Use these fields to apply capacity data and maximum weight per location. When physical monitoring is enabled the system calculates current and future volume/height/weight per storage location based on real-time stock dimensional data. Refer to 11. Physical dimensions for further information.
Storage location printers

Use this grid to attach one or more printers to a storage location. This is particularly useful in packing stations or receipt ramps where printouts should be sent to the appropriate printer according to the location of the peformed action. For further instructions on how to set up printing functionality, refer to II. Appendix – Print per resource and location.
Related items
View the item or list of items (stock items) that are related to the storage location. Instructions on how to set up item storage locations are given in 9. Stock item chapter. Item storage location set up is taken into account in putaway and replenishment storage location proposal algoriithms.
Stock

View the current stock per container and package unit of the context storage location.
Related actions per Item

View the action log per item for the context storage location.
Bulk import storage locations from file
You can import storage locations from file using the Entersoft EMI migration tool.
- Open the WMSStorageLocations.xls file found in ESMigration\ESWMSZero to import storage locations, buildings, areas, storage systems, zones, sectors and aisles.
- Select: Menu > Configuration > Import/export data/Import data (advanced mode)… and load the ESMigration\ESWMSZero\ ESWMStorageLocations.emi file
- Run the process

- Alternately you can run ui-less the emi process from the menu: Menu > Layout > Location management > Update storage locations from file
Mass create storage locations with location wizard
To mass-create storage locations use the wizard in the following path:
Menu > Layout > Location management > Location wizard
You need to activate an auto complete codification rule (see 8.9 Storage location codification) before using the wizard.
The number of storage locations is calculated by the following formula:
(Number of aisles) * (Number of sectors) * (Column To – Column From) * (Level To – Level From) * (Subcolumn To– Subcolumn From)
The following fields should be mandatorily completed:
- Branch
- Zone (multicheck field)
Example
Suppose the following data are filled in the location wizard view:

The expected results are:
Number of locations:
(Number of aisles = 2) * (Number of sectors) * (Column To – Column From = 5) * (Level To – Level From = 2) * (Subcolumn To– Subcolumn From) = 20
 Locations with columns from 1 to 5 and levels from 1 to 2 will be created per selected aisle. The Aisle side type “alternately” creates locations on the left of the aisle and at each column change locations on the right side and so on. If the growth step was defined at 2 (instead of 1) then the side of the aisle would change every two columns.

At the end of the process there is a log that informs for the number of locations created.
If for any reason an error occurs during the process, then this error is reported on the log and no location is created. The process should run from start.
Select Menu > Layout > Location management to view the results of the process.
Auto create and assign-to beam locations
Regarding beam locations management, the system provides the following functionality:
Define the conditions upon which beams should be created. For example, beams are valid and should be created only for BackToBack storage systems, for certain aisles, sectors, storage areas, buildings, column and level codes.
Use the following company parameter:

|
Profil auto-generating beam |
to define the specific values on the modal view.

Select the grouping criteria upon which a beam is defined. For example, a beam location is defined per Aisle, Column, Level.
Use the following company parameter:
|
|
Beam grouping |
to select one or more of the available storage locations fields: Aisle, sector, storage area, building, level, code,
- Select: Menu > Layout > Location management and choose the Auto-create beam and assign to locations use case.

The process assigns the selected storage locations to existing beams based on the definition and grouping criteria. If there is no match with existing beam locations, the process creates new beam locations. The process requires the activation of an auto complete codification rule for beam locations.

View and maintain storage locations
Select Menu > Layout > Location management to view and maintain storage locations. You can:
- Auto-create and assign to locations
- Add/Delete zones
- Connect – disconnect selected or all printers
Select Menu > Layout > Print storage location labels to print embedded or customized storage locations labels (of type .eal for thermal printers).

Select Menu > Layout > Location by zone to view the storage locations by zone and connect/disconnect printers per selected locations or for all zone locations:

Select Menu > Layout > Warehouse structure visualization to view graphical representation of the warehouse layout, as well as stock and capacity info per location,

You should mandatorily select a building. If container or packaging units’ capacity limits are set in the storage location profile, then you can see the percentage of the capacity coverage.
You can see the layout of the selected location data set by clicking the tab “Visualization”.
There are three view options (by colour, by capacity coverage (fullness), full info (fullness and stock)).
Right click on a selected storage location to view context info, such as the storage location form, the actions log per item, the current stock.

Stock item
Entersoft ERP® handles four different classes of items:
- Stock (inventory) items
- Fixed assets
- Services
- Expenses
Refer to the EBS User Guide EN for the definition and the utilization of each class of items.
A Warehouse Management System by definition should handle only stock items. A stock item is any unique manufactured or purchased part, material, intermediate, sub-assembly, or product for which both quantitative and value monitoring is required.
When Entersoft WMS® is activated, you should determine which of the existing stock items should be monitored in WMS and which should not. Stock Item records should already exist, either in integrated or stand-alone implementations (through import procedures). The following paragraphs describe how to apply and maintain the necessary logistics data in existing stock items that are monitored in WMS.
By the end of this chapter, you will be able to:
- Activate stock item WMS monitoring
- Understand the definition and the semantics of an item’s base, alternative and trading (service) measurement units
- Create and maintain item packing units hierarchy
- Monitor item stock dimensions
- Create and maintain item barcodes and set up barcodes processing rules
- Understand the utilization of item grouping info and catalogue item relations on WMS processes
Activate WMS monitoring
To activate WMS monitoring in Entersoft WMS® you should apply the appropriate WMS Item Control Policy (WMS ICP) per stock item.
The WMS ICP determines the policy rules under which a stock item and its stock dimensions are handled in WMS operations. It is definitely one of the major configuration elements during the implementation cycle. There might be as many control policies as required. You should be aware of the impact before applying a specific control policy to an item.
You should first clearly understand the semantics of stock dimensions, requests, actions, balances and document step fulfillments before configuring the WMS ICP. Refer to 15. WMS Item Control Policy for instructions on how to set up ICPs.
To apply the WMS ICP per stock item:
- Select Menu > Items > List of items to view the stock items list. The view by default shows the WMS activated items.
- Change the values of the following default parameters to view the non-WMS stock items:
- Has been connected to a transfer control policy: No
- At least one MU belongs to packages hierarchy: Yes,No

- Double-click to open the Stock Item form
- Select the Dimensions section of the form and apply the appropriate ICP on the WMS item control policy field.

- To mass update ICPs on selected stock items you can run the bulk modification process on the on the Stock Items view list.
You can also massively assign the appropriate WMS ICP on stock items with the use of ImportMURelations emi process. This is a method used mainly upon system’s launching.
Select the application folder’s path: ESMigration\ESWMSZero to open the PRODUCT IMPORT RELATIONS.xls file.
This file is used for defining ICPs, packaging units’ relations and item barcodes on existing stock items. More information on how to set up item’s packaging units relations is given in the following section, 9.2 Measurement and packaging units.
Select: Menu > Configuration > Import/export data/Import data (advanced mode)… and run the ImportMURelations emi process. You should define the source path of the import file and activate the steps you wish to run (packaging units relations and/or item barcodes).


You can relate item profiles with WMS ICPs. Once an item is created and assigned to an item profile, the relative WMS ICP is automatically applied.
- Select Menu: Configuration > Inventory items > Profile to create and maintain stock item profiles.
- Relate the appropriate WMS Item control policy per item profile

==
Measurement and packaging units ==
Measurement units
Select Menu: Items > Measurement unit/Packaging to define and manage all the measurement units that are valid in the installation.

The following table shows which of the measurement unit attributes are used in ERP only and which are utilized by WMS as well.
Table 3: Measurement unit attributes
| MU Attribute | Use in WMS and ERP | Use in ERP only |
|---|---|---|
| Inactive | ||
| Read-only | ||
| MyData Code | ||
| Default relation | ||
| Package | ||
| Number of decimals | ||
| Packaging – order by | ||
| No. of variables | ||
| Physical | ||
| Conversion error tolerance (+/-) | ||
| Quantities 1 – 4 |
- Inactive: inactive measurement units are not available for selection in item’s measurement units and item’s measurement unit relations, as well as in transactions (document lines, actions and requests).
- Physical: define whether the measurement unit is physical or not as well as the kind of physical unit – length, surface area, volume or weight. Physical measurement units are available for selection in item’s weight & volume measurement units, as well in physical dimensional data (for items, storage locations, containers) – refer to 11. Physical dimensions.
- Default relation: used as a default relation proposal with an item’s base measurement unit
- Number of decimals: used when rounding quantity conversions, as well as for display purposes
- Conversion error tolerance: used as a default value when the measurement unit is related with an item’s base measurement unit. This value determines the allowed deviation from the standard relation when checking the validity of automatically converted or user input quantities during transactions. This configuration applies when the specified unit is variably related with an item’s base measurement unit. Further explanation is provided in 54. Variable weight and volume management.
Refer to EBS User Guide EN for the definition and the utilization of the rest of the measurement unit attributes.
Item measurement units
Entersoft ERP® supports four distinct item measurement units (MU):
- Base (or main) MU: represents the unit that stock is held and reported.
- Alternative MU: represents the alternative unit that stock is held and reported.
- Weight MU: in cases of variable weight items, the weight MU should be identical with either the base or the alternative item mu. Weight MU can be also assigned for use as information data, intrastat obligations (stands for intra-community statistics), etc.
- Volume MU: same use as Weight MU.
The Trading (or more accurately the service) MU is defined as the unit to which back orders are held. The service MU is either the base or the alternative MU.
Each of the above item measurement units relates with the base MU in the Item Measurement Unit table:

Use the Item Measurement Unit table to define additional item measurement units that do not belong to the four aforementioned distinct fields. These additional measurement units usually serve as sales/purchase ordering units, stock handling units, etc.
You should define per item measurement unit the following attributes:
- Relation to base mu: this number depends on the relation type to base MU. If the relation type is “1 to n” then the relation is equivalent to “how many” base MUs correspond to one item MU. If the relation type is “n to 1” then the relation is equivalent to “how many” item mus correspond to one base MU.
- Binding relationship: enable this flag if the relation between the item MU and the base MU is fixed. For example, a carton of beer cans has a fixed relation of 24 cans (physically it contains four 6packs). A 6pack of beer cans has a fixed relation of six cans. If the relation is variable then you should not enable this flag. This configuration applies in variable weight and/or variable volume items.
- Conversion error tolerance: this value determines the allowed deviation from the standard relation when checking the validity of automatically converted or user input quantities during transactions. This configuration applies in variable weight and/or variable volume items.
- Relation lower and upper limit percentage: applicable in Entersoft WMS® only. The relation declared in the Item MU relation table (see 9.2.3 Item measurement units relation) should not exceed these limits. If the relation (including the limits, if set) between two measurement units is violated during transactions, then the system throws exception messages. Τhis configuration is rarely used.
- Apply upon RF user request: if this flag is enabled, WMS Mobile® will force the user input quantity on the specific MU.
- Default quantities 2,3,4: applicable in Entersoft ERP and Mobile
- Apply upon user request: applicable in Entersoft Retail®
Examples
A customer orders 10 kilograms of tomatoes. Stock is held in cases with a standard weight of 5 kilograms each. The warehouse picks 2 cases and weighs 9.8 kilograms in total. The customer is invoiced with 9.8 kilograms. The back order is 0.2 kilos.
Apply the following set-up to the tomato example:

A manufacturer produces shampoo in bottles. Each bottle has a standard weight and volume. The production process may result in half full bottles. These bottles are typically liquefied as marketing material. The shampoo item is ordered in bottles and sold in bottles. The stock, however, should be held in both grammars and bottles, since the bottle containment is not standard. The base M.U. of this item is Grams, the alternative M.U is Pieces (bottles). The service mu of this item is Pieces (bottles).
Apply the following set-up to the shampoo example:

A supermarket buys beer cans in pallets of 50 cartons from the regional distributor. The beer cans are sold in cans, 6PACK packages and cartons of four 6PACK units each (PACK24).
Apply the following set-up to the beer can example:

Entersoft WMS® uses item’s measurement units in order to:
- Reserve stock (during stock allocation processes) in base and alternative MUs.
- Create requests in service MU (one of the given alternatives).
- Convert quantities in service MU upon algorithmic calculations.
- Fulfill document orders in base and alternative MUs.
- Report document order fulfillment progress in service MU.
- Compare ERP & WMS inventory and report deviations in base and alternative MUs.
- Create and update ERP target documents (during integration processes) in base, alternative, weight and volume MUs.
Item measurement units relation
Going back to the beer can example, the item’ s measurement units relation with the base MU cannot answer questions such as:
- Are 6PACK units contained in PACK24 packaging units?
- If so, how many of these are contained in PACK24 packaging units?
- Which of the available item’s measurement units are used in WMS as stock handling units?
Entersoft WMS® uses its own item measurement unit relation table to define which of the item’s available measurement units are WMS stock handling units as well as the containment of one unit to another. To apply WMS stock handling units and their relation, follow the steps below:
- Open the stock item form and Select the Packaging section \ Packaging unit hierarchy.
- Decide which of the available item’s measurement units the Reference Stock Handling Unit is. The Reference Stock Handling Unit is the smallest packaging unit with which stock is handled.
|
|
Attention |
|---|---|
| The Reference Stock Handling Unit is often confused with the Sales Unit. An item might always sell in Cartons of 12 pieces, however if returns from customers are accepted in pieces, the Reference Stock Handling Unit should be pieces. |
Drag and drop the Reference Stock Handling Unit from the Packaging grid (item measurement unit table) to the Packaging unit hierarchy grid (item measurement unit relation table):

Drag and drop the rest of the item’s stock handling units from the item’s measurement unit table to the item’s unit relation table. Pay attention to place the cursor right below and on the right of the measurement unit if you wish to assign the containment of the dragged MU to the unit above. This is the way to build the packaging unit hierarchy, which can extend to as many levels as required.

You may also define multiple packaging unit hierarchies as depicted on the screen below:
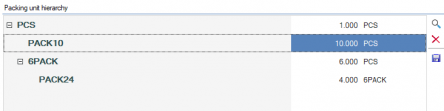
The item has two hierarchies, one 3-level hierarchy starting with PACK24 as the outer package that contains four 6PACK units while each 6PACK unit contains six pieces. The second is a 2-level hierarchy starting with PACK10 as the outer package that contains 10 pieces.
You can create multiple 2-level hierarchies between the same packaging units with variable relations, as long as the base MU is the Reference Stock Handling Unit.

You can set an Item MU relation as inactive to make these relations not available for select.


- A typical set-up for variable weight/volume items is as follows:

The stock handling unit is the packaging unit and not the physical weight. Weight is measured (or calculated) during transactions while stock is physically handled in pieces.
You can bulk import the Item MU relations with the use of ImportMURelations emi process.
- Select the application folder’s path: ESMigration\ESWMSZero to open the PRODUCT IMPORT RELATIONS.xls file and insert new Item MU relations. You can define multiple hierarchies for each item, up to 4-level each. Customization is required to support more than 4 levels of a single hierarchy.
- Select: Menu > Configuration > Import/export data/Import data (advanced mode)… and run the ImportMURelations emi process. You should define the source path of the import file and activate the steps you wish to run (packaging units relations and/or item barcodes). The process requires that item MUs exist in the Item MU table.
Implementation tips
Multiple hierarchies
You should not create multiple hierarchies of more than 2-level depth by using the same packaging unit as either the outer or the intermediate unit that end up in variable or fixed relation with the reference unit. The Item Measurement Unit Relation table is not hierarchical; therefore, you must differentiate packaging units in order for the system to identify the units’ relation during transactions.
Example
The following set-ups are not supported


Alternative MU
A basic concern when implementing Entersoft WMS® in existing Entersoft ERP® installations is to smoothly integrate with the existing item measurement units set up, particularly with the items’ alternative MUs. If the alternative MU of an item is a packaging unit that has a fixed relation with the base MU, you should not use the alternative MU as a WMS stock handling unit.
This set-up is not recommended (regardless if WMS is activated or not), since several ERP processes are delayed because of the alternative MU monitoring with no particular reason. Balance in alternative MU must correspond to an alternative measurement of the item’ stock that does not derive from a fixed relation with the base MU.
Example
Suppose that an item has the following set-up:

An order of 1 PCS is placed. The document line base MU quantity is 1 PCS and the alternative MU quantity is 1/10 = 0 PACK10 (rounded).
The order is executed in WMS. The warehouse employee picks 1 piece out of 1 PACK10 package. Physically the PACK10 package does no longer exist, since 1 piece is removed from the package of 10. The WMS transaction unpacks 10 pieces from PACK10 and moves 1 piece from one location to another.
After the order is executed in WMS, it is invoiced in ERP. The invoice line base MU quantity is 1 PCS and the alternative MU quantity is 0 PACK10.
The above transactions result in the following ERP & WMS stock balances:
- ERP Item stock balance in base & alternative MU: 9 PCS and 1 PACK10
- WMS Item stock balance in base & alternative MU: 9 PCS and 1 PACK10
- WMS Item physical stock balance: 9 PCS (no PACK10)
To avoid such conflicts in balances and consequently in transactions, before activating WMS in an existing ERP installation:
- You can eliminate the item’s alternative MU and activate it as a reporting MU. The reporting MU serves as an additional measurement unit, apart from the basic, used in financial reports. For more information about the Reporting MU, refer to 4.10.4.0 ERP Version document.
- If you do not wish to eliminate the alternative MU, you should mandatorily set an additional item measurement unit, other than the alternative, that will be used as the WMS stock handling unit, while the alternative MU should not be set in the item MU relation table. In the example above, the WMS stock handling unit could be a WM_PACK10, which also has a relation of 10 with the base MU. For proper results in ERP balances, the alternative MUs that have a fixed relation with the base MU should also carry the appropriate number of decimals, otherwise the results from the rounding calculations will strongly deviate from reality.
Variable weight/volume items
Variable weight items are defined as the items that monitor a weight measurement unit which:
- is either the base MU
- or is related variably (not binding) with the base MU
The stock of these items is handled in packaging units that are variably related with the base MU in the item MU table. The relation that is defined in the item MU table represents the standard average weight per packaging unit. This relation is used in ERP transactions to convert quantities from one unit to another in flows where weight is not measured and has to be automatically calculated.
WMS monitors physical stock balances in packaging unit hierarchies. The system calculates the average weight per stock balance row by enabling the average physical unit management per flow in WMS ICP.

Exact instructions on how to set-up variable weight items in WMS are given in 54. Variable weight and volume management.
An item can monitor different packaging units per standard average weight, e.g. packages of 1kg, packages of 2 kg, etc.
You can set the item’s packaging unit as the alternative measurement unit if you wish to monitor ERP stock balances.
The above apply to variable volume items as well.
Examples
Example variable weight item 1 –packaging unit as alternative MU

Example variable weight item 2 – packaging unit in item MU table

Example variable weight item 3 – packaging unit as service MU

Example variable weight item 4 – multiple packaging units

Item stock dimensions
EBS ERP® supports the monitoring of 6 distinct stock dimensions per stock item:
- Color
- Size
- Stock dimension 1
- Stock dimension 2
- Serial number
- Lot
Once stock dimension monitoring is enabled, Entersoft WMS® requires the completion of the dimension’s value in all system transactions. If balance dimension elimination is enabled, the system automatically assigns the appropriate dimension values based on the applied consumption rule (refer to 8.3 Storage systems).
Serial numbers are the exception to this rule; the system allows for the strict or loose management of serial numbers based on the appropriate configuration (refer to 53. Serial Number management).
To enable stock dimensions open the Stock Item form and expand the Dimensions section.

You can also set the valid item stock dimensions as a template in the item profile:

Lot monitoring
If lot monitoring is enabled, you should also set which of the lot attributes are monitored in WMS. The system supports the monitoring of the following lot attributes:
- Barcode (Code)
- Expiration date (Due date)
- Production date
- Limit order date (Last order date) – this is defined as the last limit date upon which orders can be accepted in ERP for the specific lot. Used when expiration and/or production date is monitored.
- UDF table, comment and number fields
When a lot is resolved or created during WMS transactions, the system mandatorily asks the user to input the values of the defined attributes, if they do not already exist.
When lot barcodes are scanned during WMS transactions, the resolving process takes place. If the lot is not resolved, a new one is created from the system. The lot codification rules in WMS are set in the following company parameters:
|
|
Lot Code Identification: Prefix |
|---|---|
| Category: WMS company parameters |
|
|
Lot Code Identification: Number of counter digits (default 7 digits) |
|---|---|
| Category: WMS company parameters |
The system business rule Assign lot code should be also enabled (it is enabled by default).
Should you wish to differentiate, you can disable the system business rule, set a common business rule with ERP or set a code segment sequence rule (which, by definition, is common with ERP).
Color / size / stock dimensions 1 & 2 monitoring
When color/size/stock dimension 1 & 2 are enabled, you should assign the allowed values in the relevant dimension charts as well as the allowed combinations in the combinations profile.

Refer to EBS User Guide EN for guidance on how to set-up and use item dimension charts.
Refer to 4.4.0.9 ERP Version document for guidance on how to set-up and use dimension combination profiles.
Entersoft WMS Mobile® verifies the validity of the user selected combinations of item dimensions. This is a non-configurable default validation mechanism and applies in mobile workflows only.
Entersoft WMS® provides a back-office use case for identifying and correcting invalid dimension values for items in stock.
Select Menu > Stock > Current stock > Check dimensions validity based on profile and click to open the relevant view.

When invalid dimension combinations exist in stock, a red bullet is shown in the Dimension combination validity column.
To change the dimensions of an item, follow the steps below:
- Specify an item code in the item parameter of the view for which you wish to correct stock dimensions according to valid combinations.
- Specify the color, size, stock dimension 1 and 2 charts on the relevant criteria. The search results return the valid item dimension charts of the selected item.
- Choose which dimension you wish to change in the To - Dimension criteria of the view - To color, To size, etc. The search results of each parameter return the valid values based on the selected item dimension charts.

Choose one or more stock rows and by clicking on the selector check box and press the button “Change item dimensions (C/S/D1/D2)”

Press accept in the Action type dialog box if you wish to continue. The default action type used is ES.SDTR - Stock dimension transformation
If the selected combination is invalid, an error message occurs: No valid dimension combination found for Item Code X, Color X, Size X, etc.


Serial number monitoring
Entersoft WMS® supports both loose and strict serial number management. Loose management implies that serial numbers are not held in stock, although Item Serial Number monitoring is enabled. When loose management policy is in place, you can scan / declare serial numbers at specific warehouse operations, e.g. only upon goods receipt and / or packing operations by enabling the Serial number monitoring flag in the WMS ICP line. Refer 53. Serial Number management for full guidelines on serial number management.
No matter which policy is engaged, the following validation and uniqueness rules are applied by the system.
Validation and uniqueness rules
The serial number master entity is defined by:
- the item
- the quantity in the specified measurement unit
- base and alternative MU quantity (according to the item’s set-up)
- the weight/volume (optional)
- lot, color, size, stock dimensions 1 and 2 (optional)
When serial numbers are involved in WMS actions, the system validates the quantity, the quantity in base and alternative MUs and the weight/volume quantities of the action with the corresponding quantities of the serial number master.
The system by default prohibits the double entry of the same serial number in actions that belong to the same action type and to the same work package. In order to ensure that a serial number that is already in stock is not inserted again, you should enable S/N Importing & Exporting management per ICP line property:

If S/N Importing flag is activated, then when a serial number is inserted in stock through a WMS action of the relevant property, the flag “In Warehouse” is enabled in the serial number master.

An error message occurs, as showed in the print screen below, if the same serial number is inserted through a WMS action of a property that handles S/N Importing.

If S/N Exporting flag is activated, then when a serial number is exported from stock through a WMS action of the relevant property, the flag “In Warehouse” is disabled.
Serial number creation
Entersoft WMS® by default does not allow new serial number creation, unless otherwise stated in the relevant field of the WMS ICP line:

If new serial number creation is enabled, serial number codes are applied with the use of Assign Item Serial Number Code business rule (enabled by default). This rule takes place when a serial number barcode is scanned through WMS actions and assigns the barcode as the serial number code.
Should you wish to differentiate, you can disable the system business rule, set a common business rule with ERP or set a code segment sequence rule (which, by definition, is common with ERP).
Item barcodes
Entersoft WMS® fully utilizes the EBS pre-processing and post-processing item barcode mechanisms. Pre-processing mechanism refers to the item resolving upon barcode scanning. Post-processing applies to barcodes that carry further information other than the item code, such as quantity, packaging unit, weight/volume and stock dimension information. The post-processing mechanism maps and assigns the information provided by the barcode to the relevant WMS action item fields.
Pre-processing mechanism
Item barcodes are stored and maintained in the following Item fields and related tables:
- Item code field (ESFIItem.Code)
- Item barcode field (ESFIItem.Barcode)
- Item codes (ESMMItemCodes)
- Supplier item codes (ESMMSISupplier)
The company parameter:
|
|
WMS_ITEM_INVESTIGATION_TYPE |
|---|---|
| Category: WMS company parameters |
is used to define which of the above areas take part in the item resolving process. The default parameter value is:
ESFIItem.0.E#BarCode.0.E#ESMMItemCodes.0.E#ESMMSISupplier.0.E
It is a # separated list – if you wish to exclude, for example, supplier item codes, then you should remove the #ESMMSISupplier.0.E segment out of the list.
Refer to the analytical description of the company parameter for the parameter’s characters and syntax definitions.

The items in an installation do not usually follow the same barcode symbology rules. Use the pre-processing scripts to differentiate rules per barcode symbology. You can also apply more sophisticated pre-processing rules, such as rules concerning the GS1 standard where Application Identifiers (AIs) are used to separate the type of information provided and the item barcode is not necessarily placed at the beginning or at the end of the symbology.
Select Configuration > Inventory items > Barcode types to create pre-processing scripts in vb.net. A typical example of GS1 pre-processing rule is included in zero db with the code Pre02.

Once a pre-processing rule is created, you should assign it in the appropriate segment of the company parameter according to the following syntax:
ESFIItem.0.E#BarCode.0.E#ESMMItemCodes.Pre02.CP#ESMMSISupplier.0.E
Example
According to the GS1 standard, the Application Identifier (AI) 01 stands for the Global Trade Item Number (GTIN). The barcode format is N2 + N14, N2 for the AI digits and N14 the number of the item barcode digits.

When the barcode is scanned in the Item field of any WMS mobile flow, the system resolves the item as long as:
- the barcode (without the Application Identifier) is stored in the Item Codes table and
 the appropriate pre-processing rule is applied in the company parameter (see default Pre02 barcode type).


If no item is resolved - the WMS Mobile application will prompt the user to specify the item code and to declare whether this is a new barcode that will automatically be added to the item codes or it should be discarded as an invalid barcode.
The item barcode that is resolved after pre-processing is stored in the ItemBarcode action item field in order to be used for reporting purposes.
Post-processing mechanism
Select Configuration > Inventory items > Barcode types to create post-processing scripts in vb.net. Post-processing barcode types are used when the barcode carries information other than the item that should be assigned in the WMS action item.
If you wish to apply the post-processing rule on the Item Barcode, you should enable the following company parameter:
|
|
ItemBarCodeRequiresProcessing |
|---|---|
| Category: Items administration |
And declare the rule in the following company parameter:
|
|
ItemBarCoceProcessingTypeCode |
|---|---|
| Category: Items administration |
If you wish to apply the post-processing rule on the Item Codes, then you can either declare the rule in the following company parameter:
|
|
UndefinedBarCodeProcessingType |
|---|---|
| Category: Items administration |
Or you can differentiate per Item Code:

It is important to note that barcodes processing rules are common for ERP and WMS. ERP uses the post-processing rules to assign the resolved data to the line item fields, while WMS to the action item fields. Some fields have common names, such as quantities, lots, etc. In order to avoid errors, you need to separate post-processing for ERP and WMS with the following vb statement:
' Is RF or WMS
if _dr.Table.DataSet.ExtendedProperties.ContainsKey("RF") orelse (String.Compare(_dr.Table.TableName, "ESWMActionItem", True) = 0) Then
…
..
..
End If
Example
A typical example of barcodes that require post-processing is variable weight item barcodes. The following example shows the required set-up when complex barcodes are scanned in the Item field where quantity, weight and lot should be assigned in the relevant action item fields.
The barcode has the following Human Readable Code: 2134561200191120
- The barcode has a standard length of 16 digits
- It always starts with “21”
- The first 6 characters correspond to the Item Code
- The next 4 characters correspond to the Weight (as integer – it should be divided by 1.000 so that the value is calculated in KG)
- The last 6 characters correspond to the Lot Barcode
First, you need to set-up the appropriate pre-processing rule so that the Item Code is resolved:
Apply the pre-processing rule in the WMS Item investigation type parameter:
ESFIItem.0.E#BarCode.0.E#ESMMItemCodes.Pre02.CP#ESMMSISupplier.0.E
You, then, need to define the post-processing rule as follows:
Apply the post-processing rule in the Item Codes:
Scan the barcode 2134561200191120 in the Item field in any WMS mobile flow:

The result is an action item with the following data:
- Item Code ITEM007 (as resolved through the pre-processing script)
- Quantity 1 (as defined in the post-processing script)
- MU Code PCS (as defined in the Item Codes)
- Weight: 1,2 KG
- Lot Barcode: 191120

GS1 standard embedded functionality
Entersoft WMS® is fully compatible with the GS1 standard. Download the GS1 General Specifications document to understand how GS1 barcodes and identification keys should be used (https://www.gs1.org/standards/barcodes-epcrfid-id-keys/gs1-general-specifications). Definitions of the key GS1 terms are provided below in order to be able to understand and use the embedded GS1 functionality of Entersoft WMS®.
GTIN
A trade item is any item (product or service) upon which there is a need to retrieve predefined information and that may be priced, or ordered, or invoiced at any point in any supply chain. This definition covers services and products, from raw materials through to end user products, all of which may have predefined characteristics.
Fixed measure trade items are those that are always produced in the same version and composition (e.g., type, size, weight, contents, and design). Like a fixed measure trade item, a variable measure trade item is an entity with predefined characteristics, such as the nature of the product or its contents. Unlike a fixed measure trade item, a variable measure trade item has at least one characteristic that varies whilst other characteristics of the trade item remain the same. The variable characteristic may be weight, dimension, number of items contained, or volume information. The complete identification of a variable measure trade item consists of both an identification number and information about the variable data.
A trade item may be a single, non-breakable unit or a predefined grouping of a series of single items. Such trade item groupings may be present in a wide variety of physical forms, such as a fibreboard case, a covered or banded pallet, a film wrapped tray, or a crate with bottles. Trade items consisting of a single unit are identified with a Global Trade Item Number (GTIN). Trade item groupings of identical or different units, each identified with a GTIN, are identified with a separate GTIN; the individual trade item GTIN, within any grouping, remains the same. Example: trade item A has the same GTIN whether it is sold as a single unit in a case of twelve or sold as a single unit in a case of twenty-four.
A logistic unit is an item of any composition established for transport and/or storage that needs to be managed through the supply chain. The identification and symbol marking of logistic units enables a large number of user applications. In particular, the SSCC (Serial Shipping Container Code) provides a link between the physical logistic unit and information pertaining to the logistic unit that is communicated between trading partners using Electronic Data Interchange (EDI). Refer to 10.3 Serial Shipping Container Code (SSCC) for further information on how Entersoft WMS® creates and manages SSCCs.
Application Identifiers (AIs)
GS1 Application Identifiers (AIs) are prefixes used in barcodes and EPC/RFID tags to define the meaning and format of data attributes.
For example, the GS1 Application Identifier (01) indicates that the GS1 Application Identifier data field contains a GTIN. The GTIN for trade items may be a GTIN-8, GTIN-12, GTIN-13 or a GTIN-14.
Format and data attributes
The format of the barcode is defined by:
- The data type: the barcode can be either numeric or alphanumeric
- The barcode length: the length can be fixed or variable. GTINs have a standard barcode length of either 8, 12, 13 or 14 digits. Variable length barcodes, such as Lot / Batch Numbers (followed by the AI (10)) can have a variable length from 1 to 20 characters long
- The GS1 General Specifications have always stated that the Function 1 Symbol Character (FNC1) must be used as the data separator in all GS1 barcodes that use the GS1 AI standards. As FNC1 has no ASCII value, when it is used as a separator character it is transmitted as (ASCII value 29). This has meant that some people, working backwards from the transmitted data, have used as the separator character and not FNC1 (https://www.gs1.org/docs/barcodes/GSCN_16_477_FNC1.pdf).
- Column Data format: the format of the data contained in the barcode - string, date, numeric, numeric with decimal point
|
|
Configuration |
The most commonly used AIs along with the GS1 format and data attributes are described in the xml file ESGS1Config, which is located in the ESConfig application folder. The contents of the file are listed and explained in the table below:
Table 4: Entersoft GS1 Configuration file
| AI Code | Barcode data type | Length of data | FNC1 | Mapped column (to be used in post-processing scripts) | Column data format |
|---|---|---|---|---|---|
| 00 | 0 – numeric | 18 | False | SSCC | 0 – string |
| 01 | 0 – numeric | 14 | False | _GTIN | 0 – string |
| 02 | 0 – numeric | 14 | False | _TradeItemsContainer | 0 – string |
| 10 | 1 – alphanumeric | 20 | True | LotBarcode | 0 – string |
| 11 | 0 – numeric | 6 | False | LotProductionDate | 1 - date |
| 15 | 0 – numeric | 6 | False | _BestBeforeDate_ΥΥ | 1 – date |
| 17 | 0 – numeric | 6 | False | LotExpirationDate | 1 – date |
| 37 | 0 – numeric | 8 | True | Quantity | 2 - numeric |
| 310 | 0 – numeric | 7 | False | _NetWeight | 3 – numeric with decimal point |
| 330 | 0 – numeric | 7 | False | _GrossWeight | 3 – numeric with decimal point |
The number of decimal places for AIs 310 and 330 (net and gross weight) is determined by the fourth digit of the AI. For example, if the fourth digit is 3, the decimal is in the 3rd position (nnn.nnn), if the fourth digit is 1 the decimal is in the 1st position (nnnnn.n). See GS1 General Specifications for full details.
The file can be shadowed (customized) in the CSConfig folder with additional AIs if required.
The system provides a built-in function, the GS128Parser.BarCodeDecode, which can be called in post-processing scripts to decode the GS1 barcodes and return the identified data in the mapped columns, so as to be assigned in the relevant action item fields. The function can be also used in pre-processing scripts.
The zero db post-processing script Post02 serves as a reference on how to call the function and how to assign the derived information of quantity, lot barcode, lot production date, best before and lot expiration date to the corresponding action item fields.
|
|
Note that… |
|---|---|
|
If you use the GS128Parser function in versions after 4.10.26.0 as well as in series 5 versions, you should add “Entersoft.ERP.WarehouseManagement.” before “Facades.GS128Parser.BarCodeDecode” (see print-screen below). Otherwise, the following error message will occur: “'Facades' is ambiguous, imported from the namespaces or types 'Entersoft.ERP.WarehouseManagement.DS, Entersoft.ERP.Financials.DS'.” |

To declare the FNC1 symbol character, use the following company parameter:
|
|
WMS_FNC1 |
|---|---|
| Category: WMS company parameters |
Lot, S/N and weight barcodes
Apart from the Item, barcodes can be scanned on Lot, Serial Number and Weight barcode fields in all WMS mobile workflows.
Lot barcode resolving process
When lot barcodes are scanned, the system resolves the relevant Lot based on the barcode field of the ESMMLot table (ESMMLot.Barcode) in accordance with the Item that has already been resolved. If more than one lots are identified, the user is prompted to choose the right one in a dialog box.
You can set lot barcode pre-processing rules in the WMS mobile application with the use of vb script in the file located in ESRF\WMS\Scripts\PreproccessLotBarcode.vb. A sample scenario is included in comments in the file.
The NewLotBarcode.vb can be used in combination with a Function Key (FK) to assign new lot barcodes. The system supports the use of the F5 key and assigns the new lot barcode in the format: Date.Now.ToString("yyyyMMdd").
Serial Number barcode resolving process
When Serial Number barcodes are scanned, the system resolves the relevant Serial Number based on the barcode field of the ESMMSerialNumber table in accordance with the Item that has already been resolved.
The system provides the capability to set-up validation rules on Serial Number barcodes. You first need to create a processing rule in the Barcode Types and assign it to the Serial Number Barcode Validation code of the item.

Resolving items through lot or serial number barcode scanning
If Lot or S/N barcodes are scanned on the Item field of a WMS mobile workflow, the system can identify the relevant Item with the appropriate configuration.
You should define the Lot Barcode or Serial Number Barcode processing rules to the WMS_ITEM_INVESTIGATION_TYPE company parameter with the following syntax:
- LotBarcode.0.E#SNBarcode.0.E
You may apply pre-processing rules (if required) by replacing the 0.E. with the pre-processing rule (see Pre-processing mechanism above). You should also apply the appropriate post-processing rules.
Weight barcode resolving process
Entersoft WMS Mobile® supports weight barcode scanning in the weight barcode field in order to resolve and assign weight in the relevant action item field (to-weight). The following are applied in flows where weight measurement is enabled (refer to 54. Variable weight and volume management).
The functionality is provided only in WMS mobile flows. The system uses the following ESRF Config parameters:
|
|
ENABLE_WEIGHT_BARCODEPROCESSING |
|---|---|
| ESRF Config.xaml |
If the user assigns a quantity more than 1 pcs, the system will ask for the weight of each piece by entering the weight barcode in a loop until all pieces are consumed.
Alternatively, you can enable the following parameter
|
|
ENABLE_WEIGHT_BARCODE_PER_ACTIONITEM |
|---|---|
| ESRF Config.xaml |
If you wish to assign the Quantity of 1 piece at a time and scan the relevant weight barcode.
The barcode processing depends on the following parameter:
|
|
WeightStartSequences |
|---|---|
| ESRF Config.xaml |
The system supports by default the following starting characters: 20,21,26,27 and 29.
 Post processing is being held according to the vb script CheckWeightSSCC.vb, which is located in the ESRF\WMS\Scripts application folder.
According to this script, the weight barcodes should start with one of the characters that are listed in the relevant config parameter and have a standard length of 13 digits. The last digit is a check digit. The previous five digits correspond to the weight, with the first two being the integer part and the last three the decimal part. For example, the weight resolved from the barcode presented in the figure is 1,750 Kg.
Should you need to apply different processing rules on weight barcodes, you can customize the vb script and store it to the CSRF folder.
“One scan” resolving process
If the barcode contains all the necessary information regarding item, stock dimensions, quantity and/or weight you can scan the barcode in the Item field and according to the post-processing rule the resolved data will be applied to the action item fields. You do need to set up different rules for lot, serial number or weight barcode scanning.
Print item barcode labels
Select Menu > Items > Print item labels... to view the barcode list of the WMS activated stock items. The view lists the item main barcode as well as the barcodes stored in the Item Codes table. If an item is included in one or more WMS documents (for example, in an expected receipt document), this is shown in the view’s relevant indicator. You can print item barcode labels by specific document.
The view provides two default reports for label printing in thermal printers using eal files:

Set the number of copies per label printing in the view’s parameter: Number of Labels. You cannot set different number of copies per row.
You can also design barcode print labels using the crystal report designer. For instructions on how to build EAL and Crystal reports refer to EBS - Reporting EN guide.
Item replacements
Entersoft WMS® supports replacements between items in the following flows:
- Receipts from supplier
- Shipments (picking and replenishment, packing, staging, loading)
- Raw and packaging material consumptions (consumption and replenishment)
Item replacement concerns the ability to replace the item that is ordered (through a document order) with one or more compatible items in stock.
The functionality is based on the configuration described below.
|
|
Configuration |
Catalogue items should have been created and assigned to stock items. Catalogue items are used in Entersoft ERP for various reasons, such as to store items from competitors and compare prices, to maintain compatible (replaceable) items, to set-up reusable packaging material information for stock items. Catalogue items can be viewed In Entersoft WMS® in Menu > Items > Catalogue items.


In the stock item form, in the Item Relations section, relate the item’s catalogue item with one or more catalogue items using the appropriate relation type. Once a relation is established between two items, the reverse relation is automatically established in the related stock item.

Relation types are created and maintained in Configuration > Inventory items > Catalogue items > Relation types.

Apply the relation type in use in the WMS ICP of the related items:

Define per ICP line whether replacements are allowed in requests and actions or in actions only. This configuration allows the system to fulfill document order lines with requests or actions of a related item.
If you wish to let the system decide which item to allocate in order to cover the demand, then:
Enable replacement in requests
Activate stock reservation in the relevant request types
Apply best match stock reservation rules (in picking/consumptions and replenishment ICP lines)
The stock allocation algorithm will then run according to stock handling optimization rules; replenishment will occur only if there is no available stock in picking locations for the item in demand and its related items. Priority is always given in the document order’s item, however if there is not adequate stock to cover the demand from picking locations, the algorithm tries to allocate stock for the related items before triggering replenishment. In accordance, the replenishment algorithm will first try to allocate stock for the document order’s item and then for all related items.
The system provides the ability to change the default item stock reservation method in the context of raw material and packaging consumptions, with the use of the following company parameter:


|
|
WMS_RESERVEDITEMMODE |
|---|---|
| Category: WMS company parameters |
0 – based on stock optimization (default)
1 – based on item document priority
When “based on item document priority” is chosen, the algorithm tries to allocate the available stock for the document’s order item from picking and replenishment locations before allocating stock for the related items.
Select Menu > Items > Inventory item control policies to manage and maintain WMS ICPs regarding replacement functionality.


Item storage locations
You should assign one or more picking locations to a stock item should you wish to direct storage location proposal replenishment and putaway algorithms to these specific locations. The item storage location set-up is common in Back-to-Back storage systems, where each item is stocked in specific picking locations based on various business criteria. For example, fast-moving items are usually stocked in areas near loading ramps or packing stations so as to reduce the average picking time and cost. The functionality concerns only bulk stock putaway and replenishment operations.
To assign storage locations to a stock item, follow the steps below:
- Open the stock item form and Select the storage locations section.
- Pick one picking location to assign. You can assign as many storage locations as appropriate. The system will not validate whether the chosen location is a picking location or whether the location is also assigned to another stock item.

- Replenishment limits should be defined per item storage location if one or more of the following functionalities are in use:
- Off – time replenishment based on replenishment levels (refer to 50.2.2 Replenishment requirements based on item storage location levels)
- Distribution rules in putaway algorithms (refer to 14.2.4 Distribution algorithm)
- The replenishment limits of an item storage location are:
- Safety stock level – for future or custom use
- Reorder level – if stock falls below this level then replenishment should occur
- Replenishment upper limit (Up to order level) – the maximum level of stock the storage location should be replenished for the item
- Replenishment quantity – the multiple quantity, which is applied when the replenishment quantity derives from the difference of the Up to order level with the Reorder level. Please note that it should be always greater than zero. If no multiple quantities should be applied, the value should manually be set to 1.
To view and manage item storage locations, Select Menu > Items > Item storage locations. Open the Item storage location view on click.
The view shows items that have been assigned with picking storage locations. The view returns as many rows as the item - storage location combinations.

You may define or modify replenishment limits per item storage location row, or use the relevant automation for mass update.

The automation assigns 1 to the Replenishment quantity (Base MU) as a default.

To create a new item storage location combination, use the wizard in the Menu > Items > Item storage locations > New item storage location.
The wizard opens the view of stock items, which by default returns items with no storage location assigned.
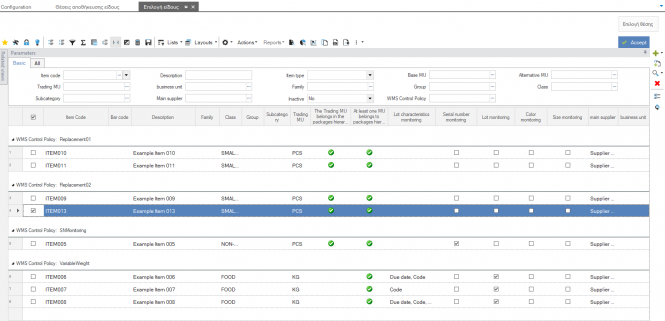
You can select one or more items and press “Storage location Selection” button. The view of storage locations then opens; the view returns results for picking storage locations (you can differentiate by choosing one or more zone types on the view’s parameter), which are not assigned to a stock item.

If more than one items are selected then the wizard will open the storage location view for each one of the selected items by pressing the “Next Item” button.
Press End to complete the process. The item storage location view is then opened with the newly created records.
When you create a new item storage location combination with the use of the “New item storage location” wizard, the record is stored as inactive - temporary. Temporary records are excluded from the storage location proposal algorithms until they are activated. You can review the results and modify them if necessary before saving (press the Save button on the up right). You can also delete a record by pressing the relevant button. Once the final decision is made, press the Activate button to turn the temporary records from true to false.

You can activate temporary records on second time, in the Item Storage Location view. The results are grouped by the temporary indicator.


Item groupings
Entersoft WMS® utilizes the ERP’s four item groupings:
- Family
- Group
- Category
- Sub-category
for reporting purposes as well as for setting – up putaway rules in storage location profiles (refer to 8.7. Storage location profile).
You can view and maintain item groupings in Menu > Items > Groupings. Pay attention to the user rights regarding insert/delete/update of these data. Any modification to these data might have a serious effect on ERP reports (financial or not).
Reporting
You can view the following context reports and analytics per stock item in the stock item form:
Stock analysis report – this the current stock view of the item

Audit trail (actions log) – the report shows the item’s actions and their effect on the current balance (positive or negative) as well as in reserved balance for a selected period.

Item actions – the analytical log of action items for a selected period.

Current insight – this is a summary of picking and receipts actions and quantities (in base MU) analyzed per month for the current year. The report shows an analysis of the daily stock variation across time.


Container
In Entersoft WMS® a container is a physical entity that holds items. The system enables you to track, transact and nest containers.
By the end of this chapter, you will be able to:
- Set up and maintain container types
- Define system validation and behavior rules when building or transferring containers using the Container Control Policy
- Generate and resolve SSCCs according to GS1 standard
- Create and maintain Item Container Types and understand the use of the relative information
- Understand how the system tracks and nests containers
- Use container management report to view and maintain container instance data and attributes
Container types
Select Configuration > Warehouse Management > Container types to set up and maintain container types.

Define the container types that are used in the installation, according to the following criteria:
- Container class; the system supports five classes of containers:
- Package: fixed size and volume boxes used for storage and transport.
- Master package: fixed size and volume boxes used when packages should be nested to bigger (master) packages. Used for storage and transport.
- Pallet: a platform of standard size that cartons or nested packages/master packages are stacked. Used for storage and transport.
- Sorting container: a (usually) wheeled carrier that holds items (or packages) when executing warehouse operations from one storage location to another. Cart is the most common representative of this class.
- Transport container: a box, typically 10 to 40 feet long, which is primarily used for ocean freight shipments. For travel to and from ports, transport containers are loaded onto truck chassis or on railroad flatcars.
Dimensional data: height, legth, width, surface area, volume and weight.
The dimensional data refer to the container and not the content of the container. In fixed size containers, the content dimensional data (apart from weight) is identical with the container’s data. For pallets, the current height depends on the actual content. Enable the Physical Dimensions Monitoring flag should you wish to monitor current height/volume/weight of the content of each container instance (see 11. Physical dimensions).
Type of use: stock (storage), picking, shipments (transport).
The default value is “all” (a container has all types of use selected). The system uses this definition to differentiate packages that are used in picking pre-packing algorithms (in this case only Picking should be selected) with packages that are created for shipments during packing operation (in this case only Shipment should be selected) (see also 39. Packing). Container types with Type of use “Stock” (at least stock should be selected) or nothing are filtered in the Receiving ESRF Workflows (Goods receipt, returns, production receipt). When palletizing in a new container, container types with Type of Use “Shipment” (at least shipment should be selected) are available to select.
For each container type, you should mandatorily assign a stock item that monitors Serial Number in order for the system to create an SSCC per container instance (see 10.3 Serial Shipping Container Code (SSCC)). The Container Type Item is not usually WMS monitored. Container Type Items are also used when Reusable container management is enabled, in order to update ERP target documents with the total quantity of container items (refer to 52.3.1 Insert container items to target documents).
Assign (if necessary) the appropriate Control Policy in order to apply system’s validation and behavior rules when transferring or building containers of the specific type (refer to 10.2. Container control policy).
Example
WMS zero parameterization inserts two records for class pallet: EUR and GMA.
EUR, GMA and CHEP pallets are the most commonly used types of pallets with standard dimensions based on the ISO Standard 6780:2003. The standard dimensions per type are presented below:
| Dimensions (W × L x H ) mm |
Type | Region most used in |
|---|---|---|
| 1016 × 1219 × 152.4 | GMA | North America |
| 1000 × 1200 × 144 | CHEP | Europe, Asia |
| 800 × 1200 × 144 | EUR | Europe |
Assign the standard dimensions of the EUR and GMA pallet per container type. This data is mandatory when Physical Dimensions Monitoring is enabled.

Create a container type item with S/N monitoring enabled and assign it to the container type. You can assign the same Container Type Item for all container types or differentiate per container type if you wish to manage reusable containers.
Container control policy
You are advised to have previously read the chapters concerning requests, actions, operation properties, document fulfillments and balances in order to better understand the configuration described below.
To create or maintain a Container Control Policy (CCP) Select Configuration > Warehouse Management > Container control policy and open the relative form.
In the CCP line, you can define per operation property the following:
Container integrity check level: define the document header and/or document line fields of the provided list for which the system validates integrity when stock is inserted into a container. The functionality concerns actions against documents (as ad hoc) or document lines.
You can also select Shipment, which is not a document header or line field. The system validates shipment integrity based on the reference shipment of the last action items that inserted stock into the container (for more information on Shipment entity refer to 17. Shipment).
Example
Suppose that it is required not mixing different items on the same container upon goods receipt. Apply the configuration in the CCP line as shown below:


Assign the CCP on the EUR container type. If you try to receive two different items (of the same or different document orders) in the same container of type EUR, an exception message will occur as shown in the view on the right.
- Container elimination check: enable this functionality should you wish to eliminate container from balances when a transport action towards a storage location of the specified property is taking place. Please note, that the option “With question” is not used, if selected it behaves as “No”.
- Elimination target zone: when enabling elimination you should also set the zone code of the target storage locations for which the functionality is applied.
Example
The business requirement is to eliminate container from balances on storage locations that belong to zone code P01 (picking zone type). This applies to stock movement and replenishment actions towards storage locations of the specified zone code.
Apply the following configuration on the CCP line:

Suppose the current stock of pallet 252070110000000091 should be transferred to storage location A1.F1.01.01.1 – a P01 zone code location.

A stock movement action is held from storage location RIN.01 to storage location A1.F1.01.01.1. The result on the balances is shown on the screen below – pallet is eliminated from stock balance, although the entire content of the container has been transferred.

Transfer container rules: you can set per CCP line one or more transfer container rules that drive the system to automatically transfer the container to the destination storage location upon transport actions.
Find below the definition of the transfer container rules fields:
Standard Item Container Quantity Percentage to be transferred: if item container type data exist, you should define the percentage of the item container type relation quantity for which the system will automatically transfer the container to the destination location. The input transfer quantity / container stock ratio should be greater or equal to the defined percentage. For example, if the Item Container Type relation is set to 50 packs, the current container stock is 40 packs, the input transfer quantity is 40 packs and the percentage is set to 100%, then the system will automatically transfer the container to the destination location, since 40/40 = 1 = 100%.
Stock percentage to be transferred: if item container type data do not exist, you should define the percentage of the current container stock for which the system will automatically transfer the container to the destination location. The input transfer quantity / container stock ratio should be greater or equal to the defined percentage.
Container transfer question (in case no auto-transfer occurs): if the auto-transfer rules are not met, then you can let the user decide whether to transfer or not the container to the storage location, by setting “Yes” to this field. Otherwise, no transfer will occur.
The above configuration formulates the system’s transfer container algorithm, which is presented in the following flow diagram:

The rest of the transfer container rules fields are described below:
- Transfer to existing container: this configuration applies only to WMS Mobile workflows. If a destination container is declared in the beginning of a transport flow and stock is consumed from a container of the same type, then if the auto-transfer conditions are met, the system checks the value set on this field. If the value is “Yes”, then the stock of the initial container is transferred to the destination container. If the value is “No”, then initial container is transferred to the destination location. If the value is set to “With question”, then the user decides.
- Homogeneous container quantity auto-confirmation: this configuration applies only to WMS Mobile workflows. If the value is set to “Yes”, then if the container is homogeneous and the input quantity is equal to the current container stock, the system will automatically transfer the container to the destination location without any user input apart from the container SSCC scan.
- Check content average weight: this configuration applies only to WMS Mobile workflows. If the value is “Yes”, the system validates whether the average weight of the item’s current stock that is being transferred is equal to the relation declared in the Item MU table. If the equation is true, the system automatically resolves and applies the input quantity. If the equation is false, the user should mandatorily validate the calculated input quantity during the transfer action.
Transfer container rules are applicable to both WMS Mobile workflows and Backoffice use cases.
As far as the WMS Mobile workflows are concerned, if no transfer rules are applied, the following ESRF Config parameters are taken into account:
|
|
TransferContainerMode, TRANSFER_PALLET_STOCKQTY_PERCENT, TRANSFER_PACKAGE_STOCKQTY_PERCENT, ASK_FOR_TRANSFER_TOCONTAINER, AUTOCONFIRM_SINGLECONTAINER_QTY, RAW_MATERIAL_AUTOCONFIRM_SINGLECONTAINER_QTY, ENABLE_COMPARISON_WITH_AVGWEIGHT, ENABLE_COMPARISON_WITH_AVGVOLUME |
|---|---|
| ESRF Config.xaml\Common |
As far as the Backoffice use cases are concerned, it is mandatory to set transfer rules when using the Picking (based on stock) use case.
Bear in mind that the Backoffice application cannot make use of the “With question” set – up wherever is applied, since there is no UI capability.
Serial Shipping Container Code (SSCC)
Container identification is achieved by assigning a unique code to each container instance. According to the GS1 standard, the SSCC (Serial Shipping Container Code), which is a GS1-128 barcode number of 18 characters long, is used as a unique identification code for containers.
The SSCC is valid for the entire life cycle of the container in the supply chain. It should be mandatorily written on the GS1 container label right next to the Application Identifier (00).
The label below shows a typical standard GS1 Logistics label.

The information included on a GS1 Logistic Label comes in two basic forms.
- Information to be used by people: This comprises Human Readable Interpretation (HRI) of the data encoded in the barcodes, and non-HRI text and graphics.
- Information designed for data capture by a machine: Barcodes.
The SSCC is the single mandatory element for all GS1 Logistic Labels.
A distinction is made between the types of data communicated on the Logistic label. This is expressed in three building blocks:
- The top building block may contain anything, e.g. text and graphics. This may include extra information about the logistic unit that is not encoded in the barcode(s).
- The middle building block contains non-HRI text reflecting the information represented in the barcode(s) using data titles rather than AIs, and optionally additional information not represented in barcodes (preferably including data titles).
- The bottom building block contains the barcode(s) including human readable interpretation (HRI).
Only the bottom building block is mandatory.
The number of barcode stacks in a logistic unit label may differ per supplier. Use the company parameter:
|
|
WMS_BARCODESTACK_SUPPLIER |
|---|---|
| Category: WMS Parameters |
to define the default number of barcode sections (system’s default value is 3), or differentiate per supplier in the Barcode Strips field of the Trade Delivery Data:

The number of stacks is taken into account in WMS Mobile workflows of Receipt, Stock Import, Receipt from Production and Returns.
Entersoft WMS® creates and identifies SSCCs according to the GS1 standard. The SSCC is maintained on the barcode field of the serial number of the container.
Generate SSCCs
SSCCs are generated:
In WMS Mobile workflows where barcodes should be scanned in the provided barcode sections and the user does not scan the SSCC and chooses to press enter


In WMS Mobile workflows by pressing the F1 function key button when SSCC scan is required


In Touch applications (Packing Station, C2C, Production Station) when new containers are created
In Back office, using the Create empty containers (SSCC) automation in the Container Management view (Menu > Stock > Current stock > Container management).


In case containers are created during a WMS transaction (e.g. in packing or production operations) a new container should be created based on the configuration below:
- A codification rule for containers should be established. The zero parameterization inserts an ESWMContainer Code segment sequence that consists of a 10 digits counter.
- The associated serial number entry should be created with the appropriate codification. The serial number for the container item is created according to the following configuration:
- Set up a prefix and the relevant counter for assigning the serial number code.
|
|
WMS_SN_CONT_CODE_PREFIX |
|---|---|
| Category: WMS Parameters |
|
|
WMS_SN_CONT_CODE_COUNTERDIGITS |
|---|---|
| Category: WMS Parameters |
- Enable the system Business Rule: Assign Container Serial Number Code in container action in the ESMMSerialNumber entity (by default enabled). The BR uses the above company parameters to create serial number codes for containers.
After containers and associated serial numbers are created (either through the aforementioned steps, or through any other mobile or back office use case), an SSCC should be created and assigned to the barcode of the serial number.
The system uses the built-in function SSCCAutoCreation to create new SSCCs. The function is used by the system ESWMContainer entity business rule: Container - Actions on Save, This Business Rule is triggered each time a container is saved and the associated serial number has an empty barcode. The function can be also used in automations that create SSCCs.
The function creates the SSCC according to the GS1 standard specification based on the specifications provided below.
The structure of the 18 characters SSCC barcode is as follows:
| Extension Digit | GS1 Company Prefix > < Serial Reference | Check Digit | |||||||||||||||
|---|---|---|---|---|---|---|---|---|---|---|---|---|---|---|---|---|---|
| N1 | N2 | N3 | N4 | N5 | N6 | N7 | N8 | N9 | N10 | N11 | N12 | N13 | N14 | N15 | N16 | N17 | N18 |
Extension digit: can have any value from 0 to 9 and is used to increase the numbering capacity. In Entersoft WMS® SSCC creation function the extension digit represents the container class (from 0 to 4).
GS1 Company Prefix: the GS1 Company Prefix (GCP) is allocated by GS1 Member Organizations to the company that allocates the SSCC. It makes the SSCC unique worldwide but does not identify the origin of the unit. The Company Prefix can be of 7 to digits long. The total length of the Company prefix with the serial reference number should be 16 digits.
Assign the appropriate company prefix in the following Company Parameter:
|
|
EAN13PREFIX |
|---|---|
| Category: Items administration |
When SSCCs are created in the context of production, you can assign different GS1 Company Prefix per reference trade account (supplier or customer) of the production order. This applies when production is made on behalf of trade partners and you need to differentiate barcoding rules per trade partner.
Should you need to use this functionality, you should assign the relevant GS1 company code in the supplier or customer Barcode stacks field:
- Serial reference: is a serial number created by the SSCCAutoCreation function. No special logic should be applied, a simple counter is enough.
- Check digit: this digit is calculated by the SSCCAutoCreation function according to the modulo-10 algorithm. This algorithm is based on the 10 previous digits of the code in order to ensure the integrity of the data. For more information on check digits, visit https://www.gs1.org/services/how-calculate-check-digit-manually.
Example
An example of a pallet SSCC is 252070110000000039.
- 2 stands for pallet class of container
- 5201011 is the GS1 Company prefix (as defined in the company parameter)
- 000000003 is the serial reference
- 9 is the check digit
An example of a package SSCC is 052070110000000110.
- 0 stands for package class of container
- 5201011 is the GS1 Company prefix (as defined in the company parameter)
- 000000011 is the serial reference
- 0 is the check digit
SSCC resolving
When a container SSCC is scanned in the relevant action container fields, the system resolves the barcode and identifies whether the container exists or not. The resolving mechanism investigates whether the SSCC exists in the Serial Number Barcode field of the container. This applies to all client applications where SSCC barcodes are scanned, i.e. WMS Mobile and Touch applications.
If there is no container resolved, the system automatically creates a new container and the associated serial number code as long as the container type is also specified. The scanned SSCC is assigned to the serial number barcode field.
Entersoft WMS Mobile supports GS1 SSCC validation with the following ESRF Config parameter:
|
|
DBG_SSCC_VALIDATION |
|---|---|
| ESRF Config.xaml\DEBUG CONFIGURATION |
The parameter is by default enabled, therefore the system accepts only GS1 SSCCs as valid barcodes. SSCCs can be scanned in any of the barcode sections, as long as the barcodes scanned in the previous sections resolve at least the Item and the MU.
|
|
Note that… |
|---|---|
| The SSCC should always start with 00 when DBG_SSCC_VALIDATION is enabled. Otherwise, the system will try to identify the barcode as an item barcode. This is why if the system fails to resolve the scanned SSCC the message that occurs is that the Item Barcode was not found. |
If the parameter is disabled, then SSCCs should be mandatorily scanned on the first barcode section.
Item container type
When items are received in homogeneous containers, you can define the standard relation of the item’s outer packing unit per container type in the Item Container Type table. You can set more than one item container type relations per item, either per supplier or per container type. The system uses the standard item container relation in order to optimize the receipt operation.
Example
ITEM001 is normally received in pallets of type EUR with a standard relation of 50 PACK10. The following data are defined in the Item Container Type:

 A request of 1.000 pcs should be received in homogeneous containers.
- Choose the Container (homogeneous) receipt workflow
- Scan SSCC barcode (if exists) and Item Barcode in the relevant barcode sections
The system will then propose the quantity and the packaging unit according to the Item Container Type information. Two homogeneous pallets of 50 PACK10 are proposed for receipt. The user, of course, can change the proposed quantity if required.
Item container type data are also used when picking requests are created with the “Use of standard pallet” package optimization mode. Flags 1 to 5 of the Item container type table are used in this case in order to define which of the existing relations is the one that should participate in the package optimization algorithm. The functionality is described in 14.Algorithms.
Item container type layers can be also defined if available. When physical dimensions monitoring is enabled, the layer information can lead to more accurate results of the container available volume. Refer to 11. Physical dimensions to understand how layers are used in the relevant algorithms.
 The Item Container Type layers for the pallet shown in image below are:

The Not available in WMS Mobile flag should be enabled when you wish to exclude the Item Container Type Data from the available list of container types in WMS Mobile flows.
Select Menu > Stock > Current stock > Item container templates: Activation control to view and maintain Item Container Type data. The view returns information regarding the inactive state of the Item MUs, Suppliers, Container Types and Container Type Items that participate in Item Container Type master data.

You can bulk import the Item MU relations with the use of ImportMURelations emi process (see 9.2.3. Item measurement units relation).
Container management
Container contents tracking
Entersoft WMS® supports container management through the identification and the tracking of its contents. Identification is achieved through the assignment of the SSCC per container instance as explained above. Tracking is achieved through the monitoring of the container as a stock balance dimension. The system tracks the container location inside the warehouse facility as well as its contents per item measurement unit and stock dimension.

A container cannot exist in two storage locations at the same time. This rule is known as container storage location multiplicity. If this rule is violated upon system’s transactions, the relevant exception message occurs.

A homogeneous container contains only one item. In cases where lot monitoring, expiration or other item attributes need to be controlled, a homogeneous container should also contain items with the same relevant variable product attributes. In any other case, a container is considered as mixed.
 A container can exist without any contents. This applies to reusable containers such as carts. Empty containers cannot be tracked in stock balance. Practically all containers are reusable, as long as their SSCC can be physically scanned. When existing SSCCs are scanned in WMS Mobile flows, the system warns the user if the container has stock and let the user decide to continue or not.
The state of the pallets’ contents is presented in the Pallet management view in Menu > Stock > Current stock > Pallet management.

The view reports the following pallet content states:
- Homogeneous: only one item is in stock with the same stock attributes
- Mixed (same item): refers to mixed containers with only one item in stock but with different stock attributes (e.g. different lots).
- Empty: no stock balance and no actions held on the container
- Zero quantity: no stock balance but actions have been performed on the container
You can create new and print labels for Empty SSCCs (for pallets only) by using the relative automation of the view.

Nesting containers
Container nesting is the warehouse operation where containers of a class are placed into a container of a different class. For example, packages can be placed into master packages or pallets. Pallets, on the other hand, cannot be placed into packages.
Nesting is supported in the following WMS Mobile flows:
- Mixed container (pallets or master packages) with packages stock import found in ESRF Menu > 2. Stock > 1. Stock Import > 3. Mixed container with packages.
- Staging of shipment packages to shipment pallets found in ESRF Menu > 4. Shipments > 1. Staging.
- Palletization of shipment packages to shipment pallets found in ESRF Menu > 4. Shipments > 2. Palletization.
Nesting is by definition supported in Container-to-Container ES Touch® application to conduct packing operations in nested containers and prepare them for shipment. C2C application specifications are described in 39. Packing.
Container instance attributes
You can create, view and maintain container instances (with or without contents) in the Menu > Stock > Current stock > Container management view.

The header returns the generated containers, while the relevant stock balance (if any) is reported on the detail of the view. Balance is reported even if the quantity of the balance is zero, indicating in this way the storage locations where the container has been transferred from.
On double click, open the container form.
General
Apart from the Code, Description and Inactive state of the container, the following information is also provided in this section:
- Comment: you can manually insert comments per container instance that might be of use as information when viewing the container data in the container form or a back office view.
- Physical dimensions monitoring: this is automatically enabled if the container belongs to a container type where physical dimensions monitoring is enabled. You can enable or disable physical dimensions monitoring per container instance, although this is not recommended since it may result in untrusted data regarding available volume/weight/height of the container.
- Printed: this flag indicates whether the label SSCC is printed or not. The flag is monitored by the various printing use cases (either from the Back Office or from WMS Mobile and ES Touch applications).
- Use in reservation algorithm: this flag is monitored from the system stock reservation algorithms. When this flag is enabled, then the system excludes the container as available for use in stock reservation. More information on this functionality is described in 14. Algorithms.

Attributes
This section shows the relevant container type and SSCC information.
Control policy: the policy applied per container instance is according to the associated container type.
Assortment: this term is also translated as sortiment. An assortment is a package unit, commonly used for color/size monitoring in apparel industry, which depicts the combination of quantities to particular colors and sizes, The association between a container instance and an assortment is used in Entersoft WMS cross docking use cases (refer to 51. Cross-docking).
Serial number & SSCC: when creating a new container instance manually, you need to create the associated Serial Number and the SSCC by press the button “create new SSCC”.

S/N status: this is a status monitored by ERP transactions. Entersoft WMS reports this information; however, it does not make use of it. The status indicates whether the serial number is inside the company’s premises or outside, whether it participates in stock reservation, etc.

Dimensional analysis
The container type dimensional analysis data (if any) are automatically applied to the container instance once it is created.
You can set the height of each container instance upon WMS Mobile Container Putaway workflow, as long as the following ESRF config parameter is enabled:
|
|
PUT_CHECK_CONTAINER_HEIGHT |
|---|---|
| ESRF Config.xaml\Putaway |
Container height is taken into account in storage location proposal algorithms for the whole container putaway use case. For more information refer to 14. Algorithms.
If physical monitoring is enabled, the current volume/height/weight data are maintained. Refer to 11. Physical dimensions for further information.
Context reporting
Related actions is a view of action items held for the context container instance.
Current container balances is the stock balance report of the context container instance.
Attachments
You can use this grid to attach any relative information files for the context container.
The system makes use of the container attachments to support the courier voucher functionality provided in the Packing Station application (refer to 39. Packing).
Physical dimensions
Dimensional analysis data
Entersoft WMS® uses the Dimensional Analysis table to keep dimensional data concerning:
- Height
- Length
- Width
- Surface Area
- Volume
- Weight (net and gross)
Per:
- Storage location
- Container
- Container type
- Item Container type
- Item MU
The MU codes used for each dimensional analysis field should have the appropriate Physical type. For example, for volume only Volume Physical type MUs can be assigned.

The system automatically calculates the derived volume and/or surface area as long as the appropriate relations between the physical measurement units in use are set in the SI MU relation table, found in Configuration > Warehouse Management > SI MU Relation.

You can optionally set the default MUs for Volume, Surface Area and Weight in the following company parameters:
|
|
DIM_SURFACEAREA |
|---|---|
| WMS company parameter |
|
|
DIM_VOLUME |
|---|---|
| WMS company parameter |
|
|
DIM_WEIGHT |
|---|---|
| WMS company parameter |
The dimensional analysis data that are set in the Container Type are automatically applied to the Item Container Type data when created. For pallets, you should modify as appropriate the height (if the data are available).

Volume, weight and height data that are set in the storage location master are used in the destination storage location proposal algorithms to check if the stock on hand fits in the candidate storage location. The calculations are based on the dimensional data that are set in the Item MUs and/or containers.
You can set the height of each container instance upon WMS Mobile Container Putaway workflow, as long as the following ESRF config parameter is enabled:
|
|
PUT_CHECK_CONTAINER_HEIGHT |
|---|---|
| ESRF Config.xaml\Putaway |
Container height is taken into account in destination storage location proposal algorithms for the whole container putaway use case. For more information, refer to 14.2 Destination storage location proposal.
The weight and volume calculations are based on static data. For example, a stock for 3 PCS of Item A has a volume of 30 cm3 based on the Item MUs volume data. The candidate storage location has a static volume of 300 cm3. The system considers the storage location as valid; however, if the storage location has existing stock, the available volume is in reality less.
Accuracy can be achieved only if the available height/volume/weight of the containers and storage locations are calculated by enabling the physical dimensions monitoring functionality in the relevant masters.
Physical dimensions monitoring
Physical dimensions monitoring refers to the functionality of calculating the available height/volume/weight in storage locations.
Definitions
Available storage location volume = physical storage location volume – current stock volume (current volume) – future stock volume (future volume)
Physical storage location volume is the static volume set in the dimensional analysis data of the storage location master.
Current storage location volume is formed by the outer container volume (if the current location stock is held in containers) or by the outer packaging unit (if the current stock is bulk). Therefore, in order to calculate the current storage location volume, the system has to calculate the container’s current volume as well.
There are container classes with static dimensions (package, master package) and classes with variable dimensions (e.g., pallets) where the current volume/height/weight depends on their content. Therefore, the current storage location height/volume/weight calculations depend on the container class in stock.
Current container volume = current stock volume
If stock is held in package/master package outer container, then:
Current storage location volume = static volume of the container (as defined in the container type’s dimensional analysis)
If stock is held in pallet outer container, then:
Current storage location volume = current container volume + static volume of the container (as defined in the container type’s dimensional analysis)
If stock is held in packaging units, then:
Current storage location volume = static volume of the packaging units (as defined in the Item MU’s dimensional analysis) * quantity
Activation
Physical dimensions monitoring is activated:
Per container type:

Per storage system:

Per storage location – run the “Activate monitoring of physical dimensions in storage location” command:

When activating physical dimensions monitoring in the storage system, the system calculates the current dimensions for all involved locations and updates the following fields found in the storage location form:

|
|
Note that… |
|---|---|
| Physical dimensions monitoring activation at Storage System level in existing installations (with current stock) is expected to be a time-consuming process, which depends linearly from the number of storage locations. Activating monitoring at storage location level on – demand is provided as an alternative. |
Current dimensional data are calculated either in real time or at second time depending on the value set in the following CSConfig\WMS.xml parameter:
|
|
GetPhysicalDimensionsMonitoringMode |
|---|---|
| WMS.xml parameter |
The default value is set to 2 (calculations performed at second time). You are advised not to change it, unless it is measured that the process will not affect the performance negatively.
Current volume/height/weight algorithm
To run current volume/height/weight calculations you need to ensure that the relevant dimensional data are set in the Item MUs, the Container Types and the Storage Locations for which physical dimensions monitoring is enabled. If any of the dimensional data is not set then the algorithm will ignore it.
To achieve more accurate results in calculations it is essential to set the Surface Area, since the number of layers of the current stock in packaging units or containers is based on this data. In case when number of layers are set at Item container type level, then the algorithm takes this data into account. The following flow diagram present the current container height algorithm.

Figure 20: Current container height algorithm
The following diagram presents the current container volume/weight algorithm:

Figure 21: Current container volume/weight algorithm
The above current container volume and weight calculation is valid when the container stock is bulk (in packaging units). If the container nests other containers then the volume container type data are taken into account concerning the outer nested container. For example, if current stock is held in a package, which is nested in a master package and the master package is nested in a pallet, the current pallet container volume is calculated based on the master package volume/weight. The same applies for height calculations. As far as weight is concerned, the total weight of nested containers is summed.
As far as the Storage Location is concerned, there are two calculations involved: one for the current volume/weight/height and one for the future volume/weight/height based on the location’s future stock balance.
The following diagram presents the current storage location volume algorithm.

Figure 22: Current storage location volume algorithm
The above calculation concerns only the outer container. The nested container volume is ignored.
The following diagram presents the current storage location weight algorithm:

Figure 23: Current storage location weight algorithm
The following diagram presents the current storage location height algorithm:

Figure 24: Current storage location height algorithm
The above calculations are converted to the MU that is defined in the storage location and container dimensional analysis data. For example, if the storage location height is set in centimeters and the Item MU height is set in millimeters, the current storage location height is calculated in centimeters. To ensure that the conversions are correct, you need to define the involved MU relations in the SI MU Relation table.
The current number of layers calculations which are based in Surface Area data apply ceiling rounding. If the number of layers is calculated to 4.1 then ceiling method rounds it to 5. This must be taken into account when calculations accuracy is examined.
The calculation of the future volume/weight/height is based on the future balance in Service MU. It is necessary to set dimensional data to the Item’s Service MU. The same logic applies as in the current storage location data, with the main difference that containers are not taken into account.
|
|
Attention |
|---|---|
| The physical dimensional analysis calculations are taken into account only during the destination location proposal algorithms. If the user decides to assign a location that does not fit, the system will not prevent it. The user’s decision is respected since it is based on actual observation. |
Stock balances
One of the major objectives when implementing a WMS is to optimize stock handling cost by minimizing warehouse movements. The foundations towards this objective are lying in the ability to monitor physical stock at any time. Physical stock should depict reality as accurately as possible in order to direct effectively warehouse employees to conduct operations in specific locations, at the right quantity, stock dimensions, packaging unit and container.
Another objective when implementing a WMS is to plan stock availability (within the warehouse premises) in order to meet demand on time. Demand is defined as any external requirement in the form of customer orders, production orders, internal movement orders, etc., that imposes stock to be exported from a warehouse storage location and optionally to be transferred to another storage location. Stock availability requires the monitoring of reserved and future stock balance indicators for the involved “from” and “to” storage locations.
Entersoft WMS® monitors physical stock balances on item MU relation level (from now on referred as Item MU current balances) while it calculates stock availability based on current, reserved and future stock on item base and alternative MU level (from now on referred as Item current balances). The system decides the optimum packaging unit (or container) upon execution and not upon reservation.
Example
Suppose a customer order X reserves 10 pcs for Item A.
Item’s A balance is as follows:
| Storage Location | Quantity | Quantity in Service MU | Future Quantity |
|---|---|---|---|
| P1 | 3 (PACK10) | 30 | 1 (PACK10) |
Another customer order Y reserves 6 pcs for Item A.
A third customer order Z reserves 10 pcs for Item A.
Order X is executed first, with a picked quantity of 1 PACK10.
Order Y is executed second, with a picked quantity of 6 PCS resulting in the following balance:
| Storage Location | Quantity | Quantity in Service MU | Future Quantity |
|---|---|---|---|
| P1 | 1 (PACK10) | 10 | 1 (PACK10) |
| P1 | 4 (PCS) | 4 |
Order Z is executed partially, 4 PCS first and after replenishment, another 6 PCS.
If Order Z was executed first or second or if replenishment occurred before Order Z execution, then the picked quantity would be 1 PACK10.
The above example shows that when stock reservation process is conducted, the system cannot predict the actual stock packaging unit since this depends on the physical sequence of stock movements in and out of the storage location.
Item MU current balances
Item MU current balance is monitored in the following dimensions:
- Company & Depositor (refer to 6. Company & depositor)
- Storage location, Warehouse, Site (refer to 8. Warehouse layout and storage location)
- Stock item (refer to 9. Stock item)
- Measurement unit (refer to 9.2.1. Measurement units)
- Measurement unit relation (refer to 9.2.3. Item measurement units relation)
- Color, size, stock dimensions 1 & 2, lot and serial number item stock dimensions (refer to 9.3. Item stock dimensions)
- Package, master package, pallet, sorting and transport container instance (refer to 10. Container)
- Reservation reason and disposition reason stock dimensions (refer to 12.4. Reservation and disposition reason codes)
- Input sequence stock dimension (refer to 8.3. Storage systems)
The measurement unit relation determines the outer packaging unit of the physical stock.
If an item monitors weight and/or volume MUs, the system holds stock in the corresponding measurement units per outer packaging unit. This applies to both variable and fixed weight/volume items.
Item MU current balances are reported in Menu > Stock > Current stock view.
Example
Suppose the following Item MU, MU relations and Item Container Type relations apply for ITEM001.

A EUR pallet of 50 PACK10 for ITEM001 is received in storage location RIN.01. The Item MU balance table records are as follows:
| Storage Location | Warehouse | Item MU | Item MU Relation | Quantity | Lot Barcode | Container SSCC |
|---|---|---|---|---|---|---|
| RIN.01 | 1 | PACK10 | PACK10 -> PCS | 50 | 051220 | 252070110000000190 |
| RIN.01 | 1 | PCS | PACK10 -> PCS | 500 | 051220 | 252070110000000190 |
| RIN.01 | 1 | KG | PACK10 -> PCS | 25K | 051220 | 252070110000000190 |
Select Menu > Stock > Current stock to view the item MU current balances.

The view reports physical stock in the outer packaging unit (based on the item MU relation) while the relevant weight is shown on a separate column.
Suppose that a stock import is made for 10 PCS of ITEM001 in the same storage location, RIN.01 for the same barcode.
The Item MU balance table records are formulated as follows:
| Storage Location | Warehouse | Item MU | Item MU Relation | Quantity | Lot Barcode | Container SSCC |
|---|---|---|---|---|---|---|
| RIN.01 | 1 | PCS | PCS -> PCS | 10 | 051220 | |
| RIN.01 | 1 | KG | PCS -> PCS | 500 | 051220 |
The Current stock view is as follows:

The view indicates whether the outer packaging unit is the highest (Superior MU) according to the item MU relation.
Item current balances
Item current balance is monitored in the following dimensions:
- Company & Depositor (refer to 6. Company & depositor)
- Storage location, Warehouse, Site (refer to 8. Warehouse layout and storage location)
- Stock item (refer to 9. Stock item)
- Color, size, stock dimensions 1 & 2, lot and serial number item stock dimensions (refer to 9.3. Item stock dimensions)
- Reservation reason and disposition reason stock dimensions (refer to 12.4. Reservation and disposition reason codes)
There are three quantity indicators - Current, Reserved and Future monitored in Base and Alternative MUs. Stock availability is calculated depending on the use case based on the following equations:
Current Balance = Quantity
Available Balance = Quantity – Reserved Quantity
Future Balance = Quantity + Future Quantity
Future Available Balance = Quantity – Reserved Quantity + Future Quantity
Item current balances are reported in Menu > Stock > Current stock > Current stock by item and storage location view.
Going back to the example of the previous paragraph, the relevant Item current stock is formulated as shown below:

The view detail shows the analysis of each balance row per packaging unit, container and input sequence dimension (Item MU current balances).
Refer to 13. Request & Action to understand how balances are updated through system transactions.
Snapshot & context balance types
The system supports three types of balances. Current balances, which are described in the above paragraphs, snapshot balances and context balances. Snapshot and context item and item MU balances are used in the Physical Inventory Plan process (refer to 49. Physical inventory).
Snapshot balance is the copy of the current balance at the start of the inventory process per Inventory Plan. Snapshot balance is used to compare stock deviations with stock counting actions.
Context balance is the balance that is formed from stock counting actions in the context of an Inventory Plan. This balance is used to compare stock counting deviations with snapshot balances. Once these deviations are checked and approved, the inventory process submits (finalizes) actual stock in the current balance.
Reservation and disposition reason codes
Reservation and disposition reason codes are used to mark stock upon physical inspection. An example of marking stock with reservation or disposition reason codes is upon goods receipt inspection, where damaged package or inappropriate to use stock is spotted.
Select Configuration > Warehouse Management > Stock disposition reasons to create and maintain the valid disposition reasons used in the installation. Zero parameterization inserts some indicative disposition reasons, shown in the figure below.

When disposition reason code is used, stock is automatically transferred to a disposition warehouse. Disposition warehouses have the relevant flag enabled. In order for the system to automatically transfer the stock to a disposition warehouse, there should only be one active disposition warehouse per site and has to be related with a physical reference warehouse (refer to 8.1. Distribution center & warehouse).

Select Configuration > Warehouse Management > Stock reservation reasons to create and maintain the valid reservation reasons used in the installation. Zero parameterization inserts some indicative reservation reasons, shown in the figure below.

When reservation reason code is used, stock is not necessarily transferred to a logical warehouse, unless it is mapped with one. For example, marking stock because it was not found during picking does not change the state of the stock. In this case, stock is marked so as to be excluded from the stock control process. Stock counting should then be conducted in order to confirm the shortage.
Use the Configuration > Warehouse Management > Inventory reservation reasons mapping to map reservation reason codes with logical warehouses. You cannot map the same reservation reason code with more than one warehouses of the same branch.

Stock reservation and disposition reason marking use cases are described in 28. Goods inspection, 45. Returns, 48. Stock transformations.
Request & Action
Warehouse operations are planned with the use of the request entity and executed with the use of the action entity.
Use actions to:
- Meet specific external requirements by fulfilling document order lines
- Define ad hoc the content of a document order, without fulfilling document order lines. For example, ad hoc receipts are conducted against an existing expected receipt document when the item that is received is not included in the document itself. The term “blind” is often met in the bibliography to define ad hoc operations.
- Execute ad hoc warehouse operations, such as stock surpluses or shortages, internal movements from one location to another, etc.
- Track and record the resource as well as the start and end time of an action or of a group of actions that define a single operation.
- Cancel requested and ordered quantities (cancellation action items).
Use requests to:
Drive the employees to navigate effectively in the warehouse to execute actions. The level of information provided in the request items depends on:
The detail of the information provided in the external requirement (document order line). For example, if document order lines specify the exact stock dimensions (analysis lines) then the generated request items respect this information.
The activation of stock reservation functionality. If stock reservation is enabled, the system’s algorithms allocate specific item, stock dimensions, storage locations and quantities to meet the external requirements.
The source generator of the request items. If request items derive from previous step actions, for example packing requests from picking actions, the more accurate the provided information is.
Allocate resources (during or after requests generation) in order to manage effectively the warehouse personnel on a daily basis.
Manage daily warehouse tasks by grouping generated requests in work packages (work lists).
Request and Action entities comprise of a header and a detail. The header is used to hold task related data such as the resource, the state, the planned/actual start and end time. The detail (action or request item) is used to hold item and stock related data to update balances and fulfill documents.
By the end of this chapter, you will be able to:
- Activate workflow steps according to implementation requirements
- Configure action, request and work package properties and behavior through action, request and work package types
- Understand the schema of action/request and action/request items
- Understand how line step request, line step action and request action fulfillments are generated and configured
- Make use of the user defined fields for actions and requests
- Create and make use of cancellation and reverse action items
- Take knowledge of the request and action related reporting views that are provided by the system
Workflow steps
In Entersoft ERP®, sales and distribution stages are used to provide reports regarding the progress and status of customer orders. Entersoft WMS® is based on ERP’s stages to report the progress of any WMS document order, regardless the flow, based on fulfilled requests and actions. In this sense, the English translation of sales and distribution stages is irrelevant; workflow step suits better to their use in WMS.
The following WMS workflow steps are included in the zero db, which can be found in Configuration > Documents and Series > Sales & distribution stages:
| Step code | Description |
|---|---|
| 146 | Receipt |
| 146R | Reverse receipt |
| 147 | Putaway |
| 148 | Internal warehouse actions |
| 148B | Replenishment to buffer locations |
| 149C | Consumption |
| 149CR | Reverse consumption |
| 149P | Production |
| 149PR | Reverse production |
| 151 | Cross-docking |
| 155 | Picking |
| 156 | Sorting |
| 157 | Checking |
| 160 | Packing |
| 161 | Staging |
| 163 | Loading |
| 163R | Reverse loading |
The first digit (1) differs per country, for example, digit 2 is used for Romania.
During the implementation cycle, you need to define which of the above steps are valid and activate them as appropriate. To activate workflow steps, set the appropriate step codes in the following company parameters.

|
|
WMS_RECEIPT_STEPCODE, WMS_PUTAWAY_STEPCODE, WMS_INTERNAL_ACTIONS_STEPCODE, WMS_BufferReplenishment_STEPCODE, WMS_CONSUMPTION_STEPCODE, WMS_PRODUCTION_STEPCODE, WMS_CROSSDOCKING_STEPCODE, WMS_PICKING_STEPCODE, WMS_SORTING_STEPCODE, WMS_CHECKPICKING_STEPCODE, WMS_PACKING_STEPCODE, WMS_STAGING_STEPCODE, WMS_LOADING_STEPCODE |
|---|---|
| WMS Company parameters |
Workflow steps that refer to reverse operations are mapped with the forward step codes in the Define reversal steps table found in Configuration > Warehouse Management > Define reversal steps. Zero parameterization inserts the appropriate records in this table; user intervention is not recommended.

Each request and action refer to a specific workflow step, according to which document line step fulfillments are generated. Document lines can be fulfilled with more than one workflow steps. For example, a shipment routing document is at least fulfilled with picking and loading steps.
You may also have noticed that the workflow step is not identical with the warehouse operation. For example, a customer return document order is executed with return property actions, but the fulfillment progress on the document is reported in the receipt workflow step.
The line step fulfillment mechanism is described in the following paragraphs.
Request types
Zero parameterization inserts the system’s standard request types, found in Configuration > Warehouse Management > Request types.

Open the request type form to view and maintain relevant data.

Basic info
- Code, prefix and international code: the international code is often used in queries instead of the code as the request type unique id. Custom request types start with CS. Prefix is the leading part of the request codification, followed by a dash and ending with a counter. The number of digits in the request and action counters are determined by the following company parameter (default value is 5):
|
|
TaskCodePaddingZeroes |
|---|---|
| CRM - Tasks Company parameters |
Request class: general and transport classes are available for selection however; general class is no longer supported. Transport requests consist of a “from” and a “to” side. The from and to columns of a transport request are:
Location dimensions (Site, WH, Storage)
Item (Item, Color, Size, Lot, SN, Dim1, Dim2)
Reasoning (Reservation, Disposition)
Containers (Package, Master Package, Pallet, Transport, Sorting)
Container types
MU
Quantities (MU, Base, Alt, Weight Volume)
Transport requests are classified as:
- Inflow: one of the “to” location dimensions is completed while all the “from” location dimensions are null.
- Stock movement: location dimensions for both sides are completed, while “from” location is different than “to” location dimensions.
- Stock changes: location dimensions for both sides are completed, while “from” location is equal with the “to” location dimensions.
- Outflow: one of the “from” location dimensions is completed, while the “to” location is null.
Task type: the task type associated with requests is “WHRQ - Warehouse request”. WMS relevant task types are inserted with the CRM zero parameterization import process. The WHRQ task type:
Defines the valid status collection for requests: a request has the default status “Open” when created, while the other two allowed statuses are “In progress” and “Completed”. Note that the request status does not have such strong semantics as the action status. Requests statuses are generally not handled except specific use cases (e.g. Stock – counting based on inventory plans).

Determines the resource roles that are allowed to be assigned to requests: only “warehouse admin” and “warehouse rep” resource roles can be assigned to requests. These resource roles are imported with the WMS zero parameterization process.
Determines the user privileges per user group: users belonging to “WMS BO Admin”, “WMS BO User” or “WMS RF User” can show, modify, insert or delete tasks associated with requests. These user groups are imported with the WMS zero parameterization process.
Workflow step: the step code to which requests of this type are generated
Request form: the request form shows or hides fields depending on the transport request classification, e.g. inflow request forms hide the “from” fields and show the “to fields.

Updates
- Quantity handling: when quantity handling is enabled, transport request:
- Increases future quantity in “to” location
- Increases reserved quantity in “from” location
- Allow requests on locked storage locations: this flag determines whether transport requests are allowed from and to the locked storage locations (refer to 49. Physical inventory).
- Allow requests on locked items: this flag determines whether transport requests are allowed for locked items (refer to 49. Physical inventory).
- Balance type: defines the balance type (current or context) that the request item updates (if quantity handling is enabled)
- Fulfillment document line type: the default value is “no participation”. Define the appropriate line type (reverse or forward) for which the line step request fulfillments should be generated, in the case where the product of a production order is also consumed in the context of the same production order. In this case, production requests should fulfill forward line types while consumption requests should fulfill reverse line types.
Properties
Zero parameterization imports the appropriate operation and context operation properties per request type (refer to 7. WMS operation properties).
User rights
Information on user rights is provided in 18. Users & resources. Note that you should be particularly careful when applying user rights in request types – it should generally be avoided since requests are generated automatically after actions.
Action types
Zero parameterization inserts the system’s standard action types, found in Configuration > Warehouse Management > Action types.

Open the action type form to view and maintain relevant data.

Basic info
- Code, prefix and international code: the international code is often used in queries instead of the code as the action type unique id. Custom action types start with CS. Prefix is the leading part of the action codification, followed by a dash and ending with a counter. The number of digits in the action counters are determined by the following company parameter (same as for request):
|
|
TaskCodePaddingZeroes |
|---|---|
| CRM - Tasks Company parameters |
Action class: general and transport classes are available for selection however; general class is no longer supported. Transport actions consist of a “from” and a “to” side. The from and to columns of a transport action item are:
Location dimensions (Site, WH, Storage)
Item (Item, Color, Size, Lot, SN, Dim1, Dim2)
Reasoning (Reservation, Disposition)
Containers (Package, Master Package, Pallet, Transport, Sorting)
MU
Quantities (MU, Base, Alt, Weight Volume)
Transport actions are classified as:
- Inflow: one of the “to” location dimensions is completed while all the “from” location dimensions are null.
- Stock movement: location dimensions for both sides are completed, while “from” location is different than “to” location dimensions.
- Stock changes: location dimensions for both sides are completed, while “from” location is equal with the “to” location dimensions.
- Outflow: one of the “from” location dimensions is completed, while the “to” location is null.
Task type: the task type associated with actions is “WHA - Warehouse action”. WMS relevant task types are inserted with the CRM zero parameterization import process. The WHA task type:
Defines the valid status collection for actions: an action has the default status “In progress” when created and “Completed” when the user completes the action. In contrast to request status, action status has strong semantics. In WMS Mobile, an action that has improperly stopped (due to system or network failures or due to long user inactive period) remains “in progress” so that the user can continue on the same action from the point where it was stopped. In many use cases (especially in shipment workflows), the completion of an action is the trigger generating the request of the next step code.

Determines the resource roles that are allowed to be assigned to actions: only “warehouse admin” and “warehouse rep” resource roles can be assigned to actions. These resource roles are imported with the WMS zero parameterization process.
Determines the user privileges per user group: users belonging to “WMS BO Admin”, “WMS BO User” or “WMS RF User” can show, modify, insert or delete tasks associated with actions. These user groups are imported with the WMS zero parameterization process.
Workflow step: the step code to which actions of this type are generated
Action form: the action form shows or hides fields depending on the transport action classification, e.g. inflow action forms hide the “from” fields and show the “to fields.

Updates
Do not allow stock transformation on containers used in replenishment requests: if a container participates in an open replenishment request (which is not yet executed) then use this flag to prohibit stock transformation actions on the container (i.e. change of the container’s content). It should be normally enabled in all stock transformation property actions.
Enable duration tracking: if this flag is enabled, the system tracks the duration per operation entry. The operation entity collects the action items that define a distinct operation for which duration, start / end time, and other information should be recorded for use in reports and KPIs relative to the resource productivity and efficiency.
The functionality is supported in the WMS Mobile workflows of Imports (goods receipt, return, receipt from production) as well as in the Consumption workflows.
The information derived per operation are:
Start/End time
Elapsed duration (in ms)
Weight & volume measurement unit, as defined in the following company parameters:
|
|
DIM_WEIGHT |
|---|---|
| WMS company parameters |
|
|
DIM_WEIGHT |
|---|---|
| WMS company parameters |
- Sum of item weight & volume (based on action item weight and volume fields – this information refers to variable weight/volume items)
- Sum of gross weight and volume of the action item measurement unit (this information is derived from the item measurement unit dimensional analysis data)
- Gross weight and volume of the outer container
- Number of packaging units
- Number of packages/ master packages/ pallets / transport containers
- Number of outer containers
Fulfillments on fulfilled (completed) documents are not allowed: when a document is completed (refer to 16.4. Document process state) this flag prohibits action items to be saved and fulfill the document in order to ensure that no changes are made after ERP is updated. This domain rule is enabled by action type, since some actions should fulfill a completed document depending on the workflow step. For example, in the goods receipt flow, the expected receipt document is completed and ERP is updated after receipt actions are completed. However, putaway operation might be in progress when the document is completed, therefore putaway actions should be able to fulfill the completed document order.
If the rule is violated then the following message occurs: “The status of action fulfillment document XXX is “Processed”.


- Fulfillment document line type: the default value is “no participation”. Define the appropriate line type (reverse or forward) for which the line step action fulfillments should be generated, in the case where the product of a production order is also consumed in the context of the same production order. In this case, production actions should fulfill forward line types while consumption actions should fulfill reverse line types.
- Mandatory reservation reason in mapped storage location: this flag is no longer used
- Actions of this type are allowed on locked storage locations: this flag determines whether transport actions are allowed from and to the locked storage locations (refer to 49. Physical inventory).
- Actions of this type on locked items are allowed: this flag determines whether transport actions are allowed for locked items (refer to 49. Physical inventory).
- Balance update (or balance posting): both options should be selected under normal circumstances meaning that an action item should update balances (item MU and item current balances or context balances). If you choose to update balances through request action fulfillments, then only the reserved and future balance quantities are updated through the fulfillments. If you choose to update balances through action item, then the action will update the current balance for both item MU and item balances, but will not handle reserved and future quantities.
- Balance type: defines the balance type (current or context) that the action item updates.
Properties
Zero parameterization imports the appropriate operation and context operation properties per action type (refer to 7. WMS operation properties).
User rights
Information on user rights is provided in 18. Users & resources.
Print-outs
Information on ES print mechanism is provided in II. Appendix – Print per resource and location.
Work package and work package types
Zero parameterization inserts the system’s standard work package types, found in Configuration > Warehouse Management > Work package types.

Work packages are used to group a list of warehouse requests that belong to the same context property. For example, the “WPShipments” work package is used to group a list of picking, packing, loading requests all belonging to the “ctx_shipments” property. Work package lists are commonly used as the reference unit against which actions are held. The work package code or barcode is searched or scanned in WMS mobile and WMS Touch workflows (where appropriate) according to which the relevant requests and request items are shown to the user.

Should you wish to print a Work Package (with or without its contents) and use the scanner to scan the barcode, you can set the barcode codification rule in the following company parameters:
|
|
WMS_WP_BARCODE_COUNTERDIGITS |
|---|---|
| WMS company parameters |
|
|
WMS_WP_BARCODE_PREFIX |
|---|---|
| WMS company parameters |
The work package type configuration is not as complex as that of request and action types, since no balance update or fulfillment configuration rules apply.

- Code, prefix and international code: The number of digits in the work package counters are determined by the following company parameter (same as for request and action):
|
|
TaskCodePaddingZeroes |
|---|---|
| CRM - Tasks Company parameters |
Task type: The ‘WHWP’ task type is used for all WMS work packages. The task type is a Work Package, while the allowed statuses are:

The system does not handle the work package statuses.
WMS resource roles and user groups that are imported with the WMS zero parameterization process are valid for the WHWP task type (see request types and action types above).

Request and request item
Request form
Select Menu > Overview > Requests by item to view request items and relevant request and fulfilled document data.
Double click to open the request form (the relevant form is defined in the request type).

General
- Progress stage: the workflow step of the request type
- Code: comprises of a prefix and a counter separated by a dash delimiter as configured in request type and the relevant company parameter
- Request barcode: you can configure request barcodes should you wish to use them in work lists printouts for scanning purposes Work package barcodes are most often used for this purpose. The request barcode codification rule is set in the following company parameters:
|
|
WMS_REQ_BARCODE_COUNTERDIGITS |
|---|---|
| WMS company parameters |
and
|
|
WMS_REQ_BARCODE_PREFIX |
|---|---|
| WMS company parameters |
- Status: “Open”, “In progress” or “Completed”, according to the allowed statuses set on the task type of the request type
- Registration date: date of creation of the request header (creation date is a date time field, while registration date is a date field).
- Resource: resources are optionally assigned to requests either upon their generation in the “Activate management in WMS” processes (applies to all flows) or in resource allocation use cases (such as the picking list report).
- Device: refers to the assigned device (WMS mobile scanners) - this functionality is not supported yet
User defined fields
Refer to 13.9 Request and action user defined fields on how to set up and use request UDFs.
Items and quantities
Request container is an optional header that may be used as a template regarding transport container information. Request container data are reported in the Request containers tab with the relevant request items per request container line. Request container grid carries the following information:
- Container instance and container type (pallet, package, master package, sorting, transport)
- From/To storage location , warehouse, site
If request container is not used, then request item data are reported in the Package tab. From/To containers (if exist) are reported in the relevant fields.
Requests use containers as hints – as a guidance to the user as per which container to use during execution.
Line step request fulfillments
Line step request fulfillments associate a request item with a document line (line item or line item analysis) in order to calculate the requested quantity per step code.
Generation mechanism
You can drive the system to generate line step request fulfillments by assigning the appropriate value to one of the following request item reference fields:
- Reference document
- Reference line item
- Reference line item analysis
You can also call the line step request fulfillments service for an array of documents (you cannot do that through the UI; mostly coded in back office automations and mobile or touch use cases).
Line step request fulfillments are shown on the Selected line fulfillments administration section of the request form.

Item & stock dimensions match
The system, by default, requires an exact match between request item and document line in the following dimensions:
- Warehouse
- Item
- Stock dimensions (lot, serial number, color, size, dimension 1 and 2)
Unless otherwise stated in the WMS ICP:

The Request match policy (against document line) is defined per ICP line (operation property) – you can set Exact or Proposed policy at stock dimension, lot attribute and warehouse level.
If no match rule is defined, then the system will consider it as exact.
If “proposed” match policy is defined, then the system allows request items to fulfill document line item analysis of different dimension.
If item replacements are in place, (see 9.5. Item replacements), then line step request fulfillments between different items are also allowed as long replacement conditions are satisfied.
If any of the exact match rules is violated when line step request fulfillments are generated, the following message occurs:
“The dimension “XXX” of the document is binding”
If no analysis data are included in the fulfillment document lines then the system will not validate stock dimensions during the fulfillment generation.
Fulfillment quantities and overflow
The line step request fulfillments quantity is the Requested quantity (in base and alternative MU)
The request item quantities that participate in the line step request fulfillments differ per transport request classification:
- Inflow: “to” quantities in base and alternative MU
- Stock changes and movement: “to” quantities in base and alternative MU
- Outflow: “from” quantities in base and alternative MU
Requested quantities update the relevant indicator of the Line Step (see 13.7. Line step).
Step code is assigned according to the request header step code.
You may allow or prohibit line step request fulfillment overflow, i.e.:
Requested quantity > Line item quantity
Overflow is enabled in the WMS ICP line in the “Overflow check in line step request fulfillments” columns (base and alternative):

There are three options to select:
No: the system allows overflow
Warning: the system allows overflow - warning message showed in the request item quantity fields of the request form
Prohibit: no overflow is allowed – if violated the following message occurs:
“The quantity is greater than the allowed”
Action and action item
Action form
Select Menu > Overview > Actions by stock item to view action items and relevant action, fulfilled request and document data.
Double click to open the action form (the relevant form is determined by the action type).

General
- Progress stage: the workflow step of the action type
- Code: comprises of a prefix and a counter separated by a dash delimiter as configured in action type and the relevant company parameter
- Registration date: date of creation of the action header (creation date is a date time field, while registration date is a date field).
- Status: “In progress” or “completed”, according to the allowed statuses set on the task type of the action type
Resource and duration
- Resource: WMS Mobile and Touch applications, as well as Back office use cases (in majority) log the resource that executes the action
- Device: for future use
- Start and completion date: these is task related information - the action start and completion date time are registered, while the duration is calculated in seconds
Transport info
If transit location is enabled (see 8.8 The transit location) then this is reported in the Transport Info section.

Insert/Edit
Action container is an optional header that reports transport container information. Action container data are reported in the Containers tab, while the relevant action items per container are reported in the Contents grid. Action container grid carries the following information:
- Container instance (pallet, package, master package, sorting, transport) – the same container is automatically applied to “from” and “to” sides of the transport action
- From/To storage location , warehouse, site
If action container is not used, then action item data are reported in the Packaging tab. From/To containers (if exist) are reported in the relevant fields.

Depending on the transport action classification (inflow, outflow, stock movement, stock changes) the action form shows the relevant from and/or to action item fields.
Balance updates
“From” and “to” item and stock dimensions and container data should be mandatorily completed in order to locate item and item MU current balances and update them as appropriate.
The following table shows how transport action item quantity fields affect item and item MU balances. The prerequisite is that the Action should update balances (both options on balance posting are checked).
Table 5: Action item quantities balance update
| Action item field | Quantity (Item MU balance) | Weight (Item MU balance) | Volume (Item MU balance) | Quantity base MU (item balance) | Quantity Alt MU (item balance) |
|---|---|---|---|---|---|
| From Quantity | |||||
| From Weight | |||||
| From Volume | |||||
| From Quantity Base MU | |||||
| From Quantity Alt MU | |||||
| To Quantity | |||||
| To Weight | |||||
| To Volume | |||||
| To Quantity Base MU | |||||
| To Quantity Alt MU |
Request action fulfillments
Request action fulfillments associate an action item with a request item of the same step code in order to calculate the open request item quantity. Request action fulfillments also decrease the reserved and future balances in case the fulfilled request has the quantity handling enabled (see above, Request types) and from /to storage locations are completed.
Generation mechanism
You can drive the system to create request action fulfillments by assigning the appropriate value to one of the following action item reference fields:
- Reference work package
- Reference request
- Reference request item
You can also call the request action fulfillments service for an array of request items (you cannot do that through the UI; mostly coded in back office automations and mobile or touch use cases).
Request action fulfillments are shown on the Requests fulfillments section of the action form.

The more specific the guidance the more accurate the results. If, for example, a reference work package or a request is assigned, then the request action fulfillment mechanism will search for the involved request items of the reference unit and will fulfill them based on the rules that are described below.
Item & stock dimensions match
The system, by default, requires an exact match between action item and request item in the following dimensions:
- Warehouse
- Item
- Stock dimensions (lot, serial number, color, size, dimension 1 and 2)
Unless otherwise stated in the WMS ICP:

The Action match policy against request is defined per ICP line (operation property) – you can set Exact or Proposed policy at stock dimension, lot attribute and warehouse level.
If no match rule is defined, then the system will consider it as exact.
If “proposed” match policy is defined, then the system allows action items to fulfill request items of different dimension, while if no specific request item is defined, the system will prioritize the request items with matching dimensions (if exist) and will then continue fulfilling request items at a random order.
If item replacements are in place, (see 9.5. Item replacements), then request action fulfillments between different items are also allowed as long replacement conditions are satisfied.
If any of the exact match rules is violated when request action fulfillments are created, the following message occurs:
“The dimension “XXX” of request is binding”

Fulfillment quantities and overflow
The request action fulfillments quantity indicators are:
- Closed quantity in base and alternative MU
- Cancelled quantity in base and alternative MU
- Fulfilled quantity in base and alternative MU
The action item quantities that participate in the request action fulfillments differ per transport action classification:
- Inflow: “to” quantities in base and alternative MU
- Stock movement: “to” quantities in base and alternative MU
- Stock changes: “to” quantities in base and alternative MU
- Outflow: “from” quantities in base and alternative MU
Closed quantity is updated when the request item is fulfilled with a forward action item.
Cancelled quantity is updated when the request item is fulfilled with a cancellation action item (see 13.6.6. Cancellation action items).
Closed and cancelled quantities update the relevant quantities of the request item. Therefore:
Open request item quantity = request item quantity – closed quantity – cancelled quantity (in base and alternative MUs)

You may allow or prohibit request action fulfillment overflow, i.e.:
(Closed + Cancelled ) > Request item quantity
Overflow is enabled in the WMS ICP line in the “Overflow check in request action fulfillments” columns (base and alternative):

There are three options to select:
- No or Warning: the system allows overflow (warning messages do not occur in the case of request action fulfillments)
- Prohibit: no overflow is allowed
 Fulfilled quantity is updated either with forward or with cancellation action items as long as “from” and/or “to” storage locations are completed in the fulfilled request item. If the request item handles quantity (according to the relevant flag of the request type) then the fulfilled quantity reduces reserved stock from the request item’s “from” storage location and future stock from the request item’s “to” storage location (if completed).
The sum of the fulfilled quantities cannot be greater than the request item quantity. In case of overflow, the fulfilled quantity is less than the closed + cancelled quantities.
Line step action fulfillments
Line step action fulfillments associate an action item with a document line (line item or line item analysis) in order to calculate the executed quantity per step code.
Generation mechanism
If request action fulfillments and line step request fulfillments exist for the reference request item, then line step action fulfillments are automatically generated with the reference document lines of the line step request fulfillment.
You can also drive the system to generate line step action fulfillments by assigning the appropriate value to one of the following action item reference fields:
- Reference document
- Reference line item
- Reference line item analysis
You can also call the line step action fulfillments service for an array of documents (you cannot do that through the UI; mostly coded in back office automations and mobile or touch use cases). The more specific the reference the more accurate the results.
Line step action fulfillments are shown on the Fulfillments by stage and document section of the action form.
Item & stock dimensions match
The system, by default, requires an exact match between action item and document line in the following dimensions:
- Warehouse
- Item
- Stock dimensions (lot, serial number, color, size, dimension 1 and 2)
Unless otherwise stated in the WMS ICP:

The Action match policy against document line is defined per ICP line (operation property) – you can set Exact or Proposed policy at stock dimension, lot attribute and warehouse level.
If no match rule is defined, then the system will consider it as exact.
If “proposed” match policy is defined, then the system allows action items to fulfill document line items of different dimension, while if no specific line item analysis is defined, the system will prioritize the document lines with matching dimensions (if exist) and will then continue fulfilling document lines at a random order.
You can use the sequence of field use entity to define specific date time ordering criteria for both line step action and line step request fulfillments.
- Select Configuration > Organization parameters > Sequence of field use to open the entity form.
- Select the “Order by” type and define the source table (ESMMLineItems) that is used in the Line step fulfillments generation process.
- Assign one or more of the available ADDateFieldX where X [1 to 5]. Define the ordering rule (ascending or descending). Note that only date fields are supported for now.

Assign the appropriate field sequence code in the “Fulfillment Seq. No” field of the WMS ICP line:

 If item replacements are in place, (see 9.5. Item replacements), then line step action fulfillments between different items are also allowed as long replacement conditions are satisfied.
If any of the exact match rules is violated when line step action fulfillments are generated, the following message occurs:
“The dimension “XXX” of the document is binding”
If no analysis data are included in the fulfillment document lines then the system will not validate stock dimensions during the fulfillment generation.
Fulfillment quantities and overflow
The line step action fulfillments quantity indicators are:
- Executed quantity in base and alternative MU
- Cancelled quantity in base and alternative MU
The action item quantities that participate in the line step action fulfillments differ per transport action classification:
- Inflow: “to” quantities in base and alternative MU
- Stock changes and stock movement: “to” quantities in base and alternative MU
- Outflow: “from” quantities in base and alternative MU
Executed quantity is updated when the document line is fulfilled with a forward action item.
Cancelled quantity is updated when the document line is fulfilled with a cancellation action item (see 13.6.6. Cancellation action items).
Executed and cancelled quantities update the relevant quantities of the Line Step (see 13.7. Line step).
Open line quantity per step code = Line quantity – executed quantity – cancelled quantity (in base and alternative MUs)
Step code is assigned according to the action header step code.
You may allow or prohibit line step action fulfillment overflow, i.e.:
(Executed + Cancelled ) > Line item quantity
Overflow is enabled in the WMS ICP line in the “Overflow check in line step action fulfillments” columns (base and alternative):

There are three options to select:
No: the system allows overflow
Warning: the system allows overflow - warning message showed in the action item quantity fields

 Prohibit: no overflow is allowed – if violated the following message occurs:
“The quantity is greater than the allowed”


Ad hoc action items
If an action item has a reference document but no line step action fulfillments exist, then it is considered as a document ad hoc action item.
Document ad hoc action items occur due to the following reasons:
A document order is assigned to WMS, however no line items are included; defined as ad hoc document. Only document header information, such as trade account and delivery data, is used in this case to drive the warehouse operations. For example, one business requirement is to liquidate stock due to obsolescence. In this case. no line items are necessary to be specified; the warehouse picks and ships the obsolete stock (as long as it can be clearly identified) to the delivery person of the ad hoc document.
The WMS activation process generates requests for ad hoc documents (with no request items) and assigns the relevant work package against which the warehouse will execute the actions.
An action is executed for an item that is not included in the document order lines. A typical example lies in the goods receipt process, where the warehouse has to receive all items that are shipped from the supplier even if they are not included in the receipt note. In WMS mobile receipts workflows, ad hoc actions are generated as long as any item stock dimension differs from the ones included in the document order lines.
The user decides to execute an action for an item that is included in the document order lines as ad hoc. This functionality is supported in the picking process, where the user can choose to execute a picking request item through the Ad hoc picking menu (ESRF Menu > 3. ORDERS > 2. AD HOC PICKING). The subsequent request items that are generated after picking is completed – e.g. packing or loading requests - are created as ad hoc requests. The same applies for the subsequent action items that are executed against the generated ad hoc requests.
To enable ad hoc actions you need to activate the “Ad hoc item is allowed in action” flag in per WMS ICP line:

To enable ad hoc picking on request items you should activate the following ESRF config parameter:
|
|
ADHOC_DoesNotCreateFulfillments |
|---|---|
| ESRF Config parameter: Common |
Ad hoc actions update the document ad hoc step executed quantity (per step code).
Ad hoc requests update the document ad hoc step requested quantity (per step code).
Ad hoc cancellation actions update the document ad hoc step cancelled quantity (per step code).
Cancellation action items
If the cancellation flag of an action item is enabled, then the action item behaves as a cancellation action. Cancellation actions are used to cancel the open requested quantity by updating the cancelled quantity (base and alternative MU) of the request action fulfillments.
Cancellation actions also cancel the line step open quantity by updating the cancelled quantity of the line step action fulfillments.
Reserved and future stock balances are reduced as long as there are request action fulfillments.
If any of the from/to storage location fields are completed, stock is added to the “from” storage location and subtracted from the “to” storage location. In this case, the necessary stock dimensions should be mandatorily completed in order to locate the appropriate balance record.
 If none of the storage location fields is completed, then the cancellation action item does not update current stock balances. Only cancellation action items are allowed to be saved with no storage location specified. If this occurs in forward actions, the following message occurs:
“Item row was not resolved” meaning that the system cannot locate the appropriate balance row to update.
When creating cancellation actions you can use a cancellation reason, defined in Configuration > Warehouse Management > Cancellation reasons.

Cancellations may occur:
- Upon stock reservation (in the Create Route process) due to stock shortage.
- During picking execution: either because the customer wants to cancel the order or because the item in demand was not found or was damaged.
- During packing execution: due to picking errors that result in shortages or surpluses in the packing station.
Use the cancellation reason mappings with reservation or disposition reasons should you wish to mark the cancelled stock and exclude it from available.
These mappings are defined in Configuration > Warehouse Management > Mapping cancellation reason to reservation reasons:

And Configuration > Warehouse Management > Mapping cancellation reason to disposition reason respectively.
The above configuration is taken into account during Picking execution in the WMS Mobile flow.
ESRF Menu > 3. ORDERS > 1. PICKING
Example
Select a Work package to execute picking and press the F5 cancel button to cancel the picking request item:


A cancellation reason is defined (Lost) which is mapped with a reservation reason code (Shortage). If current stock balance does exist, the flow will automatically continue to the stock reservation action. This results in a cancellation action item and a stock reservation action item. If current stock does not exist (because it is reserved from future stock) then no further action is made after cancellation.
Line step
Line step request fulfillments and line step action fulfillments are summed per document order line item or line item analysis in the line step cumulative.
The line step cumulative consists of the following quantity indicators:
- Requested in base and alternative MUs: updated from the line step request fulfillments
- Executed in base and alternative MUs: updated from the line step action fulfillments
- Cancelled in base and alternative MUs: updated from the line step action fulfillments of cancellation actions
Cancelled quantity cannot exceed the requested quantity.
The line step along with the document ad hoc step cumulative are reported per document and line in the Monitoring views in the “progress information”:

Reverse action items – correction use cases
Reverse action items are used to perform actions to the opposite direction of the orders that they fulfill. For example, a reverse receipt action subtracts stock from the inbound ramp that was previously received with a forward action.
Reverse action items update the executed quantity of the line step action fulfillments in reverse step codes (refer to 13.1.Workflow steps).
There are three back-office use cases supporting reverse actions based on forward actions. One in the Receipt flow and two in the Production flow (for productions and consumptions). Reverse action on productions is also supported in the production station application.
The most common reason for undoing a forward action is to correct data entry errors. Another reason is that the original order and requested quantity is no longer valid (for example, the customer has cancelled the order while this was being executed). In that sense, request items should open after action item is corrected and should be cancelled if chosen.
To cover the above requirements, correction use cases have been developed and supported in shipment and receipt workflows – picking correction, loading corrections etc. Correction and reverse use cases will be described in the relevant workflow sections of the document.
Request and action user defined fields
There are five available string user defined fields (UDFs) in the request and in the action header. The action UDFs are used in custom scenarios.
The request UDFs can be mapped with document header or line item fields in the Configuration > Warehouse Management > Request special fields matching table.

Request UDF fields are used:
- In WMS mobile workflows as filter criteria
- In back office request generation processes as long as the mapped fields participate as grouping factors (request and document grouping factors are described in the relevant workflow sections of the document)
 You should define which column from the chosen document header or line item fields should be assigned to the string field value. The assigned context property is used by WMS Mobile application to show the relevant fields per context. If no property is defined, then this will be shown in all mobile workflows.
 A caption may also be defined as a display name that makes business sense. For example, project dimension may relate with the vessel in the shipping industry sector.
Captions replace the following ESRF config parameters (which are now obsolete):
|
|
StringField1Caption, StringField2Caption, StringField3Caption, StringField4Caption, StringField5Caption |
|---|---|
| ESRF Config parameter: Common |
Reporting
The Overview menu provides a set of reports as well as an overview dashboard regarding registered requests and actions.

Actions by item (action items)
Open the action items view by double clicking the Menu > Overview > Actions by stock item.

The report shows all the relevant action and action item information. “From” and “To” data are displayed in the same column using “from:” and “to:” captions respectively. Therefore, if you need to search a “from/to” column you should use the * delimiter before and after the search value.
The action item quantity column signs are used to report the action’s classification.
- Positive sign refers to inflow transport action
- Negative sign refers to outflow transport action
- No sign refers to stock change or stock movement action
Update quantity (BMU) is the action item’s base MU quantity (either the “from” or the “to”).
As far as fulfillments are concerned:
- The executed line step action fulfillment quantity of each action item is reported in the Document fulfilled quantity (Service MU) column
- The closed request action fulfillment quantity of each action item is reported in the Fulfillment quantity (Service MU) – Requests column
- The cancelled line step action fulfillment quantity of each action item is reported in the Cancelled quantity (Service MU) – Document column
- The cancelled request action fulfillment quantity of each action item is reported in the Cancelled quantity (Service MU) – Requests column
Document related information is shown on the Document fulfillments detail of the view. Request related information is shown on the Request fulfillments detail of the view:

The actions by stock item report is reused in several contexts. For example, the context actions reports in the Stock Item and Storage Location forms use this view filtered by item or storage location respectively.
A targeted report for cancellation action items based on the actions by item report is provided in the Menu > Overview > Cancellation actions.

Other targeted reports based on the actions by stock item view are provided in the relevant context actions – log menus. For example, in Menu > Receipts > Receipt actions - log > Receipt actions by stock item you can view the report for receipt context property actions.

Actions log
Actions log report is provided in the Menu > Overview > Actions log as well as in context menu and context item views. The actions log report splits the “from” and “to” fields of transport actions and assigns a positive sign in the “to” quantities and a negative sign in the “from” quantities. The sum of the quantities per balance dimension should agree with the current stock balance.

Actions
The Actions view shows the action header information while the action item related information is provided in the detail. No information relative to fulfillments is provided. Open the view by double-clicking on the Menu > Overview > Actions.

This report can serve as a management by exception tool concerning the “In progress” actions. This may be a valid status because the action is still in progress, but this cannot be justified for long periods. If an action is “in progress” then you should open the form and investigate whether the “to” storage location is completed. If it is not completed and the transit location is enabled (see 8.8 The transit location) then the action should be continued until completed using the WMS Mobile scanner or touch application. The mobile flow knows where it has stopped and guides the user to the appropriate input view.

If the action cannot be completed with the use of the WMS Mobile scanner or touch packing station then you should manually assign the “to: storage location and complete the action. You may need to create manually requests for subsequent steps, especially if picking or packing actions are involved.
Depending on the “to” storage location zone type you may have to run one of the provided request generation use cases that are associated with the Actions view:

Requests by item (request items)
Open the request items view by double clicking the Menu > Overview > Requests by item.

The report shows all the relevant request and request item information. “From” and “To” data are displayed in the same column using “from:” and “to:” captions respectively. Therefore, if you need to search a “from/to” column you should use the * delimiter before and after the search value.
The Quantity column signs are used to report the request’s classification.
- Positive sign refers to inflow transport request
- Negative sign refers to outflow transport request
- No sign refers to stock change or stock movement request
Requested quantity (Trading MU) is the line step fulfillment requested quantity. For requests with no line step fulfillments (ad hoc) this quantity is null.
Open quantity (Service MU) is calculated as the Request Item Quantity – Closed Quantity – Cancelled Quantity.
Document related information is shown on the Documents detail of the view.

Work packages
The Requests by item view is used as a context view in the Work Package form.
To open the Work Packages form, Select Menu > Overview > Work packages to view the list of generated work packages.

The related documents context view shows the document orders that are associated through the request related documents table with the specific work package.
Requests
The Requests view shows the request header information while the request item related information is provided in the detail. No information relative to fulfillments is provided. Open the view by double-clicking on the Menu > Overview > Requests.

Two automations for mass creation of picking and receipt actions are associated with this view.

The action items are created by copy of the request items – you can only assign “to” storage locations pm the automation parameters. These use cases are applicable to occasions where the picking or receipt request item carry all the necessary information that the action item locator needs in order to update stock balances. They should be used with great caution – this is why a password is requested. The “There are actions for the request items” indicator is there to help you decide whether you should run or not the automations.
Overview
An overview of Receipts and Shipments progress as well productivity resource and stock visibility information are provided in the Overview dashboard.

Algorithms
The following paragraphs present the logic and the configuration for the major algorithms supported by the system:
- Stock reservation (request items)
- Destination storage location proposal (request items)
- Optimum packaging during request generation
- Destination warehouse proposal (action items)
These algorithms are applied globally (for example the destination warehouse proposal) or in various contexts as explained below. There are other context-specific algorithms, such as pre-packing algorithms for pick-to-cart or pick-to-pallet use cases, as well as shipment routing algorithms, which are described in the relevant workflow sections of the document.
Stock reservation
Stock reservation algorithms are applied in request generation processes in case when the request type in use handles quantity. More specifically, the stock reservation algorithms are applied in the following use cases:
- Generate picking and replenishment (if necessary) requests for shipment routing orders (create route process).
- Generate consumption and replenishment (if necessary) requests with the Activate Management in WMS process for production orders.
- Generate stock movement and replenishment (if necessary) requests with the Activate Management in WMS process for stock movement orders.
- Off time replenishments based on shipment orders, production orders demand or item storage location replenishment levels.
The algorithm decides what to reserve from which locations to meet demand based on rules set by the business in order to optimize resource utilization and order handling cost.
The stock reservation process starts with the source data of the use case views. The source data are formed by the document order and document line (line item or line item analysis), line related information, as well as case-specific data. Business constraints are applied with the use case automation parameters (and/or company parameters) and ICP configuration.
The process then executes the allocated reservation rule views and applies the source data as filtering criteria.
The outcome of the process is to create one or more request items and assign the necessary “from” balance locator and quantity data.

Source data
The following table presents the required input data for the stock reservation process. Workflow specific functionality on stock reservation is described in the relevant sections of this document.
Table 6: Source data for stock reservation
| Source data | Description |
|---|---|
| Site | The document order header site (for stock orders it is the shipment (from) site) |
| Warehouse | The document order line warehouse |
| Item | The document order line item |
| Quantity | The document order line quantity |
| Quantity base MU | The document order line quantity base MU |
| Quantity alt MU | The document order line quantity alt MU |
| MU | The document order line MU |
| Service MU | Derived from the document order line item service MU |
| ICP | Derived from the document order line item |
| Lot characteristics management | Derived from the document order line item |
| Lot | The document order line analysis lot |
| Expiration date | Defined in the automation relevant parameter – serves as up-to lot expiration date |
| Color | The document order line analysis color |
| Size | The document order line analysis size |
| Stock dim 1 | The document order line analysis stock dim 1 |
| Stock dim 2 | The document order line analysis stock dim 2 |
| Zone types | Defined in all request generation automations relevant parameter |
| Zone codes | Defined in all request generation automations relevant parameter |
| Container quantity management (use whole container’s quantity) | Defined in all request generation automations parameter – applicable only for first step replenishment in conjunction with the container reservation rule |
Reservation rule views
The process executes the stock reservation views that are set in the WMS ICP lines using the source data as filtering criteria:

The Reservation rule should be mandatorily assigned when handling quantity is enabled in the use case request type. Otherwise, the following error message occurs:
“No reserved rule (scroller) defined (itemGID = [XXX] item control policy = [XXXX])”

The reservation rule views are also used to define the allocation ordering sequence. The system provides two default sequence rules for picking/consumption and stock movements and two for replenishments. The views are located in: ESFilters\ESWMStockAllocationRules
- Stock reservation general rule – collection (Best match): suitable for picking/consumption/stock movements
- Stock reservation general rule – Picking: suitable for picking/consumption/stock movements
- Stock reservation general rule – Replenishment (Best match)
- Stock reservation general rule – Replenishment
The Best Match reservation rules sort stock balance records according to matching quantity criteria. The view prioritizes balance records with available quantity that matches exactly the input quantity. Second priority is given to records where balance available quantity is greater than the input quantity and third priority is given to records where balance available quantity is less than the input quantity.
The Best Match rules result in fewer movements in the warehouse to serve the demand quantity achieving optimization of the handling cost.
The general reservation rules sort stock balance records according to the expiration date (ascending - FEFO). This is a common way to handle stock in expiration date sensitive businesses. The risk of expired stock is far more critical than the stock handling cost optimization.
The same principles apply both for picking (including consumption and stock movements) and replenishment reservation processes. The main difference in replenishment reservation rule views is when two-step replenishment process is activated (see 14.2 Destination storage location proposal below). The stock held in buffer zone type locations is prioritized, in order to avoid 1st step replenishment execution and minimize in this way the operating cost.
Input stock dimensions (lot, color, size, etc.) are either filtered or prioritized depending on the Request match policy (against document line) defined in the ICP line. If exact match policy is defined, then the input dimension are used as filtering criteria. If proposed match policy is defined, the input dimensions are used as priority criteria.
Example
Suppose that a shipment order is placed for ITEM001 requiring 13 pcs of LOT 141021. The stock balance is as shown:

The Request match policy in the Picking ICP line of the item is set to “exact”. The picking reservation process reserves 11 pcs for the input lot, while the remaining 2 pcs are stock-out.

Change the Request match policy to “Proposed” and re-run the process. The entire quantity is reserved for both lots.

As far as reservation reason codes are concerned, the reservation rule view by default excludes stock balances with reservation reason code marking unless the input warehouse is mapped with one or more reservation reason codes.
Finally, as far as item replacements is concerned, the system reserves stock in both the input item and the related items. The reservation rule views use the Master Item parameter to filter the replacement items.
Customization tips
Setting the reservation ordering sequence is one of the key customization points in WMS implementations. You can set as many reservation rules as required. You can also set (if appropriate) additional columns and/or filtering criteria.
You can also set custom exception rules and apply them to the reservation view data rows by using the ESGOScript mechanism. The algorithm will continue with the next view row according to the set ordering sequence.
First, you need to create the script in Configuration > Organization parameters > Scripts.

Pay attention to:
- The Entity definition: which should be the ESWMCommonISUD
- The Definition type: which should be Function
- The Script type: which should be VB.NET
Then, you need to write the script and set the conditions under which the reservation rule view row should be skipped. It is necessary to define the view row as the data row.
Dim scrollerRow As DataRow = DirectCast(args("scrollerRow"), DataRow)
Last, you need to assign the script in the WMS ICP line:

Example
Suppose there is a demand for 160 packs. The standard item container contains 60 packs The stock balance records returned from the Reservation rule view are as follows:
- Location A: Pallet SSCC10 (60 packs)
- Location B: Pallet SSCC20 (60 packs)
- Location C: Pallet SSCC30 (60 packs)
- Location D: Bulk 30 packs
- Location E: Bulk 30 packs
If the remaining quantity after each row consumption is less than the item container type standard quantity, then the algorithm should lead to locations with bulk stock. The purpose is to avoid splitting homogeneous standard containers while there is enough bulk stock to cover the demand.
The reservation rule view needs to expand with two additional columns: one concerning the item container type quantity (relation) and one that indicates whether the storage location contains pallet or bulk stock.
ItemContainerTypeQuantity = 60
isItemContainerPallet with values 0 and 1
Therefore, the skip pallet row script is formed as follows:
Container reservation rule view
When the container reservation rule view is assigned to the WMS ICP line, the stock reservation process allocates the best match container. As explained above, the best match algorithm prioritizes containers that match exactly the input quantity, ranking containers with greater quantity than the input quantity as second and containers with less quantity than the input quantity as third.

The input quantity is the quantity after stock reservation rule is applied – it is not necessarily the same with the original demand. The container stock reservation rule view is executed by the reservation process based on the stock reservation rule view’s results (i.e. item, stock dimensions and storage location)
The system provides a default container reservation rule view, found in: ESFilters\ESWMContainerStockAllocationRule.
The output of the container reservation process is to update the “from” container fields of the request item and use it as a “hint” to guide Warehouse Mobile operations. If the result is to allocate the whole quantity of the container (the input quantity matches the container quantity or several containers’ quantity) then the container’s “Use in reservation algorithm” flag is automatically enabled.
When the “Use in reservation algorithm” flag is enabled, then the system excludes the container as available for use in stock reservation. The flag is automatically disabled when the request items related to the container are executed (fulfilled) with action items. Note that the unflagging is handled by each use case (back office, mobile or touch workstations).

You can also drive the algorithm to reserve the container’s whole quantity (for both mixed or homogeneous containers) even if the actual demand is less than the container’s quantity. This functionality is enabled by checking the Container quantity management flag in the Activation in WMS management automations.
This functionality is suitable for replenishment operations, where the whole container needs to be transferred from a replenishment location to a buffer location (1st step replenishment) and then distribute the contents of the container according to the requested quantity (demand) to the picking or consumption location (2nd step replenishment).
When the container is transferred to the buffer location and until its content is distributed to the destination locations, the container is not available for use as a hint. This is the reason why by default the buffer zone type storage locations are excluded from the container reservation rule view.
The “whole quantity container reservation” functionality is not applied for picking/consumption or stock movement requests since the requested quantity should not distort the actual demand.
Destination storage location proposal
Destination storage location proposal algorithms are used in the context of putaway and replenishment processes. The purpose is to propose a destination storage location either during request generation or on demand when action items are created. The storage location proposal is based on the following criteria:
- Proximity to “from” storage locations
- Rules and steps configured in the relevant company parameters
- Destination buffer zone type or zone code filtering according to business requirements
- Best match based on height (applied only for whole container putaway processes)
- Best match based on available volume (as long as physical dimension monitoring is enabled)
- Item storage locations and (depending on the context) replenishment levels
The outcome of the algorithms is a set of candidate destination storage locations that are imposed to the following validation tests:
- Putaway rules defined in the storage location profiles
- Volume capacity & weight constraints
- Height constraints
- Storage location profile container type and MU limits
- Storage location profile container type for beam parent locations
The result is to propose one valid storage location as a destination location to request item or action item.
If no valid location is proposed, then in the context of replenishment the system deletes the request item record. Otherwise, the result would be that stock is reserved in the replenishment locations, future stock in picking locations is not created, picking is cancelled due to inadequate stock, and therefore the reserved stock cannot be executed. Violating system’s proposed location in replenishment can be done in certain conditions, which are described in 38. ESRF Replenishment.
.In the context of putaway, the user can differentiate from the proposed location or set one if no proposal is made, as long as it satisfies the storage location profile constraints. User input locations are not imposed into volume capacity or height constraints.
Algorithm rules
The system supports four destination storage location proposal algorithm rules:
Add to existing stock
The proposed location must have current or future stock for the input item. The matching criteria (which by default are all enabled) are:
Color, size, stock dim 1, stock dim 2, serial number, lot, lot expiration date, lot production date, lot limit order date, lot UDF table fields, lot UDF string fields, lot UDF numeric fields.
Next empty storage location
Empty storage location has no current or future stock for any stock item
Based on last outflow action
Outflow action type is defined in the relevant argument of the algorithm – usually picking or loading properties are defined (for consumptions)
«Last» is calculated based on the date defined in the relevant argument of the algorithm – the default value is 7 days before current
First storage location
Dummy – storage location proposal is the first valid candidate storage location that derives from the applied filters
Algorithm configuration
The putaway and replenishment algorithms and steps are defined in the following company parameters:
|
|
WMS_STORAGELOCATION_PROPOSAL_ALGORITHM |
|---|---|
| WMS company parameter |
|
|
WMS_STOR_LOC_PROPOSAL_ALG_REPLENISH |
|---|---|
| WMS company parameter |
In case two-step replenishment is enabled, the following parameter is used for setting up 2nd step replenishment proposal algorithm:
|
|
WMS_STOR_LOC_PROPOSAL_ALG_REPLENISH_STEP2 |
|---|---|
| WMS company parameter |
By clicking on the parameter, the algorithm definition form opens:

The algorithm step consists of two parts. The first part is the selector where the filtering criteria are defined:
- Same site
- Same warehouse
- Same building
- Same storage area
- Same sector
- Same aisle
- Same storage system
- Same level
- Same column
The above arguments refer to the “from” storage location attributes. For example, if site, warehouse, building is enabled the proposed destination location should belong to the same site, warehouse, building with the “from” storage location of the request or action item.
- Fallback location zone code – which is defined in the following company parameter:
|
|
WMS_FALLBACK_DEST_STOR_LOC_ZONE |
|---|---|
| WMS company parameter |
The fallback zone code was first used to declare the buffer zone code for two-step replenishment. The functionality is now supported by the Buffer zone type flag, however the fallback zone is still valid for compatibility reasons.
- Buffer zone type – when this flag is enabled, the algorithm proposes storage locations that have a zone code of buffer zone type and meet the selector’s criteria.
- Zone codes – when this flag is enabled the destination storage locations are filtered with specific input zone codes that are defined in the use case. The functionality is supported in the production replenishment through the zone codes and phase (production phase) mapping (refer to 56.4 Zone and phase mapping).
The second part of the algorithm step is the definition of the algorithm rules and their sequence. Define the sequence of the algorithm rules based on the implementation requirements. You may choose the add – to – existing stock first in case when you do not wish to scatter item’s stock among different locations. You may choose the next empty storage location as the second rule in case add-to-existing stock fails, etc.
For replenishment processes, you may choose the buffer storage location as the first step. Use the First-Storage-Location when Buffer zone type flag is enabled. The buffer locations by definition cannot meet add-to-existing, next-empty or last-outflow rules. Buffer locations are shared intermediate locations where stock is held temporarily and then distributed to the final destination locations. The algorithm by default excludes storage location of zone type buffer, which are child locations to a parent buffer location.
You can also set exclusion conditions from buffer location proposal according to the Sector of the from storage locations. Do this by selecting one or more sectors in the relevant drop down list available when First-Storage-Location and Buffer Zone Type is enabled.

You can set as many steps as required. For example, in the 1st step replenishment you could set the first step to buffer zone type locations and the second step to a picking destination location if the first step fails.
Example
The following configuration in putaway, results in prioritizing locations with existing stock for the same lot, and applies a “hand-fan” approach to next empty, prioritizing the nearest locations:
Step 1
- Same site
- Same warehouse
Sequence of rules:
1. Add to existing stock (exact match in Lot)
2. Add to existing stock (no matching required)
Step 2
- Same site
- Same warehouse
- Same building
- Same storage area
- Same sector
- Same aisle
Sequence of rules:
Next empty storage location
Step 3
- Same site
- Same warehouse
- Same building
- Same storage area
- Same sector
Sequence of rules:
Next empty storage location
Step 4
- Same site
- Same warehouse
- Same building
Sequence of rules:
Next empty storage location
Algorithm flow diagram
The destination storage location proposal algorithm dynamically selects the appropriate storage location dataset upon which constraints and algorithm selector and rules are applied based on the following filtering criteria:
- The zone type of the candidate destination locations, which is determined from the context:
- In the putaway whole containers context - the zone type is 2 – Putaway
- In the putaway container contents context – the zone type is 1 – Picking
- In shipment replenishment context - the zone type is 1 – Picking, unless Buffer zone type is enabled in the selector
- In production replenishment context – the zone type is 12 - Consumption, unless Buffer zone type is enabled in the selector
- The algorithm rule in process:
- If add-to-existing-stock is in process then the selected storage locations should have current and/or future stock for the input item
- If next-empty-storage-location is in process then the selected storage locations should have no stock at all (current and/or future)
- If add-to-last-outflow is in process then the selected storage locations should satisfy the last outflow conditions.
- If storage locations are assigned to the input item then these act as a filter to the candidate dataset. Only picking locations are taken into account.
- If zone code selector flag is enabled, then this act as a filter to the candidate storage location dataset.
- If buffer zone type flag is enabled, then this act as a filter to the candidate storage location dataset.
The candidate storage location dataset is sorted based on the value set in the following CSConfig\WMS.xml parameter:
|
|
GetStorageLocationsByPriorityOrderType |
|---|---|
| WMS.xml parameter |
If the value is set to “1” then the candidate storage locations are ordered by:
- Warehouse
- Reference warehouse
- Storage location zone priority
- General zone priority
- Location height (>0) ascending
- Location code
If the value is set to “2” then the candidate storage locations are ordered by:
- Warehouse
- Reference warehouse
- Location height (>0) - ascending
- Storage location zone priority
- General zone priority
- Location code
If the value is set to “3” then the candidate storage locations are ordered by:
- Warehouse
- Reference warehouse
- Location height (>0) - ascending
- Physical dimensions monitoring (1 = yes, 0 = no) - descending
- Volume - ascending
- Storage location zone priority
- General zone priority
- Location code
Set value to “3” if physical monitoring is enabled (refer to 11 Physical dimensions) and you wish the system to propose the storage location based on best match volume criteria.
Set value to “2” if pallet height is entered during putaway (see 11 Physical dimensions)
There are two modes of storage location proposal, which are set in the following CSConfig\WMS.xml parameter (applicable values are “1” and “2”):
|
|
GetWellKnownStorageLocationProposalMode |
|---|---|
| WMS.xml parameter |
Mode “1” is now obsolete and is used only for compatibility reasons. The system by default runs in Mode “2”, since it has significant effect in performance.
|
|
Attention |
|---|---|
| For installations that previously ran with Mode “1” and now run with Mode “2”, if Zone Code flag is enabled you need to declare the First-Storage-Location as the last fallback rule. |
The destination storage location proposal algorithm flow diagram is presented below.

Figure 25: Destination storage location proposal flow diagram
If items with assigned picking storage locations exist, then:
- If the input item has a picking storage location assigned and this storage location does not meet the algorithm rules and constraints, a fallback storage location is proposed as long as this storage location is not assigned to any item.
- If the input item does not have a picking storage location assigned then, the proposed storage location should be assigned to any item.
Distribution algorithm
Distribution algorithm is used when the storage location proposal and request item quantity should occur according to item storage location replenishment levels. If more than one picking locations are assigned to the item, the distribution algorithm distributes the input quantity to the item’s locations based on each item storage location replenishment levels.
Distribution algorithm is used in the context of putaway with distribution use case (see 27.2 Receipt with putaway distribution) and off time replenishment based on item storage location replenishment levels (see 50. Off-time replenishment),
It is required to set the appropriate distribution rule view in the Allocation rule column of the WMS ICP line:

The required set-up for distribution to take place is described in the relevant use case sections of the document.
If distribution algorithm is in use then the destination storage location proposal algorithms are not taken into account.
Optimum packaging unit
Requests that are generated in the Activate management in WMS processes occur either in service MU or in optimum packaging unit according to the algorithm described below.
The following company parameter sets the general rule:
|
|
WMS_RUN_STOCK_OPTIMIZATIONS |
|---|---|
| WMS company parameter |
In shipment, stock movement and production Activate management in WMS processes, the request item measurement unit is defined and can be modified in each automation. In receipts and returns, the company parameter rule is applied. Requests that are generated due to actions in previous steps or based on item MU current balances are not imposed to this rule. The request item measurement unit in these cases is identical to the action item measurement unit or the actual item MU current balance row.
The optimum packaging unit derives from the comparison of the input quantity with the Item MU relation. For each item MU relation tree the algorithm tries to fit the input quantity in integer multiple Item MU quantities starting from the highest-ranking to the lowest-ranking MU. If Item Container Type data exist, then the algorithm selects the item MU of the item container type as the highest-ranking.
Note that if two parallel item MU relations exist the algorithm does not always propose the optimum MU. If the input quantity fits to two or more parallel relations, the algorithm chooses randomly the first.
Example
The following Item MU relations exist:

The result for input quantity of 12 PCS is:

Note that although 12 PCS match optimum with the package of PACK12, the system chooses 2 6PACKs instead (due to random order).
The result for input quantity of 4 PCS is:

The result for input quantity of 20 PCS is:

A variation of the optimum packaging unit algorithm is the ‘Use of standard pallet” algorithm – choice that is available in shipment, stock movement and production Activate management in WMS automations.
The Use of standard pallet (in reality it applies to all container classes) is based on the Item Container Type data. The functionality is used in conjunction with the following two automation parameters:
Not only full packages: by default false
If input quantity does not fit fully in integer multiple quantities to the Item container type relation MU, then the remaining quantity is rejected.
Default optimization: by default true
If Item container type data do not exist then optimum packaging is used as fallback. You are advised not to change the default value of this parameter.
The Use of standard pallet functionality is also used in conjunction with Item container type UDF flags. This functionality applies only in Shipments and it will be described in 34 Request generation process.
Destination warehouse proposal
The system calculates the destination warehouse in action items based on the algorithm presented in the following diagram. The process is triggered when the action is saved and no to-warehouse is defined.
If no result is returned then the user should select from a list the appropriate to-warehouse. Otherwise the action cannot be saved.
The to-warehouse is required in transport actions that are classified as:
- Stock change (transformation) where from and to storage locations are the same
- Stock movements, where from and to storage locations differ
- Inflow, where from storage location is null
If disposition or reservation reason codes are defined, the process will take them into account with priority.

Figure 26: Action item destination warehouse proposal
WMS Item Control Policy
This chapter summarizes the set-up instructions for the WMS Item Control Policy that are described in the document. Reference to the relevant document’s sections is provided.
Select Configuration > Warehouse Management > Inventory items - control policy to view, create and maintain WMS ICPs.
The WMS ICP consists of a header, a detail (the ICP Line) and a detail of the detail (the Stock dimensions match policy per selected ICP line).
The header information defines the flows in which the item participates:

If an ICP is not activated in one or more flows, then the item is not shown in the context related views of the system. Similar logic applies to WMS mobile workflows, although it is not rational to show an item in the expected receipts and not be able to receive it in the relevant mobile workflow.
The ICP line consists of the following columns:
- Property: policy is defined per operation property – refer to 7 WMS operation properties.
- Order of selection: obsolete
- Overflow check in line step action fulfillments (base & alternative MU) – refer to 13.6.4 Line step action fulfillments.
- Overflow check in line step request fulfillments (base & alternative MU) - refer to 13.5.2 Line step request fulfillments.
- Overflow check in request action fulfillments (base & alternative MU) – refer to 13.6.3 Request action fulfillments.
- Fulfillment Seq. no: – refer to 13.6.4 Line step action fulfillments.
- Ad hoc item is allowed in action: refer to 13.6.5 Ad hoc action items.
- Serial number monitoring: enable serial number monitory (for loose management only) – refer to 9.3.3 Serial number monitoring.
- Monitor requests serial number: enable serial number monitoring in requests (for loose management only) – refer to 53. Serial Number management.
- Serial No Monitoring: exclude target zone location type: refer to 53. Serial Number management.
- S/N Importing management: refer to 9.3.3 Serial number monitoring.
- S/N Exporting management: refer to 9.3.3 Serial number monitoring.
- Allow serial number creation: refer to 9.3.3 Serial number monitoring.
- Average physical unit management: applicable to variable weight/volume items – refer to 9.2.4 Implementation tips.
- Physical unit measurement: applicable to variable weight/volume items – refer to 54. Variable weight and volume management.
- Replacement rule: refer to 9.5 Item replacements.
- Allow replacement through request: refer to 9.5 Item replacements.
- Allow replacement through action: refer to 9.5 Item replacements.
- Reservation rule: refer to 14.1.2 Reservation rule views.
- Container reservation rule: refer to 14.1.4 Container reservation rule view.
- Script: refer to 14.1.3 Customization tips.
- Allocation rule: 14.2.4 Distribution algorithm.
The Stock dimension match policy per selected ICP line consists of the following columns:
- Stock dimension: color, size, lot, lot attributes, stock dimension 1, stock dimension 2, warehouse
- Request match policy: refer to 13.5.2 Line step request fulfillments.
- Action match policy against request: refer to 13.6.3 Request action fulfillments.
- Action match policy against document line: refer to 13.6.4 Line step action fulfillments.
Documents and integration
The following paragraphs describe the required document type and document transition configuration in order for the integration mechanism to work properly. The integration mechanism is based on the Order – Plan – Execute – Update pattern.
The life cycle of a document order in WMS is defined by the following processes:
- Assignment to WMS
- Activation for WMS processing (request generation)
- Execution in WMS (back office, mobile, touch workflows that execute actions)
- Completion and assignment back to ERP
The presence of document orders in integration processes is not mandatory for all flows. WMS ad hoc actions update ERP with target documents as long as a change in ERP balance should occur (for example, stock dimension transformation actions, stock movements between warehouses, stock counting actions).
By the end of this chapter, you will be able to:
- Assign WMS document properties to the appropriate document types
- Ensure that the proper document transitions with the appropriate configuration are set up concerning the Update-to-ERP processes
- Configure the shipment routing and cancel shipment routing documents and the relevant transitions
- Get knowledge of the processes that handle the document process state
- Understand how transition fulfillments are generated and their effect
WMS document orders
WMS document type properties
Zero parameterization inserts the WMS related document type properties, which can be found in Configuration > Documents and Series > Attributes. The WMS relevant properties / attributes start with the WMS_ prefix.

These attributes determine whether a document type participates in integration processes as a source or target document.
The WMS company parameters regarding document type properties are shown in the figure below. Changing the default parameterization is not recommended.

|
|
DIM_WMS_EXPECTED_RECEIPTS, DIM_WMS_ORIGINAL_ORDER, DIM_WMS_PRODUCTION_ORDER, DIM_WMS_RECEIPT_DOCUMENT, DIM_WMS_EXPECTED_RETURNS, DIM_WMS_SHIPMENT_ORDER, DIM_WMS_SHIPMENT_ROUTING, DIM_WMS_STOCK_COUNT, DIM_WMS_STOCK_ORDERS |
|---|---|
| WMS Company parameters |
Recommended WMS document types
You should decide which document types should participate in the WMS workflows, by assigning the appropriate document property. The following table shows the recommended document types per WMS document property:
Table 7: WMS Document Properties and recommended Document Types
| WMS Property | Recommended Document Types |
|---|---|
| WMS_EXPECTED_RECEIPT |
PPI – Proforma IWB - Intra-warehouse transfers ΤΟ Branch |
| WMS_RETURN_ORDER |
ORS - Sales Return Order IRO - Intra-warehouse transfer Return Order |
| WMS_ORIGINAL_ORDER | SOR - Sales Order |
| WMS_SHIPMENT_ORDER |
SOR - Sales Order SPI – Proforma SRC - Stock Reservation for Customer SRI - Stock reservation for Intra-warehouse transfers IWOR - Intra-warehouse transfer Order GSO - Goods Shipping Order to Third Parties W/H ORP - Purchase return order |
| WMS_SHIPMENT_ROUTING | SHO - Shipping routing order (used only by WMS) |
| WMS_CANCEL_SHIP_ROUT | SHC - Cancel Shipping routing order (used only by WMS) |
| WMS_STOCK_ORDER |
SRI - Stock reservation for Intra-warehouse transfers IWOR - Intra-warehouse transfer Order |
| WMS_PRODUCTION_ORDER | PNT - Production Order |
| WMS_STOCK_COUNT | ISC - Stock counting entry |
| WMS_RECEIPT_DOCUMENT |
PLN - Receipt note IBW - Intra-warehouse transfers FROM Branch |
| WMS_INV_PROCESS |
SLN - Delivery note SNV - Invoice – Delivery Note IWH - Intra-warehouse transfers IWR - Intra-warehouse transfer for reserved stock |
Recommended ERP ICP configuration
The target documents generated from the WMS integration processes are based on the WMS actions. It is important to review the following ERP Item Control Policy configuration elements before integrating with WMS, to avoid any conflicts.
In particular, pay attention to the following parameters set in the ICP properties of the target WMS document types:
- Balance control method (base and alternative MU): if prohibition is applied, then in case the ERP balance is not adequate the integration process is not completed, although the WMS actions have been executed successfully.
- Auto-adjustment of the line quantity based on remainings: this is strongly recommended to be disabled when WMS is activated, since the automatic modification of the line quantities causes confusion about the quality of the integration results.
- Serial number administration and lots auto-selection: let WMS to decide which stock dimensions to update. If you mix different methods of stock dimension calculation for the same target document, the result is not guaranteed.
Update-to-ERP processes
The Update-to-ERP processes use the document transition as a vehicle to create target documents based on line step action fulfillments and ad hoc actions. It is important to note that the Update-to-ERP processes do not execute transitions – they execute the fillers assigned in the transition rules, while they take into account certain transition rule parameters depending on the use case. The case specific set-up instructions are given in the workflow sections of the document.
There are two ways to run the Update-to-ERP processes, the partial and the complete update. Partial update takes place while the WMS document order is still in progress – i.e. the warehouse is still executing actions against it. Complete update takes place when the WMS document order is completed – this is declared by the warehouse administration. Both partial and complete update can run for the same order. Complete and in-progress states of the document order are explained in the 16.4 Document process state section.
Partial and complete update processes are applied in the following flows:
- Receipts (from suppliers or intra-warehouse transfers) – both complete and partial update are supported
- Returns (from customers or intra-warehouse) – only complete update is supported
- Production - both complete and partial update are supported
- Stock movements – only partial update is supported
- Import & export stock – only partial update is supported
- Stock transformations (stock dimension changes, stock reservations) – only partial update is supported
The Update-to-ERP for shipment orders is conducted with the Invoicing of the Shipment routing orders process. The process differentiates from the others due to the intervention of the Shipment routing order. The Shipment documents and invoicing section of this chapter describes the basic principles for the shipment routing order generation and invoicing process.
Update-to-ERP processes are available in both ERP and WMS applications.
Document transitions
When implementing WMS in existing Entersoft ERP installations, it is often required to adjust the existing workflows in order to meet requirements. The project team should thoroughly investigate during the implementation cycle if additional or different workflow steps are required in order to optimize integration results.
The following transition rules are recommended in WMS integrated installations:
Table 8: WMS recommended transition rules
| Transition rule | Description |
|---|---|
| 119. PPI=>PLN | Receipt Note from Proforma |
|
418. ORS=>SRN 304. IRO=> ITN 304. IRO=> IWB 445. IRO=> IWH |
Return note from customer return orders Intra-warehouse transfer note from return order Intra-warehouse transfer from return order Intra-warehouse transfer from return order |
|
111. SOR=>SLN 112. SOR=>SNV 155. SPI=>SLN 156. SPI=>SNV 152. SRC=>SLN 431. SRI=>IWR 443. IWOR=>IWH 439. GSO=> DTW 101. ORP=>PRN |
Delivery note from Sales Order Delivery note - Invoice from Sales Order Delivery Note from Proforma Sales Invoice - Delivery note from Proforma Delivery note from Stock Reservation note Intra-warehouse transfer note from Stock Reservation note Intra-warehouse transfer note from Order Goods Shipping Note to Third Parties W/H from Order Goods return note from Order |
| 157.SHO=>SHC | Cancel shipping routing order from Order |
|
431. SRI=>IWR 301. IWOR=>ITN |
Intra-warehouse transfer for reserved stock from Order Intra-warehouse transfer note from Order |
|
445. PNT=>PNC PNT=>CON |
Production Note from Order Consumptions note from Production Order |
You should then set the source transition rule to the target document type.

Depositor mappings
In order for the Update to ERP process to work properly, you need to set the appropriate action type – document type mapping in the depositor (refer to 6.2.1 Action types – document types mapping)

|
|
Note that… |
|---|---|
| You can apply more than one source transition rules in a semicolon separated list, however the integration mechanism will only take into account the transition rule that matches with the depositor document type mapping. |
Warehouses and branches should also be mapped in the relevant Depositor mapping section (see 6.2.2 Warehouse – branches mapping).
Action type properties
You should assign the COMPLETE_UPDATE and/or PARTIAL_UPDATE properties to the action types that are used in the depositor action type – document type mapping. These properties are by default set in the relevant company parameters:
|
|
WMS_PARTIAL_RECEIPTS |
|---|---|
| WMS company parameter |
And
|
|
WMS_COMPLETE_RECEIPTS |
|---|---|
| WMS company parameter |
The parameters apply to all Update-to-ERP processes that support partial and complete update and not only for Receipts.
Shipment documents and invoicing
Create shipment routing documents
Shipment operations are executed against customer orders, intra-warehouse transfer orders, shipping to third party warehouses orders and purchase return orders (WMS_Shipment_Order property documents).
The Shipment routing order document (SHO) is generated in the “create route” process to group orders per trade account/destination branch and delivery person in order for the warehouse to execute shipments efficiently. The create route or routing process is thoroughly described in Error! Reference source not found. Error! Reference source not found..
The following recommended transitions should exist in order for the routing process to transform the Shipment Order documents to Shipment Routing Order documents:
- 151. SOR => SHO
- 151. SPI =>SHO
- 151. SRC=> SHO
- 301. SRI=>SHO
- 301. IWOR=>SHO
- 439. GSO=>SHO
- 101. ORP=>SHO
Stock documents to SHO transitions
When the routing process transforms document stock shipment orders to SHO (which is a trade document), it is required to have created a customer and associate it to the same person with the company person. One customer per company is required, regardless the number of branches.
You may also need to modify the system’s “31-TRS-LinesSourceWH” filler of the transition rule in order to map the source line item warehouse with the target line item warehouse. The system, by default, applies the series default warehouse.
Cancel shipment routing
The document type SHC is used to “cancel” shipment routing orders. SHC documents are generated by the “Cancel shipment orders” process, which can run either on demand or called through shipment cancellation use cases (picking & packing cancellation). The result of this process is to create an SHC document, which fulfills the open line quantities of the SHO and re-opens the line quantities of the initial Shipment Order. Detailed specifications on this process are provided in 43. Shipment routing orders cancellation.
The 157.SHO=>SHC transition rule is required for the cancellation process to take place.
SHO and SHC recommended configuration
The SHO & SHC document types have no update profile and they should never get one. You are advised not to change the default configuration of the SHO & SHC document types. Pay attention to the following configuration for optimum performance results:
- Ensure that “DO_NOT_CALC_DLV_DAYS” and “DO_NOT_KEEP_PREV_BAL” properties are assigned. These document properties can also be assigned (if appropriate) to shipment orders documents (SOR, SRC) to gain in performance.
- Ensure that “Automatic matching” and “Automatic forecast” flags are disabled.

- In the SHO & SHC document series you should “Allow gaps in numbering” and “Gaps in dates”.

Shipment routing orders invoicing process
There are two shipment routing orders invoicing processes available in the ERP application – one concerning the sales flows (Menu > Sales > Order Routing/Invoicing > Shipment orders invoicing) and one concerning the purchase returns (Menu > Purchases & Procurement > Receipts & Purchase Invoices > Returns shipment based on Actions). The Shipment orders invoicing is also available in the WMS application as long as the target documents handle quantities and not values (SLNs and not SNVs).
The sales invoicing of shipment routing process covers the following shipping types:
- Sales
- Transfers to other branches
- Transfers to 3rd W/H
The invoicing process applies the fillers of the document transitions between the shipment order documents (document property WMS_Shipment_Order) and the target invoices or delivery notes (document property WMS_Inv_Process). The user should select the appropriate transition rule when executing the process.

The SHO document transfers the necessary line step action fulfillment data (or ad hoc action data) to the target document. For example, the shipment order document has no analysis lines, while the SHO’s fulfillment actions have stock dimension data. The target document is updated with the analysis lines according the SHO’s action items’ data.
When shipment order documents are transformed to shipment routing documents, the source lines are fulfilled with the SHO target lines. The SHO document does not update quantities (ERP balances); the pending quantities are updated when issuing the invoicing target document.
For example, if SRC is used as shipment order document, the effect in ERP balance is to increase the reserved stock.
The SHO document fulfills the line quantities of the SRC document, however, there is no effect to the balance.
The reserved stock is reduced when SLN or SNV target documents are produced from the invoicing process.

A detailed description of the invoicing process is provided in Error! Reference source not found.. Error! Reference source not found..
Document process state
WMS handles the document process state for two reasons:
- To ensure that no critical line or header information is changed while the document order is assigned or is under WMS processing
- To provide visibility in ERP order views as per the WMS processing state
The system supports the following document process states:
0 – initial: the users can create, delete and modify document header and line item data
1 – locked for processing: only users that have the appropriate document privilege profile can perform certain allowed changes
2 – under process: only users that have the appropriate document privilege profile can perform certain allowed changes
3 – processed: users can create, delete and modify document header and line item data
4 – process failed: users can create, delete and modify document header and line item data
The users that are allowed to handle document process state should have the appropriate user privilege profile in documents. WMS Zero parameterization inserts the WMS_Administrators record in the document privilege profile. Select Configuration > Documents and Series > User privilege profile in documents to open the form. The WMS_Administrators document access (or privilege) code concerns WMS BO Admin and WMS BO User user groups. You are advised to enable access to administrators by clicking the Administrators flag.
Make sure to enable access for the appropriate WMS document orders, shipment routing and shipment routing cancellation documents.

Users that have the appropriate access rights to documents can handle the process state of the documents. Otherwise, the following message will occur during process state handling processes:
“The document XXX-X-#### cannot be modified due to its processing status”

The users with the appropriate access rights are also allowed to make changes to certain logistics related document header information:
- Transporter
- Route
- Mean of conveyance
- Delivery date
- Delivery terms
Order assignment to WMS
When an order is created in ERP the process state is 0 – initial. When the orders are assigned to WMS the process state changes from 0 to 1 – locked for processing (assigned to WMS).
The order assignment processes are available in the following orders ERP views per workflow:
Menu > Sales > Sales orders > Orders/Reservations
Menu > Inventory > Stock entries > Item movements
Menu > Purchases & Procurement > Purchase orders > Purchase order list
Menu > Production > Production orders > Production Orders – List

The color index in the first column of the views represents the process state of the document.
Grey for 0- initial documents
Yellow for 1- assigned to WMS
Blue for 2 – in WMS administration
Green for 3 – administration to ERP
Red for 4 – process failed
Order assignment changes process states from 0 to 1. The assignment processes check whether the document’s site or the warehouse belongs to a site that is a distribution center. They run only for WMS property documents, otherwise an error message occurs.
Activate management in WMS
The Assigned to WMS document orders are shown in the following WMS views in order for the administrator to plan and run the activation in WMS process:
Menu > Receipts > Expected receipts: the view returns document orders and their lines (in the detail) that have the WMS_Expected_Receipts property. The view concerns trade and stock documents.
Menu > Returns > Expected orders: the view returns document orders and their lines (in the detail) that have the WMS_Return_Order property. The view concerns trade and stock documents.
Menu > Production > Expected production transports: the view returns document orders and their lines (in the detail) that have the WMS_Production_Order property. The view concerns adjustment documents.
Menu > Stock > Expected item movements: the view returns document orders and their lines (in the detail) that have the WMS_Stock_Order property. The view concerns stock documents.
Menu > Shipments > Shipments routing: the view returns document orders and their lines (in the detail) that have the WMS_Shipment_Order property. The view concerns trade and stock documents.
The Activate in WMS management process will be thoroughly described in the workflow sections of this document. The result of these processes is:
- Change of the document process state from 1 to 2 – in WMS administration
- Creation of requests and work packages and association with the document order
As far as Shipments is concerned, the Activate in WMS process can run as embedded in the Create Route process, or as a fallback process in the Shipment monitoring view for SHOs with process state 1- assigned. The change of the document process states concerns the SHO documents and not the shipment order documents, which remain in process state 1 until the order completion.
Documents with process state 2 – in WMS administration are available to WMS Mobile workflows for execution.
Complete orders
WMS document orders completion is the process that changes the document process state from 2 to 3 – administration to ERP. This the way to declare that the warehouse has finished executing the tasks related with the specific document.
The order completion processes run either on-demand or automatically. In receipts, return and stock movement flows, the system cannot assume safely when an order is completed. You should run the “complete management in WMS (assign to ERP)” processes for a selected number of document orders when you are sure that the warehouse has completed all the necessary actions.

The completion commands are located in the following views:
Menu > Receipts > Receipts monitoring
Menu > Returns > Returns monitoring
Menu > Production > Production transports monitoring
Menu > Stock > Item movement monitoring
Menu > Shipments > Shipments monitoring
When an order is completed, it is common to produce the final target document to update ERP, regardless if partial update has already been executed. To do so, you need to enable the following business rules according to the implementation requirements:
- Adjustments document: (WMS) - Production Note import when receipt completed by Production
- Trade document: (WMS) - RECEIPTS - Supplier Delivery Note import when receipt completed by loading actions OR
- Trade document: (WMS) - RECEIPTS - Receipt Note with transition from PPI and partial receipt CANCELLATION (TransitionGID variable must be updated)
- (WMS) - RETURNS - Quantity Receipt Note import when completed by return actions
- Transit (stock) document: (WMS) - RETURNS - Quantity Receipt Note import when completed by return actions
- Transit (stock) document: (WMS) - RECEIPTS - Insert Transfer note when the receipt is completed
Detailed information about the complete and Update-to-ERP processes are given in the relevant workflow sections of the document.
As far as shipments is concerned, completion can be automatically calculated since the loading step is always the final stage of the shipment order processing. When loading is completed without any pending quantities (against the open line item quantity or the requested quantities), the completion algorithm completes the SHO automatically without user intervention. Completion algorithm runs also when the SHO is cancelled to check whether there are open line quantities pending for loading. In case when ad hoc actions are in place and there is no open line quantity or requested quantity to calculate the pending, you should run the on-demand completion process in the Shipments monitoring view:

The invoicing process does not depend on the SHO’s process state – invoices can be issued at any step without necessarily to have been completed (partial invoicing). The invoicing step of the SHO can be declared in various ways that will be explained in the Outbound operation section paragraphs.
Transition fulfillments
Transition fulfillments are generated by the Update-to-ERP processes and associate the source line or source document (if exists) with the action item and the target line (item or analysis). Transition fulfillments are necessary because:
- The Update-to-ERP processes should calculate the pending action item quantity to be transitioned
- Data on action items, source and target document lines should not be modified after the Update-to-ERP processes have taken place.
The following message occurs in case this rule is violated: “The modification is not allowed since warehouse transition fulfillments exist”.

Shipment
Entersoft WMS® uses the Shipment entity to cover shipment routing requirements. Shipment is defined by the following logistics information:
Site – shipment site
Shipment date – the actual shipment date
Delivery date – the due delivery date of the shipment
Shipping method – the transport method used for the shipment, e.g. air, truck, on site, courier, etc.
Delivery terms – part of the agreement used in the transportation of goods between a buyer and a seller. CIF (Cost, Insurance and Freight), FOB (Free on board) are two of the most commonly used terms as established by the International Chamber of Commerce (known as Incoterms).
Route – relates with the scheduling of shipments. It strongly depends on the business specific requirements. For example, you can set different routes based on the shipment truck and associate it with the conveyance code (if it is standard):

Alternatively, you can set routes based on a predefined shipment schedule with the 3rd party transportation company (transporter):

Mean of conveyance: usually the truck/shipment carrier License Plate Number
Driver: the driver of the truck/shipment carrier
Transporter: the company (usually a 2nd or 3rd party logistics company) with a transportation services agreement


The above logistics related data are created and maintained in Menu > Shipments > Transfer – details.

Note that the shipment data can be defined in advance in the Shipment Order documents as delivery data information. If this is the case, then you should decide according to implementation requirements whether these data should be taken into account or not when creating and managing shipments in WMS.
Shipment management consists of two major processes:
- Shipments planning - mostly known as pre-routing process: plan what to ship in which shipment based on volume and weight constraints, on delivery due dates, on route scheduling criteria, etc. Pre-routing algorithms are used to propose the optimized shipment allocation, while user intervention and adjustments are necessary. The pre-routing process is not yet supported by Entersoft WMS® and therefore is beyond the scope of this document.
- Shipments handling: this process involves the ability to create, assign or validate the appropriate shipment during WMS operations. Invoicing process should also take shipments into account in order for the transport documents to be issued as appropriate.
The following sections of the document describe the functionality provided by Entersoft WMS® regarding shipments handling except invoicing.
Create & resolve shipments
Zero parameterization inserts a Segment sequence code for the Shipment entity that consists of a counter of 10 digits. You can also enable barcode codification rules upon shipment creation with the following company parameters:
|
|
WMS_SHP_BARCODE_COUNTERDIGITS |
|---|---|
| WMS company parameter |
And
|
|
WMS_SHP_BARCODE_PREFIX |
|---|---|
| WMS company parameter |
Shipments are automatically generated in the create route process (refer to 33.2 Create route – SHO generation). If no existing shipment resolving is required, then one shipment is created per shipment routing order.
If shipment resolving is desired during the create route process, then enable the following company parameter:
|
|
WMS_ShipmentAvailability_ResolveOnActivation |
|---|---|
| WMS company parameter |
The system then resolves if any existing shipment matches with the shipment routing order document delivery data and if not, it creates a new one. The resolving criteria are set in the following company parameter:
|
|
WMS_ShipmentResolving_MergeConfiguration |
|---|---|
| WMS company parameter |
The default selection is “All”:

The default configuration sets that the shipment order delivery data are fully respected in WMS as part of the Logistics Agreement with the customer. Note that Delivery date is a date time field; the resolving process takes into account only the date part.
You may involve other Document Trade header data as shipment resolving criteria in the following company parameter:
|
|
WMS_ShipmentResolving_MergeFields |
|---|---|
| WMS company parameter |
Make sure that the database ESFIDocumentTrade table field names are declared in a comma separated list (for example, ADComments, fADDimension1Code).
|
|
Note that… |
|---|---|
| The shipment resolving criteria are also applied for merging. Merging is the process of assigning an SHO related with an existing shipment to a new or other existing shipment, as long as merging criteria are met as set in the relevant company parameter. Merging use cases are supported only at customization level. |
The resolving of shipments in the create route process is executed with the “Insert shipment” business rule in the Document Trade entity.
|
|
Attention |
|---|---|
| Be cautious if customization is required – you should not by any means de-activate the insert shipment business rule, since shipment reporting and use cases, system validation checks and invoicing process strongly depend on the existence of shipment, even if shipment management is not required in the implementation. |
The relation between shipments and shipment routing orders is many-to-many. A shipment might relate with many different shipment routing orders, while a shipment routing order might concern more than one shipments, for example it does not fit to one truck, therefore the SHO needs to split into two trucks.
Shipment monitoring views
SHO shipment data are presented in the Shipment monitoring view - Menu > Shipments > Shipments monitoring:

If more than one shipments are related to a SHO then the view shows the relevant data in the Shipment related document detail.
You can also view the results per Shipment in the Menu > Shipments > Shipments monitoring > Shipments - Shipment details:

Shipment replacement
You can choose to replace an assigned shipment to a SHO with a new one.
The Shipment Related Document data are shown in the relevant context section Shipment-details of the SHO form – choose the replace shipment button on the right:

The process disconnects the existing shipment and assigns the new one indicating the source of creation with the “user” icon:

The shipment replacement process should meet the following conditions:
- The shipment to be replaced is also assigned to other SHOs. There is no meaning in replacing a shipment for a document if this is the only document with which it is related. Change the shipment’s information instead.
- There are no actions on containers that are associated with the current SHO and other SHOs of the same shipment. This is not the proper use case to change / replace shipments for one of the SHOs that have already been associated with containers, since the containers cannot split in loading; they should be loaded as one. If replacement is required, you should replace the shipment for all the involved SHOs per container at customization level.
- The shipment to be replaced has been associated with loading actions for the SHO. A shipment that has already been loaded (partially) cannot be disconnected. What you need is the capability to assign the rest of the loading actions to a new shipment. This is supported by the system’s loading use cases (back office & mobile).
- The shipment to be replaced has been associated with the SHO actions that have already been invoiced. This is a too-late decision, any modifications to the SHO’s shipment should have been made prior to invoicing. Should you wish to relate the non-invoiced actions with another shipment, you need to do so in the provided loading use cases.
Shipment info processing
In the relevant context section Shipment-details of the SHO form – choose the Define delivery date and time – Shipment date button on the right:

The delivery date and time refers to the Shipment related document’s delivery date. It does not update the SHO’s delivery due date. The Shipment date updates the Shipment’s relevant field.
Shipment data can also be updated and maintained in Menu > Shipments > Shipments monitoring view with the Update shipments button, as shown in the below screen. The Invoicing stage parameter refers to the SHO.

Shipment availability
Shipment availability is defined by the following flags in the Shipment form:

The Resolve on Activation makes the shipment available for resolving in the create route process, functionality that has already been described in 17.1 Create & resolve shipments.
The RF/Touch applications resolving and back-office resolving flags are by default enabled based on the following company parameters:
|
|
WMS_ShipmentAvailabilityRF_Resolving |
|---|---|
| WMS company parameter |
And
|
|
WMS_ShipmentAvailabilityΒΟ_Resolving |
|---|---|
| WMS company parameter |
If an action is saved and no shipment is assigned by the user in Back office or RF/Kiosk use cases, then the system automatically resolves the reference shipment and assigns it to the action item based on the line step action fulfillments. There should be only one resolved shipment per action item, otherwise there is no automatic assignment.
This applies only to actions. For requests, the use cases that generate the requests need to take advantage the shipment resolving functionality. This is not supported yet, if needed, you can do this at customization level.
The For selection in RF/Touch application and For selection in Back Office flags are by default disabled according to the following company parameters:
|
|
WMS_ShipmentAvailabilityBO_Selection |
|---|---|
| WMS company parameter |
And
|
|
WMS_ShipmentAvailabilityRF_Selection |
|---|---|
| WMS company parameter |
Enable these flags in order for the Shipments to be available for select in back office or RF/kiosk use cases that handle shipments (see 17.6 Shipment handling use cases).
Shipment handling use cases
ES RF use cases
Shipments are available for select in the following RF use cases:
ESRF Menu > 4. SHIPMENTS > 1. STAGING
You can select an existing Shipment as a filter for the containers ready for staging.
The use case also uses the Add-to-Existing-Shipment algorithm to propose a valid destination shipment location (refer to 40. Staging).
ESRF Menu > 4. SHIPMENTS > 2. PALLETIZATION
If you select an existing Shipment the use case checks whether the destination container contains stock from other shipments. This check is now performed based on Container Control Policy integrity rules (refer to 10.2 Container control policy).
ESRF Menu > 4. SHIPMENTS > 4. CONTAINER LOADING
You can select or create a new shipment when loading containers. Route code can also be filtered instead of shipments.
ESRF Menu > 3. ORDERS > 3. REAL TIME PICKING
You can assign or update (if exists) the Mean of Conveyance code in the beginning or at the end of the flow on the selected SHO’s shipment (refer to 37.1.2 Real time picking). Enable the following ESRF Config parameter:
|
|
GRPick_CONVEYANCE_MGMT |
|---|---|
| Real time picking |
Full description of the above use cases is provided in the relevant sections of the document.
Back office use cases
In Back office, you can assign or update the mean of conveyance and/or driver to the selected SHO’s shipment in the following use cases:
Menu > Shipments > Shipments monitoring > Towards loading (by item)
Menu > Shipments > Shipments monitoring > Items towards loading (basedon requests)
Menu > Shipments > Shipments monitoring > Towards loading (by SO)
Menu > Shipments > Shipments monitoring > Towards loading (by SO, based on requests)
Menu > Shipments > Shipments monitoring > Containers towards loading (based on requests)
The following loading automation parameters should be defined to update the SHO’s shipment info (or create a new one if the existing shipment has different values in these fields).

ES Touch use cases
In packing station and C2C Touch applications, there is no shipment selection or shipment creation functionality supported. However, when containers are created, the system checks whether the contents of the container refer to the same Shipment data. You cannot mix contents in the same container that refer to different shipping method, delivery terms, route, transporter ,mean of conveyance or driver.
If the rule is violated, then the following message occurs – “Items with different shipment details have been added to container XXX”:

Optimal route per shipment
The system calculates the optimal route for the delivery addresses that are included in the same Shipment.
|
|
Configuration |
- Assign the company’s google account key in the following company parameter:
|
|
Googlekey |
|---|---|
| MAPS company parameter |
Assign the appropriate Logistics service URL key (e.g. http://pythia.westeurope.cloudapp.azure.com:5650/calculate_routing) to the CSConfg\WMS.xml parameter:
|
|
CalculateLogisticRoutingServiceURL |
|---|---|
| WMS.xml |
Assign Longtitude/Latitude data for the Company sites:

Select Menu > Shipments > Shipments monitoring > Shipping addresses to update Google map data to the delivery addresses involved in Shipments:


You can then run the Calculate optimum route command in the Shipment’s form:

Select Menu > Shipments > Shipments monitoring > Shipments - Shipment details to view the results. If the process has run for a Shipment, the green indicator is enabled in the Optimal route column. The process applies a Route seq. number per shipment related document based on the delivery address. For example, if two SHOs of the same delivery address are included in the shipment, the seq. number will be the same.

Users & resources
Select Configuration > General > User administration to view, create and maintain users.

WMS users should be assigned to one or more default groups that are inserted with the zero parameterization:
- WMS BO Admin
- WMS BO User
- WMS RF User
WMS Back office users
The WMS BO Admin and/or WMS BO User groups are necessary for any user that executes Back Office operations concerning documents’ handling (activation and integration processes). These groups are by default assigned to “WMS_Administrators” document access (privilege) profile.
Select Configuration > Documents and Series > User privilege profile in documents to define the appropriate document types to which each user group should have access.

In the user’s form, make sure that the following are set:
- Allow access from set to “desktop”. Choose “Web api” if you wish to have access to WMS Mobile as well. In this case you should follow the recommended set-up for RF users as described below.
- Define companies and branches that the user has access to.
- Assign at least one of the WMS BO Admin and WMS BO User groups.
- It is recommended to assign a person to the BO user and associate it with a resource, so that the back office resources are logged when actions are executed through the back office application. Refer to WMS Mobile (RF) Users section for further instructions on how to set up and assign resources.
ESRF Mobile users
Concerning the WMS Mobile (RF) users:
Set the “Allow access from” to Web api: if only Web api access is enabled, then the user cannot login to the Backoffice or Touch applications.

Associate the user with a person (of type Individual)
Create a resource or associate an existing resource to the user’s person
Select Menu > Resources > Resources to view/create/update resources. The view shows resources that belong to WMS resource roles:

The resource type should be “person”. Make sure that the WMS resource roles (at least one) are assigned. WMS resource roles are inserted with the WMS Zero parameterization.

Define the company and the branch (or branches) to which the user has access.

Assign at least the WMS RF user group:


ES Kiosk Touch stations users
You need to create the ES Kiosk Touch Stations User IDs and define their behavior.
The following aspects need to be carefully addressed:
Reporting level: If it is desired to restrict a user from having simultaneous access for more than one Touch Stations, then you are advised to activate the option: “Do not allow already logged-in users to login again”.


In order to simplify the login for the users, it is strongly recommended to:
- Ensure that each Touch Station user is associated to only one Company / Site.
- Activate identification through a user identification key (Activate save key)
The primary login screen requires the User Identification data only, assuming that all other info can be inferred unambiguously. The alternative user identification methods are:
- By simply providing the identification key
- By providing the identification key and the user password.
Define the preferred method at the ES00KioskParams file and the ES_LOGIN_MODE section.
As aforementioned, these methods assume that all other login info can be inferred unambiguously. This means that:
1. Only one Database is associated to the WMS Application (ie. the CSConfig / ESDBDef.xml contains one ESDB record only)
Alternatively, if more than one DBs are defined in the ESDBDef.xml file, define the Touch Station DB at the KIOSK_DATABASE_ID section of the ES00KioskParams file.
2. The login user is associated to only one Company Site.
3. When login in using Identification Keys particularly, the corresponding activation must have taken place in advance.
Always remember to copy to the CSKiosk/PackingStation folder the ES00KioskParams.xml if any adaptation has been made
In order to safeguard simplicity and speed, it is recommended that you select identification through simple numeric identification keys.
Having made the configuration described above, a Touch Station user is not expected to use the detailed login screen (that can be accessed through the button.

The ESKiosk Touch station user should also associate with a person that is associated with a resource, in order for the resource to be logged in the touch station actions.
System administrators
System administrator users cannot by default execute back office operations regarding document handling and do not by default have access to WMS Mobile application.
You need to enable the Administrators flag in the document access profile should you wish to have access to document handling operations.

To give access to WMS Mobile you need to follow the set-up recommended in 18.2 ESRF Mobile users.
There are back office operations and commands that are available only to administrators.
Only administrators can create manually documents and actions in the “New” menu option, available in each process menu block.

 All system administration – db commands run only by administrators. A WMS related command is the Delete WMS Zero balances. Select Settings > System administration - DB > Delete zero WMS balances to run the process. This process deletes Item and Item MU current balances with zero quantities and it is recommended to run when no warehouse operations are executed. It applies to installations with a large number of transactions, where the existence of zero balances causes delays in the current balance views.
As a system administrator you can select and delete online RF connections in the Settings > Connection to the application server > RF - Connected users.
You can also send messages to selected connections - applies for all back office users and not only for administrators.

Update Company persons/associates to Users/Resources
You need to relate users and resources with company persons/associates so that resources can be assigned through the WMS activation processes. Run the corresponding command in Menu > Resources > Update Company persons/associates

The result is to create an association with the company’s person, found in the person’s contact list:

User rights per action and request type
Apply the appropriate user privileges in Settings > Users > Privilege definition...Full instructions on how to set-up user privileges are described in EBS Technology EN Guide.

You can apply Insert, Modify, Delete and Show rights to WMS users per action/request type.
The following company parameter sets the system’s behavior when no user groups are assigned in action/request types – the default value is “all”:
|
|
WMS_NOT_DECLARED_USER_RIGHTS_BEHV |
|---|---|
| WMS company parameter |
The following company parameter sets the system’s behavior when a user belongs to groups with contradicted privileges. The default value is false – meaning that if delete is permitted in one group and prohibited to the other, then “prohibited” prevails.
|
|
WMS_MULTI_DECLARED_USER_RIGHTS_BEHV |
|---|---|
| WMS company parameter |

|
|
Attention |
|---|---|
| Be very cautious when applying user privileges to Request Types. Requests are generated in various ways; one is upon completion of an action (for example packing and/or loading requests after picking). If RF users do not have the appropriate privileges to create/update requests of this type, then error messages occur and the process is interrupted. |
Inbound operations
Introduction
A goods receipt in Entersoft WMS® is the physical inbound movement of goods or materials into the warehouse against an Expected receipt order - ad hoc against document header or fulfilled against document lines. Expected receipt orders should be the confirmed dispatched quantities from the supplier (or other company’s branches). Proforma invoices, packing lists, supplier/branch delivery notes are the appropriate documents to serve as Expected Receipt Orders. Using purchase orders or intra-warehouse orders as expected receipt documents is not recommended, since the physical receipt should be checked against the actual goods transport document.
By the end of this section, you will be able to:
- Activate expected receipt orders and create receipt requests
- Execute physical receipt with WMS Mobile workflows
- Check differences between actual and requested receipts
- Execute goods inspection upon receipt
- Correct receipt actions
- Complete receipts
- Update ERP with physical receipts (partial and complete) and issue the final Receipt Note.
- Manage discrepancies against the Receipt Delivery Note
- Execute operations after receipt in the context of expected receipt order – involving sorting and/or putaway operations.
Activate expected receipt orders
Make sure that you have:
- Configured Expected receipt documents according to the guidelines given in 16.1 WMS document orders.
- Enabled Expected receipt document access rights to the appropriate users according to the instructions given in 16.4 Document process state.
- Assigned the Expected receipt documents to WMS; refer to 16.4.1 Order assignment to WMS.
Select Menu > Receipts > Expected receipts to view and schedule activation on assigned to WMS Expected receipt orders.
Useful document header information is provided to help decision making on which order to activate, such as the expected delivery date, the shipment method (air or truck), etc. You can add as much information as required both at header and detail at customization level.
At the detail of the view, you can see the document order lines and quantities, analyzed per stock dimension (if provided in the document order lines).

Run the Activate management in WMS process for the selected orders to:
- Create one or more receipt work packages depending on the selected grouping fields
- Create one or more receipt requests (depending on the selected grouping fields) with request items and assign it to the work package
- Change the process state of the activated Expected receipt documents to 2 – Administration in WMS and make them available to RF Users.
 Assign in: select from a list the resource you wish to assign to the generated receipt request and the Supervisor of the Expected receipt document.
Group by supplier / Date: the process by default generates one receipt Work Package and one Receipt Request for documents that refer to the Same Supplier, the Same Receipt (Delivery) Date.
Group by Transporter/Shipping Method: use these additional grouping fields for the generated work packages and requests.
Receipt date: use this parameter to update the actual delivery (receipt date) of the document, unless Group by Receipt Date is chosen. Default date is today (i.e. the day of activation).
Target storage location: concerns the generated request items; you can set the target storage location, used as a filter in WMS workflows. Receipt ramps, putaway, production and return zone type locations are filtered by default.
Use SSCC document in request: if the SSCC of the expected arrival is already defined and assigned in a UDF string field of the source document line, then the generated requests will assign the container as a hint for the physical receipt.
The UDF line item string field that holds the SSCC information is defined in the following company parameter:

|
|
WMS_ContainerSSCCAsFilter_ColName |
|---|---|
| WMS company parameter |
Receipts monitoring
View the results of the activation process in the Menu > Receipts > Receipts monitoring.

 You can take actions such as:
Recall a receipt document as long as there are no actions related to it. Open the Receipt Document form and choose the Receipt Recall action.
The process deletes the generated requests and turns the document’s process state to 0 – initial so as to modify the necessary data and re-assign it to WMS.
Print the receipt list and deliver it to the warehouse employees. The RF users make use of the printouts to scan the Receipt list (work package) barcode or other receipt related information that cannot be physically scanned.
Assign or change the assigned resources for selected receipts.
Physical receipt
ESRF Receipt
Select ESRF Menu > 1. IMPORTS > 1. RECEIPT:
 Insert the criteria if the relevant configuration is set in the Request special fields matching table (13.9 Request and action user defined fields). Fill in as appropriate – it is not a mandatory field; it is used as a filter criterion for receipt requests.
Enable the following ESRF Config parameter if you wish to show and use the Document’s Concerning Doc Code as filtering criteria.

|
|
ConcerningDocFilterEnabled |
|---|---|
| Common |
Scan either a Receipt work package barcode or a Receipt document barcode or choose receipt work package from the list (F3). This is a mandatory field. The “Receipt work packages” public query returns the receipt requests for documents in process state 2 – in WMS administration. Requests are filtered by the assigned resource. If both assigned and not assigned requests exist, requests with no assignment will be available to all RF users at second priority.
The date range for the reference documents is defined in the following ESRF Config parameter:

|
|
RefDocDateItervalDateRange |
|---|---|
| Common |
The date range for the requests is defined in the following ESRF Config parameter:
|
|
RefRequestDateIntervalDateRange |
|---|---|
| Common |
Both dates are set by default to minus/plus 30 days. Adjust as appropriate, but be cautious for any performance issues.
Insert the receipt location. Press the F3 Search key to choose one from the available locations of zone type 4 – Receipt. If not assigned in the beginning, the Location should be assigned at the end of the flow. If the request item has a predefined destination location, then this will be automatically applied to the Location field.
 Choose the appropriate Receipt flow to continue.

Container
Mixed container
Bulk
Multiple containers
See below sections for the involved RF Config parameters and the description of each flow.
Option 4. CHECK PACKAGE is described in 51.1 Planned cross-docking.
Container
Use this option to receive homogeneous containers.
- Scan the container label barcodes in the relevant barcode section fields or press enter to the first barcode section to create a new SSCC.
- Scan the item barcode. The barcode resolving process identifies the item. The system then matches the resolved item with the selected request items. If more than one request items are matched, you should choose from the list. Alternatively, press the F3: Search key to select a specific request item. If no item is resolved, then the flow asks whether you wish to create a new barcode and assign it to an item based on the following ESRF Config parameter:
|
|
RCPT_NEW_BARCODE |
|---|---|
| Receipt |
Select packaging unit (if more than one exists)
Scan or insert the mandatory monitored stock dimensions (if any).
Input quantity to the selected packaging unit.
If the input quantity exceeds the requested quantity, choose if you wish to continue or not.
Repeat steps 1-5 until the requested quantity is fully received. Choose whether you wish to continue or not in the same WP.
Note that the Receipt WP is available for select until the involved Expected receipt documents are completed.

If the received SSCC is also received in the context of another Work package, a relative message occurs: “SS has been received in other workpackage”. Disable this check by enabling the following ESRF Config parameter:
|
|
RCPT_ALLOW_SECOND_WP_PER_SSCC |
|---|---|
| Receipt |
Variation 1 – Barcode sections
The number of barcode sections that should be scanned is based on the relevant company parameter or supplier information as described in 10.3 Serial Shipping Container Code (SSCC).
If the SSCCs to be scanned are according to the GS1 standard, then the following ESRF Config parameter should not change (by default enabled). Full instructions are provided in 10.3.2 SSCC resolving
|
|
DBG_SSCC_VALIDATION |
|---|---|
| DEBUG CONFIGURATION |
If the barcode scanned in one of the barcode sections resolves item and/or stock dimension information and/or quantity and weight, then these are automatically applied to the receipt action item based on the system’s embedded GS1 standard functionality (see 9.4.3 GS1 standard embedded functionality). Steps 2-5 are omitted depending on the resolved information.
Variation 2 – Item container type
If Item container type data exist for all the involved WP request items, and if only one container type is resolved, the flow will automatically assign the resolved container type without asking when creating a new SSCC (Step 1). The system by default proposes the quantity and the packaging unit according to the item container type data (Step 5).
Variation 3 – Container hint in request items
 The system matches the scanned SSCC with the request items container hint. Steps 2-4 are omitted. The input quantity proposed is based on the request item’s quantity. You can modify the quantity if required. Container receipt is completed when no open request quantity remains.
Variation 4 – Stock dimensions
- If stock dimension data are resolved through the Item barcode scanning, then these are automatically applied to the receipt action item. Otherwise, you should fill in or scan all monitored stock dimensions (and lot attributes) in the relevant fields.
Refer to 9.4.4 Lot, S/N and weight barcodes for information about barcode scanning of Lot and S/N.
- The involved ESRF config parameters regarding stock dimensions are:
|
|
AUTOCOMPLETE_FROM_REQUEST_LOT, AUTOCOMPLETE_FROM_REQUEST_COLOR, AUTOCOMPLETE_FROM_REQUEST_SIZE, AUTOCOMPLETE_FROM_REQUEST_STOCKDIMS |
|---|---|
| Receipt |
 These parameters define whether the receipt action item autocompletes the stock dimensions based on the request item.
- To set a new barcode for Lot dimension, press the F5: New barcode function key. The barcode is created based on the NewLotBarcode.vb in ESRF\WMS\Scripts application folder.
- Fill in the Item types in comma separated list for which you wish the system to set the Lot Production Date (if monitored) to Today.
|
|
LOT_AUTO_PRODUCTIONDATE_FOR_ITEMTYPES |
|---|---|
| Receipt |
In the input stock dimensions view, press the F5: New barcode function key should you wish to create a new barcode for Lot based on the NewLotBarcode.vb in ESRF\WMS\Scripts application folder.
- For all workflow views that show lot information, the following ESRF parameter shows the lot code only if different than the lot barcode. If you wish to differentiate, then disable it.
|
|
SHOW_LOT_CODE |
|---|---|
| Common |
Variation 5 – Input quantity
- The following ESRF Config parameter (by default true) proposes the input quantity according to the requested quantity; applies only for homogeneous containers.
|
|
RCPT_CONFIRM_SINGLEPALLET_QTY |
|---|---|
| Receipt |
- If input quantity is resolved through the barcode scanning, you need to enable the following ESRF Config parameter should you need to confirm the resolved quantity. Otherwise, the resolved quantity is assigned with no user confirmation:
|
|
RCPT_CONFIRM_BARCODE_QTY |
|---|---|
| Receipt |
 Should you wish to change the standard relation of the inner packaging unit to the outer packaging unit (for example instead of Packs of 6, you receive Packs of 8), press the F1 Change content key.

Mixed container
Use this option to receive mixed containers (same item different dimensions or different items).
- Scan the container SSCC or press enter to create a new one.
- Choose from the list the container type
- Scan the Item barcode. Same as Container flow.
- Choose the packaging unit (if more than one item packaging units exist).
- Scan or fill in the appropriate stock dimensions.
- Input quantity to the selected packaging unit.
- Repeat steps 3-6 for the rest of the Items or stock dimensions for each container. Or press ESC to the Item barcode view to receive in another container, until the requested quantity is fully received. Choose whether you wish to continue or not in the same WP.

Variation 1 – Container hint in request items
The system matches the scanned SSCC with the request items container hint. Steps 2-7 are omitted and the process ends when all WP’s containers are scanned.

Variation 2 – Stock dimensions
As described in Container receipt.
Variation 3 – Input quantity
- In the Input Quantity view, press the F1 key if you wish to change the standard relation of the inner packaging unit to the outer packaging unit.
- If input quantity is resolved through the barcode scanning, you need to enable the following ESRF Config parameter:
|
|
RCPT_CONFIRM_BARCODE_QTY |
|---|---|
| Receipt |
Variation 4 – Receipt containers with assortment
In case the received containers are associated with assortments through custom ERP use cases (refer to 10.5.3 Container instance attributes) the system can propose a destination storage location (if not defined in the beginning of the flow) that belong to specific zone codes based on the following ESRF Config parameter:
|
|
RCPT_SORTIMENT_ZONECODE |
|---|---|
| Receipt |
Bulk
Use this option to receive stock in packaging units.
- Scan the item barcode. Same as Container flow.
- Choose the packaging unit (if more than one item packaging units exist).
- Scan or fill in the appropriate stock dimensions.
- Input quantity to the selected packaging unit.
- If the input location is a receipt ramp, then the Sorting dialog opens by default to scan the sorting container to which bulk stock is placed. Press ESC if you wish to skip sorting (refer to 25. Sorting).
- Continue until all WP request items are received. Choose whether you wish to continue or not in the same WP.

Variation 1 – Input location
In bulk receipt, you have the option to receive and put in one-step to a destination storage location. You should choose to fill in the input location at the end of the flow. The system calls the Destination storage location putaway algorithm to propose a location filtered with the zone types and / or zone codes according to the following ESRF Config parameters:
|
|
RCPT_BULK_ZONECODE |
|---|---|
| Receipt |
|
|
RCPT_BULK_ZONETYPES |
|---|---|
| Receipt |
Confirm or modify as appropriate the proposed storage location.
Variation 2 – Input quantity
Input quantity can be set by default to 1 (used in bulk receipt) with the use of the following ESRF Config parameter:
|
|
QTY_DEFAULT_VALUE |
|---|---|
| Receipt |
You can also define whether you wish the Input quantity field to be editable or not (by default it is) with the use of the following ESRF Config parameter. If the value is set to false and the QTY_DEFAULT_VALUE is false, then the QTY_ISEDITABLE value is ignored:
|
|
QTY_ISEDITABLE |
|---|---|
| Receipt |
Variation 3 – Stock dimensions
As described in Container receipt.
Variation 4 – Bulk to container
You can receive bulk stock to container by enabling the following ESRF Config parameter:
|
|
RCPT2PACK_ENABLED |
|---|---|
| Receipt |
If you set the value to 1 – the user should scan or create a new SSCC in the relevant field.

If you set the value to 2 – the system creates an SSCC automatically without user input (the field is not shown to the user).
If you decide to create new container, you need to define the container type, or you can set-up a predefined container type in the following ESRF Config parameter:
|
|
DEFAULT_CONTAINERTYPE |
|---|---|
| Common |
The SSCC is created according to the GS1 standard, unless you wish to create an SSCC identical with the Lot barcode (rarely used):
|
|
LOT_AS_SSCC |
|---|---|
| Common |
Receiving bulk stock to container functionality meets two business requirements:
- When you need to allocate received stock into a predefined number of containers. Goods are placed to the appropriate container at the time of receipt based on information, such as the destination shipment routing order when cross-docking operation follows.
- When you need to receive stock as bulk or in container depending on the receipt storage location spatial attributes. You need to define the storage location zone code for which the SSCC field is shown to the user (as long as the RCPT2PACK parameter is set to 1):
|
|
RCPT2PACK_ZONECODE |
|---|---|
| Receipt |
Multiple containers
Use this option to receive multiple homogeneous containers.
- Insert the number of containers you wish to create

If the number of containers exceeds the number set in the following ESRF Config parameter:
|
|
MAX_NEWCONTAINER_NO |
|---|---|
| Receipt |
Then, the following warning message occurs:

The flow continues as described in 22.1.1 Container. The result is to create as many identical homogeneous containers as the number declared in the beginning.
Back office receipt
It is generally not recommended conducting physical receipt through back office, since there is no verification of the actual location, quantity or stock dimensions of the received goods. Select Menu > Receipts > Receipts monitoring > Towards receipt (by item, based on requests) to view the pending receipts per receipt request item and document order.

You are advised to select the 2- Administration in WMS process state for the pending document orders.
Use the back office receipt use case as long as the following prerequisites are in place:
- Only bulk receipt is supported
- The document order lines provide all the necessary stock dimension analysis information
- The receipt request generation has no grouping selected
 The items involved in the receipt are not variable weight/volume items

If no destination storage location is defined in the receipt request, press the Assign receipt location button to define one for the selected view rows. You can choose either a picking or a receipt storage location.
You can adjust the receipt request quantity in the Final quantity towards receipt column of the view. Press the New receipt button to insert a receipt action item per selected row. A warning message occurs if the input quantity exceeds the requested.
Check physical receipt deviations vs expected
Review the progress of the activated Expected receipts in the Receipt monitoring view (Menu > Receipts > Receipts monitoring).
Drill down to the receipt document lines and the actions per line, as well as ad hoc actions (if any).
Monitor physical receipt discrepancies against the expected document order in the Menu > Receipts > Receipts monitoring > Compare to expected view.
The view by default reports discrepancies, i.e. surplus or deficit, between receipt actions and expected receipt order lines that are in progress (process state 2).
You can choose the fields for comparison in the Comparison fields. Color and size are by default chosen.

An embedded crystal report is provided (Compare to expected) to be used as a checklist for receipt discrepancies before completing the order and release it to ERP for further processing.
Complete receipt
Complete the expected receipt orders when physical receipt actions are completed, discrepancies are double-checked and goods inspection (if any) is performed. Completion process turns the Expected receipt order document process state to 3 – administration to ERP. Select Menu > Receipts > Receipts monitoring to run the “Complete management in WMS” command.
The completion process checks whether there are actions with “in progress” status and throws the exception message: “Document: $ADCode | Receipt actions in progress exist"” – the completion process is interrupted.
The complete process for receipts handles the request status as well, it turns the status to “completed”.
Sorting
Sorting, in the context of physical receipt, is the process of categorizing bulk stock in receipt ramps according to the destination putaway location and placing it to the appropriate sorting containers so that putaway operation is executed efficiently.
Sorting can be executed either in one-step with physical receipt or separately at second time. One-step sorting is by default enabled according to the following ESRF Config parameter:
|
|
SORTING_ENABLED |
|---|---|
| Receipt |
You can also define in a comma-separated list the business units of the expected receipt documents that you wish to exclude from Sorting:
|
|
SORTING_EXCLUDE_BUSINESSUNIT_LIST |
|---|---|
| Receipt |
One-step receipt and sorting
After input quantity is verified in ESRF Menu > 1. IMPORTS > 1. RECEIPT > 3. BULK, the following view asks for the sorting container SSCC scan:

The view shows the destination storage location based on the putaway algorithm set-up in the relative company parameter.
Building and area information is derived from the destination storage location. You are advised to use different sorting containers for each building or storage area, however there is no system validation check.
Scan one of the existing sorting containers. Note that the Type of use for the sorting container types used in receipt should be “All”.
Sorting is recorded as a distinct document line step code as defined in the WMS_SORTING_STEPCODE company parameter, depicted in the Receipt monitoring view:

Should you wish to bypass sorting at run-time, press the Esc button when the focus is on the SSCC field, and then press “ok” to confirm.
Sorting after receipt
Sorting is executed at second time after receipt only when sorting requests are created. Enable the following ESRF Config parameter:
|
|
SORTING_CREATE_REQUESTS |
|---|---|
| Receipt |
When a receipt action item is completed, a sorting request item is generated by copy of the receipt action item (“from” and “to” storage location is the receipt location).
 Execute sorting in the ESRF Menu > 1. IMPORTS > 5. SORTING
- Scan or search the Receipt Work Package (mandatory field)
- Input receipt location
- Scan the Sorting container SSCC in the Target SSCC field
- Confirm Item
- Confirm quantity
Putaway
Putaway is the process of inventory moving from a receipt/production storage location to picking or putaway storage locations based on destination storage location proposal algorithms.
It is reminded that the destination proposal algorithm in the context of putaway is defined in the following company parameter:
|
|
WMS_STORAGELOCATION_PROPOSAL_ALGORITHM |
|---|---|
| WMS company parameter |
Refer to 14.2 Destination storage location proposal for further set-up instructions.
 Select ESRF Menu > 1. IMPORTS > 6. PUTAWAY. Putaway operation presupposes that stock has been received in containers or received and sorted to containers. You can optionally select the Receipt code (Work package or Document Order) or directly scan the SSCC (mandatory field).
If the scanned SSCC is not located in receipt/production storage locations, the following message occurs: “Stock is not at receipt/production type location”.
If the scanned SSCC corresponds to a mixed pallet/package/master package container, you have two options: either to put the whole container “as is” in a destination storage location of zone type “2 – Putaway”, or to put the contents of the container in destination storage locations of zone type “1 – picking”.
If the scanned SSCC corresponds to a sorting container then the only option is to put the contents of the container to picking locations.
If the scanned SSCC corresponds to a homogeneous pallet or (master) package container, then the only option is to put the whole container to a putaway destination location.
You can view the results of the putaway operations (actions and/or requests) in the Receipt monitoring view, depicted in the step code defined in the WMS_PUTAWAY_STEPCODE company parameter (step code - 147 )

Whole container
 Enable the following ESRF Config parameter should you wish to input the actual height of the received container, in order for the destination storage location algorithm to take it into account.
|
|
PUT_CHECK_CONTAINER_HEIGHT |
|---|---|
| Putaway |
The system by default proposes the height of the container instance.
You can create putaway requests for the whole container by enabling the following ESRF Config parameter.
|
|
PUT_CREATE_WHOLE_MIXED_CONTAINER_REQUEST |
|---|---|
| Putaway |
This option is particularly useful when the putaway requests handle quantity. In this case, you may wish to create future stock balances in advance so as stock can be reserved, and execute the actions at a later stage. The request type used for putaway requests is defined in the following ESRF Config parameter:
|
|
REQUEST_TYPE_PUT |
|---|---|
| Request type configuration | |
The system runs the putaway destination proposal algorithm for the whole container and proposes a location of zone type 2-putaway. In the case of mixed container you should confirm or alter the proposed location (as long as volume or location profile constraints are not violated) in the Final Location control (view 1).

 In the case of homogeneous container you should confirm the Item as well as the final destination location (view 2).
Container contents
 You have two options available to select at run-time:
- Auto-select: request items are created and putaway is executed at an order predefined in the relative public query.
- Select item: item barcodes are scanned according to user selection and placed to the destination storage location
Auto-select
If auto-select option is chosen, then the system returns the open putaway request items based on the order defined in the ESPublicQueries\ESWMMobile\ESWMGetPutRoutingRequestItems. Request items are by default sorted according to the destination storage location sector priority, aisle priority, location column and location level. You can modify the sorting priority at customization level.
 The next view asks for the confirmation of the Item, the Quantity and the Final Location. The * in the proposed destination location indicates that the proposed storage location has not been connected with the item.
The PutawayLo.Sug represents the sum of current stock of the item and stock dimensions in the proposed destination storage location.
If the following ESRF Config parameter is enabled:
|
|
PUT_INSERTITEMSTORAGELOCATION |
|---|---|
| Putaway |

Then the flow will ask the user to choose one of the three following options:
- Connect location to item
- Connect and update capacity – refers to the item storage location replenishment levels
- Continue
The following ESRF Config parameter checks whether the destination storage location is associated with the item and a relevant message occurs if not.
|
|
CHECK_ITEMS_LOCATION |
|---|---|
| Common |
Select item
If you choose the “select item” option, the flow asks first to scan or search the relevant item barcode and then asks for the confirmation of Item, Quantity and Final location:


===
===
Special use cases
Pre-receipt
Pre-receipt is a special use case that applies to the business requirement of receiving stock in homogeneous containers without specifying the exact weight and stock dimensions of the content of each container. For example, a truck loaded with pallets of fresh fruit is weighed before unloading. The total net weight and lot attributes should be distributed and assigned per each received pallet during analytical receipt after the truck is unloaded (and weighed).
Select ESRF Menu > 1. IMPORTS > 7. PRE-RECEIPT to receive goods .
- Select or scan the receipt work package
- Input the receipt location. You can pre-define the receipt location in the following ESRF Config parameter:
|
|
PRR_DEFAULT_TO_LOCATION |
|---|---|
| Pre-receipt | |
Scan or press enter to create a new SSCC
Scan or search the Item from the selected Work Package request items
If the lot dimension is predefined in the document order line then this will be assigned in the generated receipt action item. If not, then you should defined a “dummy” lot barcode in the following ESRF Config parameter:
|
|
DUMMY_LOT |
|---|---|
| Pre-receipt | |
Insert the number of received pallets per selected item
Define the quantity per received pallet

The outcome of the process is:
Pallet containers are created for each item, as many as declared in the “Number of pallets” field – you can automatically print the labels of each container following the instructions described in 29. Receipt print-outs.
Receipt action containers are generated with Balance update: “Request action fulfillment” and Status: “In progress”. Balances are not updated, while document order line step fulfillments are updated. The status of the action prevents the order from being completed.


A custom use case then distributes the total weight per action item and assigns the actual lot received. At the end of the process, the action is completed and balances are updated.
 You can also change the location of the received pallet through the pre-receipt use case in ESRF Menu > 5. STOCK MOVEMENT > 8. PRE-RECEIPT LOCATION. This can occur before or after balance update. The allowed locations should be of zone type 4 – Receipt. You may define a specific zone code for pre-receipt pallet transferring.
|
|
PRERECEIPT_TRANSFER_LOC_ZONECODE |
|---|---|
| Pre-receipt |
Scan the pre-received SSCC and assign the new receipt location.

The outcome of this process is to update the destination location of the receipt action.
Receipt with putaway distribution
The use case meets the business requirement for the system’s proposal during bulk receipt whether the stock should be placed into sorting containers or pallet containers (mixed pallets in principal) based on the putaway destination storage location proposal.
Enable the following ESRF Config parameter to enable the functionality during bulk receipt - ESRF Menu > 1. IMPORTS > 1. RECEIPT > 3. BULK
|
|
RCPT2PUT_ENABLED |
|---|---|
| Receipt |
The receipt flow is presented in the following diagram:

Figure 27: Receipt with putaway distribution
During the sorting container contents putaway, if existing open putaway request items are identified, the flow will directly show the request items without asking the user to select the “Auto-select” or “Select Item” mode. You also have the option to filter the contents of the container with the Storage Area, since one sorting container may contain stock destined to different storage areas.
|
|
Configuration |
The configuration prerequisites are as follows:
Define item storage location replenishment levels. If no storage location is assigned to the item, then the algorithm proposes receipt to pallet.
Declare the distribution rule in the ICP Putaway line (refer to 14.2.4 Distribution algorithm):

The proposed quantity is calculated as follows:
Run the distribution rule based on the item storage location replenishment levels (refer to 9.6 Item storage locations)
The Replenishment Upper Limit should be mandatorily specified:
Proposed quantity = Replenishment Upper Limit – (Current stock + Future stock)
- If Proposed quantity > 0 and < = Receipt quantity then the item storage location is proposed as a candidate putaway destination location.
If more than one picking storage locations are assigned to an item, the distribution rule allocates the input (receipt) quantity to all available locations. The distribution rule view sorts the item storage locations aiming at minimizing repeated trips to the same location.
The item storage locations derived from the distribution rule are then filtered with the Selector criteria defined in the Putaway destination storage location algorithm:
|
|
WMS_STORAGELOCATION_PROPOSAL_ALGORITHM |
|---|---|
| WMS company parameter |
For best algorithm results, it is recommended to enable “Quantity Handling” in the Putaway Request Type.
Goods inspection
Select ESRF Menu > 1. IMPORTS > 8. STOCK CHARACTERIZATION to apply reservation or disposition reason code actions on received stock.
- Scan or search the Receipt work package (mandatory field)
- Scan either the receipt location (for bulk stock) or the receipt container SSCC
- Scan the Item barcode in the Item field. If more than one stock balance records are identified, choose from the list.
- Input the Quantity in the received item MU that you wish to characterize with a disposition/reservation code. You can change the item MU by pressing the F1 function key – Change MU.
- You can also repackage the quantity of 1 in another item’s measurement unit by pressing the F4 function key. The functionality proposes the repackaging quantity based on the item MU relation. User intervention is allowed only for variable relation measurement units.

For android mobile devices, Entersoft RF Android® mobile app provides the ability to shoot and project photos in the context of goods receipt stock characterization.
The following ESRF config parameter enables the functionality:
|
|
IMAGES_ENABLED |
|---|---|
| Common |
By pressing the F2 function key, you can shoot the photo, which is saved in the ES00Blob table with ObjectID the ESWMActionItem and KeyID the Action GID of the stock reservation/disposition action. You can, therefore, track and trace photos based on action item’s data, such as the Item, the Resource, the Date and the context Receipt Work Package.
After stock reservation/disposition reason code is selected, the ESPublicQueries\ESWMMobile\ ESWMGetItemQCPhotos query returns the existing photos for the selected item and reason code. If photos do already exist, a relative message occurs, the relevant photos are projected, while the user is asked whether to continue with a new photo or not.
During projection you can navigate (left, right) through the relevant photos (if many).
Receipt print-outs
Entersoft WMS® provides three receipt related views and printing reports found in Menu > Receipts > Print-outs:
- Receipt pallets – labels: the view returns the received pallet container contents (homogeneous or mixed) grouped per item, stock dimensions, location data (storage location, warehouse, site) and action code. Use the embedded report PALLET_105x148mm.eal to print the container SSCC barcode label.
- Receipt mixed pallet labels: the view returns the received pallet container and contents grouped per item MU and location data. There are two reports embedded – the PALLET_105x148mm.eal to print the container SSCC and the Labels.rpt.
- Container labels from receipt: similar to the Receipt pallets – labels report but returns also package receipt actions.
These three printing related reports are used in the context of Receipts, Returns and Receipts from Production. This is determined from the “Context” view criterion.

Follow the instructions given in the II. Appendix – Print per resource and location to set-up automatic printing of container labels (and contents) upon ESRF physical receipt.
Make sure that the following parameter names and order are defined in the ES Print report:
ContainerGID,ContainerGIDColName,fStepCode,SSCC,ContainerClass
Pay attention to the ES Print set-up when any of the used views is customized.
The following ESRF config parameters were created prior to the ES Print functionality, and they are now obsolete (however, compatible in case of upgrading older installations):
|
|
RCPT_PRINTER_NAME, RCPT_NEWSSCC_LABEL, RCPT_PRINTSSCC_SCROLLERGROUP, RCPT_PRINTSSCC_SCROLLERNAME, RCPT_AUTOPRINT_NEWSSCC |
|---|---|
| Receipt |
The following ESRF Config parameter should be set to “true” (by default) if you wish to receive in an existing container and reprint the label with the new additional content.
|
|
RCPT_REPRINT_CONTAINER |
|---|---|
| Receipt |
There is no available embedded report for printing bulk receipts; you should create one at customization level and follow the ES Print set-up instructions. Make sure to define the ActionItemGID View Parameter Code and define it also in the ES Report set-up. If the same printer is used, assigned to the same location for both container and bulk receipts, use the Printing property set to differentiate the printer records. Define the Printing property set to the following ESRF Config parameter:
|
|
PrintSettingsCollectionCodeForBulkItemsPrint |
|---|---|
| Receipt |
Correct receipts
You can correct physical goods actions receipt data with the use of the Menu > Receipts > Receipts monitoring > Correct receipts use case.
The view returns the completed receipt action items for document orders that are in process state 2-Adminstration to WMS. Information relevant to the action item as well as derived information from line step action and request action fulfillments are shown. Requests and actions of next steps (e.g. sorting actions, putaway request or actions) are also shown. The fulfilled quantity of the next step actions or requests is abstracted from the receipt action item quantity in order to define the quantity that can be corrected. In the “Decrease quantity by” field you can reduce if necessary the proposed corrected quantity.

Run the Correct receipt command for the selected action items. The process updates or deletes (if the quantity is reduced to 0) the receipt action items and therefore re-opens the receipt request item quantity – unless the correction quantity refers only to overflow.
In case a receipt action item has already been transitioned to a target document line through the partial Update-to-ERP process, the correction use case updates (or deletes if necessary) the target document line.
The Reverse receipt process found in Menu > Receipts > Reverse receipts can be used for more or less the same reasons (to correct erroneous receipt action data). As explained in 13.8 Reverse action items – correction use cases, the reverse action items fulfill the document order at the reverse step code and do not re-open the quantity of the request item. If reverse receipt is chosen, the partial Update-to-ERP process does not take into account reversed actions – the actual receipt quantity will be updated through the complete-update process. On the other hand, reverse actions provide full tracking of who, when and what went wrong and who, when, how it was corrected.
Update ERP
Both partial and complete Update-to-ERP processes are supported in the context of receipt. Make sure that you have:
- Configured as appropriate the document transitions between source WMS Expected Receipt document orders and target WMS receipt documents as instructed in the 16.2.1 Document transitions section of the document.
- Defined the appropriate depositor document type – action type mapping as described in 16.2.2 Depositor mappings.
- Assigned the appropriate action type properties as described in 16.2.3 Action type properties.
Partial Update
There are two partial update use cases available: one concerning Trade Documents and one concerning Stock Documents, found in Menu > Receipts > ERP Integration.
Partial receipt Update-to-ERP for trade documents
The partial Update-to-ERP process consists of a view that returns the necessary information for the automation Update Receipt to take place. You can also use the information provided in the view in order to investigate issues that might occur during the process. Finally, you can schedule the partial update process (this applies to all partial update processes) with the use of Time scheduling tasks – refer to EBS-Technology EN for further instructions. The core automation (ESScrollerCommands\ESWMReceipts\ReceiptsToERP\ ReceiptsToERP_CoreCommand.xml) is by default job-enabled (there is no need for customization).
Receipts to ERP view
The Receipts to ERP view returns both fulfilled and document ad hoc action items where:
The action type has the property code PARTIAL_UPDATE and the ctx_RECEIPTS property. The criterion used to filter the partial update property type is the “Update from”.
The action type has the step code corresponding to WMS_RECEIPT_STEPCODE (146) or the reverse step code (146R)
The source document type has the property code WMS_EXPECTED_RECEIPT and the Menu Entry is either 3 or 4.

The Process State of the source document is 1 or 2 (assigned to WMS or in WMS processing)
The status of the action is “completed”. The criterion used to filter “completed” actions is the “Stage”. You are advised not to change the default value of this parameter, unless you wish to investigate if there are still actions in progress.
The column “Incomplete configuration” indicates whether the depositor document type mapping has been configured properly. The value should be 1.
 If the source document has been transformed to a target document with the use of document transition and not through the Update-to-ERP processes (transition fulfillments), then the view excludes these document lines by default. The criterion used to filter this information is the “Actions are included that”. The view returns by default action items with no transition fulfillments or with transition fulfillments and pending quantity.
The Registration date criterion filters the registration date of the warehouse action. The Search from (days before) is subtracted from the action registration date to derive the Issue date (from date) for the source document. The default value is 10 days before the action registration date. You may need to adjust the number of days according to the implementation requirements – pay attention not to cause performance issues.
The “Receipt date based on” criterion is used in the Receipt to ERP update process.
The “Show transition documents” is by default set to No. If set to Yes, the target document (if more than one then the top 1 target document) is shown – used for information purposes as well as in the Receipt Update-to-ERP process.
The Open quantity is calculated as:


Line step action fulfillment Executed Quantity – Transition fulfillment Quantity (in service, base and alternative MU)
For ad hoc actions, Open quantity is calculated as:
Transport Action item “To” Quantity – Transition fulfillment Quantity (in service, base and alternative MU)
The Quantity to be updated is calculated as follows (used in the Receipt to ERP automation):
In case of a forward receipt action:
Quantity to be updated = Open Quantity (in service MU)
In case of a reverse receipt action:
Quantity to be updated = -1 * Open Quantity (in service MU)
The same calculations apply for Base and Alternative MU Quantities
The Action qty to be updated is calculated as follows (used in the Receipt to ERP automation):
In case of a forward receipt action:
Action qty to be updated = Transport Action Item “to” quantity
In case of a reverse receipt action:
Action qty to be updated = -1 * Transport Action Item “from” quantity
The Action qty to be updated (Base and Alt) are calculated as follows (used in the Receipt to ERP automation):
In case of a forward receipt action:
Action qty to be updated (base and alt) = Transport Action Item “to” quantity (base and alt) if Adhoc or else Executed quantity (base and alternative)
In case of a reverse receipt action:
Action qty to be updated (base and alt) = -1 * Transport Action Item “from” quantity (base and alt) if Adhoc or else -1 * Executed quantity (base and alternative)

Update receipts to ERP process
 The Update receipts in ERP command provides two options to create/update target document line MUs: either with the source document order line MU or with receipt action item MU.
- If Order MU is chosen, the process assigns the Quantity to be updated in base and alternative MU quantity columns, while there is no assignment to the Line Item MU. The line filler of the transition rule used by the process ensures that the Line Item MU is transferred from the source line to the target line.
- If Actions MU is chosen, the process assigns the Action qty to be updated to the target Line item quantity, the Action item MU to the Line Item MU and the Action qty to be updated base and alternative to the target line item base and alternative quantities accordingly.
- The Insert containers option concerns the update of the target document with the number of containers that are received. The functionality is described in 52.3 Reusable container and packaging material management.
The process starts with the creation of a new target document header.
- Target document type is selected based on the depositor document type mapping
- Document series is selected from the target document type series with default site the the source site (branch) of the view and default warehouse (if set) the action item warehouse (accordin to the source data view).
- The Process State of the target document is 2 – Assigned to WMS administration
- The document issue date is the Action registration date (smallest of the selected data) if the Receipt date based on criterion is set to 0 – Warehouse actions. Else, the Target document issue date is not assigned.
- The document origin is set to “process”
- The process applies the header filler of the source transition rule set in the target document type (refer to 16.2.1 Document transitions). If more than one source transition rules are set, the process identifies the one refering to the source document type.
The following conditions are validated:
- The Update receipt process does not take into account “in progress” actions.
- If incomplete configuration is identified, a relevant message occurs and the process is interrupted.
- The Update Receipts process is interrupted if actions with fulfillments to source documents that have been transformed already to target receipt notes through document transition processes (accounting dpt) are identified.
The process covers the following use cases:
- Create target document lines from action item fulfilled with source document lines (no analysis)
- Create target document analysis lines from action items fulfilled with source analysis lines
- Create target document analysis lines from action item fulfilled from source lines (no source analysis – analysis target only)
- Create target document lines from action items with no fulfillments (ad hoc)
- Create target document analysis lines with no fulfillments (ad hoc)
For each use case the process creates Transition Fulfillments and Line Item Fulfilmments between the Source and the Target Document lines (or analysis lines). Exception to the rule are the ad hoc cases, where only transition fulfilmments are created. Line item fillers and analysis fillers of the transition rule in use are also applied per use case.
Once a Target Document is created, then the process updates the existing target document as long as:
- You choose to run the view with the parameter Show transition document set to Yes.
- The Issue date of the target document meets the limits set in the Registration date & Search from (days before) parameters.
Partial receipt Update-to-ERP for stock documents
The partial receipt Update-to-ERP process for stock documents is a much simpler use case, which also consists of a view and the relevant automation process. It is based on the Internal goods transfers Update-to-ERP process which is described in 47. Stock section of the document. Should you wish to set-up scheduled tasks for this process, you have to customize the automation command to job-related.
Receipts to ERP (for stock documents) view
The view returns both fulfilled and document ad hoc action items where:
- The action type has the property ctx_RECEIPTS.
- The status of the action is “completed”. The criterion used to filter “completed” actions is the “Stage”. You are advised not to change the default value of this parameter, unless you wish to investigate if there are still actions in progress.
- The source document is of document class 2 – stock.
- The Shipped from site criterion refers to the shipment site as long as it is also a warehouse.
- The Generated document criterion is a mistranslation – it represents the source reference document.
- The view calculates the Open Quantity in base and alternative MU as follows:
Line step action fulfillment Executed Quantity – Transition fulfillment Quantity (base and alternative MU)
For ad hoc actions, Open Quantity is calculated as:
Transport Action item “To” Quantity – Transition fulfillment Quantity (base and alternative MU)

Update receipts to ERP process (Update official data)
 The Update official data command provides the option to update the target document line either in the Action MU or with one of the base/alternative depending on the item’s service MU.
- If Use of action MU is selected, the process assigns the Transport Item to Quantity and to MU to the relevant target fields
- If Use of action MU is not selected, the process assigns either the base or alternative quantity and MU to the relevant target fields depending on the Item Service MU.
- The Insert containers and Insert accessories options concern the update of the target document with the number of containers and relevant accessories that are received. The functionality is described in 52.3 Reusable container and packaging material management.
The process creates a new target document header and the relevant document lines or analysis lines for all entries of the source view. There is no “update” to existing target document functionality available.
- Target document type is selected based on the depositor document type mapping
- Document series is selected from the target document type series with default site the the “to” site (branch) of the source document and default warehouse (if set) the “to” warehouse of the source document. As long as both to - site and warehouse are defined in the depositor mapping.
- The From Site/ From Warehouse / To Site / To Warehouse are the source document’s relevant fields, as long as they are all mapped in the depositor mapping.
- The Process State of the target document is 0 – Initial
- The document issue date is the Action registration date
- The document workflow step is set to Action’s step code
The following conditions are validated:
- The document types are inactive – process is interrupted with exception message
- The documents (source and target) do not belong to Stock Document Class – process is interrupted with exception message
- Actions in progress are identified – process is interrupted with no message.
The process covers the following use cases:
- Create target document lines from action item fulfilled with source document lines (no analysis)
- Create target document analysis lines from action items fulfilled with source analysis lines
- Create target document analysis lines from action item fulfilled from source lines (no source analysis – analysis target only)
- Create target document lines from action items with no fulfillments (ad hoc)
- Create target document analysis lines with no fulfillments (ad hoc)
For each use case the process creates Transition Fulfillments, while Line Item Fulfillments between the Source and the Target Document lines (or analysis lines) are created with the use of the Back Order with Criteria automation action.
Complete Update
Once source document orders are completed, the complete update process is activated with the use of the following business rules:
- Trade document: (WMS) - RECEIPTS - Supplier Delivery Note import when receipt completed by loading actions OR
- Trade document: (WMS) - RECEIPTS - Receipt Note with transition from PPI and partial receipt CANCELLATION (TransitionGID variable must be updated)
- Transit (stock) document: (WMS) - RECEIPTS - Insert Transfer note when the receipt is completed
These business rules are triggered by the change of the document order process state to 3 – administration to ERP. The completion processes create the target document based on the document order line step action fulfillments. The only exception is the (WMS) - RECEIPTS - Receipt Note with transition from PPI and partial receipt CANCELLATION, which creates the Receipt Note using the transition with the document order (proforma, PPI).
For trade documents, you need to enable one of the two provided business rules complementary to the partial update process.
For stock documents, you should use either the partial or the complete update process.
Trade documents complete update though WMS actions
The business rule (WMS) - RECEIPTS - Supplier Delivery Note import when receipt completed by loading actions should be enabled.
The process runs only for WMS Expected Receipt Documents in Process State 3 – Administered to ERP
- If more than one Partial Update Target Documents are created, the process cancels the documents and creates a new final one.
- If only one Partial Update Target Document is created, the process deletes the line items and inserts the new ones to the existing target document header.
- If no Partial Update Target Document is created, the process creates a new final one
The target document created from the Complete Update process is in Process State 3. The process executes the Update Receipts to ERP command and view with the Update from value of 1 (complete update). There are no transition fulfillments created, since it might be required to alter/modify the target document lines as appropriate for further processing in ERP.
Trade documents complete update though transition
The business rule (WMS) - RECEIPTS - Receipt Note with transition from PPI and partial receipt CANCELLATION should be enabled. It is important to define the exact transition rule ID in the relevant variable. The system by default uses the 119. PPI => PLN transition rule. Make sure that the Default selection level of the transition rule is set to Documents set (and not to set of lines).
The process cancels the existing Partial Update Target Documents (even if it is only one) and creates a new one by executing the transition rule.
When complete update is performed through document transition, the differences between the target Receipt Note and the receipt warehouse actions are automatically shown and managed in the receipt discrepancies use case. In case the complete update is performed through WMS actions, the target Receipt Note should first be adjusted to the actual supplier Receipt Note and then check the differences in the receipt discrepancies use case.
Stock documents complete update through WMS actions
It is practically the same use case as that of the trade documents, with the difference that no partial update target document should exist. The business rule checks this condition, and if partial update target document exist, it does not create a new one.
Receipt discrepancies
The purpose of the Receipt discrepancies use case is to show the differences between WMS physical receipt and the supplier Receipt Note at item level and stock dimension (if required). The use case consists of a view found in ERP Menu > Purchases & Procurement > Receipts & Purchase Invoices > Receipt discrepancies and an automation that creates target adjustment documents for surplus or deficits.
The required configuration is:
- Assign the document property to the Receipt Note document type as set in the following WMS company parameter:
|
|
DIM_WMS_RECEIPT_DOCUMENT |
|---|---|
| WMS Company parameter |
The appropriate value is WMS_RECEIPT_DOCUMENT.
- Define the document type used for Shortages (deficits) in the following WMS company parameter:
|
|
WMS_NEGATIVE_RECEIPT_DIFF_DOC |
|---|---|
| WMS Company parameter |
The recommended document type is PRN – Goods return note.
- Define the document type used for Surpluses in the following WMS company parameter:
|
|
WMS_POSITIVE_RECEIPT_DIFF_DOC |
|---|---|
| WMS Company parameter |
The recommended document type is PLN – Receipt note.
You can select the comparison level between physical receipt and target receipt document lines based on the implementation requirements. For example, if the receipt document does not include lot analysis information, however WMS actions do, you should choose to exclude lot from the discrepancy calculations in the Comparison field criterion of the view.

The target receipt document process state is set by default to 3 – Administered to ERP (processed). However, you may differentiate for investigation reasons.
The two automations create the Surplus or Deficit documents to adjust the quantity updated to ERP with the actual WMS receipt quantity.

Outbound operations
Introduction
Outbound operations include warehouse operations related to requests from released source documents to bring the items out of the warehouse premises, either to be shipped to an external party or to another company site. In Entersoft WMS®, the outbound source documents are characterized as Shipment Order documents, such as sales orders (SOR), stock reservation for customers (SRC), stock reservation for intra-warehouse transfers (SRI), goods shipping order to third party W/H (GSO), etc. The purchase return orders (ORP) warehouse operations, although handled as shipments, are described in the reverse logistics operations, in 46. Buyback process.
The outbound operations include:
- The shipment order routing process – shipment orders are grouped and transformed to shipment order routing documents
- Shipment generation process – based on implementation requirements
- Generation of picking requests (and sorting requests if group picking is selected) with or without stock reservation
- On-time replenishment requests generation (when stock reservation is applied)
- Stock shortages management
- Execution of picking requests – picking with reservations, real time picking, ad hoc picking, group picking and sorting workflows
- Execution of on-time replenishment requests
- Generation of packing requests (optionally, after picking execution) – execution of packing with the use of WMS Mobile or Touch applications
- Staging – sorting shipments into shipment ramps before loading (optionally)
- Generation of loading requests after picking or packing – execute loading (mandatorily) either with the use of WMS Mobile application or through back office use cases.
- Shipping – create vouchers for courier services, POD (Proof-of-Delivery).
- Invoicing – create target shipment documents based on WMS actions
- Cancelling shipment routing documents – either due to stock shortages or on demand
- Correction of shipment actions – loading, packing, picking correction use cases.
Shipment orders routing
The shipment orders routing process involves the generation of the SHO (Shipment Routing Order document) and the relevant Shipment(s).
Make sure that you have:
- Configured Shipment order documents according to the guidelines given in 16.1 WMS document orders.
- Enabled Shipment order document and Shipment routing order document access rights to the appropriate users according to the instructions given in 16.4 Document process state.
- Assigned the Shipment order documents to WMS; refer to 16.4.1 Order assignment to WMS.
- Configured transitions to and from SHO and SHC (Shipment Order Cancellation) according to the instructions given in 16.3 Shipment documents and invoicing.
- Configured the system as appropriate for generating and managing Shipments based on guidelines given in 17. Shipment.
The Shipment routing order document (SHO) is generated in the create route process to group shipment orders per trade account/destination branch and delivery person in order for the warehouse to execute shipments efficiently.
The Routing process consists of the WMS Shipment routings view and the Create route automation, found in Menu > Shipments > Shipments routing.
The create route process can also be executed per Shipment Order Document in Entersoft ERP application. This option is particularly useful to implementations with Point Of Sales (POS) that are served from a central warehouse.

WMS Shipment routing view
The view returns the Shipment Order document headers and lines (or line item analysis) on the detail of the view. It is not necessary to create route for the entire document order, you may choose to create routing for specific item or analysis lines.

- The view returns by default Shipment Order documents that have been assigned to WMS (process state 1). You can also view documents in other process states for investigation purposes with the Processing status criterion. However, the create route process takes into account only process state 1 documents.
- The Shipping type criterion differentiates sales orders, returns to suppliers, shipment to 3rd party warehouses and shipments to another company site.
- You may also filter the shipment orders data according to the company dimensions (business unit, activity, dimension 1 & 2, project).
- Logistics information, such as Routes, Routes Group, Transporter, Geographical Zone, Mean of Conveyance, Driver, Shipping Method can also be used as filtering criteria.
- Filter criterion Group refers to the Customer Group.
- Active cross-docking (by default set to No) is enabled when the shipment order document is related to an expected receipt document (through relating documents). The parameter is set to Yes when the Activate Cross Docking process takes place (refer to 51. Cross-docking).
- Has been routed is an indicator that turns to true when the shipment order document has been transformed (partially or fully) to a Shipment Cancellation document (SHC).
- The document lines (item and analysis) represented at the detail of the view include both WMS monitored and non WMS items. Although non-WMS items are not handled by the warehouse operations, they are included in the SHO document so as the invoicing process works properly.
- At customization level, you need to decide whether the shipment order lines company dimensions should be transferred to the SHO document lines and participate as grouping factors. By default, shipment order company dimensions are not used in SHO grouping. To do so, you need to assign as appropriate the shipment order document line values to the relevant fields of the view (Business Unit Code, Dimension 1&2, etc.).
- At customization level, you can also use the Routing Group field of the detail of the view to assign additional document information that you wish to participate as SHO grouping factor.
Create route – SHO generation
The create route process is divided into three major sub-processes:
- The Shipment Routing Order document generation (SHO) and shipment generation
- The Request generation (picking, sorting, replenishment) which is activated with the Activate management in WMS parameter. This process is described in 34. Request generation process.
- Stock shortages management

The parameters involved in the SHO generation process are:
Execution date: by default the current date – assigned to the SHO issue date
Shipped on: assigned to the SHO shipping date and the relevant shipment date. If left blank, the maximum of the source document order shipping and issue date is assigned to the SHO shipping date.
Transition scenario: the valid transition rules to SHO – if only one scenario exists, the parameter is not visible.
Series and Use the order series code: if the Use the order series code is selected, the source document series code is assigned to the SHO series code. Else, the top 1 series of the SHO is selected with a default site (and warehouse optionally) the From site (and from warehouse) source line item field – information derived from the source data view.
No SO (shipment order) grouping: the process, by default, groups source shipment orders to SHOs by recipient, delivery address, shipment branch and warehouse (for stock documents) as well as any logistics data if provided. Enable this parameter should you wish to create one SHO per source document (no grouping).
Invoicing stage definition: you can use this parameter to predefine the invoicing step code of the generated SHO.
Transporter, Route, Mean of conveyance, Driver, Shipping method: use this shipment related information to assign the values to the generated SHO and Shipment records. If left blank, the source document data are assigned.
The Process State of the generated SHOs is determined in the following company parameter:
|
|
WMS_EAP_DEFAULT_PROCESSSTATE |
|---|---|
| WMS Company parameter |
By default, the process state is set to 1 – assigned to WMS administration. You are advised not to change the default value.
If the Activate management in WMS parameter is set to No, the generated SHOs can be viewed in the Shipment monitoring view, found in Menu > Shipments > Shipments monitoring by selecting the Assign administration to WMS processing status:

You can then run the request generation process and activate the SHO for WMS mobile execution with the Activate management in WMS relevant view command.
Request generation process
Make sure that you have:
- Configured as appropriate picking and replenishment request types that participate in the request generation process. If replenishment is enabled, make sure that Quantity handling is enabled for both picking and replenishment request types (refer to 13.2 Request types)
- Configured ICP reservation rules if stock reservation is used (refer to 14.1 Stock reservation)
- Set up as appropriate the destination storage location replenishment algorithm if on-time replenishment is enabled (refer to 14.2 Destination storage location proposal).
Picking and replenishment requests
The Request generation process involves the following Create Route parameters:
Activate management in WMS: decide whether picking requests are generated with or without grouping.
 Group or batch picking or multi-order picking is a methodology that aims to reduce time spent walking by eliminating repeated trips to the same location. This methodology is ideal when you commonly have multiple orders that require the same product and when orders contain a limited number of order lines.
Group picking methodology requires a sorting phase to follow, either as a separate warehouse operational step, or during the picking process (one-step pick and sort).
If group picking is selected, one picking request is created for the selected shipment orders. Line items with matching dimensions are fulfilled by the same request item. One sorting request per SHO is by default created. It is strongly recommended to use a request type that does not handle quantity, since group picking and sorting is supported only in the Real Time picking WMS Mobile flow.
If no group picking is selected, the process by default generates one picking request per SHO document. You can define in the following WMS company parameter whether any of the document line udf tables and comments, comment, alternative comment, reason and alternative reason fields participate as a grouping factor for the request generation:

|
|
WMS_PickingRequestGroupingFields |
|---|---|
| WMS Company parameter |
Assign in: assign the resource for the generated picking request. If the value of the following company parameter is set to true, then if the source document Supervisor exists and the value of the parameter is left blank, the supervisor is auto-assigned to the generated request as long as the supervisor is also a WMS resource. If the parameter has value, both the SHO supervisor and Request resource are assigned.
If the value is set to false, then no connection is made between the document’s supervisor and the warehouse picking resource.
|
|
WMS_AUTO_APPLY_RESOURCE_FROM_DOCUMENT_TO_REQUEST |
|---|---|
| WMS Company parameter |
Add to existing work package: enable this flag should you wish to use the same work package (picking list) according to criteria set in the Propose Relative WP view (ESFilters\ESWMShipments area). The default view returns nothing – you can set the implementation required criteria at customization level.
Picking type: select the picking request type as appropriate. A typical example is to have two picking request types active in the installation, one with handling quantity enabled and one without. If left blank, the process chooses the zero parameterization request type, with the international ID ES.pPICK.

 (Zone) type: the storage location zone types involved in the picking request generation process. The default value is set to Picking – you may differentiate according to implementation requirements. It concerns picking requests types with handling quantity, where the “from” storage location is allocated.
 Package optimization: determine the generated request item MU algorithm – by default set to No (i.e. picking and replenishment requests are generated in service MU). The use of this parameter is described in 14.3 Optimum packaging unit algorithm section.
If Use of Standard Pallet is selected, you can define which of the available Item Container Type records (based on the enabled flag) should participate in the packaging unit optimization algorithm with the use of the Item pallet template attribute hidden automation parameter. You can set up to five different item container type variations (flags 1 to 5). The default item container type flag is flag1.
Default optimization flag is always enabled as a fallback algorithm if Use of Standard Pallet algorithm fails to return results (refer to 14.3 Optimum packaging unit).
Not full packages parameter is also related with the Use standard pallet package optimization algorithm. If disabled (default behaviour), the algorithm discards requested quantities that do not fit in integer multiple item container type measurement units. For example, if an Item container type of pallet type EUR contains 10 PACK, and each PACK contains 10 PCS, if the requested quantity is 98 PCS, the Standard Pallet algorithm creates a request item of 9 PACK and discards the 8 PCS. The aim is to avoid splitting full packages resulting in mixed pallets.
Picking – target storage location: set the target storage location for the generated picking request items. If the picking request type handles quantity, the future balance stock is increased for the selected target location.
Target container type: set the target container type as a hint to the generated picking request items, that is used as a filter to WMS mobile picking workflows.
Run On time Replenishment: if you do not use on-time replenishment, set the value to “No”. The “Total items” option is obsolete and not maintained.
The default value is “By item”. If replenishment conditions exist then the system runs the process in conjunction with picking. On time replenishment in shipments context require that both replenishment and picking request types handle quantity.
The order with which replenishment and picking algorithms run depends on the value of the following company parameter:


|
|
WMS_PICKING_REQUEST_IN_REPLENISHMENT |
|---|---|
| WMS Company parameter |
Another prerequisite for the functionality to work properly is to have assigned the Container Reservation Rule in Replenishment ICP line (refer to 14.1.4 Container reservation rule view),
If the value is set to true, then:
If the requested quantity is equal or greater than the container quantity, as allocated in the Container Reservation Rule, then the system creates a picking request instead of a replenishment request for the container. This results in handling cost optimization. The process creates as many picking requests as required to cover the requested quantity with full containers. If quantity remains, then the process continues with picking and replenishment algorithms. If the replenishment algorithm set in the relevant company parameter drives to a buffer location (1st step replenishment) then the process creates a replenishment first step request to buffer location and a picking request from buffer to the destination picking request location (if set in the create route relevant parameter).
The stock reservation steps sequence is presented in the following diagram.

Figure 28: Stock reservation steps
Note that merging is supported for both replenishment and picking request items if the merging criteria are met. More specifically, for replenishments, the system merges a new request item with an existing one for a period of one calendar week. This value is default and should not be modified. For picking requests, the system merges picking requests (pass 1) with picking requests of pass 2 after replenishment step. The merging criteria require that all “from” and “to” request item data are identical.
It is recommended to enable fulfillments for replenishment request items with the following company parameter:
|
|
WMS_CreateFulfillmentsForOnTimeReplenishment |
|---|---|
| WMS Company parameter |
Fulfillments assist in tracking on-time replenishment against SHOs and on WMS Mobile replenishment workflow features concerning the allocation and update of replenishment request items.
If replenishment fulfillments are enabled, make sure to set the step code for the 1st step replenishment to 148B in the following company parameter:
|
|
WMS_BufferReplenishment_STEPCODE |
|---|---|
| WMS Company parameter |
The 2nd step replenishment step code is 148 (internal movements).
Bypass storage location distribution: this parameter is associated with On-time replenishment, ignoring any distribution rules set in the Replenishment ICP line. You are advised not to change the default value.
Container quantity management: enable this flag should you wish to reserve the entire container quantity for 1st step replenishment (refer to 14.1.4 Container reservation rule view). The generated replenishment request item is updated with the container hint, which is used as a filter to the Replenishment WMS Mobile workflow.
The implementation requirements might impose that the container hint should also be updated to the 2nd step replenishment request items. It depends on whether the 2nd step replenishment operation is driven by the proximity of the buffer location containers to the employee (choose the first container at sight) or by the predefined sequence of the destination locations (e.g. scan the appropriate container SSCC that matches the request item with the nearest destination location to the buffer location).
The functionality is enabled by activating the following company parameter:
|
|
WMS_2ndSTEPREPLENISHMENT_UPDATEFROMCONTAINERGID |
|---|---|
| WMS company parameter |
In this case, the containers located in the buffer zone type storage locations should be available in the container reservation rule view so that the process can use them as hint to the generated request item.
You should customize the container reservation rule view and remove the default value of 10- buffer from the “ZoneTypes_Exclude” view parameter.
Special use cases
Reservation rule applied on demand or per trade account
Set up Reservation rules in Configuration > Warehouse Management > Stock reservation rules, should you wish to differentiate from the reservation rules applied in the ICP picking and replenishment lines, either per trade account or on demand during the create route process.
Set the required stock reservation rules and container reservation rules (if appropriate) per picking and replenishment property:

The reservation rules can be assigned to specific customer trade accounts in the Trade delivery data:

In the create route process you can define the Reservation rule in the relevant automation parameter. If set in the create route process, then this overrides any rules set in the ICP or Trade Account.
If no reservation rule is declared in the create route process, and one has been set to the customer, then the rule applied is either that of the ICP or of the customer depending on the Reservation Rule mode automation parameter value.
The default parameter value is determined from the following company parameter:
|
|
WMS_DEFAULT_RESERVATION_RULE_MODE |
|---|---|
| WMS company parameter |
If no reservation rule is declared in the create route process, and none is set to the customer, the ICP line reservation rules are applied.
Reservation reason code management
The system provides the functionality to define exact or proposed relation with reservation reasons through the following company parameter:
|
|
WMS_RESERVATION_REASON_CODE_ALLOWLevel |
|---|---|
| WMS company parameter |
Reservation reason code handling is differentiated depending on whether the code is mapped with a warehouse or not (refer to 12.4 Reservation and disposition reason codes).
If the SHO warehouse is mapped with a reservation reason code then:
- If a Reservation reason is set to the relevant create route automation parameter, stock reservation includes balance records of the declared reason.
- If no Reservation reason code is declared, stock is reserved for all balance records of the mapped warehouse regardless the reservation reason.
If the SHO warehouse is not mapped with a reservation reason code and if the value of the company parameter is set to exact, then:
- If a Reservation reason (with no mapping) is set to the relevant create route automation parameter, stock reservation includes balance records of the declared reason.
- If no Reservation reason is declared, stock is reserved from balance records with no reservation reason.
If the SHO warehouse is not mapped with a reservation reason code and if the value of the company parameter is set to proposed, then:
- If a Reservation reason (with no mapping) is set to the relevant create route automation parameter, stock reservation prioritizes balance records of the declared reason and continues with null reservation reason balance records if quantity remains.
- If no Reservation reason is declared, stock is reserved from balance records with no reservation reason.
Note that the above apply only to requests generation for shipments.
Use document line SSCC as filter criteria
If the SSCC is already defined and assigned in a UDF string field of the source shipment document order line (at customization level), then the picking stock reservation process uses the SSCC as filtering criteria to the reservation view.
The UDF line item string field that holds the SSCC information is defined in the following company parameter:
|
|
WMS_ContainerSSCCAsFilter_ColName |
|---|---|
| WMS company parameter |
The functionality is enabled with the Document SSCC as reservation criterion parameter in the create route automation.
Pre-packing
Pre-packing is the algorithmic calculation of the number and type of picking containers (packages) based on demand and container volume data concerning the pick-to-cart operation. The picking containers are placed on carts that do not have fixed locations. The number and size of the picking containers varies depending on the demand. A picking container contains items for a single SHO only, even if available space remains.

Pre-packing algorithm is also used for the pick-to-pallet operation (only full containers), where the algorithm tries to fit demand of each SHO to full pallets. If the demand volume is less than a full pallet volume, then there is no container proposed, picking continues in mixed SHO pallets without any system hint.
|
|
Configuration |
- The container class that participates in the prepacking algorithm is set in the following company parameter:
|
|
WMS_CONTAINERCLASS_PREPACK |
|---|---|
| WMS company parameter |
The suggested value is “package” for pick-to-cart process and “pallet” for pick-to-full pallet process.
The picking container types should have Type of Use “Picking” only - Configuration > Warehouse Management > Container types:

Volume dimensional analysis data should be set both the Item Measurement Units and Container types. If you use different volume MUs, make sure you have defined their relation in the SI MU relation table, found in Configuration > Warehouse Management > SI MU Relation.
Define the Upper capacity limit percent (if necessary) in the picking container types. The upper capacity limit percent is taken into account in the pre-packing algorithm.

Define the Upper Demand Volume measurement unit (used in the pre-packing algorithm) in the following company parameter:

|
|
WMS_MEASUREMENT_UNIT_VOLUME_UPPER_LIMIT |
|---|---|
| WMS company parameter |
The pre-packing process is enabled with the Activate pre-packing create route automation parameter. The following create route parameters are involved in pre-packing:
 Pre-packing zone: set optionally the storage location zone codes that participate in the prepacking process
- Upper demanded volume limit: if the total volume of the demand exceeds this limit then pick-to-cart cannot be executed (demand does not fit in the cart), therefore no pre-packing algorithm calculations should be made. Note that the value should be greater than zero (which is the default), otherwise pre-packing does not return any results.
- Create pre-packing containers: this is a hidden parameter that is by default set to true. The result is to create container instances that update the “to” container field of the picking request item. If set to false, only “to” container types are updated to the generated picking request items – however this is not recommended since there is no WMS Mobile functionality of container type assignment to carts.
- Only full containers: enable this functionality for pick-to-full pallet functionality

The demand participating in the pre-packing algorithm is defined as the total of picking request items that are generated from the create route process. The Picking requests towards pre-packing view (ESFilters\ESWMShipments\PickingRequestItemstoPrepack) returns the generated picking request items per SHO. At customization level, you can decide upon:
- The sorting criteria and order with which the request item volume is consumed
- The filtering criteria (if any) for excluding request item records from the pre-packing process
The default view does not apply any sorting criteria, while you can optionally define in the Pre-packing zone criteria which storage location zones participate in the algorithm.
The pre-packing algorithm for pick-to-cart initially examines the following condition:
Total request items volume > = Upper demand volume limit
If true, the process stops.
If the number of request items = 1 and the Quantity of request items = 1 and the request item MU has no decimals then:
If Total Request Item Volume/Container Volume < =1 then the process chooses the first best fit container type. If there is no container type found, the process stops.
The pre-packing algorithm steps are presented in the following diagram.
- Integer volume = request item volume/request item quantity
- The splitting process consists of the following steps:
- The number of integer volumes fit into the remaining container volume is calculated
- A new request item is generated with quantity equal to the number of integer volumes
- The existing request item is updated with the remaining quantity ready to be consumed from the next container.
- Request items with zero volume are allocated to the last container on-hand.

Figure 29: The pre-packing algorithm (for pick-to-cart)
Lot handling
In the Create Route automation, there are four parameters involved with Lot handling:
- Lots end (expiration) date: by default is set to anything. Choose the appropriate expiration date after which lots are considered as valid for picking and replenishment reservation. The parameter value is used in conjunction with the following company parameter (if set):
|
|
WMS_NumOfDaysToAddOnExpirationAsFilter_ColName |
|---|---|
| WMS Company parameter |
Define the UDF source line item field where you record the number of days you wish to add in the lots expiration date when creating reservation requests.
- Flagged lots are excluded: choose the Lot qualifier (set in Configuration > Inventory items > Item dimensions > Lot qualifier) you wish to exclude from available stock to reserve. Lot qualifiers are often used in Quality Control custom use cases.
- Single lot use: the aim of the parameter (if enabled) is to stop stock reservation (only for picking) if different lot is allocated. This functionality that has never been used in practice and should not be enabled without consulting.
- Lots of the same due date: the aim of this parameter (if enabled) is to stop stock reservation (only for picking) if a lot with different expiration date is allocated. This functionality has never been used in practice and should not be enabled without consulting.
Package collection
The following two Create Route automation parameters concern a special use case for picking received package containers that match exactly the shipment order line items and analysis items and quantities.
- Only packages collection: enables the functionality
- Package picking zones: select the storage location zone codes where the received container packages are located and should be picked.
The use case examines if the SHO’s order lines can be picked with an existing package container. The package contents should serve exactly one SHO. If SHO open quantity remains, then the process continues with the next package container until all available containers (located in the defined storage location zones) are consumed. If SHO open quantity remains then the rest of the order is picked from bulk stock.
The matching process takes into account the assortment (if exists) of the Shipment Order document line and the container package assortment.
|
|
Note that… |
|---|---|
| The assortment value in container instances is updated through custom use cases that generate the receipt request containers. |

The assortment is also translated as sortiment. An assortment is a package unit, commonly used for color/size monitoring in apparel industry, which depicts the combination of quantities to particular colors and sizes. When assortments are used in document lines, the input quantity is automatically exploded into size-color analysis lines based on the assortment definition. More information about assortments is found on the EBS User Guide EN.
Assortments are typically defined by the manufacturer based on customer demand. The fashion brand vendors may choose to prepare in advance end-customer orders in packages that contain specific assortments. They can also assign a barcode per each shipment package, associating in this way a container SSCC with an assortment. If this information is provided in packing list files, or any other logistics document that can be used as an Advanced Shipment Notice import file, you can use EBS EMI tool to import this data into the system and assign the provided information to document and document line corresponding fields.
The matching package container process generates picking request containers that are then executed in the WMS Mobile relevant workflow (ESRF MENU > 3. ORDERS > 4. PACKAGES PICKING).
Auto-confirm picking
The create route automation parameter Auto-confirm picking create picking action items by copy of the generated picking request items.
The prerequisites for this functionality are:
- The picking request items contain all necessary analysis information (the shipment document order lines should therefore contain analysis information required for the items involved).
- The destination storage location is predefined in the relevant automation parameter (Picking – target location)
- No multiple MU hierarchies exist in stock balances
- Stock is not contained in containers (bulk stock)
If the destination storage location is a packing zone type, then packing request items are generated after picking actions.
If the destination storage location is a shipment zone type, then loading request items are generated after picking actions.
The Auto-confirm picking is a rare use case that should be used with caution in terms of performance. Any picking errors are identified after picking, either in the packing or in the loading phase. It is strongly recommended to enable Quantity Handling for packing or loading request types in order to ensure the accuracy of stock in packing or loading areas.
Create cross-docking requests
The create route automation parameter Create xdock requests enables the opportunistic cross-docking functionality which is described in 51.2 Opportunistic cross-docking.
.
Stock shortages management
Before running the create route process you can check the availability of the quantity in demand for selected orders or order lines with the Check fulfillment based on available command button.
The Stock availability view opens, which returns the future available stock (current – reserved + future) for the selected zone types. You can also check availability for specific reservation or disposition reason codes in the relevant view’s parameters. The view by default excludes reservation/disposition marked balance records.

To manage stock shortages after the routing process, use the following create route automation parameters. Stock shortages might occur due to inadequate stock during the stock reservation process, or due to the selected use case outcome, such as the use of full packages only when running the process with Use of standard pallet packaging optimization rule.
Cancel open quantity: if shipment routing order line quantity remains open after picking requests are generated, the remaining shipment routing quantity is cancelled (SHC documents are created) and the initial shipment order quantity re-opens. This is achieved by the Cancel shipping orders use case execution for non-requested quantities (more information on the cancel shipping orders use cases is provided in 43. Shipment routing orders cancellation).
Process failed: decide the process state of the initial shipment order that is automatically assigned after cancelling open quantities. The process state is set by default to 1- administered to WMS, so that the order can be re-routed. The implementation requirements might impose to always set the process state to 4 – Process failed so that the cancelled order due to stock shortages is handled in ERP before deciding whether to re-route it or to cancel it permanently.
The default value of this parameter is set to the following company parameter:
|
|
WMS_PROCESS_FAILURE_SHIPMENT_ORDER_DOCUMENT |
|---|---|
| WMS Company parameter |
If set to false (default), then the process state 4 is not automatically assigned, but can be set on-demand with the use of the Process Failed command in the WMS Shipment routing view:

Note that only already you can assign the Process Failed state only for routed and cancelled documents.
The ERP process failed handling use case is found in ERP Menu > Sales > Sales orders > Pendencies Management. The relevant view returns trade documents that have the WMS_Shipment_Order property and the process state of 4- process failed.
There are two automations available: one that deletes the fulfillments and cancels open quantities for the shipment order document. One that re-assigns the shipment order document to WMS administration.


Cancellation reason – stock shortage: define the cancellation reason with which stock shortages are recorded.

Once a cancellation reason is declared, the Cancel shipping order use case of non-requested quantity creates a cancellation action item for the shortage quantity. The cancellation reason and the reference SHO are assigned to the cancellation action item. In the Shipments monitoring view, the cancellation action item quantity is recorded as “Not requested”:

View the not-requested cancellation action items in Menu > Overview > Cancellation actions – which are tracked as ad-hoc against the reference SHO.


Picking list print-out
Once picking requests are generated and allocated to shipment Work Packages, select the Menu > Shipments > Print-outs > Picking list to view, manage and print the picking list.
The Shipments for picking view opens, which returns the open picking request item data, such as item and stock dimensions, storage location and relevant layout data (building, storage area, etc.) as well shipment related data (route, transporter, etc.).
Note that requests generated with the group picking methodology are returned, but not supported correctly, due to multiple request item fulfillments with different SHOs.

Select the picking list records to print and use the either print the picking list with the use of the embedded or customized crystal reports – Print picking requests (A5 size) and Print picking requests (A4 size).
Use the Picking requests management command to:
 Assign resources to selected request items – it is reminded that resource assignment is on the Request header. Therefore, if you wish to assign more than one resources to a single request, the process creates as many headers as required.
- Prioritize the relevant replenishment request items, so that they are executed in higher priority (request item priority field is increased).
- Print the picking list for selected request items and update the “printed” field in the Request header. Note that if more than one printing commands are set for the same initial request, then the process creates as many request headers as required.
- Set the printing settings, such as the Printer name and the number of copies. You may also define if preview is required or not.

Picking
ESRF Picking
Select ESRF Menu > 3. ORDERS to choose one of the provided picking use cases described in the following paragraphs.
For all picking workflows, you might need to insert the criteria if the relevant configuration is set in the Request special fields matching table (13.9 Request and action user defined fields). Fill in as appropriate – these are not mandatory fields; they are used as a filter criterion for picking requests.
Enable the following ESRF Config parameter if you wish to show and use the Document’s Concerning Doc Code as filtering criteria.
|
|
ConcerningDocFilterEnabled |
|---|---|
| Common |


For all picking workflows, you will be asked to define (scan or search) the Order (mandatorily or not, depending on the use case). You should scan either the barcode or code of the Shipment Work Package or the barcode or code of the SHO or search from the list with the F3 Search function key.
Requests are filtered by the assigned resource. If both assigned and not assigned requests exist, requests with no assignment will be available to all RF users at second priority.
The date range for the reference documents is defined in the following ESRF Config parameter:
|
|
RefDocDateItervalDateRange |
|---|---|
| Common |
The date range for the requests is defined in the following ESRF Config parameter:
|
|
RefRequestDateIntervalDateRange |
|---|---|
| Common |
Both dates are set by default to minus/plus 30 days. Adjust as appropriate, but be cautious for any performance issues. Note that these parameters are common for almost all flows.
For Picking Requests with reservations, the date range for documents issue date is defined in the following ESRF Config parameter:
|
|
PickingRefDocDateItervalDateRange |
|---|---|
| Common |
Which is set by default to minus/plus 5 days.
For picking and real time picking flows, the request items should have open quantity (request item quantity > request item cancel quantity + request item closed quantity) or the action item that fulfills the request item does not have the “to” storage location filled (picking action is “in progress”).
Enable the following ESRF Config parameters to set the gross weight for the pallets and packages at the end of the picking flows:
|
|
Pick_SET_PACKAGE_GROSSWEIGHT, Pick_SET_PALLET_GROSSWEIGHT |
|---|---|
| Stock transfer requests |
By default, user concurrency is prohibited for picking and real time picking workflows – the check is performed per request item. If multiple user select the same request item to execute, then only one can perform the action. The following message occurs to the other concurrent users: “Request is being fulfilled by another user”. If you wish to allow user concurrency, set the following ESRF Config parameter to true:
|
|
ALLOW_REQUESTITEM_CONCURRENCY |
|---|---|
| Real time picking |
Guided picking
Choose the ESRF Menu > 3. ORDERS > 1. PICKING to execute open picking request items with quantity handling (stock reservation).
Select the filtering criteria for the picking request items:
Floor: filters the storage area of the “from” picking request item storage location.
The following ESRF Config parameters define which storage location layout data are used for filtering purposes.
|
|
BuildingFilterEnabled |
|---|---|
| Picking requests |
|
|
StorageAreaFilterEnabled |
|---|---|
| Picking requests |
|
|
SectorFilterEnabled |
|---|---|
| Picking requests |
Note that the above parameters are valid for the Manage Containers flow as well
Order: If “to” sorting or package containers exist in the picking request items, then you should filter with the Target SSCC field instead of the Order. The “Shipment order Documents” public query (ESPublicQueries\ESWMMobile\ESWMShipmentOrderDocumentsRF) is executed, which returns the Work Packages for SHOs in process state 2 – in WMS administration.
Request types should have the Handle Quantity enabled and belong to the ctx_Shipments property and the Picking step code. Sorting step code is also taken into account.
 Package type: you can optionally filter and differentiate container picking from bulk picking by selecting one of the following options provided in the F3 function key:
1. Containers: if chosen, then the Target SSCC field is hidden. Only request items with “to” container type or “to” container (instance) hints are returned.
2. Mass execution (mistranslated – it is Bulk execution): if chosen, then only request items with no “to” container type or “to” container (instance) hints are returned
3. All: returns all request items with or without container hint; the same results if left blank
Target SSCC: if an “Order” is selected then you can use this field to create a new SSCC (with the F1 function key) or scan an existing SSCC for pick-to-pallet, pick-to-pack or pick-to-sorting container execution (with no hint). If no Order is selected, then the scanned SSCC filters the picking request items container hints.

Final location: scan or select the target picking action storage location – if left blank you should choose one at the end of the flow. The valid target storage location zone types are 8-packing and 5-shipment, while13-picking buffer is only available for pick-to-cart.


Once the filtering criteria are selected the Get Picking Request Items public query (ESPublicQueries\ESWMMobile\ESWMGetPickingReqItems) is executed. The view returns the open picking request items (quantity > closed + cancelled) for the selected criteria in following sorting order:
Storage area code
Sector priority
Aisle priority
Location column
Location level
Storage location code
Item code
Color code
Size code
Request item seq num
At customization level, you can define the implementation specific sorting criteria and order.
The picking request item view shows information about the selected picking request item in combination with stock balance and item information, such as:
- The “from” request item picking location
- The “from” request item warehouse
- The “from” request item Lot and Lot barcode
- The current stock in the specified location and stock dimensions
- The available stock (current – reserved)
- The future stock
- The open picking request item quantity
- You can change the selected request item with the F1: Change function key.
- You can search for a specific Item within the selected WP with the F2: Item function key
- You can cancel the open request item quantity by pressing the F5: Cancel request item function key (refer to 13.6.6 Cancellation action items and 43 Shipment routing orders cancellation). The functionality is enabled with the following ESRF Config parameter:
|
|
ALLOW_QUANTITY_CANCELLATION |
|---|---|
| Real time picking |
0 – quantity cancellation is not allowed
1 – quantity cancellation is allowed
2 – quantity cancellation is allowed after user confirmation
- You can press the F6 function key button to cancel open request item quantity, cancel last action item or execute Ad hoc picking for the selected WP (and SHO).
- Confirm the “from” location for bulk stock or confirm SSCC for stock held in containers.
The next view is the Item confirmation view.
If Item replacements are enabled in actions, you can confirm any of the replacement valid items (refer to 9.5 Item replacements).
The next view is the Input Quantity confirmation view. The proposed quantity is the request item quantity converted to the optimum balance stock packaging MU. You can press F1:Change MU to alter/unpack the proposed quantity to a different MU.
Input the final location (destination location) of the picking action item if not set at the beginning of the flow. If 8-packing zone type storage location is selected, a packing request item is generated based on the data of the picking action item. If 5-shipment zone type storage location is selected, a loading request item is generated based on the data of the picking action item.
If you press the ESC button when in the final location view, then the following options are shown:
- Set final location (returns back to the final location confirmation view).
- Temporarily exit (exits from the flow, when selecting the same WP, the flow continues in the final location view).
- Set temporary location – set a location that is not a packing or a shipment storage location (no requests generated).
Once all request items of the selected WP are executed (or cancelled) the “Picking completed” message occurs.

Variation 1 – Confirm location
Regarding location confirmation:
- Disable the following ESRF Config parameter to skip location user confirmation (auto-confirmed):
|
|
PR_CONFIRM_FROM_LOCATION |
|---|---|
| Picking requests |
- Enable the following ESRF Config parameter to auto-complete the location with the request item from location. You can change (if configured) the proposed location or press enter to confirm.
|
|
PR_PROPOSE_FROM_LOC |
|---|---|
| Picking requests |
- Change the request item’s “from” location with another picking zone type storage location, as long as there is adequate available stock, by enabling the following ESRF config parameter:
|
|
PR_CHANGE_FROM_LOCATION |
|---|---|
| Picking requests |
- You can specify the allowed picking locations by defining the zone codes in the following ESRF config parameter:
|
|
PICK_ALTERNATIVE_ZONECODE |
|---|---|
| Picking requests |
Variation 2 – Confirm item
Disable the following ESRF Config parameter if you wish to skip Item Confirmation (auto-confirmed):
|
|
PR_CONFIRM_ITEM |
|---|---|
| Picking requests |
You are strongly recommended not to disable both Item and Location confirmation fields.
Variation 3 – Input quantity
- Input quantity can be set by default to 1 with the use of the following ESRF Config parameter:
|
|
PICK_QTY_DEFAULT_VALUE |
|---|---|
| Picking requests |
- You can also define whether you wish the Input quantity field to be editable or not (by default it is) with the use of the following ESRF Config parameter. If the value is set to false and the QTY_DEFAULT_VALUE is false, then the QTY_ISEDITABLE value is ignored:
|
|
PICK_QTY_ISEDITABLE |
|---|---|
| Picking requests |
- Input quantity is by default proposed; if otherwise, enable the following ESRF Config parameter:
|
|
PICK_IGNORE_PROPOSED_QTY |
|---|---|
| Picking requests |
- The following ESRF Config parameter, by default enabled, does not allow picking in balance MUs that are lower in hierarchy from the request item MU. A relevant message occurs: “Picking in lower packaging unit ({0}) than this of the request is not allowed».
|
|
PICK_STOCKMU_CHECK |
|---|---|
| Picking requests |
- Enable the following ESRF Config parameter to propose the quantity resolved from item barcode scanning.
|
|
PICK_PROPOSE_RESOLVED_QTY |
|---|---|
| Picking requests |
- The following ESRF Config parameter by default enabled, checks whether the stock balance MU and lot (optionally) matches with the request item’s MU and lot and if true, then the flow is directed to the quantity confirmation view. If disabled, then the user should decide from available stock balance MUs.
|
|
PICK_PACK_OPTIMIZATION_TYPE |
|---|---|
| Picking requests |
- Enable the following ESRF config parameter to check if the stock balance packaging unit is higher than the request item’s Measurement unit. If true, then picking is executed in the request item’s MU and automatic unpack action is generated.
|
|
PICK_AUTOMATIC_UNPACK |
|---|---|
| Picking requests |
Variation 4 – Propose input quantity based on WP
The functionality meets the business requirement to pick request items of the same Work Package by proposing the input quantity for the total of the request items that concern the confirmed item and storage location but different lots.
Enable the following ESRF config parameter:
|
|
PICK_PROPOSE_QTY_BASED_ON_WP |
|---|---|
| Picking requests |
The outcome is to create as many action items as the resolved request items with the corresponding fulfillments. In case of overflow, the overflow quantity fulfills randomly the first request item.
Variation 5 – “From” container hint and swap
When picking request items have a “from” container hint, then the Confirm location is disabled and the user is guided to scan the request item’s SSCC, information presented in the confirm location/SSCC view.

Once you scan the SSCC the system fulfills all the request items with the specific container hint as long as the container balances match the request items involved.
You can scan by default any other SSCC available and swap it with the request item’s SSCC as long as the following criteria are met:
- The ESRF Config parameter is enabled (default true):
|
|
PICK_ENABLE_CONTAINER_SWAP |
|---|---|
| Picking requests |
- The scanned container balances match with the swapped container hint request items. The matching conditions depend on the item and item stock dimension configuration. Matching conditions take into account if the stock dimensions have a “proposed” matching relation between action and request.
If Container Swap is not allowed, then in case you scan a different SSCC than the request item’s SSCC, the system will try to fulfill the scanned container request items, and if it fails, the message “Wrong container” occurs.
In the context of picking, container swap functionality handles the Use in reservation algorithm container flag. If both the scanned and request item container are in reservation use, then the use case un-flags both of them.
Real time picking
Choose the ESRF Menu > 3. ORDERS > 3. REAL TIME PICKING to execute open picking request items with no quantity handling.
- Select the filtering criteria for the picking request items:
Order: this is a mandatory field - the Shipment Work Packages to Pick public query is executed (ESPublicQueries\ESWMMobile\ESWMShipmentWorkPackages) which returns request types with handle quantity disabled and belong to the ctx_Shipments property and the Picking step code. Sorting step code is also taken into account. The major difference with Picking with reservations is in the fact that the query returns work package with request items where current stock exists for the involved items.
Final location: this is a mandatory field - scan or select the target picking action storage location. You need to select either a packing or a shipment storage location. If packing storage location is selected, a packing request item is created right after picking action. If shipment storage location is selected, then no loading request is generated by default. You need to enable the following ESRF Config parameter to create loading requests in Real time picking:
|
|
AutoCreateLoadingRequests |
|---|---|
| Common |
Package type: same functionality as in Guided Picking
Item type: choose (optionally) between Merchandise and Product item types as a filter to the request items.
SSCC: use this field to create a new SSCC (with the F1 function key) or scan an existing SSCC for pick-to-pallet, pick-to-pack or pick-to-sorting container execution (with no hint). F1 function key is disabled when the following ESRF Parameter is enabled:
|
|
GRPick_NEWPALLET |
|---|---|
| Real time picking |
If you wish to allow only pick-to-pack and prohibit pick-to-pallet execution, the enable the following ESRF Config parameter:
|
|
GRPick_PACK |
|---|---|
| Real time picking |
Sub-family UDF String Field 1: a special use case it to use the item’s sub-family UDF string field 1 as filtering criteria. This is enabled when defining the appropriate caption in the following ESRF Config parameter:
|
|
Item_UDFFilter_Caption |
|---|---|
| Common |
Once the filtering criteria are selected the Get Group Picking Request Items public query (ESPublicQueries\ESWMMobile\ESWMGetGroupPickingReqItems) is executed. The view returns the open picking request items (quantity > closed + cancelled) for the selected criteria in following sorting order:
Quantity (descending)
Item code (ascending)
then this is shown on the request item view.
The picking request item view shows information about the selected picking request item in combination with stock balance and item information, such as:
- If current stock for the item exists in one picking storage location only, it is displayed in the Def. location
- The request item warehouse
- The current stock in the specified location and stock dimensions
- The available stock (current – reserved)
- The open picking request item quantity
- You can change the selected request item with the F1: Change function key.
- You can search for a specific Item within the selected WP with the F2: Item function key
- You can cancel the open request item quantity by pressing the F5: Cancel request item function key. The functionality is enabled with the following ESRF Config parameter:
|
|
ALLOW_QUANTITY_CANCELLATION |
|---|---|
| Real time picking |
0 – quantity cancellation is not allowed
1 – quantity cancellation is allowed
2 – quantity cancellation is allowed after user confirmation
- You can press the F6 function key button to:
- Cancel open request item quantity
- Cancel (delete) last picking action item
- Execute Ad hoc picking for the selected WP (and SHO).
- Select a specific stock balance record
- Confirm the “from” location for bulk stock or confirm SSCC for stock held in containers.
The next view is the Item confirmation view.
If Item replacements are enabled in actions, you can confirm any of the replacement valid items (refer to 9.5 Item replacements).
You need to input all the monitored item stock dimensions if more than one values return from the combination of storage location/SSCC and item balance records.
The next view is the Input Quantity confirmation view. The proposed quantity is converted to the selected balance stock MU.
Enable F1: Unpack with the following ESRF Config parameter:
|
|
GRPick_AllowUnPack |
|---|---|
| Real time picking |
If automatic unpacking should be performed from a higher to a lower MU, the following ESRF Config parameter checks whether there is available balance in the lower MU and if true, it does not perform unpacking:
|
|
UNPACK_CHECK_SUBMU_BALANCE |
|---|---|
| Common |
If no picking request items with available stock are returned, the relative message occurs.
If no other open picking request items are returned for the selected WP, then the Picking completed message occurs.

Variation 1 – Confirm location
Regarding location confirmation:
- Disable the following ESRF Config parameter to skip location user confirmation (auto-confirmed and not shown):
|
|
PR_CONFIRM_FROM_LOCATION |
|---|---|
| Picking requests |
Variation 2 – Input quantity
- Input quantity can be set by default to 1 with the use of the following ESRF Config parameter:
|
|
PICK_QTY_DEFAULT_VALUE |
|---|---|
| Picking requests |
- You can also define whether you wish the Input quantity field to be editable or not (by default it is) with the use of the following ESRF Config parameter. If the value is set to false and the QTY_DEFAULT_VALUE is false, then the QTY_ISEDITABLE value is ignored:
|
|
PICK_QTY_ISEDITABLE |
|---|---|
| Picking requests |
- Enable the following ESRF Config parameter to propose the quantity resolved from item barcode scanning.
|
|
PICK_PROPOSE_RESOLVED_QTY |
|---|---|
| Picking requests |
- The following ESRF Config parameter, by default enabled, does not allow picking in balance MUs that are lower in hierarchy from the request item MU. A relevant message occurs: “Picking in lower packaging unit ({0}) than this of the request is not allowed».
|
|
PICK_STOCKMU_CHECK |
|---|---|
| Picking requests |
- Input quantity is by default proposed; if otherwise, enable the following ESRF Config parameter:
|
|
PICK_IGNORE_PROPOSED_QTY |
|---|---|
| Picking requests |
Variation 3 – Confirm item
- Disable the following ESRF Config parameter if you wish to skip Item Confirmation (auto-confirmed):
|
|
GRPick_CONFIRM_ITEM |
|---|---|
| Real time picking |
Enable the following ESRF Config parameter if you wish the system to resolve automatically the appropriate request item when scanning a different Item than the selected request item’s.
|
|
GRPick_ALLOW_AUTO_ITEM_SEARCH |
|---|---|
| Real time picking |
Ad hoc picking
Choose the ESRF Menu > 3. ORDERS > 2. AD HOC PICKING to execute picking either for ad-hoc SHOs (with no lines) or for any SHO with process state 2 – in WMS administration. Ad hoc SHOs are differentiated with the * indicator:

Ad hoc picking can be executed through picking and real time picking flows with the F6 function key. Make sure that the following ESRF Config parameter is enabled, so as to ensure that the actions executed with the Ad hoc picking flow (and the consequent step requests and actions) are recorded as “ad hoc” even if there are available line items and request items for the picked item.
|
|
ADHOC_DoesNotCreateFulfillments |
|---|---|
| Common |
The parameter is by default set to false, resulting in request action and line step action fulfillments in case the item picked exists in document order line items and picking request items. This might result in problems during invoicing.
Make sure that you have enabled in all shipment context property ICP lines the actions for ad hoc items (refer to 13.6.5 Ad hoc action items).
- Select the reference criteria for the picking actions:
Order: this is a mandatory field - the Shipment Orders available for Adhoc public query is executed (ESPublicQueries\ESWMMobile\ESWMShipmentOrdersForAdhoc) which returns SHO documents with process state 2 and request types that belong to the ctx_Shipments property and the Picking step code. Sorting step code is also taken into account.
Picking location: this is a mandatory field - scan or select the target picking action storage location. You need to select either a packing or a shipment storage location. If packing storage location is selected, a packing request item is created right after picking action. If shipment storage location is selected, then no loading request is generated by default. You need to enable the following ESRF Config parameter to create loading requests in Real time picking:
|
|
AutoCreateLoadingRequests |
|---|---|
| Common |
Container SSCC: use this field to create a new SSCC (with the F1 function key) or scan an existing SSCC for pick-to-pallet, pick-to-pack or pick-to-sorting container execution (with no hint).
Scan or input the from storage location (only picking locations are allowed) for bulk picking or scan the container SSCC when picking from container stock.
Scan the Item code or barcode. If more than one stock balance records are resolved, choose one from the list to continue.
Define the picking quantity (no proposal is made).
Scan the next item or press ESC to exit the flow.

Variation 1 – Input quantity
- Input quantity can be set by default to 1 with the use of the following ESRF Config parameter:
|
|
PICK_QTY_DEFAULT_VALUE |
|---|---|
| Picking requests |
- You can also define whether you wish the Input quantity field to be editable or not (by default it is) with the use of the following ESRF Config parameter. If the value is set to false and the QTY_DEFAULT_VALUE is false, then the QTY_ISEDITABLE value is ignored:
|
|
PICK_QTY_ISEDITABLE |
|---|---|
| Picking requests |
- Enable the following ESRF Config parameter to propose the quantity resolved from item barcode scanning.
|
|
PICK_PROPOSE_RESOLVED_QTY |
|---|---|
| Picking requests |
Pick-to-cart
Pick-to-cart is a shipment order picking model in which employees (pickers) walk throughout a warehouse, picking items off the shelves and placing them on a rolling cart for packing and delivery. Pickers can pick multiple orders at the same time as they work their way throughout the warehouse, therefore pick-to-cart minimizes walking distance — an element that has a big impact on order fulfillment times and cost.
Carts may have fixed and standard size locations (sorting storage locations), where items are placed. It is not mandatory to monitor sorting storage locations. Carts may also have variable number and size of containers (picking containers). The configuration and the picking execution varies depending on the type of cart. Note that the pick-to-cart flow is available only for guided picking (picking with reservations).
Carts with sorting storage locations
Should you wish to monitor sorting storage locations, create storage locations of zone type 7 – Sorting. You may optionally assign a specific sorting container SSCC to each storage location. In this case, you should create different storage locations for each cart. If you do not associate sorting storage locations with certain containers, then you should set these locations as Transit.

Assign shipment routing documents to sorting containers in the ESRF Menu > 3. ORDERS > 5. MANAGE CONTAINERS > 1. ASSIGN ORDERS.

- Scan the sorting container SSCC
- Select a storage area (optionally) to filter picking request items from storage locations
- Scan the order (WP code/barcode, SHO code/barcode) to be assigned. Orders that have already been assigned are displayed with an * indicator.
- Assign the sorting container location depending on the ESRF Config parameter:
|
|
SortingLocationMgmt |
|---|---|
| Picking requests |
If set to 1 (default) - the next empty sorting storage location is auto-assigned (empty storage location = no SHO assigned). If no storage location is resolved, the user should assign it manually
If set to 0 - sorting storage locations are not monitored
If set to 2 – storage location assigned by the user (mandatorily)
The order assignment to sorting storage locations is based on the public query ESWMGetSortingLocationForPickingRequests.

The use case checks:
- Whether the assigned WP request items have different destination locations and throws an exception message
- Whether the sorting container is empty and if not, it throws an exception message.
After order assignment is made for sorting containers and/or sorting storage locations, the involved picking request items are updated with the “to” sorting containers and “to” sorting storage locations.
 Select ESRF Menu > 3. ORDERS > 5. MANAGE CONTAINERS > 2. UNASSIGN ORDERS to disconnect picking request items from assigned sorting containers and/or storage location.
 Execute the flow of Guided Picking by scanning the Cart SSCC in the Target SSCC field.
The destination sorting location code is displayed in the request item view. The picking actions are updated with the “to” sorting container and “to” sorting location container, while the packing request items (the destination storage location in picking should be set to packing), are updated with the “from” sorting container and container location data.
Carts with picking containers (pre-packing)
As described in 34.2.4 Pre-packing, the outcome of the pre-packing algorithm is the generation of request items updated with the “to” picking container.
Select ESRF Menu > 3. ORDERS > 5. MANAGE CONTAINERS > 3. ASSIGN CONTAINERS to associate carts with picking containers. It is mandatory to fill in the storage area (floor) before proceeding. The use case checks whether:
- The picking container is already associated with the current or another cart and a relative message occurs.
- The cart has been associated with request items of another storage area (or building, etc. depending on the warehouse layout criteria in use).
- There are balances for the cart that belong to a different site than the login site.
Select ESRF Menu > 3. ORDERS > 5. MANAGE CONTAINERS > 4. UNASSIGN CONTAINERS to disconnect picking request items from assigned sorting containers.
 Execute the flow of Guided Picking by scanning the Cart SSCC in the Target SSCC field.
The destination picking container SSCC is displayed in the request item view. The picking actions are updated with the “to” sorting container and “to” package container (if package class is used as picking container). You should confirm the destination picking container SSCC at the quantity confirmation view. The available destination locations are either packing or picking buffer locations.
Enable the following ESRF Config parameter to avoid concurrent actions on the same picking container.
|
|
PICK_CHECK_TOCONTAINER_CONCURRENT_ACTIONS |
|---|---|
| Picking requests |
If the destination location is set to packing, then packing requests are generated with sorting and packing containers updated.
If the destination location is set to picking buffer, then you can either transfer the sorting container and its contents to a packing / shipment or another picking buffer location and optionally place the picking containers into pallet containers with the ESRF Menu > 3. ORDERS > 5. MANAGE CONTAINERS > 5. TRANSFER CONTAINERS option. Enable the following ESRF Config parameter to automatically transfer the sorting container and its contents to the final location, otherwise you should scan each Package SSCCs.
.
|
|
SRTMGMT_AUTOTRANSFER_SORTING |
|---|---|
| Picking requests |
If the sorting container is transferred to a packing location, packing requests are created for the picking containers. Sorting container is removed. This use case is particularly useful when the picking containers that are placed into carts are loaded into conveyor belts before ending up in Packing Stations.
If the sorting container is transferred to a shipment ramp, loading requests are created for the picking containers. This use case is applicable when picking containers are used as shipment package containers - packing operation is conducted with pick-to-cart.
Unload container
You can remove the contents of a sorting container to the same location with the ESRF Menu > 3. ORDERS > 5. MANAGE CONTAINERS > 6. UNLOAD CONTAINER. There should be no pending request items for the sorting container, i.e. picking should have already been executed or cancelled. The option applies to all types of carts.
Disconnect sorting container
When pick-to-cart process is completed, the public query ESWMGetPendingPickingRequestsOfContainer checks whether there are open picking request items assigned to the sorting container. If results are returned, the following question occurs:
“There are open picking requests assigned to the sorting container. Disconnect sorting container?”
If confirmed, the ESScrollerCommands\ESWMMobile\DummyFilter\DisconnectSortingContainerFromPickingRequestItems.xml automation is executed, that removes the sorting container from the open picking request items.
Group picking
When picking requests are generated with the Group picking methodology, choose the Real Time Picking flow to execute picking and sorting at one-step or choose to execute sorting at second time. If you do not wish to monitor the sorting phase as a separate step code (sorting is executed during packing), then the sorting phase should not be declared in the company parameter WMS_SORTING_STEPCODE. In this case, you can execute picking requests through the Guided Picking workflow, as long as the requests handle quantity. Packing is executed per SHO (refer to 39. Packing).
The following steps describe the group pick and sort methodology.
- Once a group picking work package is selected, you are prompt to select whether to bypass sorting in one-step or not.
- You should, then, mandatorily assign a final picking location that belongs to a 7 - sorting zone type. You can set a default sorting location in the following ESRF config parameter:
|
|
Sorting_DEFAULT_LOCATION |
|---|---|
| Sorting |
Once picking is executed, the Sorting view displays information about the sorting quantity per SHO involved. Define the final location for picking and sorting, which in this case is shipment (packing cannot by default selected). Loading requests are then generated.


Select ESRF Menu > 3. ORDERS > 8. SORTING to execute sorting at second time.

|
|
Sorting_CONFIRM_ITEM |
|---|---|
| Sorting |
Enable the following ESRF Config parameters:
To auto-confirm item based on sorting request item.
|
|
SRT_ALLOW_AUTO_ITEM_SEARCH |
|---|---|
| Sorting |
to resolve automatically the appropriate sorting request item when scanning a different Item than the selected request item’s.
Enable the following ESRF Config parameter should you wish to measure weight upon sorting for variable weight items (see also 54. Variable weight and volume management).
|
|
SRT_WeightScanEnabled |
|---|---|
| Picking requests |
In the sorting quantity confirmation view, you can assign a route to the SHO with the F1 function key. This functionality does not take into account Shipments; therefore, you are not advised to use it for new implementations.
Packages picking
Select ESRF Menu > 3. ORDERS > 4. PACKAGES PIICKING to execute picking for received package containers. The use case handles picking request containers generated with the Package Collection mode (refer to 34.2.6 Package collection).
- Select or scan the Shipment Work Package. The public query ESWMPickingRequestsWithPackages is executed, returning SHOs in process state 2 and request items with a “to” package container hint.
- Select the destination storage location for the picking action. You may define a default destination location for package picking operation, as long as it belongs to a shipment zone type, in following ESRF Config parameter:
|
|
PACKAGE_PICKING_DEFAULT_TOLOCATION |
|---|---|
| Package picking |
Scan the package container SSCCs until all SSCCs are picked. Loading requests are created if the following ESRF Config parameter is enabled.
|
|
AutoCreateLoadingRequests |
|---|---|
| Common |

Picking and number of shipment packages
 When shipment packages cannot be identified – for example Item MU is PCS while the physical picked packaging unit may be a carton or a box containing the PCS but is not serialized or picking is executed to non-serialized physical containers – you can declare the number of picked shipment packages ad hoc during picking execution. The following ESRF Config parameter enables the functionality and applies to picking with reservations, real time and ad hoc picking.
|
|
KOLA_ENABLED |
|---|---|
| Real time picking |
During picking execution press the F5: SHIPMENT PACKAGES function key to declare the number of packaging units that will be shipped. You can also declare the Number of Shipment Packages at the end of the flow:
 Track this information in the Qty Pack MU field of the ESWMAction table, which is displayed in the Amount field of the Transport Info Action form. Use this information at customization level to update Shipment Delivery Notes with the total number of shipment packages.
Back office picking
Select Menu > Shipments > Shipments monitoring > Towards picking (based on stock) to execute picking through Back office application.

The use case:
- Supports both picking with and without stock reservation
- Creates new picking actions based on stock balance data. The picking actions are created in the actual stock balance MU, including stock dimensions that are not necessarily derived from the picking request item. The request item guides the use case so as to automatically select and suggest the appropriate balance record(s).
- Transfers the stock balance container (from container) to the destination location based on the Container Control Policy rules (refer to 10.2 Container control policy),
- Stock balance records are selected automatically based on “best match” criteria, allowing however user intervention.
The use case does not support automatic unpack.
The following “from” request items fields are used as mandatory filtering criteria to the stock balance analysis records:
- Item
- Storage location (if exists)
- Warehouse
- Site
In the Join Condition criterion define which of the request item fields (if not null) participate as filtering criteria to the stock balance records.
For example, if Lot is defined as filtering criterion and Lot exists in the picking request item, then the use case filters the available stock balances with the requested lot. If Lot is not selected in the Join Condition criterion, then the use case returns the available stock regardless the lot value prioritizing the requested lot.
In conclusion, depending on the implementation requirements, the use case allows the exact or proposed stock dimensions handling – including all stock dimensions, even containers. The sorting order of the returned balance records is based on the quantity best match algorithm (records that match exactly the requested quantity are prioritized) and the requested stock dimension values.
You may also set the available zone types for picking – by default set to 1-picking. This might be useful in requests that do not handle quantity, therefore the “from” location is not specified.
When refreshing the view, the system proposes the quantity “For Collection” displayed at the detail of the view (balance analysis records) based on the available quantity per stock balance row. The available quantity per stock balance row is defined as the remaining consumption quantity. If, for example, the same item should be served from multiple request items, for each request item the quantity is “consumed”, decreasing the available quantity.
You can edit the “For Collection” quantity and adjust as appropriate. The maximum quantity cannot be greater than the available quantity per balance row. The quantity adjustments concerns the selected row – not automatic readjustment is made if more than one balance rows are selected.
For each request item the Open Picking Quantity is calculated based on the open request item quantity minus the sum of quantities for collection of the involved balance rows per request.
The balance rows with For Collection Quantity greater than zero are auto-selected. If the quantity is set to zero, the rows are de-selected.
Select the New picking command button and set (mandatorily) a destination storage location. Choose either packing or shipment zone types to generate either packing or loading requests based on picking actions.
Picking correction
You can correct picking actions data with the Menu > Shipments > Shipments monitoring > Picking correction use case.

The picking corrections view returns picking action items for SHOs with process state 2- in WMS administration. Information relevant to the action item as well as derived information from line step action and request action fulfillments are shown. Requests and actions of next steps (e.g. packing or loading actions and requests) are also shown. The fulfilled quantity of the next step actions is abstracted from the picking action item quantity in order to define the quantity that can be corrected. In the “Decrease quantity by” field you can modify the proposed corrected quantity.
The use case checks whether the action item to be corrected is fulfilled with an “invoiced” target document line. In this case, you cannot proceed in correction, unless the invoice is also cancelled.
The use case takes care of the next step requests (if exist), and decreases (re-opens) their requested quantity by the final correction quantity.
You can optionally select whether you wish to cancel the picking request quantity and the SHO’s open line quantity with the Cancel quantity flag. If selected, the Shipment Orders Cancellation use case is called (refer to 43 Shipment routing orders cancellation for further information).
You can optionally select whether the corrected quantity should be returned back to the initial picking location with the use of the Transfer from initial picking location flag. By default, the stock remains in the target picking action storage location (flag is not selected) – which is the current stock location.
ESRF Replenishment (shipment context)
Replenishment is the process of inventory moving from a replenishment storage location (zone type 3) to a picking storage location (zone type 1), through an intermediate (buffer zone type - 10) location if required, based on the replenishment 1st and/or 2nd step destination storage location proposal algorithms (refer to 14.2 Destination storage location proposal).
The purpose is to replenish picking storage locations with adequate stock to serve the picking operation. Replenishment operation typically applies to Back-to-Back and VNA storage systems (refer to 8.3 Storage systems). The use of buffer locations (two-step replenishment) depends on the warehouse layout. For example, if pallet storage locations are located in different storage areas than the picking storage locations, then pallets need to move into intermediate locations before their content is transferred to the final picking locations.
Three modes of replenishment are supported:
- Οn-time, which is triggered by the create route processing (Activate shipments in WMS) to serve the selected shipment orders demand (refer to 34.1 Picking and replenishment requests). Replenishment actions fulfill relative requests that handle quantity.
- Off-time, which is driven on-demand. The off-time replenishment generation scenarios are described in 50. Off-time replenishment. Replenishment actions fulfill relative requests that do not necessarily handle quantity. Off-time replenishment operation is typically conducted at times when there are no concurrent on-time replenishment operations. However, if executed concurrently, on-time replenishment requests are either differentiated or by default set in higher priority from off-time requests.
- Ad hoc, replenishment quantities are proposed based on demand or picking location replenishment levels. No requests are generated.
Select ESRF Menu > 3. ORDERS > 6. REPLENISHMENT to view the provided replenishment use cases.

Single/First step replenishment
Select ESRF Menu > 3. ORDERS > 6. REPLENISHMENT > 1. REPLENISHMENT to execute off/on time single step of 1st step replenishment request items.
- Select the filtering request item criteria:
- Replenishment type: select “on-time” to filter request types with context property ctx_Shipments (pRPLSH is the system’s default request type). Select “off-time” to filter request types with context property ctx_StockMovements (pREPL is the system’s default request type). If no selection is made, both on-time and off-time requests are filtered.
- Order: The Shipments orders for replenishment public query is executed, found in ESPublicQueries\ESWMMobile\ESWMGetShipmentOrdersForReplenishment, which returns shipment order documents of process state 2 that are related to the replenishment requests. This is an obsolete query that no longer returns results. It is not, however, common to filter replenishment requests for specific shipment orders.
- Floor (storage area): same use as in Picking flow. Building and sector location criteria can also be used if enabled.
- Item Group and Item Category: item group and category filtering criteria can be optionally used for the replenishment request items.
- Target location: select the replenishment request items to serve based on the destination storage location.
- Target SSCC: scan an existing container or create a new one with the F1 function key to run the replenishment-to-container mode of operation.
None of the above criteria are mandatory.
The Get Replenishment Request Items public query (ESPublicQueries\ESWMMobile\ESWMGetReplenishmentReqItems) is executed, which returns open replenishment request items of 1st step (step code is 148B) or single step (“from” storage location is not buffer zone type). The request registration date range criteria are set by default to plus/minus 10 days, in the following ESRF config parameter:
|
|
ReplenishmentRefDocDateItervalDateRange |
|---|---|
| Common |
Requests are also filtered with the assigned resource. If both assigned and not assigned requests exist, requests with no assignment will be available to all RF users at second priority.
Results are returned only when current stock balances exist in the “from” replenishment storage location.
Press the F3 key to search for a specific Item.
Press the F1 key to navigate and select a different request item.
Press the F7 key to view stock balance data for the item in the destination storage location.
If the selected request item has a container hint (mixed or homogeneous) and the container quantity is fully reserved (when the create replenishment process is run with Container quantity management enabled) then scan to confirm the container SSCC. By default, the container is transferred to the request item’s destination storage location, the relevant container request items are fulfilled and the container flag “Use in stock reservation” is unchecked.
If the selected request item has a container hint, but the contents of the container differ in quantity or stock dimensions from the open request items, then scan the SSCC and then confirm Item and Quantity.
If the selected request item has no container hint, then scan the SSCC (if stock is held in containers, which is typical in replenishment locations) and confirm Item and Quantity.

Enable the following ESRF Config parameter should you wish to add stock to a destination container:

|
|
REPL_TOSSCC |
|---|---|
| Replenishment |
Enable the following ESRF Config parameter to exclude stock marked with reservation or disposition reason codes from available stock:
|
|
REPL_CHECK_DISPRES |
|---|---|
| Replenishment |
Variation 1 – Confirm location
Regarding location confirmation:
- Disable the following ESRF Config parameter to skip location user confirmation (auto-confirmed):
|
|
REPL_CONFIRM_FROM_LOCATION |
|---|---|
| Replenishment |
Note that you can change the request item’s “from” location, by default – no configuration is required. The following question occurs:
“You have set different location than the suggested replenishment location. Continue?”
The allowed locations are replenishment zone type location. You can specify the allowed zone codes for the replenishment “from” location in the following ESRF Config parameter:
|
|
REPL_ALTERNATIVE_ZONECODE |
|---|---|
| Replenishment |
- Enable the following ESRF Config parameter to confirm or modify the destination storage location:
|
|
REPL_FIRSTSTEP_CONFIRM_TO_LOCATION |
|---|---|
| Replenishment |
Once the 1st step destination location is modified, the 2nd step replenishment request items are updated with the new “from” storage location.
For single step replenishments, the picking requests that have reserved stock from the initial replenishment destination storage location are not updated. Therefore, modification of the destination location is allowed only when stock balance is adequate in the picking location and reserve stock does not exceed the available.
Variation 2 – Confirm item
Disable the following ESRF Config parameter if you wish to skip Item Confirmation (auto-confirmed):
|
|
REPL_CONFIRM_ITEM |
|---|---|
| Replenishment |
You are strongly recommended not to disable both Item and Location confirmation fields.
Variation 3 – Input quantity
- Input quantity can be set by default to 1 with the use of the following ESRF Config parameter:
|
|
REPL_QTY_DEFAULT_VALUE |
|---|---|
| Replenishment |
- You can also define whether you wish the Input quantity field to be editable or not (by default it is) with the use of the following ESRF Config parameter. If the value is set to false and the QTY_DEFAULT_VALUE is false, then the QTY_ISEDITABLE value is ignored:
|
|
REPL_QTY_ISEDITABLE |
|---|---|
| Replenishment |
Variation 4 – Enable container swap
If the following ESRF Config parameter is enabled:
|
|
REPL_ENABLE_CONTAINER_SWAP |
|---|---|
| Replenishment |
Then swap is allowed for request items with container hints. Swap in the context of replenishment:
- Is allowed between containers regardless the quantity, the from/to storage locations and the stock dimensions. If the scanned container is allocated to existing open replenishment request items, then the process swaps (updates) both swapping and swapped request items with the container hint, quantity and stock dimension data.
- Updates the 2nd step replenishment request items with the new container hint and stock dimensional data.
If stock balance quantity is not adequate for swap, for example if picking request items reserve stock from the replenishment destination location and after the swap the quantity reserved becomes greater than the future available stock, then the message “Request item execution is not allowed for the selected container” occurs.
When swap is enabled, it applies to both 1st and 2nd step replenishment processes.
The container swap functionality is most commonly used in the context of replenishment for consumptions in conjunction with balance elimination activated to the consumption and buffer storage locations.
Second step replenishment
Select ESRF Menu > 3. ORDERS > 6. REPLENISHMENT > 2. REPLENISHMENT FROM BUFFER to execute off/on time 2nd step replenishment request items from buffer replenishment locations.
- Select the filtering request item criteria:
- Replenishment type: select “on-time” to filter request types with context property ctx_Shipments (pRPLSH is the system’s default request type). Select “off-time” to filter request types with context property ctx_StockMovements (pREPL is the system’s default request type). If no selection is made, both on-time and off-time requests are filtered.
- Floor (storage area): same use as in Guided Picking flow. Building and sector location criteria can also be used, if enabled.
- Item Group and Item Category: item group and category filtering criteria can be optionally used for the replenishment request items.
- Target location: select the replenishment request items to serve based on the destination storage location.
- Starting point location: select the replenishment request items to serve based on the starting storage location (buffer type locations are filtered).
- SSCC: scan the SSCC to filter the request items with the specified container hint.
Note that you should define either the Starting point Location or the SSCC filtering criteria.
The Get Replenishment Request Items public query (ESPublicQueries\ESWMMobile\ESWMGetReplenishmentReqItems) is executed, which returns open replenishment request items of 2st step (step code -148) with buffer “from” location. The request registration date range criteria are set by default to plus/minus 10 days, in the following ESRF config parameter:
|
|
ReplenishmentRefDocDateItervalDateRange |
|---|---|
| Common |
 Requests are also filtered with the assigned resource. If both assigned and not assigned requests exist, requests with no assignment will be available to all RF users at second priority.
Results are returned only when current stock balances for the selected criteria exist in the buffer replenishment storage location.
Press the F2 key to view container balance information.
If the selected request item has a container hint, then scan the SSCC and confirm the quantity for each container request item. If no container hint exists, then you should confirm the quantity. If the following ESRF config parameter is disabled, then the item confirmation is required.
|
|
TSR_REPL_AUTOCONFIRM_ITEM |
|---|---|
| Replenishment |
Variation 1 – Confirm Location
Enable the following ESRF Config parameter to confirm or modify the destination storage location:
|
|
REPL_ SECONDSTEP_CONFIRM_TO_LOCATION |
|---|---|
| Replenishment |
If not sufficient available stock exists in the initial destination storage location then negative reservation stock balance error occurs.
Variation 2 – Enable distribution
When a container SSCC is scanned, and there is stock available that has not been reserved and allocated to a destination location, you can enable the distribution algorithm with the following configuration:
- Define the distribution view in the replenishment ICP line (refer to 14.2.4 Distribution algorithm).
- Enable the following ESRF Config parameter:
|
|
REPL_ENABLE_CONTAINER_DISTRIBUTION |
|---|---|
| Replenishment |
- Set the request type used for distribution request items in the following ESRF Config parameter:
|
|
REPL_REQUEST_TYPE_FOR_DISTRIBUTION |
|---|---|
| Request type configuration |
- Enable the following ESRF Config parameter if you wish the storage area defined in the filtering criteria to be used as a hint to filter destination storage locations derived from distribution algorithm.
|
|
REPL_FILTER_STORAGEAREA_DISTR |
|---|---|
| Replenishment |
Variation 3 – Handling stock in buffer
The following ESRF Config parameter checks whether stock remains available for the selected container after replenishment is executed and asks the user to set a transfer location for the remaining stock. A stock movement action transfers stock from buffer to the selected storage location.
|
|
REPL_CHECK_CONTAINERSTOCK |
|---|---|
| Replenishment |
The following ESRF Config parameter automatically transfers the container stock from the buffer location to the transit location once the SSCC is scanned. Request item from location is updated with the transit location. If stock remains in the container after replenishment is executed, then you should set the location to transfer the remaining stock at the end of the flow. Note that you cannot transfer the remaining stock through ad hoc transfers for stock in transit locations.
|
|
REPL_ENABLE_PALLET_INTRANSIT |
|---|---|
| Replenishment |
Ad hoc replenishment (shipment context)
Ad hoc replenishment is the process of picking locations replenishment without any prior request generation process. There are two scenarios supported in the context of shipment: “Ad hoc based on demand” and “Ad hoc based on storage location replenishment levels”.
Select ESRF Menu > 3. ORDERS > 6. REPLENISHMENT > 3. ADHOC BASED ON DEMAND to execute the scenario that compares the demand that will be fulfilled through the real time picking flow with the available stock in picking locations with zone codes equal to those declared in the following ESRF Config parameter:
|
|
ZONECODE_FOR_ADHOC_REPL |
|---|---|
| Replenishment |
If demand is less than the available stock, then stock control is performed in replenishment locations, based on filtering criteria that are set in the following view:

The picking location stock shortages are calculated with the use of the ESWMReplenishImmediatePickingShortages public query.
Select ESRF Menu > 3. ORDERS > 6. REPLENISHMENT > 3. ADHOC LOCATION CAPACITY to execute the scenario based on replenishment levels set to the item storage location.
For each item in stock in the selected replenishment location, the item storage location upper replenishment level is checked versus current stock. The difference between current stock and upper replenishment level is proposed as the replenishment quantity. The use case is suggested when Item storage location replenishment methodology is used (refer to 9.6 Item storage locations).

The ESPublicQueries\ESWMMobile\ESWMReplenishItemSLShortages public query calculates the stock shortages in picking locations.
Packing
Packing is the process of packing items for one or more shipment routing orders into an appropriate container before shipping it to the recipient. Typically consists of choosing appropriate materials and an appropriate container to pack the products, weighing the package, and labeling it with the relevant packing list.
ES Touch® Packing Station supports packing operation in workstations with the use of touch screens. Handheld barcode scanners, label printers and weighing machines are commonly part of a packing station equipment.

Packing process may also involve container nesting – packages nested into master packages and / or pallets. ES Touch® C2C Station supports container nesting during packing operation.
When mobility is required, use the ESRF® WMS Mobile Packing workflow to execute packing operation.
ES Touch® Packing Station
Run the ESKiosk.exe in the application folder to create a desktop shortcut for each client PC by double clicking on the Packing Station icon.

Configure as appropriate the ES Touch users (refer to 18.3 ES Kiosk Touch stations users) and login to the application by double-clicking the shortcut icon.
The ESKiosk\PackingStation ES00KioskDocuments.xml file contains configuration parameters concerning the Form ID that is opened, the action type that is used, as well information that is shown in the application menu.
Through the options found in Operations menu, a list of functionalities is provided, such as the application exit, representation of logging screen or minimizing of application window as well as information regarding the identification and application connection data. By selecting the «Menu» option, the functionality of accessing additional application operations is provided, whereas by selecting the “Packing” option the working area will be covered from the Packing registration screen. Finally, by selecting the «Cancel transaction» option the user may close the “current” registration screen.
The Current Transactions menu is directly connected with the new action entry functionality by holding another one «On hold». Through this menu, you can have an indication as to the number of in progress (open) transactions and also the functionality of alternation among these depending on the transaction you are able of completing at a point in time.
The Packing Action form consists of controls (special fields) - used to search and input data either by scanning or typing - and of command fields to execute actions. The red-marked controls are mandatory for the packing operation.
The Requests towards packing view (in WMS Shipments view area) is used to display the pending packing request items on the down-left part of the screen.
The Packing action item grid and context information are displayed on the down-right part of the screen.
Use the Form Designer tool to adjust the layout according to implementation requirements, as well as show/hide special fields and available actions.

Packing operations are supported in touch screen and keyboard environments. The environment definition where the application will operate is set in the USER_INTERACTION parameter of ESKiosk\PackingStation ES00KioskParams.xml, default set to 0 – touch screen.
The functionality consists of:
- Setting the appropriate selection criteria for the open packing request items – commonly created after picking operation.
- Defining the appropriate container type to create new container or select an existing container. Only one container can be used at a time.
- Adding contents to the container by item barcode scanning and input quantity, or by using the bulk packing functionality for selected request items.
- Closing the container when packing is completed and continue with a new package if required.
- Deleting/updating contents of the selected container
- Managing open packing request item quantity use cases, such as cancelling open quantities or handling picking errors.
- Creating multiple containers based on Item Container Type data, using the Packing to Optimal Containers functionality.
- Printing on-demand reports, or automatically after certain actions (for example, upon container closing action).
- Measuring packing operation container gross weight and volume.
Open packing request items selection criteria
Packing station: scan or search storage locations with zone type 8-packing (mandatory field). This is the “from” storage location of the packing request items. The Shift+F3 view PSF3_SelectedStorageLocation (WMS Shipments area) is executed.
Enable the following ES00KioskParam parameter:
|
|
BUFFER_MODE_TYPE |
|---|---|
| Packing Station ES00KioskParam.xml |
When the packing request items storage location is a parent location (of zone type 8-packing) to other child packing locations. The functionality is useful when the package or sorting containers that are used in the picking operation are gathered in a “buffer” packing area and then distributed/allocated to specific packing station locations. The buffer packing area should be a parent location to the packing station locations.
In this case, you should set the actual child packing station location in the Packing station field. The open packing request items are filtered with the parent storage location.
Once a picking container SSCC is scanned, the packing request storage location (the storage location on the header of the request) is updated with the actual child packing station location. The request item location is not updated. The container stock is not transferred to the packing station location, which means that in case of unpack (correction), the stock returns back to the buffer packing location, which is the actual physical location.
- To: the destination storage location of the packing action items, which should belong to zone types 8-packing or 5-shipment. The destination storage location is by default auto-completed (if empty) with the “from” storage location.
- Select WP/Request: scan or search shipment work package codes/barcodes or packing request codes/barcodes. The Shift+F3 view PSF3_SelectedEntity view (WMS Shipments area) is executed. The view returns open packing request items for a predefined period of plus/minus 30 days. For best performance results, disable either search with packing request or search with work package request by setting the appropriate default value in the view’ s parameters: WP Scan or Request Scan.
- Delivery address: search through the company’s delivery addresses. Shift+F3 view is supported at customization level.
- Trade account selection, document selection, select recipient: you can show these three available selection special fields at customization level using the ES Form Designer tool. Document selection is recommended when group picking methodology is used and sorting operation is executed during packing.
- Picking container: scan container SSCCs of class sorting/packing (4,0) and Type of Use “picking”. Recommended when pick-to-cart picking methodology is used (refer to 37.1.4 Pick-to-cart).
- Enable the following ES00KioskParam parameter:
|
|
AUTO_OPEN_SORTING_INFO |
|---|---|
| Packing Station ES00KioskParam.xml |
To execute automatically the custom view defined in the ESWMCurrentBalances area with the code PackingStation_SortingInfo. The results are displayed automatically when the container SSCC is scanned.
Alternatively, you can set a Shift+F3 view in the form designer. Note that the views return results for information purposes only.
- Enable the following ES00KioskParam parameter:
|
|
DISCONECT_SORTING_CONTAINER_FROM_PICKING_REQUESTS |
|---|---|
| Packing Station ES00KioskParam.xml |
To check whether there are open picking request items assigned to the sorting container, and if true the user has to confirm or not the question: “There are open picking request items assigned to the cart: do you wish to disconnect the cart?”
- If sorting container locations are monitored, it is recommended to show (at customization level) the “Select container code” control as a filter the open packing request items.
- Item (search): scan item barcode to filter open packing request items with the resolved item.
Once the selection criteria are defined, the open packing request items view is executed. At customization level, you are advised to adjust the layout of the view and show the appropriate information based on the implementation requirements. Note that the view results are used by the system as source information to create the packing actions; therefore, the customization of the query should be generally avoided.

Create new or select existing container
 Container type: choose the appropriate container type for the current packing transaction. The 0-package container class is supported with the Type of Use 4-Shipment. This is defined in the special field parameters shown in designer mode. At customization level you can set additional container classes (e.g. pallets) in a comma-separated list. If more than one container types are available, choose from the list. If only one container type is resolved, it is auto-completed.
The container type is a mandatory field. Once a container type is selected, a new container instance is created during the packing action. If left blank, the following message occurs during the packing action save:
“You have not selected a container type or existing container”.
Once a container is closed, the container type remains selected for the next action container. Should you wish to select a container type each time a container is closed, enable the following ES00KioskParam parameter:

|
|
CLEAR_SELECTED_CONTAINER_TYPE |
|---|---|
| Packing Station ES00KioskParam.xml |
Select existing package (open):alternatively, you can add contents to an existing container or search for existing packages with the Open existing packages button.

The open existing package is a command button that runs the ESFormCommands\ESWMTransportAction\ OpenExistingPack_classic.xml automation. The automation returns by default packages with current stock balances in the destination location. If any of the selection criteria is completed, they are used by default as filters to the open existing packages. For example, if Work Package is selected, then the use case returns the packages (with current stock in the destination location) that are created in the context of the selected Work Package.
Note that, if at customization level additional container classes are used, you need to customize the existing packages form command as well.
Container contents: press this command button to view the containers of the selected existing package. The ESFormCommands\ESWMTransportAction\ViewPackageItems.xml automation is executed.

Insert packing container action items
There are three ways to add contents to the packing container:
- Scan Item barcode and set the input quantity
- Double-click (or press twice) a specific request item from the list
- Select multiple request items from the list and choose the bulk packing functionality
Scan or type Item barcode and input quantity
Scan the Item Barcode in the Item (towards packing) control field – the item barcode processing resolving process takes place (refer to 9.4 Item barcodes).
The following ES00KioskParam parameter (by default enabled) uses the resolved item as filter to the open packing request items (the Item Code is auto-completed in the Item search field):
|
|
INPUTITEM_ISFILTER |
|---|---|
| Packing Station ES00KioskParam.xml |
The Input Quantity is set by default to 1. Should you wish to define a different quantity, press the Define Quantity button and then scan/type the Item Barcode.

The number of digits allowed for the Input Quantity is defined in the following ES00KioskParam parameter:
|
|
INPUT_QUANTITY_NUM_OF_DIGITS |
|---|---|
| Packing Station ES00KioskParam.xml |
Use the following ES00KioskParam parameter:
|
|
ΙNPUT_QTY_DEFAULT_VALUE_BASED_ON_PACK_REQUESTS |
|---|---|
| Packing Station ES00KioskParam.xml |
To propose the Input quantity:
- If set to 1: the quantity of the first request item for the item resolved is proposed.
- If set to 2: the sum of all the resolved item request items is proposed.
As long as the stock dimensions of the involved request items are the same.
If multiple request items are filtered after item resolving, the system prompts you to choose the appropriate request item from the list. If the following ES00KioskParam parameter is enabled:
|
|
ALLOW_MULTIPLE_LOTS_IN_RESOLVING |
|---|---|
| Packing Station ES00KioskParam.xml |
Then, all the request items of the resolved item that refer to different lots are selected, while the Input quantity is calculated as the sum of the selected request items quantity. The Define quantity screen pops up, where you can confirm or set a smaller quantity. In this case, the request items are fulfilled in FIFO order.
Select specific packing request item
If Item barcode scan is not an option, then select and double click or press twice a specific request item. Use the Define Quantity screen to set the appropriate quantity, otherwise the quantity of 1 is used by default.

Bulk packing of multiple request item
You can select multiple request items and press the Bulk packing of same requests (n -> 1) command button to create the packing actions as long as the selected request items have same item and stock dimension data. This is useful when picking is executed partially for the same item, therefore multiple request items are created for the same item (and stock dimensions).
Enable the following ES00KioskParam parameter to allow bulk packing for the selected request items without any constraint:
|
|
ALLOW_MULTI_ITEMS_PACKING |
|---|---|
| Packing Station ES00KioskParam.xml |
You can add contents to the same container for different work packages or other selection criteria as long as they refer to the same recipient, delivery address and Shipment related data (refer to 17.6.3 ES Touch use cases).
Actions on packing container and container contents
Press the Package closing command when the packing process is completed for the selected container. The closing command:
- Updates the status of the current Packing Action from “in progress” to “completed”
- Generates loading requests for the container if the destination location is set to shipment type location.
- Prompts a message box with the container’s relevant information is shown, which auto-closes after the period set in the following ES00KioskParam parameter:
|
|
SUCCESS_MSG_BOX_AUTO_CLOSE_INTERVAL_IN_SECS |
|---|---|
| Packing Station ES00KioskParam.xml |
- Plays a sound on success if the following parameter is enabled:
|
|
PLAY_SOUND_ON_SUCCESS |
|---|---|
| Packing Station ES00KioskParam.xml |
- Pops up a dialog box for measuring gross weight and/or volume of the packing containers if enabled (see Weight and volume measurement of packing containers section below).
- Adds comments to the container by enabling the following parameter:
|
|
COMMENT_CONTAINER |
|---|---|
| Packing Station ES00KioskParam.xml |
- Prints the relevant reports based on the ES Report configuration (see Packing Print-outs section below).

You may also delete (correct) one or more container contents rows (action items) by pressing the Delete button on the right. If you wish to view and modify the contents of a selected existing container, enable the following ES00KioskParam parameter:
|
|
ALLOW_PACKAGE_CONTENTS_DELETE |
|---|---|
| Packing Station ES00KioskParam.xml |
The parameter replaces the Action item grid shown on the down-right part of the screen with the WMSPackageContents view (WMS Current balances area). Make sure to close the package after corrections take place in order to update the loading requests (if any) and the print-outs with the modified contents.

Packing print-outs
 Configure packing print-outs using the ES Report functionality (refer to II Appendix – Print per resource and location). You need to decide the context (On close, on Demand and Multi-print) as well as the operation type (mandatory or optional).
To allow multi-print, enable the following ES00KioskParam parameter:
|
|
ALLOW_MULTI_PRINT |
|---|---|
| Packing Station ES00KioskParam.xml |
The Bulk printing command button is then shown on the right side of the packing container contents.
 For on-demand printing reports you should use the Progress report print-out command. You can also assign the report name (if only one exists) to the relevant control button property in designer mode.
The required parameters per printing context are:
- containerGID or fToPackageGID (depending on the view) for “on-close” context
- entityGID (WP ή Request) for “multi-print” context
- containerGID for “on-demand” context
The provided embedded reports in the context of packing are:
- Print container labels by WP (WMS Current Stock) – found in Menu > Stock > Print-outs > Shipping container labels by WP.
- Print container labels (WMS Current Stock) – found in Menu > Stock > Print-outs > Shipping container labels.
- Print package label (WMS Current Stock) – found in Menu > Stock > Print-outs > Container labels.
- C2C packing – Contents: subcontainers, items and quantities (WMS Shipments) – found in Menu > Shipments > Print-outs > Packing - contents.
Weight and volume measurement of packing containers
Enable the following ES00KioskParam parameters:
|
|
ASK_FOR_CONTAINER_GROSS_WEIGHT |
|---|---|
| Packing Station ES00KioskParam.xml |
|
|
ASK_FOR_CONTAINER_VOLUME |
|---|---|
| Packing Station ES00KioskParam.xml |
To input the container gross weight and volume at container closing.

The weight and volume measurement units are displayed in the Packing attributes section of the form:

The default MU Codes are set according to the following Company parameters:
|
|
DIM_WEIGHT |
|---|---|
| WMS Company parameter |
And
|
|
DIM_VOLUME |
|---|---|
| WMS Company parameter |
The measured gross weight and volume are saved in the dimensional analysis gross weight and volume of each container instance.
Packing to multiple containers per item
Press the Packing to optimal containers button for selected request items that concern the same item and measurement unit (different stock dimensions are allowed) to create multiple containers based on item container type data.
More specifically, if a container type of class “package” and type of use “shipment” is set for the selected item, then the system proposes the automatic creation of containers based on the item container type relation. You can modify the proposed relation or change “ad hoc” the container type and the measurement unit.
The process creates automatically the containers, the packing action items and performs the closing action per each generated container.

Packing remaining quantity handling
The use case handles packing remaining quantity either by cancelling the open request item quantity or by managing picking overflow or shortage quantities.

Option 1 – Cancel open packing request item quantity
Use this option when you wish to cancel the remaining packing request item quantity for the selected record. You may optionally set a cancellation reason code. A cancellation packing action item is created, that fulfills the selected request item and updates the cancelled quantity.
Shipment Routing Order Cancellation also occurs (refer to 43. Shipment routing orders cancellation), if the cancelled quantity is not due to picking overflow or ad hoc picking actions.
Option 2 – Cancel picking shortage
Picking shortage occurs when the actual quantity in the packing station is less that the requested, which means that during the picking operation, the physically picked quantity is less than the confirmed. The packing operator has two options:
- To complete the packing operation with the physically picked quantity and cancel the remaining picking quantity, returning back to the initial picking location the shortage quantity.
- To ask from picking operators to physically execute the remaining quantity, by printing a relevant report.
You should select only one packing request item. The Cancel picking shortage command:
- Reduces the packing open request item quantity
- Returns the stock back to the initial picking location
- Cancels the request item by the shortage quantity, while Shipment Routing Cancellation also occurs.
The above are accomplished with a picking cancellation action item, while you are advised to set the appropriate cancellation reason to the following ES00KioskParam parameter for tracking purposes:
|
|
CANCELLATION_REASON_CODE |
|---|---|
| Packing Station ES00KioskParam.xml |
Track the cancellation picking actions in the Menu > Overview > Cancellation actions view.

Option 3 – Print picking shortage
Use this option to print a report that is used as a guide to physically pick the shortage quantity from the relative picking starting locations. The following steps should be followed:
Configure printers and assign them to resource and/or location based on the ES Report specifications (refer to II Appendix – Print per resource and location).
Configure the ESWMPickingActionsFromPackingRequests.rpt crystal report, embedded in the ESWMPickingActionsFromPackingRequests view in the WMS Shipments area, as “on-demand”.
Set the report to the Shortage report name of the control button with the ES Form Designer tool.

Set the report parameter names to: packingRequestItemsGIDs,RequestTypeGID.

The use case generates a cancellation picking action item that does not update balances, only for tracking purposes. The cancellation reason code that is set in the following ES00KioskParam parameter:
|
|
CANCELLATION_REASON_CODE |
|---|---|
| Packing Station ES00KioskParam.xml |
Option 4- Picking overflow
Use this option to insert stock for the overflow quantity over the packing requested quantity that is identified in the packing station. Overflow may refer either to greater quantity than that of the selected request item, or to a new item that has never been requested.
In case of quantity overflow, select the packing request item. The Picking overflow dialog opens that requires to complete the quantity.
In case of item overflow, scan the item, select all the monitored stock dimensions and input the overflow quantity and measurement unit. In case Lot is monitored, you should enter the Lot barcode.

The use case generates an import stock action (ES.STKIN is the Action Type used) in the Packing Station storage location, allocating a reservation reason code, if set in the following ES00KioskParam parameter:
|
|
RESERVATION_REASON_CODE |
|---|---|
| Packing Station ES00KioskParam.xml |
You need, then, to decide at customization level how to handle the overflow quantity.
You can set optionally an “on-demand” report and assign it to the “Overflow Report Name” property of the control in Form Designer mode. You should set the following parameter names: actionGID, actionItemGID that refer to the STKIN action.
The content of this report as well as the necessary correction actions depend on the implementation requirements. For example, you might need to conduct a stock count for the item and, depending on the counting results, decide whether to export the stock from the packing station and move it back physically to the actual storage location.
ES Touch® C2C Packing Station
C2C Packing station application is used when container nesting is required. The application supports up-to three-level nesting, from package container to master package container and from master package to pallet container. It is not mandatory to nest always. You can create single shipment packing containers (of any of the supported classes) or create two-level nesting containers.

The basic configuration principles are common with the Packing station. It is an ESKiosk.exe application, where the configuration settings are declared in the ESKiosk\C2CPackingStation ES00KioskDocuments.xml and ES00KioskParams.xml files.
User configuration is also common with Packing Station application (refer to 18.3 ES Kiosk Touch stations users).
The following paragraphs describe the C2C functionality, giving emphasis to the non-common parts with Packing Station.
The functionality consists of:
- Setting the appropriate selection criteria for the open packing request items – commonly created after picking operation.
- Defining the appropriate container types to create new containers or select existing containers. Only one outer container can be used at a time.
- Adding contents to containers by item/package barcode scanning and input quantity, or by using the bulk packing functionality for selected request items.
- Closing the outer and inner containers when packing is completed.
- Deleting/updating contents of the selected container
- Creating multiple containers based on Item Container Type data, using the Packing to Optimal Containers functionality.
- Printing on-demand reports, or automatically after certain actions (for example, upon container closing action).
- Measuring packing operation containers gross weight and volume.
Open packing request items selection criteria (C2C)
- Packing station: same functionality with Packing station (refer to 39.1.1 Open packing request items selection criteria). Parent/child packing storage location functionality is also supported with the use of the following ES00KioskParams.xml parameter:
|
|
BUFFER_MODE_TYPE |
|---|---|
| C2C Packing Station ES00KioskParam.xml |
To: refer to 39.1.1 Open packing request items selection criteria.
Select WP/Request: scan shipment work package codes/barcodes or packing request codes/barcodes. There is no Shift+F3 view assigned. The F3 query is used as a validator to the scanned barcode – it returns by default all open request items regardless the context. You can apply a Shift+F3 view at customization level.
Delivery address: search through the company’s delivery addresses. Shift+F3 view is supported at customization level – same functionality as in Packing Station.
Trade account selection, document selection, select recipient: you can show these three available selection special fields at customization level using the ES Form Designer tool. Document selection is recommended when group picking methodology is used and sorting operation is executed during packing (same as in Packing Station).
Picking container: not supported in C2C application.
Item /package (search): scan item barcode to filter open packing request items with the resolved item. C2C supports scanning package SSCCs to filter packing request items. This applies to cases where picking is executed to package containers; either containers in stock, or new packing containers (pick-to-pack), where the packing request items are updated with the package container hint (see print screen below).
The view returns the grouped information for packing request items per package container. The package container request items are displayed with an open carton icon, while instead of Item code and description, the package SSCC is shown. The grouped request items may refer to the same or different items/stock dimensions.


Create new or select existing containers for nesting (C2C)
 Container type: select the appropriate container type per container class. To nest containers, select at least an outer and an inner container type. The “active” container is always the inner one, since you can create many inner containers as required per outer container. If only one container class type is selected, then this is by default the active one.

- Select existing package (open):alternatively, you can add contents to an existing container or search for existing containers with the Open existing pallets/master packages/packages buttons. Similar functionality with the Packing Station,
Insert/delete container action items (C2C)
Τhe functionality described in 39.1.3 Insert packing container action items applies also for C2C when scanning item barcodes or selecting packing request items with no package container hint. Use accordingly the following ES00KioskParams.xml parameters in C2C application:
|
|
INPUTITEM_ISFILTER, INPUT_QUANTITY_NUM_OF_DIGITS, ΙNPUT_QTY_DEFAULT_VALUE_BASED_ON_PACK_REQUESTS, ALLOW_MULTIPLE_LOTS_IN_RESOLVING, ALLOW_MULTI_ITEMS_PACKING |
|---|---|
| C2C Packing Station ES00KioskParam.xml |
Moreover, in C2C, you can scan or select request items with package container hint and add automatically the contents of the selected package container to another container of the same class or nest it in upper class containers.
As shown on the print screen below, the package container 052070110000001018 that has been created from pick-to-pack operation, contains two items. By scanning the package container SSCC you can either place it into another package container and nest it to master package and/or pallet container, or you can directly add the picked package SSCC to a pallet or master package container.

Note that, in order to display the nested container action items, the C2C form uses the C2C_PackingStation_ContainerItems view in WMS Current balances area. Therefore, the ALLOW_PACKAGE_CONTENTS_DELETE parameter is not used in C2C application.
You can also enable adding comments per container class, based on the following ES00Kiosk Parameters:
|
|
COMMENT_PACKAGE, COMMENT_MASTERPACKAGE, COMMENT_PALLET |
|---|---|
| C2C Packing Station ES00KioskParam.xml |
Actions on C2C containers
There are three closing container command buttons one per each container class. In nested containers, if you press the closing command for the outer container, then all the inner containers are closed. The closing command functionality is the same with Packing station as described in 39.1.4. Actions on packing container and container contents.
C2C print-outs
Follow the guidelines described in 39.1.5 Packing print-outs. On close, on Demand and Multi-print context is supported. Mandatory and optional operation types are also supported.
Pay attention to use printing views that have the parameter JoinColumn, which represents the container class (package, master package and pallet). The parameter names for C2C printing report configuration should be: containerGID,JoinColumn.
Weight and volume measurement on C2C Containers
Follow the configuration instructions described in 39.1.6 Weight and volume measurement of packing containers. The functionality refers to the outer container only. Use accordingly the following ES00KioskParams.xml parameters in C2C application:
|
|
ASK_FOR_CONTAINER_GROSS_WEIGHT, ASK_FOR_CONTAINER_VOLUME |
|---|---|
| C2C Packing Station ES00KioskParam.xml |
C2C Packing to multiple containers per item
The relevant Packing Station functionality applies to C2C as well – refer to 39.1.7 Packing to multiple containers per item.
 C2C Packing remaining quantity handling

The use case supported in C2C is the Cancel balance towards packing functionality, i.e. cancelling open request item quantity. There is no use case supporting errors handling during picking.
ESRF Packing
Select ESRF Menu > 3. ORDERS > 9. PACKING to perform packing operation when mobility is required.
- Choose the appropriate open packing requests selection criteria:
- Order: Scan or select the appropriate shipment work package. The F3 search public query used is ESPublicQueries\ESWMMobile\ESWMPackingWorkPackages, which returns shipment work packages with open packing request items that fulfill SHOs of process state 2 – in WMS administration. The date interval is determined by the following ESRF Config parameter:
|
|
RefDocDateItervalDateRange |
|---|---|
| Common |
- Packing location: scan or select the appropriate packing type location (this is the “from” packing location) that is used as a filter to the open request items.
- Picking container: scan the picking container (same functionality as described in Packing Station corresponding control), where sorting or package containers of type of use 2 – picking are used as a filter to the open packing requests.
- Target location: scan or select the target storage location, which can be either a packing or a shipment zone type location. If shipment zone type location is selected, the process will create loading requests for each generated target package container.
- Target SSCC: create a new (F1 function key) or scan an existing package container (only package class is supported).
For each target package container scan the item barcode or select the packing request item from a list. You can view the container stock (if exists) with the F1 function key.
Confirm quantity – you cannot alter the packaging unit.
Press ESC to close the current container and create a new one. In the confirm quantity view, you can also choose to cancel “delete” the last packing action with the F5 Cancel function key.

As far as print-outs are concerned, mobile packing operation supports mandatory or optional reports, as long as the appropriate reports are set either in packing locations or per resource. The required parameter names for the reports are: ContainerGID,ContainerGIDColName,fStepCode,SSCC,ContainerClass.
Staging
Staging is a warehouse operation that applies mainly to large warehouse layouts. It concerns the sorting of shipping containers before loading into trucks, in storage areas that are close to the loading docks based on the Shipment ID. Staging concerns transferring containers generated from the packing operation to the appropriate shipment staging location and optionally nesting these containers to pallets.

Staging required configuration
Make sure that you have:
- Enabled the staging step code monitoring in the company parameter:
|
|
WMS_STAGING_STEPCODE |
|---|---|
| WMS company parameter |
The recommended step code is 161 – staging.
- Created as many staging locations as required. Staging locations should be of zone type 5- shipment.
- Optionally, set-up the appropriate container control policy for pallet container types so that stock that “belongs” to different shipments cannot be added to the same container (refer to 10.2 Container control policy).
- Optionally, configure the WMS Staging proposal algorithm so as the system proposes the destination staging location. More specifically, If no staging location is selected by the user during the staging process, the system can propose a destination location of zone type 5-Shipment based on the Add-to-Existing-Shipment algorithm that is defined in the following company parameter:
|
|
WMS_STOR_LOC_PROPOSAL_ALG_STAGING |
|---|---|
| WMS company parameter |
Define the appropriate selector criteria so as the algorithm proposes the appropriate shipment location for staging. The algorithm proposes locations that already have containers that belong to the same shipment as the shipment in use. If there is no location found, the algorithm proposes the next empty shipment storage location.
Staging is executed after packing operation. The process does not require the generation of staging requests; there is no staging request generation use case for the moment.
ESRF Staging
Select ESRF Menu > 4. SHIPMENTS > 1. STAGING to perform staging operation.
- Selection criteria:
- Location: mandatorily select the starting location, which is required to be of zone type 8 - packing.
- Shipment: optionally select or scan the Shipment ID. If one, then it is auto-completed. The ESPublicQueries\ESWMMobile\ESWMGetShipmentsInPackingStation public query is executed, to validate shipment barcode resolving result or search available shipments. The query returns the reference shipments of the completed packing actions, which generated the containers to be staged, with current stock existing in the selected starting staging location.
- Order: optionally select or scan the Shipment Work Package. The ESPublicQueries\ESWMMobile\ESWMShipmentOrdersInPackingStation public query is executed, which returns the work packages of the completed packing actions, which generated the containers to be staged, with current stock existing in the selected starting staging location.
- Staging location: select or scan the destination staging location, which should be of zone type 5 - shipment. If left blank, the AddtoExistingShipment algorithm proposes the destination location (see above paragraph).
Scan the container SSCC to be staged. The ESPublicQueries\ESWMMobile\ESWMRemainingPackagesInPackingStation is executed to validate whether the resolved container meets the selection criteria. Press the F3 search key to view container stock information.
Should you wish to palletize packing containers, you can optionally scan a target pallet container in the target SSCC field. If not, just press enter. The system, will then generate the staging actions and the loading container requests.

Select Menu > Shipments > Shipments monitoring to view the results and the SHO progress information:

ESRF Package correction
The Package correction use case refers to package containers located in shipment locations (zone type 5 – shipment) that have been generated from packing actions and transferred to the shipment locations with staging actions. You can either choose to correct the contents of the selected package or disconnect the entire package from the SHO.
Select ESRF Menu > 4. SHIPMENTS > 7. UNBOUND PACKAGE.
- Selection criteria:
- Shipment: optionally select the Shipment for which the package SSCCs to correct are filtered.
- SSCC: scan the package SSCC to be corrected. The SSCC should be located in a shipment location, otherwise the error message Container not found will occur.
Choose whether you wish to disconnect the entire package from the SHO or to correct the contents of the package.
If you select to disconnect the entire package, the staging action items of the selected package, are disconnected from the SHO – i.e. line step action fulfillments are deleted. The package container remains in the shipment ramp so as to take the necessary actions, either to transfer the entire package to another location, or to empty its contents and transfer them to other locations.
If you select to correct the contents of a package, then you will be asked to confirm the Item and the quantity to correct. In this case, the staging action item is updated with the corrected item and quantity, while the stock returns back to the initial packing location.
You will then be asked to confirm whether you wish to cancel the related loading request. If you choose to cancel the related request, the relative SHO open quantity is cancelled as well. If you choose not to cancel, then the loading request is updated (loading request items referring to the package are deleted).

ESRF Palletization
Palletization is commonly used instead of staging, when staging is not required to be monitored as a separate step. It can apply to smaller warehouses, to create shipment pallet containers for loading. Unlike staging, palletization is conducted on the shipment locations, while it is not required to have previously performed packing operation. Note that when palletization is executed, loading requests have already been created; therefore, the process updates the loading requests with the pallet container.
Select ESRF Menu > 4. SHIPMENTS > 2. PALLETIZATION to transfer package, master package or pallet contents generated from picking or packing operations to new or existing shipment containers in shipment locations. You can optionally transfer the shipment container to another shipment location.
- Selection criteria:
 Loading ramp: mandatorily scan or select the shipment storage location (zone type 5 – shipment) where the containers to be palletized exist.
- Shipment: optionally scan or select a Shipment. The ESPublicQueries\ESWMMobile\ESWMGetShipmentsToLoad is executed, which returns the loading requests reference SHO related shipments. Note that in order to select a Shipment, the Shipment should be available for RF selection (refer to 17.5 Shipment availability). In this case, you should mandatorily select the shipment, otherwise an error message occurs at the end of the flow (see print screen on the right).
- Order: optionally scan or select a shipment work package or SHO. The ESPublicQueries\ESWMMobile\ESWMLoadingRequestsByContainer is executed, which returns the open loading request items for containers (“from” request item container should have a value), concerning SHOs in process state 2 – in WMS administration. Package, master package and pallet container classes are supported.
- Target ramp: optionally scan or select another shipment location to transfer the shipment container.
- SSCC: scan an existing or create a new shipment container – classes of pallet, packages and master packages are supported.

Scan the container SSCC to be transferred to the selected container and confirm.
The outcome of the process is the generation of one or more action items (depending on the contents of the scanned container) of action type RPAL – palletization, that fulfills the SHO in step code 148- internal warehouse movements, which is not reported in the Shipments Monitoring view. The loading requests are updated with the shipment container.

Loading
Loading operation is the physical export of goods from the warehouse shipment ramps (loading docks).
Even if the implementation specifications do not require the physical monitoring of the loading operation, loading actions should mandatorily be executed so that:
- Stock is exported from current balances
- SHO documents are completed (refer to 16.4.3 Complete orders).
Use any of the following loading scenarios – or a combination of them, in ESRF mobile and back office applications, depending on the implementation requirements:
- ESRF Mobile Container Loading: most commonly used scenario when physical monitoring of the loading operation is required. The use case runs only when loading requests have been generated from previous step code actions (picking or packing). Stock in shipment ramps should be held in containers.
- ESRF Mobile Loading packaging: this is the least commonly used scenario, since it requires the physical identification of bulk stock in shipment ramps, which is not a cost-efficient practice. Loading requests are a prerequisite to use this scenario.
- ESRF Order Loading: use this scenario to load the contents of the selected SHO, regardless if the stock is in containers or bulk, when no physical monitoring is required. Loading requests should not exist.
- Towards loading, by SHO (back office): use this scenario when loading requests do not exist and when physical monitoring is not an issue. The loading actions are based on previous step code actions, where the step code is configured per implementation requirements.
- Towards loading, by item (back office): use this scenario when mobility is not an option, however physical monitoring is required for the loading operation. Loading requests should not exist. Loading is executed per item, user intervention (quantity modification) is allowed.
- Towards loading, by item based on requests (back office): same use as above, with the difference that loading requests are required.
- Towards loading, by SHO based on requests (back office): this is one of the most frequently used loading scenarios when physical monitoring is not required. Loading requests are required. The process is often set as a scheduled job. Note that this process is ideal when stock in shipment ramps is bulk. If stock in ramps is held in containers, you are advised to use the container loading (see below).
- Containers towards loading, based on requests (back office): this is also one of the most frequently used loading scenarios when physical monitoring is not required. Loading requests are required. Stock in shipment ramps should be in containers. Nested containers with multiple SHO fulfillments are supported. The process is often set as a scheduled job.
ESRF Container Loading
Select ESRF Menu > 4. SHIPMENTS > 4. CONTAINER LOADING to create loading actions based on loading container requests.
- Selection criteria:
- Shipping ramp: optionally scan or select the shipment storage location (zone type 5 – shipment).
- Route: optionally scan or select a route. The ESPublicQueries\ESWMMobile\ESWMGetRoutesToLoad public query is executed, which returns the routes of the shipments that are related with the SHOs to be loaded (i.e. with pending loading request items).
- Shipment: optionally scan or select a Shipment. The ESPublicQueries\ESWMMobile\ESWMGetShipmentsToLoad is executed, which returns the loading requests reference SHO related shipments. Note that the Shipment should be available for RF selection (refer to 17.5 Shipment availability). Create a new shipment with the F5 function key. The consequent loading actions will be referenced to the new shipment.
- Order: optionally scan or select a shipment work package or SHO. The ESPublicQueries\ESWMMobile\ESWMLoadingRequestsByContainer is executed, which returns the open loading request items for containers (“from” request item container should have a value), concerning SHOs in process state 2 – in WMS administration. Package, master package and pallet container classes are supported.
Depending on the selection criteria, the count of containers with existing stock and open loading request items is displayed. Scan the SSCCs of the containers to be loaded. Once you scan the SSCC, the relative SHO and Work package information is displayed. You can either change the selected request item by pressing the F7 function key or cancel the last loading action item by pressing the F5 function key. Scan the next SSCC to continue or ESC to save and complete loading.


ESRF Loading packaging units
Select ESRF Menu > 4. SHIPMENTS > 4. LOAD PACKAGING to create loading actions based on loading requests.
- Selection criteria:
- Shipping ramp: mandatorily scan or select the shipment storage location (zone type 5 – shipment).
- Order: mandatorily scan or select a shipment work package or SHO.
- SSCC: if the loading request items of the selected order have a container hint of class pallet or sorting, then you should mandatorily scan the SSCC to continue with loading the contents of the container. In case the loading request items refer to bulk stock, you can press enter and continue with bulk loading.
Once the selection criteria are defined, the ESPublicQueries\ESWMMobile\ESWMGetLoadingReqItemsGroupped public query is executed, returning the loading request items grouped per location data, item, stock dimensions and pallet/sorting container. Scan to confirm Item or press F3 to select from the list of loading requests.
If more than one packaging units are resolved for the scanned Item, then you should choose from the list. Confirm the quantity to continue.
Input quantity can be set by default to 1 with the use of the following ESRF Config parameter:
|
|
LOAD_QTY_DEFAULT_VALUE |
|---|---|
| Loading |
You can also define whether you wish the Input quantity field to be editable or not (by default it is) with the use of the following ESRF Config parameter. If the value is set to false and the QTY_DEFAULT_VALUE is false, then the QTY_ISEDITABLE value is ignored:
|
|
LOAD_QTY_ISEDITABLE |
|---|---|
| Loading |
 Continue with the rest of the open loading request items. You can press F5 to cancel (delete) the last loading action item of the current session.
Confirm to complete loading when there is no open loading request item quantity left.

ESRF Order loading
Select ESRF Menu > 4. SHIPMENTS > 3. ORDER LOADING to create loading actions for the selected SHO.
- Selection criteria:
- Shipping ramp: mandatorily scan or select the shipment storage location (zone type 5 – shipment).
- Order: mandatorily scan or select a shipment work package or SHO. The ESPublicQueries\ESWMMobile\ESWMShipmentOrdersToLoad is executed, returning SHO’s of process state 2. The quantity to be loaded is calculated based on picking actions.
The resolved SHO data are displayed (delivery address and trade account). Confirm to create loading actions for the entire content of the SHO.


Loading by SHO based on requests
Select Menu > Shipments > Shipments monitoring > Towards loading (by SO, based on requests) to create loading actions based on loading requests per SHO when physical monitoring is not required. The use case consists of the Loading based on requests view and the relevant New loading automation to create the actions.
The view calculates the Quantity to be Loaded per SHO and per SHO line, based on the open line step requested quantity (requested – executed – cancelled) for the loading step code. Ad hoc quantity to be loaded is displayed in a separate column based on the document ad hoc step open quantity for the loading step code.
Select the SHO documents or document lines to be loaded and press the New Loading button to create the loading actions.

The Define shipping orders as available for invoicing parameter assigns the Loading step code (163) as the Invoicing stage (step code) if not already defined or if there is no executed quantity at the assigned Invoicing stage.
Press next to update means of conveyance and/or driver to existing shipments or create new (refer to 17.6.2 Back office use cases).
|
|
Note that… |
|---|---|
| If a loading request item fulfills more than one SHO lines, then the process fails, since the use case loads each document line separately. “From Item MU Relation was not specified” is thrown as an exception message. To avoid this problem, use the Loading by item based on requests use case (if there is no container involved) or the Containers loading based on requests use case when containers are involved. |
Containers loading based on requests
Select Menu > Shipments > Shipments monitoring > Containers towards loading (based on requests) to create loading actions based on loading requests per container. The use case consists of the Containers to be loaded view and the relevant Load container automation to create the actions.
The view returns the loading request items grouped per outer container. The list of Work packages, list of SHO document codes displayed and list of Shipments are displayed in comma-separated lists, while Delivery address and Shipment info are displayed if only one record is associated with the container to be loaded.
The green indicator verifies whether the “from” loading request item location is a shipment type location.

Press the Load container button to create the loading actions per container. You can update means of conveyance and/or driver to existing shipments or create new (refer to 17.6.2 Back office use cases).
Loading items based on requests
Select Menu > Shipments > Shipments monitoring > Items towards loading (based on requests) to create loading actions based on loading requests per item. The use case consists of the Towards loading (by item, based on requests) view and the relevant New load automation to create the actions.
You can decrease the quantity to be loaded to conduct partial loading – you cannot modify the measurement unit.

Press the New load button to create the loading actions for the selected item rows. You can update means of conveyance and/or driver to existing shipments or create new (refer to 17.6.2 Back office use cases).
Loading by SHO
Select Menu > Shipments > Shipments monitoring > Towards loading (by SO) to create loading actions based on previous step code actions per SHO line. The use case consists of the Shipments loading view and the relevant New load automation to create the loading actions.

In the Loading from stage view parameter, you should define the step code on which loading action data should be based. The view by default returns the picking step code – 155. The view returns the SHO documents and document lines for which picking has been executed and there are no loading requests created. The quantity to be loaded is the sum of the line step executed quantity in the defined step code (default picking).
The Define shipping orders as available for invoicing parameter assigns the Loading step code (163) as the Invoicing stage (step code) if not already defined or if there is no executed quantity at the assigned Invoicing stage.
Press next to update means of conveyance and/or driver to existing shipments or create new (refer to 17.6.2 Back office use cases).
Note that, this use case cannot handle multiple SHO line fulfillments with the same action item, since loading is performed per SHO document line.
Loading by item
Select Menu > Shipments > Shipments monitoring > Towards loading (by item) to create loading actions based on previous step code actions per item. The use case consists of the Loading by item view and the relevant New load automation to create the loading actions.

You can decrease the quantity to be loaded to conduct partial loading – you cannot modify the measurement unit.
Press the New load button to create the loading actions for the selected item rows. You can update means of conveyance and/or driver to existing shipments or create new (refer to 17.6.2 Back office use cases).
Loading correction
Back office loading correction
Should you wish to undo (correct) loading actions, select the Menu > Shipments > Shipments monitoring > Correct loadings use case.
The use case consists of the Correct loadings view and the Delete/Cancel loading automation.

The view returns the completed loading action items. The process checks if Invoices are issued for the selected rows and if so, the following exception message occurs:
“The XXX action for item YYY (SSCC: SSCCX | Seq.No.: # ) has been invoiced. Not allowed to delete it”
You are not allowed to edit the quantity to be corrected,
Press the Delete/Cancel loading button to either delete or cancel the selected action item.
If you do not choose to cancel the quantity, the process:
- Deletes the selected action item. The stock returns back to the starting storage location (shipment ramp).
- Re-opens the loading request item (if exists) so as to be loaded again.
- Re-activates the SHO – updates the process state to 2 – in WMS administration (if completed)
If you choose to cancel the quantity, then the process:
- Turns the selected action item to cancellation action item. The stock is returned back to the starting storage location.
- The fulfilled loading request item is cancelled.
- The fulfilled SHO line quantity is also cancelled.
ESRF Container unloading
Select ESRF Menu > 4. SHIPMENTS > 5. CONTAINER UNLOADING to unload containers.
Select optionally Shipping ramp, Route, Shipment and Order criteria to validate if the scanned container SSCC refer to loading actions that meet the selection criteria.

If the following ESRF Config parameter is enabled:
|
|
ASK_UNLOAD_CANCEL_QTY |
|---|---|
| Common |
Then, the user is asked to confirm whether to cancel the requested and SHO quantity or not. By default, the process does not cancel quantities.
If you do not choose to cancel the quantity, the process:
- Deletes the action items of the selected container. The stock returns back to the starting storage location (shipment ramp).
- Re-opens the loading request items (if exist) so as to be loaded again.
- Re-activates the SHO – updates the process state to 2 – in WMS administration (if completed)
If you choose to cancel the quantity, then the process:
- Turns the selected container action items to cancellation action items. The stock is returned back to the starting storage location.
- The fulfilled loading request items are cancelled.
- The fulfilled SHO lines quantity are also cancelled.
Invoicing
Invoicing is the process of issuing shipment delivery notes and invoices. When WMS is activated, the invoicing process is executed by the ERP Menu > Sales > Order Routing/Invoicing > Shipment orders invoicing. The process is also available in WMS application, not available in the menu, as long as the issued documents do not involve values (e.g. delivery notes).
Refer to 16.3.5 Shipment routing orders invoicing process to ensure that the document transitions and document types used in the process are configured appropriately.
The Shipment orders invoicing process consists of:
- The data preparation part
- The documents issuing part
- The process reviewing part
The data preparation process consists of:
- The Order documents for invoicing view, which returns the SHO documents, document lines and WMS action relevant information.
- The automatic calculation of the quantities to be invoiced based on line step action fulfillments.
- The optional automatic preselection of document lines ready to be invoiced depending on the implementation requirements.
The Documents issuing process consists of:
- The selection of the appropriate transition rule and document parameters,
- The generation of the target documents and document lines (line item and analysis).
The reviewing process consists of:
- The Shipment documents from orders view, which returns the target documents of the invoicing process. You can edit/delete/update the target documents.
Invoicing stage and invoiceable actions
A Shipment Routing Order document is available for invoicing when:
- The Invoicing stage is assigned
- There are open document line quantities
The SHO document lines are available for invoicing when:
- There is open document line quantity
- They are fulfilled with WMS action items (refer to 13.6.4 Line step action fulfillments)
The WMS action items should:
- Belong to actions of status “completed”
- Invoiceable flag is enabled to the line step action fulfillments
- Executed quantity in service MU of the invoiceable line step action fulfillments is greater than zero
Exceptions to the above rules are Ad hoc documents and document lines concerning non-WMS monitored items (refer to following paragraphs).
The Invoicing stage of an SHO depends on the implementation requirements. It can be any of the shipment related step codes monitored in the installation; i.e. picking, packing, loading, etc.
Once the Invoicing stage is assigned to the SHO, then the actions of the invoicing step code are considered as “invoiceable”. The invoiceable flag is updated by the system when line step action fulfillments are generated. For ad hoc action items, the system updates the invoiceable flag of the action item.
The Invoicing stage refers to the entire SHO. You can assign the Invoicing stage of the SHO in different use cases, during the create route process, the loading process, etc. You can also define the default invoicing stage (if only one applies) in the following WMS company parameter:
|
|
WMS_DEFINV_STEPCODE |
|---|---|
| WMS Company parameter |
There are cases, where an SHO should be invoiced in mixed steps. For example, the default Invoicing stage is Packing (160), however when pallets are picked they are directed to the shipment area without any packing operation. In this case, some of the document lines (or line quantities) should be invoiced based on the packing actions, and some others based on the picking actions. In this case, you should set the value of the following company parameter to “Based on rule”.
|
|
WMS_SET_INVOICEABLES_RULE |
|---|---|
| WMS Company parameter |
The SHO document Invoicing stage should be set to 190 – Invoicing, Define the default value in the following company parameter:
|
|
WMS_UNIQUEINV_STEPCODE |
|---|---|
| WMS Company parameter |
The system business rule Update actions to be invoiced based on rule in Document Trade is triggered, The rule updates the invoiceable flag to action items where the destination storage location is of zone type 5 – shipments. Set the implementation specific conditions at customization level.
Invoicing data preparation
The Order documents for invoicing view consists of three hierarchical and one parallel levels:
- The header level returns the SHO document header and Shipment related information. The SHO document is shown only if the Invoicing stage is assigned.
- The Document lines level returns the document line (combined line item and line item analysis) information per document order row. Document lines are returned only if there is remaining (open) line quantity. For ad hoc documents (with no document lines), the level returns the ad hoc actions information related to the document row with the invoiceable flag enabled.
- The Actions level returns the WMS action item information related to the document line row. Actions data are shown only for actions of status “completed”, with line step executed quantity calculated from line step action fulfillments with the invoiceable flag enabled.
- The Shipments by actions level is parallel with the Actions level, which returns actions and action open quantities of the SHO related shipments.

Select the Export to excel command should you wish to export the view’s data to excel files. One excel file per SHO is created. You can choose to export header and document line level data or header, document line and actions data. You should define the path for the export file at the Location parameter.
Service quantity
The process calculates the quantity to be invoiced in service MU and applies it to the Service quantity field of the view, based on the following formulas:
Actions level
Open quantity = line step action fulfillment executed quantity – transition fulfillment quantity
Service quantity = Open quantity
Document lines level
Document – open quantity = document line quantity – document line closed quantity (line item or line item analysis)
Actions – open quantity = calculated by the process as the sum of open quantity of the Actions level.
If the document-open quantity is less than the actions-open quantity (overflow scenario) and the Overflow qty invoicing parameter of the view is set to “Allowed”, then:
Service quantity = Actions-open quantity
If the document-open quantity is less than the actions-open quantity (overflow scenario) and the Overflow qty invoicing parameter of the view is set to “Prohibited”, then:
Service quantity = Document-open quantity
If the document-open quantity is greater or equal than the actions-open quantity, then:
Service quantity = Actions-open quantity
For non-WMS monitored items, the Actions-open quantity is 0; therefore:
Service quantity = Document-open quantity
For ad hoc actions, there is not Document-open quantity, therefore:
Service quantity = Actions-open quantity
Diff and Not processed indicators
 The Diff indicator at the header level is activated (red button) when there is difference between action and document line data in any of the fields selected in the Comparison fields criterion. By default, the comparison fields are quantity, warehouse and item.
The Document lines level displays the field for which the difference is spotted. For example, Quantity Diff field, WH Diff field, etc.
In the example of the print screen shown below, the Document line open quantity is 2, while the Actions open quantity is 1. This is shown as a Quantity difference.

The Not processed indicator at the header is activated when at least one document line has no line step action fulfillments (no actions executed). The relevant indicator is also shown at document line level.

Selection and quantity modification
The process is by default set to automatically preselect the document lines to be invoiced as long as there are no differences spotted.
 The user should then check by exception the documents for which differences or not processed lines are spotted.
Document lines involving non-WMS monitored items are by default preselected.
Set the Default entries parameter to “None”, should you wish to let the user select the document lines to be invoiced.
Set the Default entries parameter to “All”, should you wish the system to automatically preselect entries even if differences are spotted.
Not processed document lines are excluded from preselection, whereas no user edit is allowed.
To select the lines to be invoiced, click on the Selector field on the document lines level. If you select the document header, then the document lines are auto-selected while the Service quantity is automatically assigned.

Should you wish to modify or set the Service quantity, you can do this at the Actions level relevant field.
|
|
Note that… |
|---|---|
| The relationship between document row and document lines, document line row and actions is one–to-many. The Service quantity to be invoiced calculation requires the sum of the actions open quantity to have been calculated. The process requires the appropriate quantity to be defined at Actions level in order to auto-apply the document line Service quantity. |

Ad hoc shipment routing documents
The Order documents for invoicing view returns results as long as there is open document line quantity to be invoiced. As far as Ad hoc shipment routing documents are concerned, the fact that there are no document lines involved, requires a special handling.
If the Invoiced adhoc view parameter is set to “Exempted” (default value) then the Ad hoc SHO document is returned until it is completed (the process state of the document is set to 3-in ERP administration).
If the Invoiced adhoc view parameter is set to “Included” then the Ad hoc SHO document is always returned.
Note that Ad hoc SHOs is the only case where the Order documents for invoicing view handles the SHO process state.
Multiple shipments per SHO
When an SHO is related with more than one Shipments, this is represented with the Multiple shipments indication at the view’s header level.

The view returns as many rows for the same SHO as the related Shipments.
At Document lines level, the user should intervene when the line quantity is fulfilled with action items referenced to different shipments. In this case, the process spots quantity difference, so the user should decide whether to proceed with invoicing or not. The Other shipments qty field sums the executed quantity of actions that refer to the other related shipments of the document. The detailed information of action item quantity per shipment is shown in the Shipments by Actions level of the view. This information assists in user decision. Note that, at the time of invoicing, it is not necessary that all the shipments of the SHO are completed.
Issue invoices
To issue invoicing documents press the Order documents for invoicing button.
Set-up the invoicing process parameters
Select the appropriate transition rule, set the series and issue date for the target document.

You can select only one transition rule per run time. Therefore, it is important to select the appropriate entries that should be invoiced with the selected transition rule.
As described in 16.3.5 Shipment routing orders invoicing process, the invoicing process applies the fillers of the selected document transition between the shipment order documents (document property WMS_Shipment_Order) and the target invoices or delivery notes (document property WMS_Inv_Process).
If you choose to Use the same series code, the process selects the SHO series code to generate the target document, as long as the series code is valid for the target document type.
Select the Document grouping level – applied for trade and stock documents.

If set to “No”, no grouping is applied for the target documents, regardless the transition rule configuration.
If set to “Based on trade account”, the process respects the configuration set to the Trade account master (Document grouping flag). This value is not valid for stock documents.
If set to “Yes” (default), the target documents are grouped based on the configuration of the selected transition rule.

The following fields are taken into account by the invoicing process if set in the transition rule:
fSiteGID
fTradeAcountGID
fTradeAccountSiteGID
fPaymentMethodGID
fInvoicePolicyGID
fDeliverySiteGID
fShippingMethodCode
fRouteCode
fADProjectGID
fADActivityCode
fADBusinessUnitCode
fADDimension1Code
fADDimension2Code
If additional fields should be considered, then the fields should be added both to the transition rule grouping and to the Orders for invoicing view at customization level.
As far as stock documents are concerned, grouping is by default applied based on Delivery address and Destination site. The process ignores any configuration regarding grouping set in the transition rules.
The process by default generates one target document per SHO if no grouping is applied. SHO documents may relate to more than one source shipment order documents (SRC, SOR, etc.) Enable Document separation should you wish to generate as many target documents as the source shipment order documents. The process applies only for trade documents. No grouping is applied, even if enabled.
The default value of the parameter is derived from the following WMS company parameter:


|
|
WMS_INVOICING_SPLIT_BASED_ON_SOURCE |
|---|---|
| WMS company parameter |
Decide whether the Shipment ID will be taken into account in the target document generation as a grouping factor or not by enabling the Release shipment parameter. The default value of the process parameter is derived from the following WMS company parameter:
|
|
WMS_ACTIVATE_SHIPMENTS |
|---|---|
| WMS company parameter |
The SHO generation process does not by default carry the information of the source shipment order document company dimensions, unless required for the WMS operations (refer to 33.1 WMS Shipment routing view). Enable the Transfer Business dim. from source doc parameter to transfer the company dimensions of the source documents to the target documents during the invoicing process.
Insert containers and accessories to the target documents parameters are described in the context of 52.3 Reusable container and packaging material management.
Enable the Activate service parameter in implementations where the ES Service module is used in conjunction with ES WMS (refer to V Appendix – Integration with ES Service module).
Note that you can set the default parameters of the invoicing process at customization level (ESScrollerCommands\ESWMShipments\PendingShipmentOrdersFromHeader\ CallCreateShipmentDocumentsFromHeader.xml) without affecting the core invoicing process.
Transition rule configuration elements
The following transition rule configuration elements are taken into account by the invoicing process.
Item line packing
If Item line packing is enabled in the selected transition rule, the shipment routing order invoicing process generates the target document lines based on the standard ES ERP functionality.

It is reminded that the standard ES ERP functionality, is based on the following fields:
- Line Type
- Item
- Warehouse
- Line Item MU
- Dimension1 Code
- Dimension2 Code
- Business Unit Code
- Activity Code
- Project
- Line Item price
- Delivery Date
- Gross Discount, Discount1, Discount2, Discount3, Discount4
- Serial Number
- VAT Category Code
- Line Reference
- Line Item Category Code
If any additional fields are assigned to the Line packing set, these are ignored by the process.
Special accounts
The process supports the ES ERP special account functionality, except the accounts for which the Auto-apply field is enabled.
You need to assign the appropriate field set in the transition rule - 1-TRS-LinesSP - in order to transfer the special accounts from the source to the target document. It is reminded that the transition rules do not apply by default the special accounts field set.

When special accounts are transferred, no grouping is supported. Therefore, if a target document is generated with a grouping process relating to more than one source documents, the target special account lines are as many as those of the source documents.
Source and target workflow step handling
The process respects the configuration set in the selected transition rule concerning source, target workflow step values after transition and source workflow step before transition.

If the source document workflow step value is not the one set in the transition rule, the following exception message occurs:
“Transition is not allowed from workflow step (transition check)”
The process ensures that the source and target document workflow steps are updated with the appropriate values after the process is completed.
Invoicing process use cases
You can set in the following WMS company parameter the order with which the target documents are generated, based on SHO document header data,
|
|
WMS_INVOICING_SORTING_ON_TARGET_DOC |
|---|---|
| WMS company parameter |
Define the db field names of the SHO document (ESFIDocumentTrade) in a comma-separated list. Note that the assigned fields should necessarily be included in the Invoicing view; therefore customization might be needed based on the implementation requirements.
The invoicing process supports the following use cases:
- Generate trade documents from source trade documents
- Generate trade documents from source trade documents with document separation
- Generate stock documents from stock documents – shipment type to Third party warehouse is also supported (system transition rule: 439.GSO=>DTW)
- Generate stock documents from trade documents – only for shipment type to Third party warehouse (system transition rule: 442. SRC=>DTW)
The process:
- Creates a new document header
- Assigns the document type based on the selected transition rule
- Assigns the series as defined in the process parameters.
- Applies the header fillers (field sets) of the selected transition rule
- Assigns directly the Shipment related information (if the Activate shipment parameter is enabled):
- Delivery due date (shipment date)
- Mean of conveyance
- Driver
- Route
- Delivery terms
- Shipping method
- Assigns the value “process” in the document’s origin field
- Assigns default 0 value for Sortiment and BOM execution fields.
For each of the above document headers, the following target document lines use cases are supported:
- Create document lines from ad hoc actions
- Create document lines and analysis lines from ad hoc actions
- Create document lines from source document lines
- Create document lines from source document analysis lines
- Create document lines and analysis lines from source document analysis lines
- Create document lines for non-WMS items
- Create document lines and analysis lines for non-WMS items
As described in 16.3.5 Shipment routing orders invoicing process, the SHO document transfers the necessary line step action fulfillment data (or ad hoc action data) to the target document. For example, the shipment order document has no analysis lines, while the SHO’s fulfillment actions have stock dimension data. The target document is updated with the analysis lines according the SHO’s action items’ data.
The process applies the line and/or line analysis fillers (field sets) of the selected transition rule, providing the following information from the source data view (i.e. from the line fulfilled action items):
- Item
- Measurement unit: by default, the measurement unit of the source document is applied, unless at customization level the hidden parameter of the invoicing process automation “Invoicing unit” is set to 1; in which case, the action item’s MU is applied. This is not a recommended practice, since line sensitive information, such as discounts might be seriously affected.
- Warehouse
- Stock dimensions (if appropriate)
As far as quantities are concerned, the process provides the following quantities from the source data view:
- Service quantity – i.e. the quantity in service MU as calculated in the data preparation process
- Quantity in counter service MU – the quantity in base MU if the service MU is the alternative MU and vice versa
The document mechanism assigns the final target document line quantities.
For ad hoc actions, the process directly assigns the action item source data to the target document lines (and line analysis). The measurement unit is the service MU.
Review invoices
View the target documents of the process in the Documents section of the invoicing form:

Shipment routing orders cancellation
The shipment routing orders cancellation process is used to cancel open SHO line quantities and optionally relevant open request item quantities depending on the data and on the selected cancelling use case.
The process consists of the source data view (Shipping orders towards cancellation) and the Cancel shipping orders automation.
Once the document lines to be cancelled are selected and the quantities to be cancelled are calculated, the process creates target document lines of document type SHC (Shipment routing cancellation document). The SHC document fulfills the open line quantities of the SHO and re-opens the line quantities of the initial Shipment Order document.
Regardless the selected use case, the process requires the transition rule SHO=>SHC to exist, as well as the SHC document series, which by default is recommended to be the same with the SHO. Otherwise, select next to the wizard to choose the appropriate series (enabled when the Use of the same series code is disabled). The process proposes the first SHC series that applies to the default login site.

Refer to 16.3.4 SHO and SHC recommended configuration for configuring the SHC document type and relevant transition rule as appropriate.
The process, then, cancels the open request item quantities (depending on the selected use case) regardless the step code. Note that the cancellation of the shipment routing orders is document – driven and not step code – driven. You should not use this process if you wish to cancel the open requested quantity of a specific step code. Use instead the open request item cancelling use cases in the ESRF and ES Touch applications as well as the BackOffice correction use cases.
In these cases, the view that is used by the process is the Shipping orders to be cancelled_RF (WMS Shipments area), where the quantity to be cancelled and the request item is defined by the user. The process, then, cancels the open SHO quantity (if exists) according to the user defined quantity.
All shipment routing order cancellation use cases complete the SHO (update process state to 3 – in EPR administration) by checking if there are any loading and/or document line pending quantities.
The Shipment routing orders cancellation view
Select Menu > Shipments > Cancel shipping orders to open the Shipping orders towards cancellation view. The view returns SHO line items where the calculated Quantity to be cancelled is greater than zero.
The detail level returns the line step quantities (requested, executed and cancelled) per step code, while the quantity to be cancelled per step code is calculated.

Select one of the provided three use cases that determine the quantity to be cancelled (Quantity handling indicator):
- Not requested
- Not executed
- Document

Select (optionally) the Cancellation type, which is a three-state indicator:
- Without requests (participates in document)
- With requests
- With actions
The cancellation type indicator filters the Participates in field of the view, which represents the minimum state of all line step codes. For example, if there are actions in the picking step code but only requests in the packing step code, the cancellation type is “Requests”.

The Quantity to be cancelled formulas depend on the selected use case and cancellation type – described in the following sections.
Not-requested cancellation use case
The Not-requested use case is commonly used in the context of the Create route process to manage stock shortages after stock control (refer to 35. Stock shortages management).
When selected, the view returns SHO document lines where there is no requested quantity or the maximum of the requested quantity is less than the open line item quantity.
Quantity to be cancelled = Open line item quantity – requested quantity
In the example of the print-screen below, the open line item quantity is 100, the requested quantity is 96, therefore the not requested quantity of 4 is going to be cancelled.

Note that the not requested use case returns document lines for non-WMS monitored items, since by definition there is no requested quantity for these lines. The view’s column WMS monitored is used as a qualifier so as these lines are excluded from the SHO cancellation not-requested use case. If you wish to cancel line item quantity concerning non-WMS items, you should select the Document cancellation use case.
Press the Cancel shipping orders button to run the cancellation process.

If you select a cancellation reason code, then the process will create an ad hoc cancellation action item (refer to 35. Stock shortages management).
You may also assign the process state “failed” on the source shipment order document by enabling the Source document editing failed parameter. This functionality is described as well in the 35. Stock shortages management.

The cancellation process then:
- produces the target SHC document lines that fulfill the selected SHO document lines by the Quantity to be cancelled and
- re-opens the related source Shipment Order document lines by the Quantity to be cancelled.
Not-executed cancellation use case
Select the Not-executed quantity handling use case to cancel the SHO document open line quantity based on the maximum open requested quantity of the line step.
The calculation formulas of the quantity to be cancelled depends on the case.
Case 1
Max executed quantity for all steps > 0 where all steps are involved except the ones with no remaining quantity (requested – executed – cancelled = 0).
In the example of the print-screen below:

For the first row:
Open line quantity = 980 PCS
Open picking quantity = requested – executed – cancelled = 980 – 1 – 0 = 979
Open loading quantity = requested – executed – cancelled = 1 – 0 = 1
The Max executed quantity for all steps is 1.
Quantity to be cancelled = Open line quantity – Max executed quantity = 980 – 979 = 1
For the second row:
Open line quantity = 10 PCS
Open picking quantity = requested – executed – cancelled = 10 – 1 – 0 = 9
Open loading quantity = requested – executed – cancelled = 9 – 0 = 9
The Max executed quantity for all steps is 1.
Quantity to be cancelled = Open line quantity – Max executed quantity = 10 – 1 = 9
Note that in both cases, the executed quantity in the picking step is not cancelled, while the open loading request quantity remains open to be executed (the Quantity towards cancellation in the loading line step row is zero), since picking has been already executed.
In the example of the print-screen below:

Open line quantity = 1.000 PCS
Open picking quantity = requested – executed – cancelled = 1.000 – 1.000 – 0 = 0
Open loading quantity = requested – executed – cancelled = 1.000 – 700 = 300
The Max executed quantity for all steps is 300.
Quantity to be cancelled = Open line quantity – Max executed quantity = 1.000 – 700 = 300
Case 2
Max executed quantity for all steps = 0 where all steps are involved except the ones with no remaining quantity (requested – executed – cancelled = 0).
In the example of the print-screen below:

Open line quantity = 200 PCS
Open picking quantity = requested – executed – cancelled = 200 – 200 – 0 = 0
Open loading quantity = requested – executed – cancelled = 200 –0 = 200
The Max executed quantity for all steps is 0.
Quantity to be cancelled = Min(Open Line Step quantity excluding the fully executed) = 200
Press the Cancel shipping orders button to run the cancellation process.
If the selected rows involve actions, the following warning message occurs:
“Attention!
You have selected to cancel Orders which have already been related to Actions. After their cancellation you have to apply the appropriate actions to configure stock.
Please, see the "Shipments monitoring view".”
This message informs the user that the necessary actions should be taken to transfer stock back to appropriate locations, since the cancellation process took place after warehouse actions are performed.
The process also checks whether the involved actions are in state “in progress” and in this case, the process is interrupted for the document line and continues with the next selected entry. There is no meaning in cancelling document line quantities when the warehouse operations concerning the line are still in progress.
The cancellation process:
- produces the target SHC document lines that fulfill the selected SHO document lines by the Quantity to be cancelled
- creates cancellation action items per step code by the Quantity towards cancellation (detail of the view). If a cancellation reason is defined at the parameter of the cancellation automation, then this will be assigned and used for tracking purposes.
- re-opens the related source Shipment Order document lines by the Quantity to be cancelled.
Document cancellation use case
This is the most straightforward cancellation use case regarding the Quantity to be cancelled, since by definition it is equal to the open document line quantity.
See below the comparison results between the not-executed and document cancellation use cases in the same document lines.
In the not-executed use case:
The quantity to be cancelled for the first row is 979 (since 1 is already executed), while the open loading request quantity is not cancelled – it is still pending for execution due to prior picking operation.
In the document use case:

The quantity to be cancelled equals to the document open line quantity (980), while the open loading request quantity is also cancelled by 1) since the user decided that the document line will never be invoiced, no matter if the warehouse has already executed actions related to it.
The cancellation process is the same as described in the Not-executed use case, only the assigned quantity values change.
Shipments monitoring
Select Menu > Shipments > Shipments monitoring to view the results of WMS shipment operations, Invoicing and Cancellation information per SHO and SHO lines.

Select the SHOs in process state 1 – Assign administration to WMS so as to:
Generate requests by pressing the Activate management in WMS command. Use this option as a fallback when for any reason the Create route process has failed. The SHO process state then remains in 1, no matter if requests have already been paritally generated. Run the Activate management in WMS process again to continue from the point the process has stopped.
You can also use this option if you wish to run the Create route process with the Activate management in WMS disabled – in this case the process generates the SHOs in process state 1 and the request generation/cancelling shortages processes run at second time.
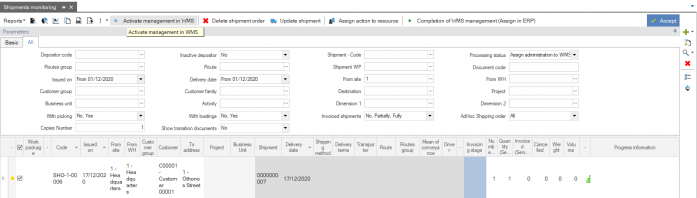
Delete the SHO and re-open the related Shipment Order line quantities by pressing the Delete shipment order command. The Shipment order documents are again available for re-routing in the Shipment routing view.
Note that the Delete command runs only for SHOs in process state 1. If you wish to recall the SHO when requests have already been generated, the process state has already been changed to 2, and no related actions exist, then you should open the SHO form and run the Recall SO command. The Recall process updates the original Shipment order document process state to 0 – in order to be able to modify the content and re-assign it to WMS if necessary.


The Update Shipment use case is described in 17.4 Shipment info processing. Use it also if you wish to assign or update the SHO Invoicing stage.
The Assign to resource use case assigns the supervisor the selected SHOs and the resource to the relevant picking requests.
The Completion of WMS management (Assign to ERP) process should run on demand for all ad hoc SHO documents, since these documents cannot be completed automatically – there is no initial line item quantity (and therefore requested quantity) to be used as a guide for the auto-completion algorithm.
On demand SHO completion can be also selected in cases where the user decides to complete the order based on the open quantities of a selected step code.

Note that the completion process always checks if there are pending quantities in the loading step, even if a specific step is selected.
= Reverse logistics
=
Returns
The returns management process is the part of supply chain management responsible for collecting, sorting, organizing, and restocking inventory that has been returned or exchanged. Returns management is often used interchangeably with Reverse logistics term, however it has a broader sense, since it includes the logistics part, the strategy part - how to avoid returns, how returns are classified and managed (return types), the customer service part - how to compensate for the customer return, the RMA part – Return Material Authorization established processes. Returns management process requires an integrated software ERP, CRM and WMS solution.
As far as the WMS Return operations are concerned, the software should ensure that:
- Damaged Goods can be quarantined and dealt for repackaging or disposal.
- Re-usable stock is quickly identified so that it can be relocated for order picking.
- Complete traceability processes can track and monitor the levels and types of returns.
- Integrates with ERP systems to ensure credits and/or replacements are done promptly to maintain customer satisfaction levels.
In Entersoft WMS® Return is the physical inbound movement of goods or materials into the warehouse against an Expected return order – either as ad hoc or fulfilled with document lines. Expected return orders from customers, other company branches and 3rd party warehouses are supported.
By the end of this section, you will be able to:
- Activate expected return orders and create return requests
- Execute physical returns with WMS Mobile workflows
- Identify and mark damaged good upon receipt with reservation and or disposition reason codes
- Manage discrepancies against the Expected return orders
- Complete receipts and Update ERP to issue the Return Notes based on physical return actions.
Activate expected returns
Make sure that you have:
Configured Expected return documents according to the guidelines given in 16.1 WMS document orders. The involved document types should be characterized with the “WMS_RETURN_ORDER” property. The recommended document types are:
ORS - Sales Return Order
IRO - Intra-warehouse transfer Return Order
GRO - Goods Received Order from Third Parties W/H
- Enabled Expected return document access rights to the appropriate users according to the instructions given in 16.4 Document process state.
- Assigned the Expected return documents to WMS; refer to 16.4.1 Order assignment to WMS.
Select Menu > Returns > Expected orders to view and schedule activation on assigned to WMS Expected return orders.
Useful document header information is provided to help decision making on which order to activate. You can add as much information as required both at header and detail at customization level.
At the detail of the view, you can see the document order lines and quantities, analyzed per stock dimension (if provided in the document order lines).

Run the Activate management in WMS process to generate a Return Request per selected Document. Grouping of documents under the same WP and Request is not supported. The process updates the document’s process state to 2 – in WMS administration.
In the Assign in parameter, you can select from a list the resource you wish to assign to the generated return request and the Supervisor of the Expected return document.
Returns monitoring
View the results of the activation process in the Menu > Returns > Returns monitoring.

Note that the step code for returns is the same with receipts (146).
You can take actions such as:
Recall a return document as long as there are no actions related to it. Open the Return Document form and choose the Receipt Recall action.
The process deletes the generated requests and turns the document’s process state to 0 – initial so as to modify the necessary data and re-assign it to WMS.
Assign or change the assigned resources for the selected return orders.
ESRF Physical receipt from returns
Select ESRF Menu > 1. IMPORTS > 4. RETURN to run the provided ESRF return workflows. The provided use cases are the same with those of the ESRF Receipt menu (refer to 22.1 ESRF Receipt).
Scan either a Return work package barcode or a Return document barcode or choose return work package from the list (F3). This is a mandatory field. The “Returns receipt work packages” public query returns the return requests for documents in process state 2 – in WMS administration. Requests are filtered by the assigned resource. If both assigned and not assigned requests exist, requests with no assignment will be available to all RF users at second priority.
The storage location to receive returns should be of zone type 9 – return.
Choose one of the five available receipt workflows (same as Receipts – except choice 4 (check package) which refers to cross-docking).
The main difference between receipts and returns is that you can set the reservation or disposition reason code for the received stock at the time of the receipt.

Setting the reservation or disposition reason codes upon receipt, guides the stock in the appropriate logical warehouse in the receipt location. This is the “sorting” process, where the received goods are sorted to re-usable and disposable or towards quality inspection.
After stock is received in the return location(s), choose one of the available stock movement flows, described in 47. Stock chapter to transfer the received stock in the appropriate warehouse locations and areas, depending on whether stock can be re-used or not.
Note that Putaway, Sorting and Stock characterization flows are not supported for stock received from return orders.
The Receipt ERSF config parameters apply to the Return workflows with the following exceptions:
- Since sorting is not supported in returns, the SORTING_ENABLED, SORTING_CREATE_REQUESTS and SORTING_EXCLUDE_BUSINESSUNIT_LIST Config parameters are not used
- Return with putaway distribution workflow is not supported, but in order to differentiate it from the receipts, the following Config parameter should be disabled (by default it is disabled):
|
|
RETURN2PUT_ENABLED |
|---|---|
| Receipt |
- If the following ESRF Config parameter is enabled, then the system validates whether the item and stock dimensions (if any) returned from the customer have been actually purchased by the customer. The validation is performed with the use of the Get Exported Quantity By Item Analysis And TradeAccount or Get Exported Quantity By Item And TradeAccount public queries.
|
|
RC_RETURN_CHECKEXPORTEDQTY |
|---|---|
| Return receipt |
Note that such validation should be performed prior to or after the warehouse receipt. However, if there is no such process established, use it as a fallback scenario only if the return orders and the sales documents include all the appropriate stock dimension data; otherwise the results are not guaranteed.
As far as Print-outs are concerned, refer to 29. Receipt print-outs.
Check physical receipt from returns discrepancies vs expected
Monitor physical receipt discrepancies against the expected document order in the Menu > Returns > Returns monitoring > Differences from expected orders view.
The view by default reports discrepancies, i.e. surplus or deficit, between return actions and expected return order lines that are in progress (process state 2).
You can choose the fields for comparison in the Comparison fields. Color and size are by default chosen.
Same use as described in the Goods receipt section.
Complete return orders
Complete the expected return orders when physical receipt from return actions are completed and discrepancies are double-checked. Completion process turns the Expected return order document process state to 3 – administration to ERP. Select Menu > Returns > Returns monitoring to run the “Complete management in WMS” command.
The completion process checks whether there are actions with “in progress” status and throws the exception message: “Document: $ADCode | Receipt actions in progress exist"” – the completion process is interrupted.
Update to ERP (complete)
Update-to-ERP process is supported only when completing the return document orders – no partial update process is supported for the time.
The complete update process is activated with the use of the following business rules:
- Trade document: (WMS) - RETURNS - Quantity Receipt Note import when completed by return actions
- Transit (stock) document: (WMS) - RETURNS - Quantity Receipt Note import when completed by return actions
Since there are no documents through the partial update process, both business rules create the target documents based on line step action fulfillments. The target document type is derived from the depositor action type-document type mapping and the transition rule from the source rule set to the target document type.
Note that, the complete update to ERP process for returns create transition fulfillments, unlike receipts complete update process. You are not, therefore, allowed to modify or update the target document lines.
Buyback process
Buyback is part of the returns management process concerning the return of products back to the supplier/manufacturer. In Entersoft WMS®, purchase returns are handled in the shipment context. The ORP - Purchase return order document type is the recommended type to be used as a Shipment Order document order, which is then routed to SHO documents. Picking and any other shipment related operations are executed according to the implementation requirements.
Create route for selected ORP document lines

Execute picking operation (all picking flows supported) and any other required operation (replenishment, packing, staging, loading)

Assign the appropriate Invoicing stage and proceed to invoicing


Buyback is differentiated from shipments in the Update-to-ERP process (integration).
When WMS is activated, the Goods Return Notes to supplier (recommended Document type PRN) are issued by the ERP Menu > Purchases & Procurement > Receipts & Purchase Invoices > Returns shipment based on Actions process.
The process consists of the data preparation part, the target document issuing part, while you can review the results in the Documents section – identical with the invoicing process (refer to 42. Invoicing).

The differences with the invoicing process are as follows:
- Only the Shipment type “Return” is supported – Generate trade documents from source trade documents.
- The documents separation functionality is not supported.
- Document grouping is not supported.
- Transfer company dimensions from source documents is not supported.
Storage and Facility Management
Stock transfer
Stock transfer is the physical movement of stock items:
- from one storage location to another within the warehouse premises (stock movement)
- from bulk stock to container, from one container to another, from container to bulk (within the same location)
- from a storage location of a WMS monitored warehouse to a receipt storage location of another branch (stock movement between branches)
- from a storage location of a WMS monitored warehouse to a non-WMS monitored warehouse (export stock to warehouse)
- from a non-WMS monitored warehouse to a storage location of a WMS monitored warehouse (import stock from warehouse)
Stock transfer actions are executed either as ad hoc, or against stock movement orders, or against ad hoc stock movement requests (generated based on stock). Note that Document ad hoc action items are not supported (refer to 13.6.5 Ad hoc action items). The ad hoc stock movement actions update ERP target documents when stock is transferred to another warehouse or/and branch.
A warehouse is considered as non-WMS monitored if there is no active storage location assigned to the warehouse.
Stock movements against orders
When physical stock movements from one warehouse/branch to another are executed against document orders, the standard process of activation, physical actions and order completion is followed. The update-to-ERP process covers both ad hoc and document order driven stock movements, therefore it is described at the end of all supported use cases (order driven or ad hoc).
Activate stock orders
Make sure that you have:
- Configured WMS Stock order documents according to the guidelines given in 16.1 WMS document orders. The recommended document type is IWOR - Intra-warehouse transfer Order.
- Enabled Stock order document access rights to the appropriate users according to the instructions given in 16.4 Document process state.
- Assigned the Stock order documents to WMS; refer to 16.4.1 Order assignment to WMS.
Select Menu > Stock > Expected item movements to view and schedule activation on assigned to WMS Stock orders.
Useful document header information is provided to help decision making on which order to activate, such as the source and destination warehouse and branches. You can add as much information as required both at header and detail at customization level.
At the detail of the view, you can see the document order lines and quantities, analyzed per stock dimension (if provided in the document order lines).

Run the Activate management in WMS process by pressing the relevant button.

- Request type: the process generates requests of operation property Stock Movements (pSMOV is the default request type). If the request type in use has quantity handling enabled, then replenishment requests might be also generated depending on the data and the implementation requirements. In such case, you need to make sure that:
- If replenishment is enabled, make sure that Quantity handling is enabled for both stock movement and replenishment request types (refer to 13.2 Request types)
- Configured ICP reservation rules if stock reservation is used (refer to 14.1 Stock reservation)
- Set up as appropriate the destination storage location replenishment algorithm if on-time replenishment is enabled (refer to 14.2 Destination storage location proposal).
- Picking grouping: if enabled, then group picking request generation methodology is used – refer to 34.1 Picking and replenishment requests.
- Add to existing WP: same functionality as the one described in 34.1 Picking and replenishment requests. The only difference is that the relative view in this case is the Propose relative Stock WP in WMS Item Movements filter area.
- The rest of the parameters are thoroughly described in 34.1 Picking and replenishment requests. On-time replenishment and pre-packing use cases are supported.
ESRF stock movement against orders
Select ESRF Menu > 5. STOCK MOVEMENT > 1. ORDER DRIVEN to execute stock movements against document orders.
Order: Select or scan the stock movement Work package or Document code/barcode the order to filter the stock movement open request items. The ESPublicQueries\ESWMMobile\ESWMStockMoveWorkPackages is executed, which returns the open stock movement request items for stock orders of process state 2 – in WMS administration.
The date range for the reference documents is defined in the following ESRF Config parameter:
|
|
RefDocDateItervalDateRange |
|---|---|
| Common |
The date range for the requests is defined in the following ESRF Config parameter:
|
|
RefRequestDateIntervalDateRange |
|---|---|
| Common |
Target SSCC: If an Order is selected, you can optionally scan an existing SSCC or create a new one with the F1 New container function key to place the transferred stock into the container.
If “to” sorting or package containers exist in the stock movement request items, then you should filter with the Target SSCC field instead of the Order (when requests are generated with pre-packing algorithm). Note that you should have first assigned the sorting container to the generated stock movement requests with the use of the Assign Orders or Assign Containers workflows (refer to 37.1.4 Pick-to-cart).
Enable the following ESRF Config parameters to set the gross weight for the pallets and packages at the end of the flow:
|
|
Pick_SET_PALLET_GROSSWEIGHT, Pick_SET_PACKAGE_GROSSWEIGHT |
|---|---|
| Stock transfer requests |
Confirm the location or SSCC (depending on whether the stock to transfer is held in containers or packaging units). Note that if there is no from location specified in the request item, the view returns the current stock location for the item and warehouse if only one is identified.
At this point, you can press F1 to change the selected request item, press F5 to cancel the open quantity of the selected request item, press F2 to view the stock balance information for the selected request item locator. Press F3, to filter a request item for the scanned Item.
Change the request item’s “from” location with another picking zone type storage location, as long as there is adequate available stock, by enabling the following ESRF config parameter:
|
|
STReq_CHANGE_FROM_LOCATION |
|---|---|
| Stock transfer requests |
You can specify the allowed picking locations by defining the zone codes in the following ESRF config parameter:
|
|
STReq_ALTERNATIVE_ZONECODE |
|---|---|
| Stock transfer requests |
Confirm the Item. Disable the following ESRF Config parameter if you wish to skip Item Confirmation (auto-confirmed):
|
|
STReq_CONFIRM_ITEM |
|---|---|
| Stock transfer requests |
Confirm the quantity. Set the final location if the “to” warehouse of the stock movement request item is WMS monitored. An action item of action type SMOV is generated.
If the destination warehouse is non WMS monitored, then no final location is defined, while the action type that is used is the WMOV.
If the destination branch is different than the login branch, then the destination storage location should be of zone type receipt.
 You can set a default “to” storage location in the following ESRF Config parameter:

|
|
STReq_DEFAULT_TOLOCATION |
|---|---|
| Stock transfer requests |
Stock movements monitoring
Select the Menu > Stock > Item movement monitoring to view the line step progress information per Stock order header and lines, and the relative action items per line.

 You can recall the Stock order document as long as there are no actions related to it. Open the Stock order document form and choose the Undo item movement action.
The process deletes the generated requests and turns the document’s process state to 0 – initial so as to modify the necessary data and re-assign it to WMS (if required).
 Run the Complete administration in WMS command the warehouse has finished executing the selected stock order. The process updates the stock order document process state to 3 – in ERP administration and validates whether there are actions in status “in progress”.
It is recommended to enable the Cancel pending requests flag, when stock movement requests and replenishment requests that handle quantity are in use. In this way, stock is again available for reservation.


ESRF Ad hoc stock transfer workflows
The following paragraphs describe the provided ESRF Ad hoc stock transfer flows.
Ad hoc stock movements
Select ESRF Menu > 5. STOCK MOVEMENT > 2. AD HOC to execute ad hoc stock movements between storage locations of the same or different warehouses (both WMS monitored) of the login branch. You may also use this workflow to add bulk stock into a container without transferring it to different location.
Scan a storage location for bulk stock transfer or the container SSCC to be transferred.
If bulk stock is selected, search or scan the selected location’s items to transfer. Confirm the quantity to transfer (if only 1 is left in stock, then it is automatically selected and not editable). Choose to transfer to a different storage location or add contents to an existing or new container SSCC (F1).

If container stock is selected to be transferred, choose whether to transfer its contents or the entire container. If you choose to transfer the entire container, then set the final location with no item/quantity confirmation.


Mass execution
Select ESRF Menu > 5. STOCK MOVEMENT > 3. MASS EXECUTION should you wish to transfer ad hoc the stock of multiple items from one starting storage location to one destination storage location.
The functionality is the same as described in Ad hoc stock movements, with the difference that after the quantity to transfer is confirmed, the flow continues with the next Item in stock for the selected storage location. Destination location or target SSCC are confirmed at the end of the flow for all the confirmed item and quantities. The flow returns back to the location/SSCC selection criteria once all the stock of the selected starting location (or SSCC) is transferred. Press ESC to the Item confirmation view to exit the flow on demand. In such case, three alternatives are provided, as shown on the print screen below:

Stock movements to another branch
Select ESRF Menu > 5. STOCK MOVEMENT > 4. TO BRANCH should you wish to transfer ad hoc stock from the login branch to another, as long as the destination storage location is a receipt location.
The flow is the same as in ad hoc stock movements, except that the destination storage location should belong to another branch than the login and the fact that it should be a receipt zone type storage location. If any of the above conditions are violated, the following error messages occur:
“The target location must belong to receipt zone type.”
“The target location must belong to different branch than this one of the initial location.”
A WMOV action is generated - stock is exported from the selected storage location.
 Stock movements to non WMS monitored warehouse

Select ESRF Menu > 5. STOCK MOVEMENT > 5. TO NON WMS W/H should you wish to transfer ad hoc stock from a storage location to another warehouse that is non-WMS monitored (no storage locations are assigned to the Warehouse).
The flow is the same as in ad hoc stock movements, with the difference that at the end of the flow, instead of confirming a destination location or container, you should confirm a non WMS monitored warehouse.
A WMOV action is generated - stock is exported from the selected storage location.
Stock movements from non WMS monitored warehouse
Select ESRF Menu > 5. STOCK MOVEMENT > 6. FROM NON WMS W/H should you wish to transfer stock from a non WMS monitored warehouse to a storage location of a WMS monitored warehouse. The flow is identical to the Stock Import flow (see below 48. Stock transformations). A WMOV action item is generated, with no “from” storage location (i.e. stock import).
 Select the warehouse “from” which stock is exported and the location “to” which stock is imported.
Select the appropriate import flow (container, mixed container, mixed container with packages, bulk, multiple containers).
Declare all necessary stock import data, such as the container SSCC (depending on the selected flow), the item, the measurement unit, the monitored stock dimensions and the quantity. After confirming the quantity you can assign a disposition reason code or a reservation reason code. Note that if the “from” warehouse is a disposition warehouse, you should mandatorily assign a disposition reason code, otherwise the following error message occurs:
“The completion of the disposition reason is required”.

This is monitored by the following ESRF Config parameter (by default enabled):
|
|
SI_ASK_DISP_RES |
|---|---|
| Stock import |
Change stock warehouse
Select ESRF Menu > 5. STOCK MOVEMENT > 7. CHANGE STOCK W/H should you wish to change the logical warehouse of the stock without changing the storage location.
The flow is identical with the Stock movements to non WMS monitored warehouse, at the end of the flow you should confirm the destination warehouse. Note that the destination warehouse should be non-WMS monitored. The generated action item is a WMOV action item with the same from/to storage locations.
Transfer and manage containers
Select ESRF Menu > 2. STOCK to view the provided use cases regarding container management.

- Transfer to sorting container: select this use case to ad hoc sort bulk stock in a storage location and transfer it to an existing sorting container. The generated action is a sorting (SRT) action.
- Transfer to container: select this use case to ad hoc add bulk stock to an existing container. The generated action is a Palletization (RPAL) action. Use it interchangeably with the ad hoc stock movement to container use case.
- Manage containers – transfer container: use this when you wish to transfer an existing container to another location or nest it to a pallet container. The generated action is a Palletization (RPAL) action.
- Manage containers – unload container: use this when you wish to empty the contents of the selected container. The use case empties the nested containers when the outer container is selected. The generated action is a depalletization (UPAL) action.
Back office stock transfer use cases
The current stock view menu (Menu > Stock > Current stock) provides a set of use cases concerning the generation of ad hoc stock movement and stock transformation actions or requests based on selected balance rows.
Stock movement to another storage location
As far as stock movements requests and actions are concerned, the back office relative use case is the Item movements of pallets, packages and packagings.

Note that ad hoc stock transfers are allowed on available stock only.
Select the appropriate balance rows to transfer and press the Item movements of pallets, packages and packagings command.
Select the appropriate destination storage location in the relevant parameter (mandatorily). If only one balance row is selected, you may also define the quantity to be transferred – the balance row quantity is automatically proposed.

Choose Next to view the warehouse and branch of the selected destination storage location. Use this information to confirm that you took the right decision.

Press Accept to generate an action of action type SMOV, where the action items’ “from” and “to” fields are assigned based on the selected balance row data. “To” storage location is assigned based on the relevant use case parameter, while the “to” warehouse is determined based on the destination warehouse algorithm (refer to 14.4 Destination warehouse proposal).
Note that if only one balance row is selected, the generated action form opens, where you can edit/modify the assigned information. Press save to close the action form.
If you wish to generate stock movement requests instead of stock movement actions, enable the Create requests parameter.
A request of type pSMOV is then generated (you may define a different request type at customization level), where the request items’ “from” and “to” fields are assigned based on the selected balance row data. “To” storage location is assigned based on the relevant use case parameter.
Select the ESRF Menu > 5. STOCK MOVEMENT > 9. AD HOC REQUESTS to execute the ad hoc stock movement request items. The flow is the same with the Stock movements against orders, except that in this case there are no selection criteria (Order or SSCC). The ESPublicQueries\ESWMMobile\ESWMGetStockMovementReqItems returns the ad hoc request items with open quantity.
Scan or select the SSCC or location (depending on whether stock is bulk or in container) and confirm/modify the quantity. The destination storage location is auto-completed based on the request item and cannot be edited.

Stock transfer to pallet
As far as stock transfer to containers are concerned, the back office relative use case is the Stock palletization. Only pallet class containers are supported as a destination container. You can transfer bulk stock, or stock held in package/master package/sorting containers. You cannot move stock from one pallet container to another.

An action of type RPAL is generated. If more than one balance rows are selected, choose whether to add the stock in one pallet only or create as many pallets as the selected rows.

Remove contents from container
Run the Remove containers command should you wish to transfer stock from a selected container to bulk stock. Nested containers are also removed. You can select all the relevant balance container rows to remove the container as is for all its contents, or select to remove selected items and quantities from the container. The generated action is a depalletization (UPAL) action.
Update-to-ERP stock movements
Stock movement actions, ad hoc or with line step document fulfillments, participate in the Update-to-ERP Internal goods transfers process (Menu > Stock > ERP Integration > Internal goods transfers) as long as the following conditions are met:
- Action types have one of the following operational properties; STOCK_MOVEMENT, STOCK_TRANSFORMATION, WH_STOC_MOVEMENT.

- The status of the participating actions is “complete”
- The action items’ “from” warehouse is different from the “to” warehouse (3rd party warehouses are excluded).
- The action items “from” site is equal to the “to” site – if you wish to include intra-site stock movements, enable it at customization level for the time being.
The parameter Select transactions should be set to “Accounting stock to be updated” (default) in order to run the update-to-ERP process. Set the parameter to “Updated accounting stock” to view the process results, i.e. the generated target document per action item.

Run the Update official data command to create target stock documents based on the view’s source data.

The update process:
- Runs by default for all view entries – note that the update process is usually time – scheduled
- Creates a target document of class transit (stock document) while the document type is according to the depositor’s document’s type action type – document type mapping.
- Target documents are grouped by from/to site, receipt/delivery warehouse, receipt/delivery branch, action type, action step code, ad hoc indicator and action registration date.
- Creates target document lines, grouped by:
- Item
- Measurement unit according to the criteria selected in the parameter Use of action MU
- Ad hoc indicator
- The quantity assigned depends on the Use of action MU parameter value. If enabled, then the “to” quantity of the action items is assigned, else the Service MU “to” quantity is assigned.
- Creates target document line analysis (if necessary) assigning the “to” stock dimension data of the action items.
- Generates transition fulfillments between source document lines (if exist), action items and target document lines.
- Runs the “back order” process to generate fulfillments between source (if exist) and target documents.
Stock transformations
Stock transformations concern ad hoc warehouse operations that update and item’s balance stock dimensions. The relevant Update-to-ERP process for stock transformation actions generates target adjustment documents.
The provided use cases and the relevant Update-to-ERP process are described in the following sections.
ESRF Stock transformation use cases
Run the ESRF Menu > 2. STOCK > 7. STOCK TRANSFORMATION to select bulk stock from a location or select container stock.

Set or update reservation reason code
- Press F1: RSV to set the “to” reservation reason code. Select the reservation reason code (* indicates that the reservation reason code is mapped with a logical warehouse)
- Confirm the quantity for which you wish to set the reservation reason code.


A Reservation reason transformation action (RES) is generated, which updates the reservation reason code in balances. In case when the selected reservation reason code is mapped with a logical warehouse that is different from the stock balance warehouse, then the “to” warehouse is also updated – based on the destination warehouse proposal algorithm (refer to 14.4 Destination warehouse proposal). When “from” warehouse is different that the “to” warehouse, the relevant Update-to-ERP process to use is the Internal goods transfers (refer to 47.4 Update-to-ERP stock movements).
 Set or update disposition reason code

Press F2: DSP to set the “to” disposition reason code. Select the disposition reason code from the list and confirm the quantity. A Disposition reason transformation action (DISP) is generated, which updates the disposition reason code in balances. In case when the “to” disposition warehouse is different from the stock balance warehouse (“from” warehouse), the relevant Update-to-ERP process to use is the Internal goods transfers (refer to 47.4 Update-to-ERP stock movements).
Update item stock dimensions in balances
 Press F3: Change dimension to change the stock balance lot, color, code, size, stock dim 1 and stock dim 2 dimensions.
A Stock dimension transformation action (SDTR) is generated, that updates the stock dimensions in balances. The relevant Update-to-ERP process used in case of stock dimension transformations is Stock dimensions – adjusting entries (refer to 48.3 Update-to-ERP stock dimensions).
Back office stock transformation use cases
The current stock view menu (Menu > Stock > Current stock) provides a set of use cases concerning the generation of ad hoc stock transformation actions based on selected balance rows.

Change reservation reason
Select the balance records to set or update the reservation reason code. A Reservation reason transformation action (RES) is generated. In case when the selected reservation reason code is mapped with a logical warehouse that is different from the stock balance warehouse, then the “to” warehouse is also updated – based on the destination warehouse proposal algorithm (refer to 14.4 Destination warehouse proposal). When “from” warehouse is different that the “to” warehouse, the relevant Update-to-ERP process used is the Internal goods transfers (refer to 47.4 Update-to-ERP stock movements).

Disposition reason change
Select the balance records to set or update the disposition reason code. A Disposition reason transformation action (DISP) is generated. In case when the “to” disposition warehouse is different from the stock balance warehouse (“from” warehouse), the relevant Update-to-ERP process used is the Internal goods transfers (refer to 47.4 Update-to-ERP stock movements).

Change item dimensions
Filter a specific Item code in the current stock view and select the balance records to change the item’s balance stock dimensions. You should select at least one dimension to change.
A Stock dimension transformation action (SDTR) is generated, that updates the stock dimensions in balances. The relevant Update-to-ERP process used in case of stock dimension transformations is Stock dimensions – adjusting entries (refer to 48.3 Update-to-ERP stock dimensions).

Change item and dimensions
Filter a specific Item code in the current stock view and select the balance records to change the Item and Item’s balance stock dimensions. You should define all the monitored stock dimensions for the selected new item. The Item transformation should involve “from” and “to” items that monitor the same stock dimensions.
A Stock Item transformation action (SITR) is generated, that updates the item and the stock dimensions in balances. The relevant Update-to-ERP process used in case of item stock transformation is Stock dimensions – adjusting entries (refer to 48.3 Update-to-ERP stock dimensions).

Update-to-ERP stock dimensions
Ad hoc stock transformation actions participate in the Update-to-ERP stock dimension adjustment process, found in Menu > Stock > ERP Integration > Stock dimensions - adjusting entries, as long as the following criteria are met:

- The action status is “completed”
- The property of the action is STOCK_TRANSFORMATION
- The depositor action type – document type mapping is configured as appropriate – the recommended target document type for SITR action type is OFI (Goods adjustment document) and for SDTR action type is CTD (Correcting transaction of items dimensions balances),
- The parameter Select transactions should be set to “Accounting stock to be updated” (default) in order to run the update-to-ERP process. Set the parameter to “Updated accounting stock” to view the process results, i.e. the generated target document per action item.
Run the Stock dimensions – update correction command to create the target adjustment document and document lines. The adjustment target document types use reverse line type to insert stock according to “to” action item data, and forward line type to export stock according to “from” action item data.

Physical inventory, stock initialization and stock adjustments
Stock counting is the physical verification of quantities, stock dimensions, packaging units and condition of items held in a warehouse. It is the source of stock discrepancy information.
Stock counting may be performed as an intensive annual procedure known as physical inventory, or may be done continuously by means of a cycle-count.
Stock counting may be performed based on plans, known as inventory plans, where balances are updated at second time and after stock discrepancies are checked and confirmed. Stock counting may also update stock balances real time with no prior planning.
Stock initialization is the process of physical inventory upon system’s launch.
Stock adjustment is the ad hoc import or export of stock to and from a storage location without any prior stock counting process.
Entersoft WMS® supports planned and real time stock counting operations as well as stock initialization and stock adjustment processes. The following sections describe the relevant functionality.
Inventory plans
The stock counting process based on inventory plans consists of the following steps:
- Create the inventory list and the stock counting work packages associated to it.
- For each stock counting work package create the stock counting requests based on storage location or item selection criteria.
- Assign resources, if necessary, lock storage locations or items and take the balance snapshot to initiate physical stock counting.
- Execute physical stock counting operation with ESRF Mobile provided workflows.
- Review the stock differences between counted and snapshot balances.
- Create a second stock counting work package for selected stock differences and execute it with ESRF Mobile provided workflows
- Repeat steps 5 and 6 as many times as required.
- Finalize the stock counting process by creating a finalization work package based on last counting work package.
- Review finalized stock differences and update stock balances.
Configuration
The required configuration regarding inventory plans relevant work package types, request types and action types is inserted with the zero parameterization process.
Work package types
The stock counting work package types used by the inventory plan process are:
- WPCount - Stock counting work package: used in the stock counting per storage location method
- WPCountItem - Stock counting work package per item: used in the stock counting per item method
- WPCountSLItem - Stock counting work package per storage location & item: used for repeat stock counting on selected items and storage locations based on differences.
- WPCountFin - Stock counting finalization work package: created upon stock counting finalization process.
Select Configuration > Warehouse Management > Work package types to view the work package types.

For each work package type a different UI form is defined, which determines the steps that should be followed per context.
The stock counting work packages that are generated in the context of an inventory list belong to the Inventory list work package. The Inventory list is a task type with code “WHInv”, accessed through Configuration > Task management > Task types.
The state of the stock counting work packages and the state of the inventory list are automatically assigned by the system depending on the stock counting workflow stage.
Request types
The stock counting request type is the “psCOUNT”. Stock counting requests are generated in the first step of the stock counting process based on plans (applies both on stock counting per storage location and per item). Enable the Allow requests on locked items flag, if the stock counting per item methodology is in place.

The Allow requests on locked storage location is by default enabled. Storage locations and items are locked at the initiation of the stock counting process. When locked, no actions or requests can be performed on these storage locations and items by default, unless the Allow requests/actions on locked flags are enabled. The system, by default, recommends that only stock counting relevant requests and actions are allowed when stock counting is in progress.
Note that the Quantity handling is by default disabled and it is not recommended to enable it. The standard functionality stock counting use cases do not support quantity handling for the time. If quantity handling was enabled, then the “context” balance is updated, as set on the Balance type default value.
The stock counting finalization request type is the “pfCOUNT” – not supported in any system use case.
The state of the request is handled by the system as explained in the below sections.
Action types
The stock counting action type is the “sCOUNT”. Enable the Allow actions on locked items flag, if the stock counting per item methodology is in place. Note that the sCOUNT action items update the context balances.

The stock counting finalization action type is “fCount”. Note that by default the fCount action items do not update balances. It is recommended to run the relevant stock counting finalization use case to update the current balance records with the final quantity.

Performance related configuration
In order for the stock counting request generation process to work with best performance results, it is required to define a network path where the AppServer user writes and the SQLServer user reads the created temporary file, using the following Company parameter:
|
|
ES_ImportTempPath |
|---|---|
| Category: System company parameters |
Create inventory list and stock counting work packages
- Select Menu > Inventory > Inventory list to create a new Inventory list.

Fill in a description optionally – for example Annual Inventory 2020. One Inventory list should be created per Distribution point. The Inventory list status is “initial” when created.

In the Stock counting WP context view, insert, modify or delete the inventory list’s counting work packages. Press the add button to insert a new work package. Select the “WPCountItem” work package type to perform stock counting per item or the “WPCount” work package type to perform stock counting per storage location.

Stock counting work packages are reported and accessed either through the context Inventory list view or through the Menu > Inventory > Stock counting - work packages view.
The status of the generated stock counting work packages is “initial”.
Note that you can cancel a stock counting work package as long as it has not been selected to be finalized. To cancel a stock counting work package press the Cancel command in the work package form:

Cancelled work packages do not participate in the stock counting finalization process.
Generate stock counting requests per storage location
When the storage location stock counting method is used, you should first select the storage locations to count based on layout criteria, such as storage areas, buildings, warehouses, etc. Open the Work package count form and select the appropriate locations in the Create stock counting requests section.

- Run the Create stock counting requests command for the selected locations. The process:
- Generates a request of request type “psCount - Stock counting request”.
- The status of the generated request is “open”.
- One request is generated per selected location. The location is held in the transport request header fields (from and to). There are no request items generated.
The generated stock counting requests per location are shown in the Stock counting requests context view. You can select and delete stock counting requests in status “open” by pressing the delete key in your keyboard.

Run the Assign stock counting requests to resource command should you wish to allocate resources for specific locations prior to execution.

Lock storage locations and start counting
When ready to execute stock counting, run the Lock storage locations and start stock counting command. The process:
Locks the selected storage locations and updates the storage locations lock context reason code with the relevant stock counting work package id. This is a stored information available only in the stock counting context - not available in the storage location’s form and cannot be user modified. The process also updates the storage location’s lock reason code with the value “stock count”.

Creates the snapshot balances by copy of the current balances. Stock comparison is made between stock counted context balance and snapshot balance in the context of each stock counting work package. The snapshot MU balances are shown in the System stock context view:

Updates the stock counting request status to “In progress”.
Updates the stock counting work package status to “In progress”.


Note that the storage location locking and start counting process can be also performed with the ESRF relevant workflow.
ESRF Stock counting per storage location
Select ESRF Menu > 8. STOCK COUNTING > 4. BASED ON PLAN > 1. LOCATION to execute stock counting per storage location based on inventory plans.
- Counting plan: select or scan the stock counting work package. The ESPublicQueries\ESWMMobile\ESWMGetCountRequestsPerStorageLocation is executed, which returns stock counting requests for storage locations with the following sorting order:
Requests assigned to the login resource return first, and then requests with no resource assigned.
Requests with status “in progress” first, with status “open” second and with status “completed” last.
Storage area code, sector priority, aisle priority, column and level.
Floor: select the storage area to filter the stock counting requests based on the following ESRF Config parameter (default enabled):
|
|
STOCKCOUNT_StorageAreaFilterEnabled |
|---|---|
| Stock counting |
Enable the following ESRF Config parameters to filter Building and/or Sector codes as well.
|
|
STOCKCOUNT_BuildingFilterEnabled |
|---|---|
| Stock counting |
|
|
STOCKCOUNT_SectorFilterEnabled |
|---|---|
| Stock counting |

Confirm the Location to be counted. Press F1 to change request or confirm a different location as long as it is included in the selected work package and assigned to the login user related resource (the system automatically resolves the relevant request).

If the selected request is in status “open”, then the process locks the storage location, takes the snapshot balance and changes the state of the request to “in progress” upon confirmation (see Lock storage location and start counting process above).

Choose one of the provided options to perform counting.


Container, Mixed container, Mixed container with packages, bulk: choose any of these options to count analytically the contents and stock dimensions of a homogeneous container, a mixed container, a mixed container with packages or bulk stock. You should confirm the Item, stock dimensions (if monitored) and quantity.


Input quantity can be set by default to 1 (used in bulk stock counting) with the use of the following ESRF Config parameter:
|
|
STOCKCOUNT_QTY_DEFAULT_VALUE |
|---|---|
| Stock counting |
You can also define whether you wish the Input quantity field to be editable or not (by default it is) with the use of the following ESRF Config parameter. If the value is set to false and the QTY_DEFAULT_VALUE is false, then the QTY_ISEDITABLE value is ignored:
|
|
STOCKCOUNT_QTY_ISEDITABLE |
|---|---|
| Stock counting |
Press F2 to view a summary of the selected location balance container class or bulk.


Press F1 to change the contents of the inner packaging to the outer packaging unit (if exists).
Press F2 to change the container type (if exist) – container types with type of use “stock” are returned.


Press F5 to set a reservation or disposition reason code.

Entire container: choose this option to scan the container and automatically confirm its contents (items, stock dimensions and quantities are automatically confirmed).
Container with content: choose this option to scan the container and confirm only the quantity or add a new item. Item and stock dimensions for existing contents are automatically verified.
Complete counting: select this option at the end of each flow to complete the counting operation for the selected storage location. If no stock is counted (the location is empty), choose this option in the beginning. Upon completion:
- The request status is updated to “completed”
- The storage location is unlocked, the lock reason code is set to null, the lock context work package is set to null.
Note that the complete counting process can also be performed in the relevant back office use case.
Once all the requests of a work package are completed, the work package is also updated to “completed”.
Note that you can select an already completed location to count as long as the stock counting work package is in progress.
Check differences per location and start a new stock counting
The stock counting action items update the context balance, which is reported in the Counted stock context view of the stock counting work package form.

When the stock counting request is completed, then you can see the differences between the snapshot and the context balances per balance stock dimension in the Differences context view. Note that the stock counting request status is set to “completed” by default – change the value of the parameter of the view to show differences for requests that are still in progress.

The plus indicator represents stock counting surplus (counted stock is greater than the snapshot balance), the minus indicator represent deficit (counted stock is less than the snapshot balance).
Should you wish to view grouped information about context and snapshot differences at container level (outer container for nested containers), use the Balance at container level context view.

Once the stock counting work package’s requests are completed, the status of the stock counting work package is also updated to “completed”. At this point, you can select the locations with differences in the Storage locations with discrepancies context view and start a new stock count.

Note that if you select to start a new count without first completing the current stock counting process, the following error message occurs:

A new stock counting work package is generated with a bigger sequential number, so as the stock counting finalization process can select the last stock counting work package. The stock counting work package type used is the “WPCount”, while in the description, the system auto-completes that it is “based on differences”. The process also generates the stock counting requests for the selected locations.

Follow the steps described in 0
Lock storage locations and start counting and 49.1.5 ESRF Stock counting per storage location.
Alternatively, if you do not wish to start a new counting process for the entire storage location contents, you can select specific items per storage location for which stock differences have been spotted. Run the New stock counting command in the Locations with differences by item.

The process generates a work package of type “WPCountSLItem - Stock counting work package per storage location & item”, while the generated requests contain the storage location and the item to be counted.

To execute stock counting for selected items per storage location, select ESRF Menu > 8. STOCK COUNTING > 4. BASED ON PLAN > 1. LOCATION. Once a WPCountiSLItem work package is selected, the Location confirmation view shows the Item for which stock counting should be performed.

If you scan a different item barcode than the selected request item, the following error message occurs:

The flow continues as described in 49.1.5 ESRF Stock counting per storage location.
Generate stock counting requests per item
When the stock counting per item method is used, you should first select the items to count based on criteria such as item groupings, ICP, whether the item is in stock or not, etc. Open the Work package “WPCountItem“ form and select the appropriate items in the Create stock counting requests section.

- Run the Create stock counting requests command for the selected items. The process:
- Generates a request of request type “psCount - Stock counting request”.
- The status of the generated request is “open”.
- One request and request item is generated per item.
The generated stock counting requests per item are shown in the Stock counting requests context view. You can select and delete stock counting requests in status “open” by pressing the delete key in your keyboard.

Run the Assign stock counting requests to resource command should you wish to allocate resources for specific items prior to execution.

Lock items and start counting
When ready to execute stock counting, run the Lock item and start stock counting command. The process:
Locks the selected items and updates the item lock context reason code with the relevant stock counting work package id. This is a stored information available only in the stock counting context - not available in the item’s form and cannot be user modified.

Creates the snapshot balances by copy of the current balances. Stock comparison is made between stock counted context balance and snapshot balance in the context of each stock counting work package. Define in the following WMS company parameter the zone types you wish to exclude from the item stock counting process:

|
|
WMS_EXCLUDEZoneType_StockItemCounting |
|---|---|
| Category: WMS company parameters |
The snapshot MU balances are shown in the System stock context view.
- Updates the stock counting request status to “In progress”.
- Updates the stock counting work package status to “In progress”.
Note that item locking and start counting process can be also performed with the ESRF relevant workflow.
ESRF Stock counting per item
Select ESRF Menu > 8. STOCK COUNTING > 4. BASED ON PLAN > 2. ITEM to execute stock counting per item based on inventory plans.
- Counting plan: select or scan the stock counting work package. The ESPublicQueries\ESWMMobile\ESWMCountItemWorkPackages is executed, which returns stock counting requests for items with the following sorting order:
- Requests assigned to the login resource return first, and then requests with no resource assigned.
- Requests with status “in progress” first, with status “open” second and with status “completed” last.
Confirm the Item to be counted. Press F1 to change request or confirm a different item as long as it is included in the selected work package and assigned to the login user related resource (the system automatically resolves the relevant request).
If the selected request is in status “open”, then the process locks the item, takes the snapshot balance and changes the state of the request to “in progress” upon confirmation (see Lock items and start counting process above).
Confirm the Location to be counted.
Choose one of the provided options to perform counting. The rest of the process is exactly the same with stock counting per storage location process (refer to 49.1.5 ESRF Stock counting per storage location).

Check differences per item and start new counting
The stock counting action items update the context balance, which is reported in the Counted stock context view of the stock counting work package form.

When the stock counting request is completed, then you can see the differences between the snapshot and the context balances per balance stock dimension in the Differences context view. Note that the stock counting request status is set to “completed” by default – change the value of the parameter of the view to show differences for requests that are still in progress.
The plus indicator represents stock counting surplus (counted stock is greater than the snapshot balance), the minus indicator represent deficit (counted stock is less than the snapshot balance).
Should you wish to view grouped information about context and snapshot differences at container level (outer container for nested containers), use the Balance at container level context view.
Once the stock counting work package’s requests are completed, the status of the stock counting work package is also updated to “completed”. At this point, you can select the items with differences in the Items with differences context view and start a new stock count.

A new stock counting work package is generated with a bigger sequential number, so as the stock counting finalization process can select the last stock counting work package. The stock counting work package type used is the “WPCountItem”, while in the description, the system auto-completes that it is “based on differences”. The process also generates the stock counting requests for the selected items.
Follow the steps described in 49.1.8 Lock items and start counting and 49.1.9 ESRF Stock counting per item. Generating new stock counting per item for selected locations is not yet supported.
Stock counting finalization process
The stock counting finalization process updates the counted stock in the WMS current balances. The finalization process takes into account stock counting work packages of state “completed” (“cancelled” and “in progress” WPs are excluded). It is recommended to run the finalization process when the Inventory list is completed, unless you can control which locations or items to update. The finalization process takes into account the last stock counting work package for the item and location (based on the sequence number).
- You need to create the finalization work package in the Stock counting finalization WP context view of the Inventory list form. The Work Package type used is the “WPCountFin”.

Open the Stock counting finalization WP form to run the Counting by Location (and Item) towards finalization command.

The process selects the last stock counting work package per storage location or item and creates the relevant snapshot balances and context balances assigning the finalization WP as context.
Review and manage the reserved stock for which stock deficit is counted in the Stock reservation management context view. You are strongly recommended to cancel the reserved quantity for stock deficits, since you will not be able to post the actual stock at the end of the finalization process – negative reserved stock will occur.

Create the finalization actions and action items (of type fCount) in the Differences and current balance update preparation. The process runs for all entries. The system by default does not update the current stock balances at this point due to the relevant configuration of the action type in use (refer to 49.1.1 Configuration).
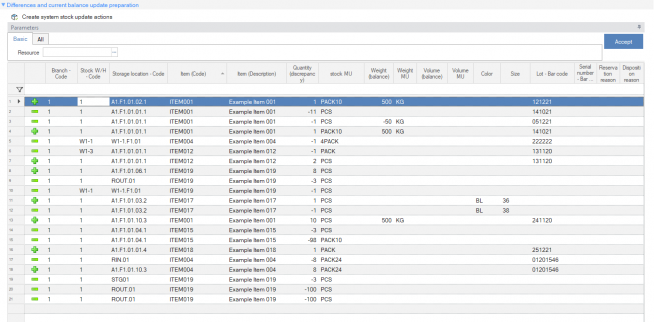
The process generates one fCount action per item.
Update the current stock balance in the List of actions towards finalization context view. The view returns the fCount actions generated from the previous step. You may select to update the current stock balances partially for the selected items.


Inventory plans monitoring
Apart from the context views per each stock counting work package, view the progress per Inventory list in the Preview and Quantitative overview context dashboards:

The quantity to be counted is based on the snapshot balances per each stock counting work package, while the counted quantity is based on the context balances of each work package.
Real time stock counting
Stock counting per storage location or SSCC without prior planning (real time) is supported through the ESRF Menu > 8. STOCK COUNTING > 6. LOCATION STOCK flow. Before performing real time stock counting process, make sure that there is no stock reserved in the storage locations to be counted.
ESRF Location stock counting
Scan the location or SSCC to be counted.

Scan or select the Item to count – a list of the selected location / SSCC balance is provided to select.

Once you select an existing stock, you will be asked to set the counted quantity. You can confirm zero quantity if the item is not in stock.

If you scan an item that is not in stock for the selected location, you need first to confirm should you wish to continue with stock counting. Choose the appropriate workflow (container, mixed container, mixed container with packages, bulk) and then continue with the appropriate data entry in order to add stock to the selected location.

The outcome of the real time stock counting process per location/SSCC is the registration of an action of type SDTR (Stock dimension Transformation), where in the action items the “from” quantity is equal to the current balance quantity and the “to” quantity is equal to the counted quantity.

When a new item is inserted in the storage location balance, the relevant action type used is STKIN (Add stock). Note that the effect on current balances is in real time.


Real time stock counting monitoring
To view and monitor real time stock counting effect on balances and the derived stock discrepancies, select Menu > Inventory > Unplanned countings.

Stock discrepancies are reported between current balances and balance calculated by abstracting the “to” quantity of the stock counting action items. At the Information level criterion of the view, select which of the balance stock dimensions you wish to participate in the comparison. At the Registration date of the view, define the date range for which real time stock counting actions are taken into account.
Container counting
The ESRF Menu > 8. STOCK COUNTING > 2. CONTAINER COUNTING flow supports a special stock counting use case where you scan and confirm the existence of a container in a specified location without counting its contents.

The process generates an action of type “sCount” with an action container without any action items. No balance update is performed.
You can view the generated actions in the Menu > Overview > Actions view. There is no system provided view to monitor the container stock counting process – you should create one at customization level.
Stock initialization
The stock initialization process refers to the import of stock into WMS current balances upon system’s launch. The process can be executed either with data migration methods using the EMI tool, or with a physical stock counting method as described below. The system supports also a rarely used WMS import methodology from ERP balances described in section 49.3.2.
ESRF Location counting
To run the stock initialization with physical stock counting use the ESRF Menu > 8. STOCK COUNTING > 1. LOCATION COUNTING or ESRF Menu > 8. STOCK COUNTING > 3. WITH QUANTITY SET flows. Both flows are practically the same, with the difference that in the Location Counting flow the quantity of Items held in bulk stock is automatically set to 1 as long as the packaging MU is resolved from the barcode processing, or it is only one (no item MU hierarchy).
You should select/scan the location to count and then select the type of stock to import,

If you enable the following ESRF Config parameter, the system checks if there is existing stock for the resolved item and autocompletes stock dimensions 1 and 2 (if monitored) based on the existing stock.
|
|
STOCKCOUNT_AUTOCOMPLETESTOCKDIMS |
|---|---|
| Stock counting |
The following ESRF Config parameter (by default enabled) adds a new barcode if not resolved to the selected item after user confirmation.
|
|
STOCKCOUNT_NEW_BARCODE |
|---|---|
| Stock counting |
The outcome of the process is the generation of actions and action items of type STKIN (Add stock).
Update stock based on ERP data use case
Select the Menu > Inventory > Update stock based on ERP data to run the data migration import of stock from ERP balances to WMS balances. It is not recommended to use this data migration method for items with multiple hierarchies or with packaging unit different from base or alternative MU.
The process is based on selection of items to import from the stock items view (WMS monitored items) and the Action Items Inventory Count.

Stock is migrated to the item storage locations. If there is no item storage location set, then the stock is imported in a general storage location set in the following WMS company parameter:
|
|
WMS_STORAGELOCATION_INIT |
|---|---|
| WMS Company parameter |
The action type used for the process is set in the following WMS company parameter – SINIT action type (stock initialization) is set by default:
|
|
WMS_ΙΝΙΤ_ACTIONTYPE |
|---|---|
| WMS Company parameter |
The process creates one action per 100 action items, as set by default in the following WMS company parameter:
|
|
WMS_UCASE_MAX_NUMBER_LINES |
|---|---|
| WMS Company parameter |
Compare WMS stock to ERP stock
Select the Menu > Inventory > Compare WMS stock to ERP stock to view stock discrepancies between WMS and ERP balances at item and/or stock dimension level (if selected).

The view by default returns results for WMS monitored items with stock differences. For items that monitor stock dimensions, the differences are shown at both item level (bold highlighted row) and dimension level.
You can use this view as a source of information only, or use it to update ERP with the Stock count document based on physical counting as part of the company’s Inventory process. Run the Import stock counting command to update ERP balances with the WMS balance quantity.
The recommended document type to use is ISC - Stock counting entry, which should be assigned with the document property WMS_STOCK_COUNT.
|
|
Note that… |
|---|---|
| The Compare WMS stock to ERP stock view returns the WMS Item current balances in base and alternative MUs. In case balance elimination is activated, the eliminated dimension is excluded from the difference. Therefore, ERP balance cannot be updated with eliminated dimensions balance. |
Stock adjustments
Stock adjustments refer to stock import and export actions in order to correct balances when an actual discrepancy between physical and system stock is spotted. Stock adjustments are ad hoc actions that do not require the physical stock counting of the location contents or of the item for all locations. In practice, stock import and export actions should be allowed to authorized users only.
ESRF Stock import
Select ESRF Menu > 2. STOCK > 1. STOCK IMPORT to import stock to a selected location. The flow is similar to the ESRF Location counting flow (refer to 49.3.1 ESRF Location counting), Apart from Container, Mixed Container, Mixed Container with packages and Bulk workflows, the process supports also Multiple containers import, similar with the Receipt workflow.

Υou should then input all appropriate item and stock information in order to import stock. If the item resolved has stock in the selected location, you can just define the quantity to be added to the existing stock dimensions with the F1 key, or choose to add new stock with the F2 key.

The STKIN (add stock) action type is used.
The following ESRF config parameters were created prior to the ES Print functionality, and they are now obsolete (however, compatible in case of upgrading older installations):
|
|
SI_PRINTER_NAME, SI_NEWSSCC_LABEL, SI_PRINTSSCC_SCROLLERGROUP, SI_PRINTSSCC_SCROLLERNAME, SI_AUTOPRINT_NEWSSCC |
|---|---|
| Stock import |
ESRF Stock export
Select ESRF Menu > 2. STOCK > 2. STOCK EXPORT to export stock from a selected balance row. To select a balance row, specify the location (for bulk stock) or SSCC (for stock held in containers) and scan or select the Item and stock dimensions to export.

The STKOUT (reduce stock) action type is used.
Back office stock export
The current stock view menu (Menu > Stock > Current stock) provides a stock export use case based on selected balance rows. Choose the balance rows to export and press the Direct export command button.

The STKOUT action type is used. The generation of requests for stock exports will be fully supported in future versions.
Update stock adjustments to ERP
To Update stock import and export action items to ERP balances, select the Menu > Stock > ERP Integration > Import & Export Transactions use case.
The required configuration is to map the STKIN action type with the relevant document type – recommended document type is ISE – Entry of materials in the depositors action type – document type mapping. The relevant document type for STKOUT action type is IPE - Stock Corrective Entry - Other Exports.

Run the Update movements command to create the target documents, document lines or line analysis for all entries. The process can also run as a scheduled job.
Off-time replenishment
As described in 38. ESRF Replenishment, replenishment is the process of inventory moving from a replenishment storage location (zone type 3) to a picking storage location (zone type 1), through an intermediate (buffer zone type - 10) location if required, based on the replenishment 1st and/or 2nd step destination storage location proposal algorithms (refer to 14.2 Destination storage location proposal).
The purpose is to replenish picking storage locations with adequate stock to serve the picking operation. Off-time replenishment operation is typically executed before picking operation.
To execute off time replenishment requests, refer to 38. ESRF Replenishment. The following paragraphs describe the provided functionality regarding off-time replenishment request generation per replenishment plan.
Create replenishment plans
The off-time replenishment operation consists of the following steps:
- The planning of the replenishment requirements based on demand data or storage location replenishment levels.
- The replenishment requirements scheduling – when to execute what based on stock availability.
- The create replenishment requests process.
Select Menu > Stock > Storage location replenishment to view and create off time replenishment plans.

You should assign a code and an indicative description per plan. When a plan is created, the status of the plan is “initial”. Creation and modification user and date are displayed. “From” and “to” dates are also displayed, in case the off-time replenishment requirements are scheduled across time (not used in practice).

The status of the plan is automatically updated based on the plan actions. The plan actions are available on the toolbar of the plan form and in the sections of the form as described in the following paragraphs.

You can run each plan action separately if you wish to review the results of each process, or run the Direct execution of requests calculation, scheduling and creation command to generate the final replenishment requests at one step.
The plan status changes, as well as the user and the date time of the modifications are listed in the History log and status changes context view of the form.

Note that the Cancel plan action is available for plans that are not scheduled – i.e. no requests have been created. You can undo the cancel plan action with the  button next to the status field.
Calculate replenishment requirements
You need first to define the source data upon which replenishment requirements are calculated.
There are two use cases provided:
- Based on shipment or production orders
- Based on item storage location replenishment levels
Replenishment requirements based on shipment/production orders
Define the appropriate view and filtering criteria in the Shipping and/or production orders area in the Criteria for determining replenishment requirements section of the form.

The system view is the “Off-time replenishment requirements based on demand” located in the MRP-Sales orders views filter area. In the selection criteria, you can define:
- The source document orders – Shipment order documents and shipment routing order documents or Process state 1 – i.e. assigned to WMS but not yet activated for execution are by default suggested. Select Production orders should you wish to run the off time replenishment process in the production context.
- The specific Item code or item grouping for which the process calculates the replenishment requirements.
- The specific warehouse code for which the process calculates the replenishment requirements.
Run the Calculate replenishment requirements command to create a material requirement item per Item and Warehouse. The results are listed in the Replenishment requirements context view. The status of the plan is updated to “Requirements selection”.

- The Material requirement Date is based on the source document orders due delivery date.
- The Source indicates that the results derived from the selection of demand data.
- The Quantity is the Requirement quantity based on the following calculation formula:
If Picking Open Requests Quantity > 0 , then:
Requirement quantity = Picking Open Requested Quantity (Requested – Cancelled – Executed).
If Picking Open Requested Quantity = 0, then:
Requirement quantity = Document line quantity – (executed quantity + cancelled quantity)
If there are no picking requests fulfilled with the document line (which is the default scenario, since the selected documents are in process state 1), then:
Requirement quantity = Document line open quantity (line quantity – closed quantity)
 Note that you can add ad hoc a new material requirement item for the plan with the button. In this case, the source is User.
You can also delete material requirement plan items should you wish to exclude them from the replenishment requests generation process.
Note that the source demand view does not take into account the current balances in order to calculate the requirements. Stock availability is taken into account in the final requirement quantities in the Replenishment locations stock availability stage.
Replenishment requirements based on item storage location levels
In order to use the off time replenishment process based on item storage location levels, you should have first defined and configured as appropriate the item storage locations (refer to 9.6 Item storage locations).
Define the appropriate view and filtering criteria in the Storage location replenishment level area in the Criteria for determining replenishment requirements section of the form.

The system view is the “Off-time replenishment requirements based on storage location replenishment levels” located in the MRP-Budget sheet views filter area. In the selection criteria, you can define:
- The replenishment method: the process supports two methods to calculate the replenishment quantity – based on maximum or on minimum quantity.
- The specific Item code or item grouping for which the process calculates the replenishment requirements.
- The specific storage location code for which the process calculates the replenishment requirements.
- The zone types of the item storage locations that are included in the calculations – by default set to 1-Picking.
- The zone codes of the item storage locations that are included in the calculations.
The Requirement quantity is calculated according to the formulas described below.
If the Replenishment method is set to “maximum” and the Replenishment quantity > 0:
Requirement quantity = ((Replenishment upper level – stock quantity)/Replenishment quantity)*Replenishment quantity
Where Stock quantity = sum (current + future stock) for selected zone types (default picking) and zone codes (default all) and buffer zone type storage locations.
If the Replenishment method is set to “minimum” and the Replenishment quantity > 0:
If Stock quantity > = Replenishment upper level then:
Requirement quantity = Replenishment quantity
Else, if Stock quantity < Replenishment upper level then:
Requirement quantity = ((Reorder level – stock quantity)/ Replenishment quantity) * Replenishment quantity
Run the Calculate replenishment requirements command to create a material requirement plan item per Item. The results are listed in the Replenishment requirements context view. The status of the plan is updated to “Requirements selection”.

Replenishment scheduling and stock availability
When the replenishment plan requirements are calculated based on shipment/production orders, use the Replenishment locations stock availability to define the stock availability criteria that should be considered in the final requirement quantity calculation. Stock availability is by default based on picking/consumption and replenishment/buffer storage locations.
|
|
Note that… |
|---|---|
| Do not use the stock availability views when replenishment plan requirements are based on item storage location replenishment levels, since stock availability has already been considered in the initial requirements generation step. |

Use the criteria to define per replenishment plan whether:
- Stock should not be available when marked with the specified reservation/disposition reason codes.
- Future stock or reserved stock should not be taken into account in stock availability
There are two views available located in the MRP-Stock on-hand views area, the “Not available stock at replenishment / picking etc. (differentiated criteria by zone)” and the “Not available stock at replenishment / picking / consumption locations “. The difference is that the exemption stock availability criteria can be defined per zone type level (other criteria valid for the replenishment locations and other for the picking locations) or for all included zone types.
After defining the non availability stock criteria, run the Replenishment scheduling command to:
- Create the material requirement plan items grouped by item, warehouse and requirement date.
- Calculate the requirement plan quantity based on the sum of the requirement quantity minus the available stock (if defined), according to the exemption criteria set in the stock availability view per item, warehouse and requirement date.
- Calculate the request final quantity based on the requirement plan quantity per date. The quantity calculated for the next requirement date abstracts the requirement plan quantity of the previous date (scheduling).
You can modify the request final quantity by double clicking and opening the Scheduling material requirement form.
Note that the Replenishment scheduling action is mandatory for the process, regardless if no stock availability view is used, i.e. in case replenishment requirements criteria are based on item storage location levels.
 Press the button to modify the quantity.

 If you modify the Requirement date, press the button to reschedule.
Create and manage replenishment requests per plan
Select the material requirement plan items and run the Create replenishment requests (selected entries).

Replenishment zone type: default set to “Replenishment” – not recommended to modify.
Locations towards replenishment – zone type: default set to “Picking” – change it to “Consumption” if the process concerns production orders.
Lot expiration date: define the date range of lot expiration date for which stock is considered as available.
Reserve container total quantity: if enabled, the process will reserve the entire container quantity for single/first step replenishment. It is required to have previously defined a Container Stock allocation rule in the Replenishment ICP. Refer to 34.1 Picking and replenishment requests for full instructions on the container hint for first and second step replenishment.
Replenishment request type: by default set to “pREPL” – should you need to use a custom replenishment request type, it is mandatory to belong to a ctx_STOCKMOVEMENTS context property so as to differentiate from on-time replenishment requests in the context of shipment or production.
Note that if the replenishment request type in use does not handle quantity, the process still generates first/single replenishment request items with the whole quantity of the container (if Reserve container total quantity parameter is enabled).
Package optimization type: by default set to no. Refer to 34.1 Picking and replenishment requests for further instructions on the package optimization type parameter.
The status of the Plan is updated to “Routing”. You cannot delete the generated request items of material requirement plan items after a plan is routed.
The generated replenishment requests are related to the context Plan. If the off-time replenishment request type does not handle quantity, then you may create as many plans as required and then choose which one to execute.
To view or cancel the request items of a plan, select the Menu > Stock > Storage location replenishment > Replenishment requests view.

Run the Cancel replenishment request remainings command to cancel the open request item quantity.
Advanced distribution processes
Cross-docking
Cross-docking is the process of moving received goods from the receipt ramps to the shipment ramps ready for loading. The decision to execute cross-docking operations on received goods can be taken prior or after the physical receipt. If taken prior to the physical receipt, then a planning step is required; this process is known as planned cross-docking. If not, then the decision is taken based on the current demand requirements; this process is known as opportunistic cross-docking.
Cross-docking process is supported both in cases of supplier/branch receipt and production receipt. The cross-docking functionality for production is described in the Production stock monitoring section.
To run cross-docking operations in Entersoft WMS®, enable the following WMS company parameter:
|
|
WMS_CROSSDOCKING_ENABLED |
|---|---|
| WMS company parameter |
Planned cross-docking
Entersoft WMS® supports two planned cross-docking scenarios:
- Cross-docking of bulk received goods: refers to cases where the contents of the received container should be counted analytically and dispatched either for cross-docking or for putaway depending on whether cross-docking requests are pending for the receipt.
- Cross-docking of containers: refers to cases where the entire received container (homogeneous or mixed) should be cross-docked to a specific recipient (customer or company branch) as is, without receiving analytically the contents of the container.
The planned cross-docking operation requires that the cross-docking requests are generated prior to the physical receipt. This is based on an established relation between shipment orders and expected receipt documents. Both Entersoft WMS & ERP systems support end to end the cross-docking operation of bulk received goods. In case of container cross-docking, the process requires the generation of cross-docking and receipt requests per container. The container is created before physical receipt, based on supplier/branch packing list information. The process of generating container cross-docking and receipt requests is based on ERP custom use cases.
Create planned cross-docking requests for bulk receipt
The pre-requisites to run the process are:
- The shipment order document (e.g. SRC or SRI) should be related with the expected receipt document (e.g. PPI or IWB) through the related documents table. You can relate more than one shipment order documents to one expected receipt document. Stock-to-trade, stock-to-stock, trade-to-stock and trade-to-trade relations are supported.
- The shipment order and expected receipt documents should have been assigned to WMS (process state – 1).
- The step code for the cross-docking request type (pxDOCK) and cross-docking action type (xDOCK) should change to “155 – picking”.
Select Menu > Receipts > Expected receipts to view the expected receipts documents ready to be activated to WMS.
The related shipment order documents are shown in the Relevant shipping orders column.

Select Menu > Shipments > Shipments routing and set the Active Cross Docking parameter to “yes” to view the related shipment orders.

The cross docking request generation is invoked through the Receipt activation in WMS process and not through the Create route process.
More specifically, select the Expected receipt documents to activate. You can select as many documents as required without necessarily all relating to cross-docking shipment order documents. Run the Activate management in WMS process according to the instructions given in 20. Activate expected receipt orders.
The process checks whether there are shipment order documents related to the expected receipt document and:
- Generates the receipt request and receipt work package.
- Creates the SHO for each relevant shipment order document.
- Creates the picking requests and shipment work package if the default “pPick” request type handles quantity.
- If any quantity remains, it creates the cross docking requests and a new shipment work package.
- If the “pPick” request type does not handle quantity, then cross docking requests are generated for the entire SHO quantity.
|
|
Note that… |
|---|---|
| It is important that the cross-docking request type step code is the same with the picking request type step code, in order for the request generation process to calculate the remaining quantity per step. If the picking request type does not handle quantity, then it is not necessary to change the cross-docking step code, you can leave it to the default “151 – cross docking”. |
The results of the cross-docking process are shown in the Shipment monitoring view:

Should you wish to recall the process, you should first recall the generated SHOs and then recall the Receipt document using the recall receipt action – do not confuse it with the Recall cross docking action, which refers to the cross docking of containers.
ESRF Cross docking for bulk receipt
Select ESRF Menu > 1. IMPORTS > 1. RECEIPT > 3. BULK to receive bulk stock.
Scan the Item barcode or select the receipt request item to receive.
Confirm the receipt quantity. The ESPublicQueries\ESWMMobile\ESWMGetCrossDockingOfSpecificReqItem public query is executed, returning the item and quantity to be cross-docked and relative shipment order document.

 Confirm the cross docking quantity, which cannot be greater than the minimum between the received quantity and the pending cross docking request item quantity.
Scan an existing SSCC (or create a new one by enter) to place the cross docked quantity. This is by default enabled in the following ESRF Config parameter:


|
|
CD2PACK_ENABLED |
|---|---|
| Receipt |
Define the destination location, which should be of zone type “5 – shipment”. You can predefine the cross docking destination location or location zone codes in the following ESRF Config parameters:
|
|
CROSSDOCK_DEFAULT_LOCATION |
|---|---|
| Receipt |
|
|
CROSSDOCK_DEFAULT_LOCATION_ZONECODE |
|---|---|
| Receipt |
The generated cross docking action items fulfill the Expected receipt document in 151 – cross docking step code and the Shipment routing document in 155 – picking step code, while loading step requests are also generated.

Note that you cannot execute the cross docking requests for bulk receipt at second time through the ESRF Menu > 1. IMPORTS > 3. CROSS DOCKING. This applies only to container cross docking operation.
Activate planned cross-docking requests for container receipt
The pre-requisites to run the process are:
- The containers to be received and cross-docked should have already been created.
- The request containers for receipt and cross-docking should have already been created and fulfilled with the expected receipt documents.
- The cross-docking container requests should fulfill the relevant shipment order documents (e.g. SRC or SRI).
- The receipt request should be related to the expected receipt document in the Related request document table.
- The cross docking request should be related with both the expected receipt and shipment order document in the related request document table.
The above are achieved through ERP custom use cases.
- The expected receipt documents should have been assigned to WMS (process state – 1).
- The shipment order documents should have been assigned to WMS (process state – 1).
- The shipment order documents should be related with the expected receipt document through the related documents table.
- The step code for the cross-docking request type (pxDOCK) and cross-docking action type (xDOCK) should change to “155 – picking”.
Select Menu > Receipts > Expected receipts to view the expected receipts documents ready to be activated to WMS.

Note that the cross docking requests fulfill the Expected receipt document in “151-cross docking” step code.
Select Menu > Shipments > Shipments routing and set the Active Cross Docking parameter to “yes” to view the related shipment orders.

Note that the cross docking request items are shown at the detail of each document line. It is necessary that all the lines of the shipment order should be cross-docked.
Select the Expected receipt documents to activate. You can select as many documents as required without necessarily all relating to cross-docking shipment order documents. Run the Activate management in WMS process according to the instructions given in 20. Activate expected receipt orders.
The process checks whether there are shipment order documents related to the expected receipt document and:
- Generates a new receipt work package.
- Generates a new receipt request if there are document lines with no request. The existing receipt request items are connected under the new receipt request header (if created).
- Creates the SHOs for each relevant shipment order documents.
- Transfers the cross docking request items from the shipment order document lines to the SHO document lines.
- The work package assigned to the cross docking requests is the receipt work package.
The results of the cross-docking process are shown in the Shipment monitoring view:

Note that the Work package assigned to the cross docking request is the receipt work package, shown also in the Receipt monitoring view.

To recall the cross docking process before any actions are executed, open the expected receipt document form and run the Recall cross docking preparation action.

The process deletes the cross docking requests, the SHOs, the receipt requests, the work package and the associated containers. Both the expected receipt and shipment order documents are updated to process state – 0. You need to rerun the cross docking preparation process should you wish to reassign the documents.
ESRF Cross docking for containers
You can check whether a container has cross docking requests before receiving with the ESRF Menu > 1. IMPORTS > 1. RECEIPT > 4. CHECK PACKAGE option. After the SSCC of the container is scanned, the system throws the message CROSS DOCKING if open cross docking request items are identified for the selected container. If not, the relevant message is “there are no pendencies”.


Select ESRF Menu > 1. IMPORTS > 1. RECEIPT > 2. MIXED CONTAINER to receive and cross dock containers.
Scan the container for the selected receipt work package. If a package container is scanned, the ESPublicQueries\ESWMMobile\ESWMReceivedPackagesToCrossDock is executed, which returns the cross docking request for the container. If a pallet container is scanned, the relevant “Received Pallets To CrossDock” public query is executed.
Once a cross docking request is resolved for the selected container, confirm the destination location (PickLocation), which should be a location of type 5-shipment.

The outcome is to generate receipt action items for the contents of the container and the relevant cross docking action items, which fulfill both the shipment routing order document and the expected receipt document. Loading request items are also generated for the container.

If the SSCC to be cross-docked is also cross-docked in the context of another Work package, a relative message occurs: “SSCC has been cross docked in other workpackage”. Disable this check by enabling the following ESRF Config parameter:
|
|
XDOCK_ALLOW_SECOND_WP_PER_SSCC |
|---|---|
| Receipt |

If you press ESC in the Cross docking view of the receipt flow, you can execute cross docking at second stage, by selecting ESRF Menu > 1. IMPORTS > 3. CROSS DOCKING. Choose Cross docking based on Receipt Orders (option 1), since cross docking based on shipping orders refers to opportunistic cross docking.
Select the Receipt work package and Receipt location and then scan the SSCC.
The cross docking view opens, you need to select the destination storage location, which should be of zone type 5- shipment.
You may define a default destination storage location for cross-docking or a certain zone code with the use of the following ESRF Config parameters, as long as they belong to zone type 5- shipment:
|
|
CROSSDOCK_DEFAULT_LOCATION |
|---|---|
| Receipt |
|
|
CROSSDOCK_DEFAULT_LOCATION_ZONECODE |
|---|---|
| Receipt |
Cross docking from production receipts
The functionality supports the cross docking upon bulk receipt from production (refer to 58.2 ESRF Production). The process followed is the same with the ESRF Cross docking for bulk receipt.
The Activate production orders to WMS process (refer to 57 Activate production orders) takes into account cross docking requests as long as the following pre-requisites are met:
- The shipment order document (e.g. SRC or SRI) should be related with the expected production order document (e.g. PNT) through the related documents table. You can relate more than one shipment order documents to one expected receipt document.
- A custom ERP use case should generate the cross-docking requests and fulfill them with the Shipment order documents.
The Activation of the production orders process checks whether there are shipment order documents related to the expected production order document and:
- Generates a production receipt work package.
- Generates a production receipt request.
- Creates the SHOs for each relevant shipment order documents.
- Transfers the cross docking request items from the shipment order document lines to the SHO document lines.
- The work package assigned to the cross docking requests is the production receipt work package.
Opportunistic cross-docking
The process of opportunistic cross-docking covers the case when stock shortages occur during stock reservation in the picking (and replenishment, if necessary) request generation. The shortage quantity is covered through a cross docking operation after stock is received.
At the time the cross-docking request is generated, the process is not aware with which receipt order to be associated.
The step code for the cross-docking request type (pxDOCK) and cross-docking action type (xDOCK) should change to “155 – picking” so that the remaining open quantity is calculated per step.
To generate opportunistic cross-docking request, enable the flag Create xdock requests in the Create route process.

The process by default uses the system default cross-docking request type – pxDOCK. You may change the request type at customization level in the non-visible automation parameter “Xdock type request”.
The generated cross-docking requests are assigned to a Shipment work package. The process creates one work package for the picking and cross docking requests per SHO.

You can execute the cross docking requests by selecting ESRF Menu > 1. IMPORTS > 3. CROSS DOCKING. Choose option 2. SHIPPING ORDERS.
The received stock should be in homogeneous containers. The default process requires that the entire content of the homogeneous container matches exactly with or is less than the open cross-docking request items quantity. This logic is defined in the ESPublicQueries\ESWMMobile\ESWMGetCrossDockingRequestItemsOfShipments public query, which can be differentiated at customization level. The received pallets can be in any storage location when scanned for cross-docking – it is not necessary to be located in the receipt locations. You may optionally scan or select the Receipt work package of the container.

Value-added services
A Value-added service (VAS service) goes beyond typical warehousing. Most commonly offered VAS services in warehouses are kitting operations, bundles and gift packaging, repackaging operations, etc.
Entersoft WMS® offers a variety of VAS services such as:
- Light production / assembling (described in the Production stock monitoring section)
- Set / kit management
- Integrating with courier services and create vouchers
- Reusable container and packaging material management
- Packaging and containerization (described in the Outbound operations section)
Set management
Set is defined as a trading item code consisting of other stock items, which does not necessarily physically exist.
When inserting it in a document order line, the components are automatically developed based on the set item’s BOM (Bill of materials). The editing of the BOM lines depends on the type of BOM (Bill of materials). The “static” BOM type, will allow the user to interact only with the set line while the “dynamic” type allows full control over the lines of the set. The set item does not take part in the document totals and does not update any of the sub-ledgers, except the Sales Statistics. The “static” set is often used as an offer (gift) pack of certain items to a special price.
As far as the warehouse handling operations for set items, these depend on the physical existence of the set item. There are three types of handling identified:
The set item is physically handled (i.e. there is a physical packaging unit with a barcode), whereas its components are not physically monitored. In this case, the set item code is WMS monitored, while the item codes of the components are not. The warehouse handles the set item as a distinct stock keeping unit, as a kit. The use case is not supported end-to-end, since there are pending implementations related to the integration with Entersoft ERP®.
Both the set item and its components are held in stock as distinct SKUs. In this case, all items should be WMS monitored. The use case is not supported end-to-end, since there are pending implementations related to the integration with the ERP®.
The set item is not WMS monitored, only the components of the set item are WMS monitored. The virtual assembly of the components to the final set item is executed during shipment order operations based on BOM integrity rules. Both dynamic and static BOM types are supported, since the system integrity calculations are based on the instance BOM as derived from the shipment document order lines.
Apart from shipment operations, no other flow (e.g. receipts) is supported end-to-end due to integration pending implementations.
The following two sections describe the integrated Entersoft WMS® set functionality in terms of:
Set integrity validation and quantity adjustment during the stock reservation process.
Verifying integrity and calculation of the integer set item quantity in the invoicing process.
The required configuration for the functionality is:
- The set item should be not activated to WMS
- The shipment order document (e.g. SRC) should contain the set item developed in its components.
- The SHO document type should not handle BOM explosion (default)
Set integrity during stock reservation process
During the stock reservation process, the system validates the generated picking request items quantities that fulfill SHO document lines concerning the set components against the instance BOM relation. In case when integrity is violated due to stock shortage in any of the set components, the process readjusts the picking request items quantities for all the set components.
If the Cancel open quantity parameter is enabled, then the cancellation process cancels the open document quantity for the component document lines and cancels accordingly the quantity for the set related line. The Shipment routing cancellation process checks integrity in both not-requested and not-executed use cases as long as the set and the component lines are selected.
The functionality supports cases where the component item code participates in lines related to a set and lines not related to a set (picked as individual SKUs) in the same shipment order document. The generated request item concerns the total of all document lines. If integrity is violated, then the process readjusts the quantity concerning the line related to the set.
The functionality applies to both document lines and document line analysis. It also takes into account measurement units with decimals, in such case the integrity-calculated quantities are rounded to the number of decimals as set in the measurement unit.
The functionality does not apply to group picking request generation use case.
Note that the integrity validation is performed after picking request items are generated. In cases when replenishment request items are also generated, the process readjusts the quantities of the picking request items that are generated after the replenishment step. The replenishment request item quantities are not readjusted, since they do not necessarily concern the demand quantity (e.g. reservation of the whole container).
Example
Suppose a shipment order document of type SRC is assigned to WMS with the following document lines:

For each SET01, 2 PCS of COMP01 and 10 PCS of COMP02 are required. The document line quantity for SET01 is 10 PCS.
The available stock quantity for COMP01 and COMP02 is 30 and 90 PCS accordingly.
The integrity validation cancelled 10 PCS for COMP02, 2 PCS of COMP01 and 1 PCS for SET01, as shown in the Shipment monitoring view:

Set integrity in shipment routing invoicing
The set integrity validation is enabled with the relevant Check SET integrity parameter in the Orders for invoicing view:

Example
Based on the data of the example presented in the Set integrity during reservation process section, suppose that the following quantities are loaded:
17 PCS for COMP01 and
90 PCS for COMP02
According to the SHO’s instance BOM, the above component quantities make 8 PCS of complete sets. This is shown in the following columns in the document lines detail of the view:
Entire SET: yes (green indicator)
Integrity quantity: 8 PCS for the SET document line, 16 PCS for the COMP01 document line and 90 PCS for the COMP02 document line.
The document open quantity for the COMP02 line is equal to the actions – open quantity, therefore the line is pre-selected but highlighted with red color, since integrity is not ensured if the entire quantity is invoiced.
In this case, you should manually adjust the service quantities at the Actions level based on the Integrity quantity column data in order to invoice the 8 complete sets.

The target document contains the set document line and the components document lines:

Integrating with courier services
Entersoft WMS® provides the functionality of creating and printing courier vouchers concurrently with the packing label printouts in the Packing and C2C workstations.
Configuration
The required configuration for the functionality is as follows:
Integration with the courier service settings: Entersoft EBS supports integration with the known national courier providers. You need to provide the integration required settings in WMS application regardless if the settings have been also set in the ERP application. Select Settings > System integration and choose the appropriate provider to connect with:

Detailed instructions on how to connect with each one of the providers are provided in the relevant ERP version documents.
The functionality applies for SHOs with shipments concerning a transporter, which has been associated with the relevant courier service provider.
To associate a transporter with a courier service provider, select Configuration > Transaction parameters > Transporters (the field is available in the ERP application):

In the ESKioskParams files of the Packing and C2C application folders, enable the functionality with following parameter:


|
|
CREATE_VOUCHER |
|---|---|
| Packing Station and C2C ES00KioskParam.xml |
- 0 – disabled
- 1 – user confirmation required
- 2 – auto create voucher
- In the ESKioskParams files of the Packing and C2C application folders, enable the multi-print functionality with following parameter:
|
|
ALLOW_MULTI_PRINT |
|---|---|
| Packing Station and C2C ES00KioskParam.xml |
Functionality
Create voucher and print pdf file
Press the Multi print command One voucher is created per Shipment Routing Document and Shipment combination (ShipmentRelatedDocument). For each container of the same voucher, one pdf file is created with sequence number (1/2, 2/2, etc).


Reprint issued voucher
The generated pdf files are accessed in the attachments of the container form – select Menu > Stock > Current stock > Container management.

View voucher details
To view the voucher details, open the Shipment form (select Menu > Shipments > Shipments monitoring > Shipments - Shipment details), and run the Action Show shipping information in the context Shipping orders view.

Cancel voucher
Run the Cancel shipment action in the Shipment’s shipping orders context view to delete the generated vouchers.


|
|
Attention |
|---|---|
| The voucher issuing process in the Packing Station is executed before issuing the final Delivery Note. The Invoicing of Shipment Routing Documents process issues one target Delivery Note per Voucher. |
Reusable container and packaging material management
The following paragraphs describe the process of updating target documents that are issued through the integration processes with the number of containers and number of packaging units of the WMS action items. In this way, ERP documents and balances are updated with the actual number of containers and packaging units (accessories) as part of the bailment management process (refer to EBS User Guide EN).
Insert container items to target documents
The functionality consists of inserting container items in the target document lines based on WMS action items. The container item is the item assigned to the container type (refer to 10.1 Container types). The quantity is the count of distinct container instances per container type item for the selected document lines.
The functionality is available in the following integration processes:
- Update receipts to ERP (trade documents) – both in partial and complete update processes.
- Update receipts to ERP (stock documents) - both in partial and complete update processes.
- Internal goods transfers
- Invoicing shipment routing documents
To allow the functionality in complete update processes for Receipts, enable the following system Business Rule either in Document Trade or in Document Stock entities (or both):
(WMS) - RECEIPTS - Apply Palette Info through LineStep
The functionality is enabled with the activation of the Insert containers integration automation parameters:

The parameter takes its default value from the following WMS Company parameter:
|
|
WMS_INVOICING_ADD_PALLET |
|---|---|
| WMS Company parameter |
You may also define in a comma-separated list which types of containers should be included in the update process.
|
|
WMS_INVOICING_ADD_CONTAINER_TYPE |
|---|---|
| WMS Company parameter |
Enable the following WMS company parameter should you wish to include only the outer containers in the update process. The nested containers are excluded.
|
|
WMS_INVOICING_EXCLUDE_NESTED_CONTAINERS |
|---|---|
| WMS Company parameter |
Example
An SHO document line is to ready to be invoiced based on loading action items that contain one package SCCC nested in a pallet SSCC.

Run the invoicing process with the Insert containers parameter enabled. No specific container types are declared and nested containers are included (see relevant company parameters above). That target document contains one document line for the Package container item with 1 PCS and one document line for Pallet container item with 1 PCS. The number of Packages in the header of the target document is 2.

Run the invoicing for the same document by enabling the “exclude nested containers” parameter. The target document in this case contains one document line for the Pallet container item with 1 PCS. The number of Packages in the header of the target document is 1.


Insert accessories to target documents
The functionality inserts items of type “Bailment good” to the target document lines based on the relation type set between the invoiced item and the packaging unit related item. The functionality is provided in the following integration processes:
- Update receipts to ERP (stock documents) - both in partial and complete update processes.
- Internal goods transfers
- Invoicing shipment routing documents
The required configuration is as follows:
- Create items of type “bailment good”.
- Associate each bailment item with the relevant catalogue item.

Associate the stock items involved with the relevant catalogue items.

Relate the catalogue items of the bailment goods and the stock items to be invoiced. It is reminded that the item relation table associates catalogue items only (refer to 9.5 Item replacements).

Define the relation type used in the following WMS company parameter:


|
|
WMS_INVOICING_ACCESSORIES_REL_TYPE |
|---|---|
| WMS Company parameter |
Pay attention so as the relation type code does not exceed the 12 characters.
The relation type that is used by the process is the one defined in the relation between the stock item to be invoiced (“from” item) and the bailment item (“to” item). In the example of the above print screen you should set the relation type code “Hasaccessory” and not the “Isaccessory”, which is the reverse relation type.
6. Enable the following WMS company parameter so as the Insert accessories automation parameter is by default enabled (applies to the integration parameters described above):
|
|
WMS_INVOICING_ADD_ACCESSORIES |
|---|---|
| WMS Company parameter |
The process inserts line items to the target document with the bailment good item, whereas the quantity is calculated on the transition fulfillment quantity.
Note that the measurement units involved are the action item’s measurement units and not the document line measurement units. For example, if the bailment item is set for the packaging unit of PACK of 10 pcs, and the action item is one PACK, whereas the line item quantity is 10 PCS, the process will insert the bailment item in the quantity of 1.

Serial Number management
The following paragraphs describe the full functionality of serial number management in Entersoft WMS®. Strict serial number management requires that the serial number is monitored as a stock balance dimension. Loose serial number management does not monitor serial number as a stock balance dimension. The confirmation of the serial number in actions is configured based on the guidelines presented below.
The system by default holds stock per serial number dimension, as long as the item has the Serial number monitoring flag enabled. In cases when loose serial number management is required, you should set the following parameter in the CSConfig WMS.xml file to “1”:
|
|
IgnoreSerialNumberAsBalanceDimension |
|---|---|
| WMS.xml parameter |
Paragraphs 53.1 and 53.2 are also described in 9.3.3 Serial number monitoring.
Validation and uniqueness rules
No matter which policy is engaged, the following validation and uniqueness rules are applied by the system.
The serial number master entity is defined by:
- the item
- the quantity in the specified measurement unit
- base and alternative MU quantity (according to the item’s set-up)
- the weight/volume (optional)
- lot, color, size, stock dimensions 1 and 2 (optional)
When serial numbers are involved in WMS actions, the system validates the quantity, the quantity in base and alternative MUs and the weight/volume quantities of the action with the corresponding quantities of the serial number master.
The system by default prohibits the double entry of the same serial number in actions that belong to the same action type and to the same work package. In order to ensure that a serial number that is already in stock is not inserted again, you should enable S/N Importing & Exporting management per ICP line property:
If S/N Importing flag is activated, then when a serial number is inserted in stock through a WMS action of the relevant property, the flag “In Warehouse” is enabled in the serial number master.
An error message occurs, as showed in the print screen below, if the same serial number is inserted through a WMS action of a property that handles S/N Importing.
If S/N Exporting flag is activated, then when a serial number is exported from stock through a WMS action of the relevant property, the flag “In Warehouse” is disabled.
Serial number creation
Entersoft WMS® by default does not allow new serial number creation, unless otherwise stated in the relevant field of the WMS ICP line:
If new serial number creation is enabled, serial number codes are applied with the use of Assign Item Serial Number Code business rule (enabled by default). This rule takes place when a serial number barcode is scanned through WMS actions and assigns the barcode as the serial number code.
Should you wish to differentiate, you can disable the system business rule, set a common business rule with ERP or set a code segment sequence rule (which, by definition, is common with ERP).
The serial number barcode set-up instructions as described in 9.4.4 Lot, S/N and weight barcodes.
Enable serial number monitoring
In case of loose serial number management, define the operations for which serial number should be mandatorily confirmed, by enabling the Serial number monitoring flag per operation property in the ICP line:

If the Serial Number monitoring flag is enabled, then the relevant ESRF and ESTouch flows will ask for the confirmation of the serial number before saving the action item. Enable the Monitor requests serial numbers flag should you wish the system to ask for the mandatory assignment of the serial number in requests.
Exclude serial number monitoring
The following exclusion conditions apply only in loose serial number management.
Exclusion based on operation conditions
Define a zone type (or multiple zone types) in the Serial No Monitoring Exclude target location zone type parameter in the ICP line, should you wish not to confirm the serial number when the action item destination location belongs to the defined type. A typical example is to set the packing zone type as the exclusion zone type for picking. This configuration means that serial numbers are commonly confirmed during packing, unless the picking is destined to a shipment location, in which case the serial number should be confirmed during picking. In such case, the destination location should be confirmed at the beginning of the guided picking flow and not at the end (refer to 37.1.1 Guided picking – final location field).
Exclusion based on document info
The following two WMS company parameters define the UDF fields of the document header and document lines accordingly that should be considered when the system requires serial number monitoring. Note that only trade document class is supported.
|
|
WMS_SN_MANDATORY_EXCLUSION_RULE_H_COLNAME |
|---|---|
| WMS Company parameter |
|
|
WMS_SN_MANDATORY_EXCLUSION_RULE_L_COLNAME |
|---|---|
| WMS Company parameter |
You should set the column name that participates in the functionality. Use a field that can take values 0 and 1. E.g. ADFlag or ADValue fields for document headers or UDFFlag and UDFValue fields for document lines.
When the value of the defined field is 1, then the system does not require the confirmation of the serial number for actions and requests that fulfill the specified lines (applies also for ad hoc actions against document).
Multi-purpose serial number
The business requirement is to use a “dummy” serial number code in cases when the actual item serial number cannot be identified. The functionality applies only in loose serial number management.
To define a serial number as “multi-purpose”, set the value of the serial number characteristic/attribute in the following WMS Company parameter:
|
|
WMS_SN_MANDATORY_EXCLUSION_RULE_H_COLNAME |
|---|---|
| WMS Company parameter |
Then create the item serial numbers and assign the appropriate characteristic.

Note that the serial number attributes/characteristics are defined in the ERP application Configuration > Inventory items > Item dimensions > Serial numbers – Attribute.
The multi-purpose serial numbers are excluded from system validation and uniqueness rules as well as from barcode processing rules. It is required that the multi-purpose item serial numbers already exist when scanned and identified. The entity does not support the creation of a serial number in a pre-defined attribute.
ESRF workflows
ESRF supports serial number management (both loose and strict) horizontally in any workflow, as long as serial number monitoring is enabled.
In case when the request items contain the serial number, then the flows respect the request item serial number as any other item stock dimension.
Resolving serial number
When the Serial Number Barcode processing rules are set to the WMS_ITEM_INVESTIGATION_TYPE company parameter with the following syntax:
- SNBarcode.0.E
 Then if the serial number barcode is scanned in the Item barcode field, the item is resolved.
If the Item barcode is scanned in the Item field, then the flow will ask for the serial number confirmation in the SN field. The number of SNs to confirm depends on the input quantity.


Serial numbers in containers
In order to receive / import stock in a container for the same item for several serial numbers, you should select the mixed container mode.
When serial number stock is imported in containers, then the system updates the relevant package, master package, pallet, transport and sorting container fields of the serial number. Select Menu > Stock > Current stock > Serial numbers management to view the relevant information.

In this way, the system can automatically identify the serial numbers contained in a container when the container SSCC is scanned in the ESRF picking flows. It then checks whether the sum of the quantity of the serial numbers is equal to the sum of the container’s quantity. If an exact match is resolved, then the serial numbers are automatically assigned to the generated action items without user confirmation. If the result is negative, the serial numbers of the container should be confirmed.
ES Touch Packing and C2C station
Resolving serial number
Item and serial number barcode resolving functionality is the same as described in the ESRF workflow section.
 You can either scan the Serial number barcode in the Item field:
Or confirm the serial numbers for item based on the input quantity:

Auto-increment script serial number barcode
The functionality described in this paragraph concerns the automatic assignment of serial numbers when the input quantity is greater than 1. The trigger upon which the system selects the serial number barcodes is described in a vb script with the use of the ESGOScript entity.
The functionality selects serial numbers with increment + 1 to the scanned serial number. It does not create new serial numbers if they do not exist, even if the relevant ICP parameter (Allow serial number creation) is enabled. If the derived serial number does not exist, the process is interrupted with a relevant error message.
For example, if the serial number 100001 is scanned and an input quantity of 3 is entered, then the functionality selects serial number barcodes 100002 and 100003 (as long as they exist) and assigns them automatically to the generated action items.
The required configuration is as follows:
Create script
Define the trigger of the functionality either based on a UDF Item field or on the packing request items view custom field. Select Configuration > Organization parameters > Scripts to create a new script of type VB.net and definition type “Function”.
Set the script code to the following parameter in the CSConfig WMS.xml file:
|
|
SerialNumberAutoIncrementScriptCode |
|---|---|
| WMS.xml parameter |
Examples
A typical example of a script when Item Flag3 is enabled:
A typical example of a script based on a custom field of the packing station’s request items view:
Variable weight and volume management
As described in 9.2.4 Implementation tips, variable weight/volume items are defined as the items that monitor a weight/volume measurement unit which:
- is either the base MU
- or is related variably (not binding) with the base MU
The stock of these items is handled in packaging units that are variably related with the base MU in the item MU table. The relation that is defined in the item MU table represents the standard average weight per packaging unit. This relation is used in ERP transactions to convert quantities from one unit to another in flows where weight is not measured and has to be automatically calculated. WMS also uses the standard item MU relations, as explained in the paragraphs below.

Insert weight/volume methods
Entersoft WMS® monitors physical stock balances in packaging unit hierarchies. In practice, weighing does not necessarily apply to all warehouse operations. For example, weighing is conducted upon picking or packing but not upon loading. The measurement of the physical weight/volume is enabled per ICP line operation property with the Physical unit measurement field.

The system provides two methods of handling weight/volume balances. The most commonly used is the average weight/volume per stock balance row by enabling the Average physical unit management per flow in WMS ICP.
Weight/volume measurements update the “to” weight/volume action item fields. Item MU current balances weight/volume rows are updated (refer to 13.6.2 Balance updates).
When physical measurement unit is not enabled, then:
For stock movement action class: the “to” weight/volume fields are equal to the “from” weight/volume fields
For inflow action class: the “to” weight/volume fields are calculated based on the standard relation set in the Item MU table.
- === ESRF weighing functionality ===
When weight/volume measurement is enabled, the Weight/Volume input fields are enabled for data entry in the relevant ESRF Workflows:

When the input quantity is greater than 1, then the repetitive weight measurement view opens, where you can scan the weight barcode (if exists) and automatically assign the weight, or input directly the weight per each packaging unit. Press ESC to input directly the total weight for the input/scan the weight in the weight measurement field.
Refer to 9.4.4 Lot, S/N and weight barcodes for instruction on weight barcode processing and set-up.

You can set the weight measurements to zero by pressing the F2 function and measure the weight again.
If the average weight (see paragraph below for the average weight calculation) is equal to the standard Item MU relation, then this weight is automatically assigned to the Weight field and user intervention is prohibited, even if weight measurement is enabled.
The functionality, known as the Rounded Weight/Volume validation, is by default enabled with the following ESRF Config parameters:
|
|
ENABLE_COMPARISON_WITH_AVGWEIGHT, ENABLE_COMPARISON_WITH_AVGVOLUME |
|---|---|
| Common |
In general, weighing is not supported in flows where container handling is involved. However, there are flows where weighing is not supported, but is about to be supported in future versions. More specifically, the following workflows do not support weighing:
- 8. Stock counting > 2. Container counting
- 4. Shipment > Loading (all loading workflows – to be supported in packaging units loading in next versions)
- 2. Stock > 5. Transport to container
- 4. Shipment > 7. Unbound package
- 3. Orders > 5. Manage containers
- 3. Orders > 4. Packages picking
- 3. Orders > 9. Packing (to be supported in next versions)
- 4. Shipment > 2. Palletization
- 4. Shipment > 1. Staging
- 7. Production > not supported in receipt production flows (supported in transfers to production and consumption)
- 1. Import > 6. Putaway
- 1. Import > 8. Stock characterization
- 1. Import > 3. Cross docking
The following workflows do not support repetitive weighing:
- 3. Orders > 8. Sorting
- 2. Stock > 2. Stock export
- 3. Orders > 6. Replenishment
- 7. Production > 7. Replenishment
Note that volume measurement is not supported in all workflows where weighing is supported.
Finally, when homogeneous containers are received or picked, the following ES Config parameter define whether the defined weight refers to the gross weight (set to 1) of the container or the net weight (default 0) of the container in picking, receipt and receipt from production flows.
|
|
Pick_DEFAULT_SINGLECONTAINER_WEIGHT_MODE, RCPT_DEFAULT_SINGLECONTAINER_WEIGHT_MODE, RC_PROD_DEFAULT_SINGLECONTAINER_WEIGHT_MODE |
|---|---|
| Pick, Receipt and Receipt from Production |
ES Touch weighing functionality
Note that weighing is supported only in C2C application – weighing in Packing station application will be supported in future versions.
When weighing is enabled in the packing operation of the ICP line, the following modal opens when the Item is scanned:

The functionality is similar to the repetitive weighing in ESRF. In the SSCC control you can scan the Weight barcode or you can directly input the weight per each in the Weight control. When finished, press completion, otherwise continue with next until all the input quantity is consumed. The Rounded Weight/Volume validation is also supported (see section above) by enabling the following ESKiosk parameter:
|
|
CHECK_ROUNDED_WEIGHT, CHECK_ROUNDED_VOLUME |
|---|---|
| C2C Packing Station ES00KioskParam.xml |
Export weight/volume methods
The “from” weight/volume action item quantities (export quantities) in stock movement class actions are calculated with two methods:
- The average weight/volume method
- The standard weight/volume method
The average weight/volume per stock balance row method is the most commonly used method, since there is no need to handle the remaining weight. The method is enabled with the Average physical unit management per operation in WMS ICP line.
Average weight is calculated with the following formula:
Quantity in Weight MU / Quantity in Item MU per Item MU balance row
The Item MU balance row is determined by the “from” action item fields.
It is reminded that weight is a separate record in Item MU balances. This means that the system does not have knowledge of the weight per each packaging unit measured. Therefore, the average weight is measured against the balance row dimensions, i.e.
- Item
- Storage location, warehouse, site
- Stock dimensions
- Reservation/Disposition reason codes
- Container (pallet, master package, package, transport and sorting)
When the last packaging unit is exported from a balance row (i.e. there is no quantity in packaging unit left), then the total remaining weight is abstracted as long as the following CS Config WMS.xml parameter enabled:
|
|
StressFulfillmentQuantitiesEnabled |
|---|---|
| WMS.xml parameter |
As far as outflow class actions, where only the “from” quantity is completed, if you enable the Physical unit measurement in the relevant ICP line, the measured weight updates the “from” weight of the action item. If you enable the Average physical unit management in the relevant ICP line, the weight is updated with the average weight.
The standard weight/volume method updates the “from” action item fields based on the standard relation set in the Item MU table. This method results in remaining weight handling (positive or negative). To handle the remaining weight/volume on storage locations with zero quantity in packaging MU, run the Reset balance from roundings action in the Locations management view. The result of the process is to set the weight and volume quantities to zero with STKOUT/STKIN actions as long as the Item MU current balance in the packaging MU is zero.

You should also set the appropriate Conversion error tolerance for the weight MU in the Item MU table in order to allow negative balances.

Examples
The following example is presented, to understand the difference between standard and average weight calculation methods.
Suppose ITEM008 has the following Item MU configuration, where the standard relation between PCS and KG is 0.02. The conversion error tolerance for KG is set to 1.

The current stock balances are:

If average weight is enabled for stock movements, then the action item is as follows:

If standard weight is used as the calculation method, then the action item is as follows:

The result in balance is negative stock in BaseMU:

Run the Reset balance from roundings action for the storage location to set the quantity in base mu to zero and the weight quantity in the ItemMU balances to zero as well. In this case, a STKIN action is generated.
Stock reservation on variable weight/volume items
When requests are generated through the Activate in WMS processes, the request items “from” and “to” quantity calculations are based on the source line item service MU quantity. The conversion from the base to alt MU is based on the standard Item MU relation.
It is important to understand that when stock reservations are enabled during picking/replenishment request generation processes, the reserved quantity for base and alternative MU is determined by the source line item service MU quantity. The request item quantity in the counter service MU is calculated based on the standard Item MU relation and not on the actual balance instance relation between the two MU quantities.
For example, suppose the Item MU relation is set to 1 between PCS and KG, where KG is the base and service MU and PCS is the alternative MU.
The shipment order document line has a quantity in service MU of 10 KG.
The generated request item has 10 KG in base MU and 10 PCS in alt MU.
The balance row for which stock is reserved has 10 KG in base MU and 8 PCS in alternative MU.
An error of negative reserved stock occurs during the stock reservation process since there are only 8 PCS available to reserve in alternative MU, unless a conversion balance tolerance is set for the PCS Item MU.

The above example shows that stock reservations for variable weight/volume items serve best results when the standard Item MU relation does not deviate significantly from the actual instance balance relation. You should set the appropriate conversion tolerance based on the average deviations in order to avoid negative reserved stock errors during stock reservation.
Integration processes and variable weight/volume items
As explained in the previous paragraphs, the “to” action item quantities carry the information of the actual weight. The line step action fulfilment quantities are updated from the “to” action items base and alternative quantities as long as the action items belong to inflow or transport class. For outflow class action items, it is obvious that only “from” quantities are considered.
All integration processes rely upon the line step action fulfillment quantities. Therefore, in order to ensure that ERP balances are updated with the actual weight/volume measured quantities, you should enable weight measurement in actions that participate in integration processes.
As far as Invoicing is concerned, it is recommended to set the Invoicing stage at a step code where weight measurement is enabled. If this set up is not appropriate for the implementation, then differences might occur between actual measured weight (in previous steps) and invoiced weight. If you enable average weight measurement in the invoicing step operation, then these differences are eliminated, especially when containers are involved.
For example, assume that measurement is not enabled in loading, but the Invoicing stage is set to the loading step. If the containers to be loaded derived from the picking or packing operation, where weight was measured before adding the contents to the container, then the average weight in the shipment ramp is calculated based on the container dimension. In this way, deviations from the actual measurement are eliminated. This is not true, however, for bulk loading operations. In this case, you should set the appropriate Invoicing stage so as to ensure that the right weight is updated in ERP.
Production stock monitoring
Introduction
Entersoft WMS® supports three modes of handling production/manufacturing related warehouse operations.
- Light production - the functionality concerns warehouse operations of:
- Transferring raw materials to the production area based on ERP transfer orders
- Receiving finished, semi-finished products, co-products and sub-products from the production area
- Consuming (loading) raw and / or packaging materials in the context of production
- Handling production waste
- Returns from consumption
It is not mandatory to monitor transfers to production area or consumptions; in many cases only receipts from production area are monitored in WMS. It depends on the implementation requirements.
Kitting and assembly operations can also be supported through the production context warehouse operations. Warehousing assembly orders are used to pick items in order to assemble them into one item. Warehousing assembly orders transform goods within the warehouse. A warehousing assembly order, orders you to pick and combine a number of items to produce an end item that remains in the warehouse. The main difference with common production functionality is in integration.
- Advanced production (production stock monitoring module) - the functionality concerns:
- Receiving finished, semi-finished products, co-products and sub-products in production area
- On-time replenishment of consumption storage locations based on production phase criteria
- The creation of replenishment and consumption requests with stock reservation rules where Item replacements are also taken into account (if enabled)
- The automatic consumption of raw and packaging materials based on BOM and actual production quantity
- Physical consumption of raw and packaging materials against production orders
- Handling production waste
- Returns from consumption
- Ad hoc production / consumption – the functionality concerns warehouse operations of importing stock and exporting stock with production context action types without any document order.
Production context operations are executed either with Production Station (ES Touch application), ESRF Production workflow or Back office relevant use cases.
- = Configuration =
- == Documents ==
Light and advanced production context operations can be executed against an existing Production Order or as ad hoc against a reference empty document.
WMS_PRODUCTION_ORDER is the document property in use as expected production order.
The recommended document type for WMS production orders is the PNT – Production order.
The recommended document transitions are:
445. PNT=>PNC Production Note from Order
PNT=>CON Consumptions note from Production Order
435. PNT=>NPC Production & Consumptions Note from Order may also be used (although not recommended) when consumptions are not monitored in WMS
435. PNT=>ANS Assembly note from Assembly order for assembly operations.
- == Stock items and item replacements ==
The stock items involved in the receipts from production area operations are of type “product” or “semi-finished”. A Bill of Materials (BOM) is typically set for this type of items, which contains the raw material and/or packaging material analogy with which the finished or semi-finished product is produced. Raw materials and packaging materials are different types of stock items.
Select Menu > Production > Products to view and maintain stock items of type “product” and “semi-finished”. Select Menu > Production > Raw materials to view the raw and packaging materials.
As far as Item replacements is concerned, choose the appropriate mode of replacement in the following WMS company parameter:
|
|
WMS_RESERVEDITEMMODE |
|---|---|
| Category: WMS company parameters |
Mode 0 – based on stock optimization (default)
Mode 1 – based on item document priority
Refer to 9.5 Item replacements for further instructions on how to set up item replacements.
Request and action types
As far as step codes, action and request types are concerned:
- The action type used for production is “RPROD - Receipt from production/assembly”.
- The request type used for production is “pPROD - Production receipt request”.
- The step code for production is 146 – Receipt.
- Both production action and request types belong to ctx_Production property and Receipts operation property.
- The action type used for consumption is “TPROD - Stock transfer to production/for assembly”.
- The request type used for consumption is “pTPROD - Request for stock transfer to Production”
- The step code for consumptions is 163 – Loading.
- Both consumption action and request types belong to ctx_Production property and Loading operation property.
Enable the following WMS company parameter to use the advanced production module:
|
|
WMS_PRODUCTION_STOCK_MONITORING |
|---|---|
| Category: WMS company parameters |
When the Production stock monitoring parameter is enabled the relevant step codes, action and request types in use are as follows:
- The action type used for production is “PROD- Production”.
- The request type used for production is “pPRD- Production request”.
- The step code for production is 149P – Production.
- Both production action and request types belong to ctx_Production property and Receipts operation property.
- The action type used for consumption is “CONS- Consumption”.
- The request type used for consumption is “pCONS - Consumption request”
- The step code for consumptions is 149C – Consumption.
- Both consumption action and request types belong to ctx_Production property and Loading operation property.
You should set the step codes in the relevant WMS company parameters:
|
|
WMS_PRODUCTION_STEPCODE |
|---|---|
| Category: WMS company parameters |
And
|
|
WMS_CONSUMPTION_STEPCODE |
|---|---|
| Category: WMS company parameters |
The request type used for on-time replenishment is “pRPLPR - Replenishment request (Production)”
It is recommended to enable fulfillments for replenishment request items with the following company parameter:
|
|
WMS_CreateFulfillmentsForOnTimeReplenishment |
|---|---|
| WMS Company parameter |
Fulfillments assist in tracking on-time replenishment against PNTs and on WMS Mobile replenishment workflow features concerning the allocation and update of replenishment request items.
If replenishment fulfillments are enabled, make sure to set the step code for the 1st step replenishment to “148B” in the following company parameter:
|
|
WMS_BufferReplenishment_STEPCODE |
|---|---|
| WMS Company parameter |
The 2nd step replenishment step code is 148 (internal movements).
The action type used for the on-time replenishment in the context of production is “SRPLPR - Replenishment (Production)”
The work package type for production operations is “WPProduction - Production movements work package”
- == Zone and phase mapping ==
This is a required configuration when advanced production stock monitoring module is enabled. You need to define a mapping between storage location zone codes (consumption, buffer and production zone types are used) and production phases in order for the replenishment algorithm to propose the appropriate destination consumption or buffer location. The mapping is also used in the generation of the production requests, in order for the system to propose the right production storage location and assign it to the production request item.
Production phases should have already been configured in ERP application.
Select Configuration > Warehouse Management > Zones and phases mapping to map zone codes and production phases.

Activate production orders
Select Menu > Production > Expected production transports to view and schedule activation on assigned to WMS Production orders.

The view consists of the header level and three parallel detail levels:
- Products / assemblies level – production requests are generated for these lines
- Co-products and by-products level – production requests are generated for these lines
- Consumptions level – consumption requests are generated for these lines
In accordance with the PNT document, which also consists of the production and consumption levels (forward and reverse line types).
The process also takes into account production orders of type dissolution, which in this case generates the reverse request types (productions for consumption lines and consumptions for production lines).
Create production/consumption requests (light production)
Run the Activate management in WMS command for the selected production orders.

- Without grouping: grouping is by default enabled in the context of production, should you wish to differentiate enable this flag. The grouping fields for the generated work packages and production/consumption requests are:
- Document type
- Resource (if resource is assigned in the Assign in parameter)
- Site
- Company dimensions
- With consumptions management: the process by default does not create consumption requests unless this parameter is enabled.
These parameters are the only ones required for the generation of pPROD and pTPROD requests in light production mode. It is not recommended to enable quantity handling in the pTPROD request type in light production mode.
The results of the activation process are shown in the Production monitoring view, Menu > Production > Production transports monitoring.
Note that the step code for production is Receipt and for consumption is Loading.
When the advanced Production stock monitoring module is enabled, the corresponding step codes are Production and Consumption.
You can recall the Production order (delete the generated requests and work package) as long as there are no actions executed against the order by pressing the Recall production button on the Production Order form.

Choose Recall cross docking when production orders are fulfilled with cross docking requests. The recall production cross docking process deletes the generated SHOs and cross docking requests apart from the production receipt and consumption requests of the production document order. Refer to 51.1.5 Cross docking from production receipts for further information about the functionality.
Transfers to production area (light production)
In order to cover the required quantities for raw and packaging material consumptions based on registered PNT documents, ERP internal transfer orders are created from the raw/packaging material warehouse to the production warehouse. To execute these internal transfer orders in the context of production in WMS, it is required to set the relevant PNT document order as an alternative document.

Run the activate management in WMS for the selected Internal transfer document orders as described in 47.1.1 Activate stock orders.
Create consumption and replenishment requests (advanced production)
To make use of the full functionality provided with the Production stock monitoring module, you should first ensure that the following pre-requisites are met:
- The production order document lines should refer to specific phases (applies both for production and consumption lines).
- Zone – phase mapping (see Configuration settings above) exists.
If you run the process with stock reservation enabled for consumption, then:
- The consumption (pCONS) and replenishment (pRPLPR) request types should have the quantity handling flag enabled.
- The appropriate stock reservation view should be set in the Loading and Replenishment operation ICP lines.
- The replenishment algorithm should be set as appropriate (see section below).
- Custom replenishment request type (with quantity handling enabled) should be created to use it when the Remaining consumption handling flag is enabled.
To ensure that zone phase mapping is set correctly and that the document order lines contain the appropriate phases, show the ZoneCodeByPhase and BufferZoneCodeByPhase columns in the Consumptions detail of the Production orders view:

The “ZoneCodeByPhase” column should never be null, while the BufferZoneCodeByPhase should have value only if the document order line phase is mapped with a Buffer zone code.
Run the Activate management in WMS command for the selected production orders.

Zone by phase management
Enable this flag to drive the stock reservation and the replenishment algorithms to consumption storage locations with zone codes mapped with production phases.
As far as the production requests are concerned, the generated request item assigns the destination production storage location of the mapped phase. Note that, the production station default functionality requires that the production storage location is assigned to the production request item.
To invoke on-time replenishment, you need to set the Run On-Time Replenishments parameter to “By Item”.
 As far as the replenishment algorithm with zone-phase mapping, it is mandatory to enable the flag “Zone Code” in the Selector and assign the “First Storage Location” algorithm rule. Even if “Buffer zone type” is enabled, Zone Code flag should also be enabled in order to guide the algorithm to the mapped buffer zone code. The First storage location rule is ideal for the consumption context, since typically next empty and add to existing stock conditions are never met.
|
|
Note that… |
|---|---|
| When the GetWellKnownStorageLocationProposalMode in WMS.xml is set to “2” (recommended and default setting from 5.0.6.0 and after) the FirstStorageLocation algorithm should be mandatorily declared in the algorithm definition. In Mode “1”, the rule was applied by the system as a fallback algorithm rule when all the other rules failed. |
Reserve whole container quantity for 1st & 2nd step replenishment
The Container quantity management flag is equivalent to the corresponding flag for on-time replenishment in the context of shipments. This functionality is suitable when the whole container needs to be transferred from a replenishment location to a buffer location (1st step replenishment) and then distribute the contents of the container according to the requested quantity to the consumption location (2nd step replenishment). The pre-requisite is to set a Container stock allocation rule in the Replenishment ICP line (refer to 14.1.4 Container reservation rule view).
Another variation of the 2nd step replenishment request items with container hint is provided with the Reserve whole container quantity for 2nd step replenishment flag. The requirement is to reserve the whole container quantity in the 2nd step so as to ensure that the container content in the buffer locations cannot be reserved partially for different consumption destination locations. This is required when the distances between the destination (consumption) locations are significantly big, which is common in production plants.
If for any reason (e.g. returns from consumption or replenishment request cancelling) there is available stock in buffer locations to be reserved, the process reserves this stock only when the available stock exists in containers and the entire container content is available, in order to satisfy the reserve whole container quantity condition. It is required to make available buffer locations in the Container reservation rule view at customization level.
Manage stock shortages for consumptions
If stock is not adequate to cover the consumption requirements (including stock in replenishment and buffer locations), enable the Consumption remaining quantity management flag to create additional replenishment requests towards the consumption locations with the shortage quantity. These replenishment requests do not have a “from” storage location, since stock is not yet available and cannot be algorithmically defined. Use a custom replenishment request type (by copy of the default “pRPLPR”) where the handling quantity is enabled, to update future balances in the destination buffer or consumption location. Assign the custom replenishment request type in the Consumption remaining quantity request type parameter. This mode of replenishment is known as “Immediate replenishment”. Two-step replenishment is supported (through buffer locations) in immediate replenishment requests. In this case, the first step has the starting location null, while the second step has as starting location the destination buffer location of the first step.
When stock becomes available in replenishment storage locations, you can execute the immediate replenishment requests through the default ESRF Replenishment workflow.
A consumption request item will be then generated based on the future stock in consumption locations.
Stock reservation steps
The stock reservation steps sequence in the context of production is presented in the following diagram.

Figure 30: Stock reservation steps in the context of production
Note that merging is supported for both replenishment (immediate or not) and consumption request items if the merging criteria are met. More specifically, for replenishments, the system merges a new request item with an existing one for a period of one calendar week. This value is default and should not be modified. For consumption requests, the system merges consumption requests (pass 1) with consumption requests of pass 2 after replenishment step. The merging criteria require that all “from” and “to” request item data are identical.
Item replacement mode
The replenishment and consumption algorithms in the context of production take into account the Item replacement mode as set in the relevant Company parameter (see Configuration section above).
More specifically, if the Reservation Item mode is set to “0 – based on stock optimization (default)” the algorithm tries to reserve stock for both the item on demand and its replacement items per stock reservation step. The algorithm will first try to allocate stock from consumption storage locations for all the involved items and then invoke replenishment if stock is not adequate.
If the Reservation Item mode is set to “1 – based on item document priority” the algorithm tries to reserve stock for the item in demand and then for the replacement items. The algorithm will first try to reserve stock from consumption and replenishment locations for the item in demand and then, if quantity remains, it will run the same steps (consumption, replenishment and consumption) for the replacement items.
Create requests with no reservation with zone by phase management
In case when the consumption and replenishment requests in use do not handle quantity and the zone by phase management is enabled, then the system will generate consumption and replenishment requests for the entire document line quantity. This mode of operation is applicable in cases when reservation is not required, but the consumption locations should be defined and replenished through zone - phase mapping.
Run the Activate management in WMS command with the following parameterization:

- Enable the Zone management by Phase flag
- Disable the Consumption remaining quantity management (there is no need for this since the consumption request does not handle quantity, therefore the whole document line quantity is requested)
- Define the appropriate replenishment request type (with no reservation) in the Consumption remaining quantity request type.
- Define the appropriate consumption request type (with no reservation) in the Consumption Request type (Stock monitoring).
Two-step replenishment is supported for replenishment with no reservations, as long as the mapped zoned by phase is a buffer location.
Note that on-time replenishment is not mandatory. You can create consumption requests with no reservation and then replenish the consumption locations with the Ad hoc replenishment ESRF workflow option.
You may also define which document lines to exclude from the replenishment process (only when stock reservations are not enabled) in the Ad hoc Replenishment column in the Consumptions level of the Expected production orders view. This column by default returns “0”. You can write a custom expression to describe the exception rule and return “1”.

Production
Production as a warehouse operation involves the receipt of the finished or semi-finished product, co-product and sub-product. The operation is often executed with the use of Workstations (touch or keyboard enabled) placed next to the machines in the production plant. Each production machine is conceptually mapped with a storage location of zone type “6 – Production”.
Production receipt warehouse operations can be conducted also with ESRF Mobile workflows when mobility is required.
Both applications support light and advanced production modes of operation.

ES Touch® Product receipts station
Configuration
Run the ESKiosk.exe in the application folder to create a desktop shortcut for each client PC by double clicking on the Product receipts icon.
Configure as appropriate the ES Touch users (refer to 18.3 ES Kiosk Touch stations users) and login to the application by double-clicking the shortcut icon.
The ESKiosk\ProductReceipt ES00KioskDocuments.xml file contains configuration parameters concerning the Form ID that is opened, the action type that is used, as well information that is shown in the application menu.
When Advanced Production Stock monitoring is enabled, you should change the Action Type to “ES.PROD”.
Through the options found in Operations menu, a list of functionalities is provided, such as the application exit, representation of logging screen or minimizing of application window as well as information regarding the identification and application connection data. By selecting the «Menu» option, the functionality of accessing additional application operations is provided, whereas by selecting the “Production receipt” option the working area will be covered from the Production receipt registration screen. Finally, by selecting the «Cancel transaction» option the user may close the “current” registration screen.
The Current Transactions menu is directly connected with the new action entry functionality by holding another one «On hold». Through this menu, you can have an indication as to the number of in progress (open) transactions and also the functionality of alternation among these depending on the transaction you are able of completing at a point in time.
Production receipt operation is supported in touch screen and keyboard environments. The environment definition where the application will operate is set in the USER_INTERACTION parameter of ESKiosk\Production Receipt ES00KioskParams.xml, default set to 0 – touch screen.
Selection criteria
To generate production receipt actions for selected Production Work packages, follow the steps described below.
- Open a new Production Receipt form and select the Production location and the Production date fields (mandatory).

The search for WP button returns the available work packages where:
- The production request item destination location is equal to the selected Production location – you may differentiate at customization level. The context form command is FormCommands\ESWMTransportAction\ Search for WP.xml, where you need to modify the “where” condition of the destination storage location on the filter used for the “Select WP” automation parameter.
- The creation date of the production WP is equal to the selected Production date. You may define at customization level the number of days before and after the selected date where WP are searched in the “NumOfDaysBeforeAndAfter” parameter of the “Search for WP” automation.
 The Select container category button returns the available receipt type:

- Item container type: select this type to receive in homogeneous containers according to the Item Container Type data.
- Mixed pallet: select this type to receive in mixed pallets.
- Packaging units: select this type to receive bulk stock in the selected packaging unit.
- You can automatically assign the receipt type when selecting the WP at customization level by defining the appropriate default value in the “ContainementType” parameter of the “Search for WP” automation.
The Search for item button returns the available production request items for the selected WP. If the “ContainementType” parameter of the “Search for WP” automation is set to “0 – Item container type” and only one production request item exists for the selected WP, then the system automatically identifies and assigns the request item.
Create production actions and complete process
The data input fields regarding container type, packaging units and quantities depend on the selected Receipt type.
If the selected Receipt type is the Item container type, then double click on the Container template data to auto-assign the packaging unit and the quantity based on the Item container type relation. You can avoid the double-clicking if you have customized the automatic assignment of the Container type and if the production request item involved in the selected WP is one.

 You can modify the proposed quantity with the button. Press the production entry and completion button to generate the production action container and action items and complete (close) the container.
If the selected Receipt type is Mixed pallet, then you need to select the Pallet container Type and Packaging in the relevant buttons and then press the Production entry to generate the production action container and action items. You can continue with other production request items in the same container and then “close” the container with the Complete production entry button.

If the selected Receipt type is Packaging, then you need to select the Packaging units available for the selected product, define the quantity and press the Production entry and completion button.

Production print-outs
Automatic label print-outs functionality is available with the Production entry and Complete command. The reports in this case should be assigned in “on-close” context using the ES Report functionality (refer to II Appendix – Print per resource and location).
The embedded reports that can be used as is or customized as appropriate according to the implementation requirements are provided in the Menu > Production > Print-outs.

You can re-print the last pallet SSCC label by pressing the Re-print last container button in the Production receipt form.

Note that you can also use the Print progress report command at customization level. The provided functionality is the same as described in 39.1.5 Packing print-outs.
Context reporting
The progress of the received quantity versus the total requested quantity is shown per Selected WP (both in percentage and in quantity) and Selected Production Request Item.

Lot barcode and Lot info
When the product received has Lot monitoring enabled and the lot assigned in the production request item (as derived from the Production document order line item analysis) does not have the Lot barcode field updated, then the following pop-up screen appears upon production receipt in order to complete and assign the lot barcode. It is common that the lot barcode is known only after production takes place.

In the ESKiosk\ProductReceipt application folder, you can set a vb script in the SetLotInfo.vb file which determines which of the lot information that is generated during production receipt should be updated and how.
The prerequisite is that Lot should not have been assigned in the Production document order line item analysis, and therefore in the production request item. Lot should be generated by the Action entity according to the Lot info provided in the vb script.
The default script provided is the following:
Enable the following ProductReceipt ESKioskParams parameter:
|
|
AUTO_COMPLETE_LOT_INFO |
|---|---|
| Product Receipt parameters |
The AUTO_COMPLETE_LOT_EXPIRATION_DATE parameter is obsolete and maintained for compatibility purposes.
ESRF Production
Production receipt (against document orders)
To execute production receipt operation against a production receipt WP with the use of the ESRF mobile application, select ESRF Menu > 7. PRODUCTION > 5. PRODUCTION RECEIPT option. The option is also available in ESRF Menu > 1. IMPORT > 2. PRODUCTION RECEIPT in case when only production receipt is performed in the context of production and there is no need to use the entire production menu.
Insert the criteria if the relevant configuration is set in the Request special fields matching table (13.9 Request and action user defined fields). Fill in as appropriate – it is not a mandatory field; it is used as a filter criterion for production receipt requests.

 Scan either a Production work package barcode or a Production document order barcode or choose Production work package from the list (F3). This is a mandatory field. The “Production receipt work packages” public query returns the production receipt requests for documents in process state 2 – in WMS administration. Requests are filtered by the assigned resource. If both assigned and not assigned requests exist, requests with no assignment will be available to all RF users at second priority.


The date range for the reference documents is defined in the following ESRF Config parameter:
|
|
RefDocDateItervalDateRange |
|---|---|
| Common |
The date range for the requests is defined in the following ESRF Config parameter:
|
|
RefRequestDateIntervalDateRange |
|---|---|
| Common |
Both dates are set by default to minus/plus 30 days. Adjust as appropriate, but be cautious for any performance issues.
Insert the production receipt location. Press the F3 Search key to choose one from the available locations of zone type 6 – Production. If the request item has a predefined destination location, then this will be automatically applied to the Location field. If the production location set is parent to child production locations, then you will be asked to choose from the child locations.
 Choose the appropriate Receipt flow to continue.

Container
Mixed container
Bulk
Multiple containers
The receipt flows are the same as described in 22.1 ESRF Receipt.
The Product receipt context parameters that differentiate from the standard Receipt parameters are:
|
|
RC_PROD_WP_MANDATORY |
|---|---|
| Receipt from production |
The default value is true, meaning that the selection of the Production WP is mandatory (at the beginning of the flow). There is no reason to change the default parameterization; this parameter is obsolete.
|
|
RC_PROD_AUTOPRINT_NEWSSCC, RC_PROD_PRINTER_NAME, RC_PROD_NEWSSCC_LABEL, RC_PROD_PRINTSSCC_SCROLLERGROUP, RC_PROD_PRINTSSCC_SCROLLERNAME |
|---|---|
| Receipt from production |
As explained in all ESRF workflows, the printing settings parameters are now obsolete and replaced from the ES Report functionality. However, fully compatible with older implementations.
The following ESRF Config parameter should be set to “true” (by default) if you wish to receive in an existing container and reprint the label with the new additional content.
|
|
PROD_REPRINT_CONTAINER |
|---|---|
| Receipt from production |
If the received SSCC is also received in the context of another Work package, a relative message occurs: “SSCC has been received in other workpackage”. Disable this check by enabling the following ESRF Config parameter (same functionality as the one described in ESRF Physical receipt):
|
|
RC_PROD_ALLOW_SECOND_WP_PER_SSCC |
|---|---|
| Receipt from production |
When the selected production WP contains only one production request item, then the item is auto confirmed as long as the following ESRF Config parameter is enabled:
|
|
RC_PROD_AUTOCONFIRM_UNIQUE_ITEM |
|---|---|
| Receipt from production |
When the received quantity exceeds the item container type relation quantity, set “1” to the following ESRF Config parameter to warn the user with a relevant message or “2” to throw an exception message and stop the process.
|
|
RC_PROD_CHECK_DEFCONTAINER_QTY |
|---|---|
| Receipt from production |
Ad hoc production
Select ESRF Menu > 7. PRODUCTION > 4. AD HOC PRODUCTION RECEIPT to execute production receipt as ad hoc against a document order. In the context of production receipt, you can use this flow when there is no production order.
If you leave the Production Order selection field blank, the system creates a new production order with the use of the ESScrollerCommands\ESWMMobile\DummyFilter\ CreateADHocProductionOrder.xml automation. The system selects the first document type with WMS_Production_Order property. You may differentiate at customization level.
The generated Production Order has no Work Package. You can view the result in the Production monitoring view:

The next view is a selection view where you need to choose whether to create consumption or production receipts. Ad hoc consumptions are described in the following section. Note that the Produce semi-finished caption is not accurate. The process supports both finished and semi-finished product receipts. This is clear in the next view, where you need to choose either a finished or semi-finished (or both) Item Type.
You should then san the Item barcode and define all relevant stock dimensions (if not resolved from the Item barcode).
Define the Quantity and scan an existing or create a new SSCC or press enter to receive in bulk stock. You can choose among all container classes. Continue until all containers are received for the item, and choose another product to receive or press ESC to go back to the initial view.

The result of the ad hoc production receipts are presented in the Production monitoring view:

You can set captions in the following ESRF Config parameters should you wish to make visible for selection item grouping information such as family, sub category, etc.
|
|
Pro_FamilyCaption, Pro_SubFamilyFamilyCaption, Pro_CategoryCaption, Pro_SubCategoryCaption |
|---|---|
| Production |
The following two Production relevant parameters refer to captions set for Company dimension 1 and 2, functionality which is now obsolete and replaced by the Request special fields matching table.
|
|
Pro_COMPANYDIM1_CAPTION, Pro_COMPANYDIM2_CAPTION |
|---|---|
| Production |
Consumptions
Consumption as a warehouse operation is the export of stock from storage locations of zone type 12 – Consumption to satisfy the consumption requirements for the production / manufacturing of a finished or a semi-finished product.
Entersoft WMS® provides three methods to conduct consumption operation:
- Automatic consumptions based on the production’s order BOM and the actual produced quantity
- Physical consumption conducted with the use of the ESRF Consumption workflows.
- Back office consumption based on production quantity with user intervention on the final quantities
Automatic consumptions
Automatic consumptions are generated upon receipt from production either through the ESRF or through the ES Touch Product receipt workflows by enabling the appropriate parameters.
For each receipt from production action item, the receipt quantity is converted to consumption quantities based on the open consumption request item quantities that fulfill the same production document order. The pre-requisite is that the production order contains only one Product (or Semi-finished) line item. The system, then generates consumption action items and fulfills the open consumption request items. Overflow receipt quantities are also taken into account and are distributed accordingly to consumption overflows.
Enable automatic consumptions
Enable the functionality in ESRF Receipt from Production workflow by setting the Item Types for which the functionality is valid in the following Config parameter. The Item types that can be used are “1 – Product” and “8 – Semi-finished”. You can use both in a comma-separated list.
|
|
RC_PROD_ITEMTYPES_AUTO_CONSUMPTIONS |
|---|---|
| Receipt from production |
Enable the functionality in ES Touch Product Receipt ESKioskParams file with the following two parameters.
Set the Item types for which the functionality is valid (1,8 in a comma-separated list if both item types should be considered):
|
|
CONSUMPTION_ITEM_TYPE |
|---|---|
| Product Receipt parameters |
Set the Consumption Action Type international ID, recommended to assign the system’s default “ES.CONS”:
|
|
CONSUMPTION_INTERNATIONAL_ID |
|---|---|
| Product Receipt parameters |
The consumption of secondary raw materials, or packaging materials, such as the wrapping film of the received pallets, needs special handling especially when the measurement unit does not monitor decimals. For example, one piece of wrapping film is theoretically needed for the entire production quantity. The one piece cannot be divided per produced pallet. In order to avoid such conflicts, you can either exempt the measurement unit from the automatic consumption algorithm by setting it in the following WMS Company parameter. Multiple MUs can be set in a comma-separated list:
|
|
WMS_AutoConsumptionExcludedMeasurementUnits |
|---|---|
| WMS Company parameter |
Or you can set the rounding method used in the automatic consumptions for measurement units with no decimals. You have three options available: proportionally (default), ceiling and floor.
|
|
WMS_AutoConsumptionRoundingMethod |
|---|---|
| WMS Company parameter |
You can also exclude specific zone codes from automatic consumption by setting them in the following WMS company parameter:
|
|
WMS_EXCLUDED_ZONES_FROM_AUTOMATIC_CONSUMPTION |
|---|---|
| WMS Company parameter |
Create pending automatic consumptions
When the available stock in consumption locations is not adequate to cover the consumption requirements, automatic consumptions are generated for the shortage quantity. These actions do not update current balances; however, they do reduce the reserved stock. The Balance update field of the Action is set to “Request-action fulfillment” (refer to 13.3 Action types). The state of these actions is “in progress”.
The pre-requisite for the functionality is that the involved consumption storage locations are assigned to a storage system with Balance elimination enabled (refer to 8.3 Storage systems).
The functionality is by default enabled in ESRF Receipt from Production workflow (as long as the automatic consumptions are enabled). In ES Touch Product Receipt application, you need to enable the following ESKioskParams parameter:
|
|
ALLOW_SHORTAGE_IN_AUTO_CONSUMPTION |
|---|---|
| Product Receipt parameters |
In case when the pending consumption action item fulfill the request item with overflow quantity, you can trigger automatically the generation of replenishment requests (immediate replenishment requests are also included) by configuring the following ESKioskParams parameters. The functionality is available only in ES Touch Product Receipt application.
- REPLENISHMENT_REQUEST_TYPE_ID: pRPLPR (default)
- REAL_TIME_REPLENISHMENT_REQUEST_TYPE_ID: there is no default value, you need to assign the CS request type used in immediate replenishment
- PICKING_REQUEST_TYPE_ID: null
- REPLENISHMENT_RESERVE_ALL_PALLET_QTY: true
- REPLENISHMENT_SECOND_STEP_RESERVE_ALL_PALLET_QTY: true
- REPLENISHMENT_MODE_TYPE: 0 (this can be set to 0 or 1 depending on the Reservation Item mode as set in the relevant company parameter)
- REPLENISHMENT_IGNORE_DISTRIBUTION: true
- REPLENISHMENT_PACK_OPTIMIZATION_TYPE: 3 (with no packing optimization, this is the recommended value)
View and manage pending consumption action items in Menu > Production > Production transports monitoring > Pending consumptions.

The detail of the view returns the action items and the current stock based on the action item data. When stock becomes available, you can run the Balance update command to reduce the consumption location stock balances.
ESRF Consumption
Consumption with order
Select ESRF Menu > 7. PRODUCTION > 2. CONSUMPTION > 1. CONSUMPTION WITH ORDER to execute consumption actions against consumption requests.
Insert the criteria if the relevant configuration is set in the Request special fields matching table (13.9 Request and action user defined fields). Fill in as appropriate – it is not a mandatory field; it is used as a filter criterion for production receipt requests.
 Scan either a Production work package barcode or a Production document order barcode or choose Production work package from the list (F3). This is a mandatory field. The “Consumption work packages” public query returns the consumption requests for documents in process state 2 – in WMS administration. Requests are filtered by the assigned resource. If both assigned and not assigned requests exist, requests with no assignment will be available to all RF users at second priority.

The date range for the reference documents is defined in the following ESRF Config parameter:
|
|
RefDocDateItervalDateRange |
|---|---|
| Common |
The date range for the requests is defined in the following ESRF Config parameter:
|
|
RefRequestDateIntervalDateRange |
|---|---|
| Common |
Both dates are set by default to minus/plus 30 days. Adjust as appropriate, but be cautious for any performance issues.
Insert the consumption location. Press the F3 Search key to choose one from the available locations of zone type 6 – Production or zone type 12 - consumption. Note that in light production mode, the locations from which consumption is executed is not necessarily of type 12 – consumption, they are typically configured as 6 – production.
Enable the following ESRF Config parameter should you wish to filter the consumption locations according to the selected WP consumption request items “from” locations.
|
|
RMCon_FILTER_REQITEMS_LOCATIONS |
|---|---|
| Raw materials consumption |
Select the Item type to filter consumption requests or press enter to choose all. Press F3 to choose from the available Item types.

The ESPublicQueries\ESWMMobile\ESWMGetConsumptionsReqItem is then executed returning consumption request items with open quantity for the selected Work package, location (if exists in the request item) and Item Type.
Set the following ESRF Config parameter to false should you wish to auto-assign the Item according to the selected request item.

|
|
RMCon_CONFIRM_ITEM |
|---|---|
| Raw materials consumption |
Enable the following ESRF Config parameter should you wish the system to check whether the scanned SSCC belongs to the selected Production order.
|
|
RMcon_CHECK_PROD_ORDERS |
|---|---|
| Raw materials consumption |
You can choose to cancel the consumption request item open quantity by pressing the F5 key, or press the F6 key to continue with the Ad hoc consumption flow (described below) for additional quantity or adding ad hoc items against the selected document order.
Confirm the consumption quantity. If the quantity of the scanned container is equal to the open request item quantity then the system auto-suggests the consumption quantity.

The following two ESRF Config parameters check whether the stock to be consumed has a lot that is qualified as “blocked”. You need first to define the lot qualifier code which is used as a “blocked” lot:
|
|
LOT_BLOCKED_QUALIFIERS |
|---|---|
| Raw materials picking |
You can also define for which Item Types the check should be performed:
|
|
ITEMTYPES_FOR_BLOCKED_LOT_CHECK |
|---|---|
| Raw materials consumption |
The lot qualifier blocking condition is valid also in Raw materials transfer (see section below).
Container consumption & confirm consumption
Select ESRF Menu > > 7. PRODUCTION > 2. CONSUMPTION > 2. CONTAINER CONSUMPTION to scan containers for consumption against selected Production orders without confirming its contents. This is a special use case suitable for specific implementation requirements where the containers to be consumed have already been weighed before final consumption.

Enable the following ESRF Config parameter to display the 3. CONFIRM CONSUMPTION option in the Consumption menu.
|
|
CONFIRM_CONTAINER_CONSUMPTION |
|---|---|
| Raw materials consumption |
When this option is enabled, the consumption is made in two steps. In the first step (Consumption with orders) the consumption action is “in progress” (not completed). It should then, be confirmed in order to be completed and be available in the integration processes. Applies only for container consumptions. This is a special use case used in light production mode.
Ad hoc consumptions
Select ESRF Menu > 7. PRODUCTION > 4. AD HOC PRODUCTION RECEIPT > 1. SET CONSUMPTIONS to execute ad hoc consumptions against a selected open production WP or ad hoc against a new created document order.
The ad hoc consumptions against existing open document orders are used:
- To consume an item not included in the original document order.
- To consume additional quantity when the consumption request item quantity is fully executed
The ad hoc consumptions against new created document orders are often used to declare production waste.
The process is the same as described in 58.2.2 Ad hoc production. If the ad hoc consumption action item is against an existing request item of the selected order, then request action fulfillments are generated.

Return consumptions
Select ESRF Menu > 7. PRODUCTION > 3. RETURN CONSUMPTION to transfer back to the storage locations the remaining surplus stock from the production process and optionally consume the rest of the remaining quantity ad hoc (e.g. to clean the residues from the production machine). The ad hoc consumption generates an ad hoc document order in order to be handled accordingly in the integration processes.
- Scan the consumption location or the SSCC (depending on whether the stock to return is bulk or container)
- Select from stock or scan the Item barcode to be returned.
- Input the quantity to be returned (the available stock is displayed; you cannot return stock that is reserved for consumption).
- Input the destination location - mandatory
- Scan an existing or create a new SSCC (F1) - mandatory
- Choose whether to consume stock for the selected item in selected location (ad hoc consumption)
- Input the quantity to consume (by default the total available quantity).

The results of the process are shown in the Actions by stock item view:

At customization level, you can add stock if the actual consumption is greater than the system’s consumption and there is no stock remaining. In this case, the generated consumption is ad hoc with no document order. The sum of the ad hoc consumed quantity is distributed to the total production cost.
Back office consumption based on production
Use this process to register consumption actions against a production order based on the actual produced quantity and adjust the system proposed quantities where necessary. The proposed consumption quantity is calculated with the same method as in automatic consumptions, i.e. the receipt quantity is converted to consumption quantities based on the open consumption request item quantities that fulfill the same production document order. The pre-requisite is that the production order contains only one Product (or Semi-finished) line item.
This process is often used to adjust the automatic consumption quantities with actual consumptions, or to register to the system consumption quantities according to measures taken by 3rd party systems (manufacturing or production management tools).
Select Menu > Production > Production transports monitoring > Consumptions based on production to open the form.

The form consists of the Production order selection part and the Consumption request items details.
Input the production order in the Select production order field. Press F3 to select from available production orders. The view returns production order in process state 2 – in WMS administration with open consumption request items within a specified date range. Adjust as appropriate the selection criteria at customization level. Note that if the input production order does not meet the F3 criteria, it will not be considered as valid.

Press the  button to display the actual produced quantity in Service MU. This quantity is used to calculate the consumption requirements. You can modify the production quantity in order to recalculate the consumption requirements. This action does not update the actual production quantity.
In the Selected production order details context view, production monitoring relevant information is displayed (used only for information purposes).

In the Consumptions part of the form, the view displays the context consumption request items and relative stock balance information to assist the user in the final decision.
The view returns the sum of the quantity from consumption request items grouped by:
- Item
- Color, size, stock dimension 1 and 2
- Storage location
- Warehouse
- Site
Note that Lot dimension is not part of the grouping fields. This puts the constraint to use this process only when Lot is not monitored, or if it is monitored, it should be eliminated from balances. This is the default behavior, since lot balance elimination is the most frequent scenario used in advanced production module. Should you wish to differentiate, you need to customize both the view and the consumption generation automation.

The information displayed in the consumption view are as follows:
Pending estimated consumption quantity based on user quantity: this is the open consumption request item quantity as calculated based on the Input production quantity.
Quantity to be consumed: this is the editable quantity field where the user can do adjustments. If the pending consumption quantity is greater than zero, then these two quantities are equal. If there is no open pending request item quantity, then the quantity to be consumed may turn negative in case when the request item quantity is closed with overflow.
Closed quantity: the total of the closed request item quantity minus the reverse consumptions.
Stock: the current balance for the item, stock dimensions (excluding lot) and the storage location, warehouse, site.
Future stock: the future balance for the item, stock dimensions (excluding lot) and the storage location, warehouse, site.
Reserved stock: the reserved balance for the item, stock dimensions (excluding lot) and the storage location, warehouse, site.
Reserved stock for the Order: the amount of the total reserved stock that is allocated to the selected order’s consumption request items.
Stock shortage: this indicator is enabled when there is not enough available stock to cover the estimated consumption quantity:
Pending estimated consumption quantity > Reserved quantity for the order or
Pending estimated consumption quantity – reserved quantity for the order > Stock – Reserved stock
Generate the consumption action items for the selected rows with the New consumption and replenishment requests command.

If the input quantity exceeds the future available stock (for the item and storage location) you can generate replenishment requests and immediate replenishment requests with the use of the automation parameters. It is recommended to use the default values as set in the Activate in WMS Management process.
ESRF Replenishment (production context)
Select ESRF Menu > 7. PRODUCTION > 7. REPLENISHMENT to view the provided replenishment use cases in the context of production.

First/single replenishment, 2nd step replenishment from buffer and ad hoc replenishment based on demand use cases are supported. The functionality is the same as described in 38. ESRF Replenishment (shipment context). The production context replenishments support all types of replenishment requests - with reservations, immediate (no “from” storage locations) and with no reservations.
The following ESRF Config replenishment related parameters should be adjusted in the context of production:
- The distribution algorithm is not used in the context of production, therefore it is recommended to leave the distribution parameter disabled (default).
|
|
REPL_ENABLE_CONTAINER_DISTRIBUTION |
|---|---|
| Replenishment |
- Container swap is typically used in the context of consumption, therefore it is recommended to leave the swap parameter enabled (default).
|
|
REPL_ENABLE_CONTAINER_SWAP |
|---|---|
| Replenishment |
- If 2nd step container quantity is fully reserved, it is recommended to leave the transfer in transit location parameter disabled (default)
|
|
REPL_ENABLE_PALLET_INTRANSIT |
|---|---|
| Replenishment |
- Should you wish to enable the SSCC field at the end of the flow (to add stock to a container), then enable the following production specific parameter:
|
|
PROD_REPL_TOSSCC |
|---|---|
| Replenishment |
- Enable the following parameter should you wish the system to propose the quantity to replenish as the minimum between available stock and open request item quantity.
|
|
PROD_REPL_PROPOSESTOCKQTY |
|---|---|
| Replenishment |
- Enable the SSCC field at the end of the flow only for “Immediate” replenishments.
|
|
PROD_IMMEDIATE_REPL_TOSSCC |
|---|---|
| Replenishment |
- Set the immediate replenishment type in the following parameter:
|
|
REPL_RealTimeReplType |
|---|---|
| Replenishment |
- Change the request type for replenishment to the default production request type “pRPLPR”
|
|
REQUEST_TYPE_REPLENISHMENT |
|---|---|
| EBS Configuration |
ESRF Transfers to production area (light production)
Select ESRF Menu > 7. PRODUCTION > 1. TRANSFER TO PRODUCTION AREA to execute stock movement request items for Intra Warehouse Transfer orders that move stock from a raw and packaging materials storage area to the production area ready for consumption. As described in 57.2 Transfers to production area (light production), the Intra warehouse transfer order in the production context should have assigned the production order document in the alternative document field.
- Order: scan either a Stock movements work package barcode or an Internal transfers document order barcode or choose Stock movements work package from the list (F3). This is a mandatory field. The “Production stock movements work packages” public query returns the stock movements requests for intra warehouse transfer documents in process state 2 – in WMS administration with alternative code a production order in process state 2. Requests are filtered by the assigned resource. If both assigned and not assigned requests exist, requests with no assignment will be available to all RF users at second priority.
The date range for the reference documents is defined in the following ESRF Config parameter:
|
|
RefDocDateItervalDateRange |
|---|---|
| Common |
The date range for the requests is defined in the following ESRF Config parameter:
|
|
RefRequestDateIntervalDateRange |
|---|---|
| Common |
 Final location: scan or select a consumption/production destination location
Package type: same use as in picking workflows
Item types: The item types involved on this process are:

- Semi-finished (8)
- Raw materials (2)
- Secondary raw material (9)
- Package materials (12)
Choose one specific item type to filter the request item or choose all / press enter.
SSCC: scan or create new target SSCC to add contents to the selected container upon stock movement operation.
Scan the stock SSCC or input the “from” location for bulk stock.
The SSCC input is mandatory when the selected Item type belongs to one of the ones set in the following ESRF Config parameter:
|
|
ITEMTYPES_MOVEINCONTAINER |
|---|---|
| Raw materials picking |
If no specific item type is selected, then the SSCC scan is not mandatory.
If bulk stock or mixed container is selected, you need to define the item and stock dimensions. For homogeneous containers, item and stock dimensions are automatically resolved.
Input the transfer quantity.
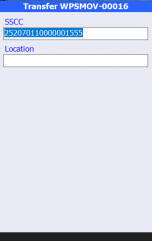

Variation 1 – Confirm location
Regarding location confirmation:
- Disable the following ESRF Config parameter to skip location user confirmation (auto-confirmed):
|
|
RMP_CONFIRM_FROM_LOCATION |
|---|---|
| Raw materials picking |
- Change the request item’s “from” location with another storage location, as long as there is adequate available stock, by enabling the following ESRF config parameter:
|
|
RMP_CHANGE_FROM_LOCATION |
|---|---|
| Raw materials picking |
- You can specify the allowed locations by defining the zone codes in the following ESRF config parameter:
|
|
RMP_ALTERNATIVE_ZONECODE |
|---|---|
| Raw materials picking |
Variation 2 – Confirm Item
Disable the following ESRF Config parameter if you wish to skip Item Confirmation (auto-confirmed):
|
|
RMP_CONFIRM_ITEM |
|---|---|
| Raw materials picking |
You are strongly recommended not to disable both Item and Location confirmation fields.
Variation 3 – Blocked lots handling
- Declare the lot qualifier (characteristic) codes to define lots that should be blocked from stock movements and consumption:
|
|
LOT_BLOCKED_QUALIFIERS |
|---|---|
| Raw materials picking |
- Define the zone codes of storage locations where the system should take into account the lot qualifier blocked condition on stock availability check.
|
|
ZONES_FOR_BLOCKED_LOT_CHECK |
|---|---|
| Raw materials picking |
Reverse productions and consumptions
Execute reverse production or consumption use case to correct/adjust the production or consumption quantity for selected production or consumption action items.
As explained in 13.8 Reverse action items – correction use cases, the reverse action items fulfill the document order at the reverse step code and do not re-open the quantity of the request item. The reverse step code for production is “149PR” and for consumption is “149CR”.
The reverse production use case is available in Menu > Production > Reserve production transfers > Reverse receipt from production while the reverse consumption use case is available in Menu > Production > Reserve production transfers > Reverse consumptions.
Both views return the sum of the action item quantity grouped by all action item fields (item, stock dimensions, location data and container data) for production orders that are in process state 2-in WMS administration. Consumption actions with “in progress” status are also included. Select the production actions to reverse and press the New revocation (new reverse production) command button.

Define the quantity to be reversed; it cannot exceed the selected forward quantity. The use case provides the functionality to auto-reverse the relevant consumption action items. The relevant consumption action item is the action item that fulfills the same document order line with the selected production action item to reverse. The quantity to be reversed in consumptions is based on the quantity to be reversed in production, following the same logic as in the forward automatic consumptions based on actual production quantity.
The functionality is also available in ES Touch Product Receipts application with the use of the Reverse last pallet production – consumption. The command button is available in the Actions of the production form and can be shown at customization level.

The functionality generates a reverse production action for the last pallet produced (whole quantity). It applies only for pallet containers. In order to reverse consumptions automatically, you need to set the Production reverse automation parameter “Auto-reverse consumption” to default enabled.
Complete production orders
Select Menu > Production > Production transports monitoring and run the WMS processing completed (assign to ERP) command in order to complete production orders (update the process state from 2 to 3).
The process checks whether there are pending quantities (consumption, replenishment or production quantities) and throws a warning message: “Document: $ADCode | There are consumption requests from production with pendencies”.
You can choose to cancel open requested quantities for productions, consumptions and related replenishments, This is recommended when consumption and replenishment requests reserve stock, in order to make the stock available again for other orders.

Define the request type of immediate replenishment in the relevant automation parameter should you wish to cancel the immediate replenishment open requested quantities.

Update productions and consumptions to ERP
Both partial and complete Update-to-ERP processes are supported in the context of production. Make sure that you have:
- Configured as appropriate the document transitions between source WMS Production document orders and target WMS Production documents as instructed in 56.1 Documents.
- Defined the appropriate depositor document type – action type mapping as described in 16.2.2 Depositor mappings.
- Assigned the appropriate action type properties as described in 16.2.3 Action type properties.
Partial update
There are two partial update use cases available: one concerning Productions, available in Menu > Production > ERP Integration > Receipts from production based on orders and one concerning Consumptions (if enabled), found in Menu > Production > ERP Integration > Consumptions based on orders.
Partial Update-to-ERP for production receipts
The partial Update-to-ERP process consists of a view that returns the necessary information for the automation Update Productions to take place. You can also use the information provided in the view in order to investigate issues that might occur during the process. Finally, you can schedule the partial update process (this applies to all partial update processes) with the use of Time scheduling tasks – refer to EBS-Technology EN for further instructions. The core automation (ESScrollerCommands\ESWMProduction\ProductionsToERP\ProductionsToERP_CoreCommand.xml) is by default job-enabled (there is no need for customization).
Productions to ERP view
The Productions to ERP view returns both fulfilled and document ad hoc action items for products, semi-finished, co-products and sub-products where:
- The action type has the property code PARTIAL_UPDATE and the ctx_PRODUCTIONS property. The criterion used to filter the partial update property type is the “Update from”.
- The action type has the step code corresponding to WMS_RECEIPT_STEPCODE (146) or the reverse step code (146R) – for light production, and WMS_PRODUCTION_STEPCODE (149P) or the reverse step code (149PR) for advanced production.
- The source document type has the property code WMS_PRODUCTION_ORDER.
- The Process State of the source document is 1 or 2 (assigned to WMS or in WMS processing)
- The status of the action is “completed”. The criterion used to filter “completed” actions is the “Stage”. You are advised not to change the default value of this parameter, unless you wish to investigate if there are still actions in progress.
- The column “Incomplete customization” indicates whether the depositor document type mapping has been configured properly. The value should be 1.
- If the source document has been transformed to a target document with the use of document transition and not through the Update-to-ERP processes (transition fulfillments), then the view excludes these document lines by default. The criterion used to filter this information is the “Actions are included that”. The view returns by default action items with no transition fulfillments or with transition fulfillments and pending quantity.
- The Registration date criterion filters the registration date of the warehouse action. The Search from (days before) is subtracted from the action registration date to derive the Issue date (from date) for the source document. The default value is 10 days before the action registration date. You may need to adjust the number of days according to the implementation requirements – pay attention not to cause performance issues.
- The “Receipt date based on” criterion is used in the Productions to ERP update process.
- The “Show transition documents” is by default set to Yes, i.e. the target document (if more than one then the top 1 target document) is shown – used for information purposes as well as in the Production Update-to-ERP process.
- The Open quantity is calculated as:
Line step action fulfillment Executed Quantity – Transition fulfillment Quantity (in service, base and alternative MU)
For ad hoc actions, Open quantity is calculated as:
Transport Action item “To” Quantity – Transition fulfillment Quantity (in service, base and alternative MU)
The Quantity to be updated is calculated as follows (used in the Production to ERP automation):
In case of a forward receipt action:
Quantity to be updated = Open Quantity (in service MU)
In case of a reverse receipt action:
Quantity to be updated = -1 * Open Quantity (in service MU)
The same calculations apply for Base and Alternative MU Quantities
The Action qty to be updated is calculated as follows (used in the Receipt to ERP automation):
In case of a forward receipt action:
Action qty to be updated = Transport Action Item “to” quantity
In case of a reverse receipt action:
Action qty to be updated = -1 * Transport Action Item “from” quantity
The Action qty to be updated (Base and Alt) are calculated as follows (used in the Receipt to ERP automation):
In case of a forward receipt action:
Action qty to be updated (base and alt) = Transport Action Item “to” quantity (base and alt) if Adhoc or else Executed quantity (base and alternative)
In case of a reverse receipt action:
Action qty to be updated (base and alt) = -1 * Transport Action Item “from” quantity (base and alt) if Adhoc or else -1 * Executed quantity (base and alternative)

Update productions to ERP process
The Update productions in ERP command provides two options to create/update target document line MUs: either with the source document order line MU or with production receipt action item MU.
 If Order MU is chosen, the process assigns the Quantity to be updated in base and alternative MU quantity columns, while there is no assignment to the Line Item MU. The line filler of the transition rule used by the process ensures that the Line Item MU is transferred from the source line to the target line.
- If Actions MU is chosen, the process assigns the Action qty to be updated to the target Line item quantity, the Action item MU to the Line Item MU and the Action qty to be updated base and alternative to the target line item base and alternative quantities accordingly.

The process starts with the creation of a new target document header.
- Target document type is selected based on the depositor document type mapping
- Document series is selected from the target document type series with default site the the source site (branch) of the view and default warehouse (if set) the action item warehouse (accordin to the source data view).
- The Process State of the target document is 2 – Assigned to WMS administration
- The document issue date is the Action registration date (smallest of the selected data) if the Receipt date based on criterion is set to 0 – Warehouse actions. Else, the Target document issue date is not assigned.
- The document origin is set to “process”
- The process applies the header filler of the source transition rule set in the target document type (refer to 16.2.1 Document transitions). If more than one source transition rules are set, the process identifies the one refering to the source document type.
The following conditions are validated:
- The Update productions process does not take into account “in progress” actions.
- If incomplete configuration is identified, a relevant message occurs and the process is interrupted.
- The Update productions process is interrupted if actions with fulfillments to source documents that have been transformed already to target receipt notes through document transition processes (accounting dpt) are identified.
The process covers the following use cases:
- Create target document lines from action item fulfilled with source document lines (no analysis)
- Create target document analysis lines from action items fulfilled with source analysis lines
- Create target document analysis lines from action item fulfilled from source lines (no source analysis – analysis target only)
- Create target document lines from action items with no fulfillments (ad hoc)
- Create target document analysis lines with no fulfillments (ad hoc)
For each use case the process creates Transition Fulfillments and Line Item Fulfilmments between the Source and the Target Document lines (or analysis lines). Exception to the rule are the ad hoc cases, where only transition fulfilmments are created. Line item fillers and analysis fillers of the transition rule in use are also applied per use case.
Once a Target Document is created, then the process updates the existing target document as long as:
- You choose to run the view with the parameter Show transition document set to Yes.
- The Issue date of the target document meets the limits set in the Registration date & Search from (days before) parameters.
As far as reverse production actions are concerned, these are taken into account by the process. The process identifies the target document line based on the line step action fulfillments and the transition fulfillments and abstracts the reverse quantity from the document line quantity, or deletes the entire target line if the whole quantity is reversed. It is required that the PARTIAL_UPDATE property has been assigned to the reverse action type and that the appropriate depositor action type-document type mapping has been configured.
Partial Update-to-ERP for consumptions
The Partial Update-to-ERP for consumptions process is identical with the relevant process for productions. The recommended target document type in this case is CON. Reverse consumption actions are also taken into account. The process identifies the existing target document line based on the line step action fulfillments and the transition fulfillments and abstracts the reverse quantity from the document line quantity, or deletes the target line if the whole line quantity is reversed.
Complete update
Once source document orders are completed, the complete update process is activated with the use of the following business rule
- Adjustment document: (WMS) - Production Note import when receipt completed by Production (default enabled)
The business rule is triggered by the change of the document order process state to 3 – administration to ERP. The completion process creates the target document based on the document order line step action fulfillments.
The action types of productions and consumptions as well as the reverse action types should have the COMPLETE_UPDATE property.
The process runs only for WMS Production Order Documents in Process State 3 – Administered to ERP
If Partial Update Target Documents are created, the process deletes the partial documents and creates the new final ones – one for productions and one for consumptions.
The target documents created from the Complete Update process are in Process State 3. The process executes the Update Productions/Consumptions to ERP commands and view with the Update from value of 1 (complete update). The process creates transition fulfillments.
Ad hoc productions and consumptions (no document order)
Use the ESRF Menu > 7. PRODUCTION > 9. KIT RECEIPT to generate ad hoc action items of action type RPROD with no document order.
Use the ESRF Menu > 7. PRODUCTION > 8. MATERIALS EXPORT to generate ad hoc action items of action type TPROD with no document order.
Note that ad hoc consumption/production action items can also be generated through Return from consumption use case.
If you wish to update ERP with ad hoc consumption/production action items and generate the target documents as configured in the document type mapping, use the relevant use cases in:
Menu > Stock > ERP Integration > Receipt from production
Menu > Stock > ERP Integration > Consumptions
Note that these integration use cases are the first integration processes developed in the context of production and by default they return completely ad hoc action items as well as ad hoc against document orders. You can differentiate the completely ad hoc actions from the document ad hoc actions at customization level.
==
==
Appendix – ESRF Android app
Full support of TOUCH in devices with or without hard keyboard – no need to change the flows supported by WMS Mobile.
Project photos (item or action) with FK (refer to 28. Goods inspection).
Added value: Entersoft WMS as Integrated with EBS (ERP & CRM) takes advantage of the information related to Items (CMS, E-Shops, etc).
Shoot photos per action type, mandatory or with question, shoot 1 per item or per batch of actions and file them in the relative item and action documents (refer to 28. Goods inspection).
Use camera for barcode / QRcode scanner if the device does not support the specific scanner.
Use camera and QR Code technology to setup a device.
A. Entersoft RF Android App – Touch
Configuration
 Touch mode parameter
Once enabled, the following gestures are enabled:
Horizontal:
Swipe up -> VKey ArrowDown
Swipe down -> VKey ArrowUp
Swipe left -> VKey ArrowRight
Swipe right -> VKey ArrowLeft
Single tap in empty space -> VKey Enter
Long press in empty space -> VKey FK3 // i.e. it performs investigation
Title bar:
Back icon in title bar.
Single tap on the left of the title bar -> VKey Esc
Single tap on the right of title bar -> VKey Enter
Status bar:
Single tap on the order caption (e.g. F12: Login) – the relevant order is executed
More button “…” to the right.
Pressing the more button a popup is shown in the middle of the screen containing a list of the available actions of the current view.
The use can select any of the available actions.
Selection view:
Single tap on any selection, enables the selection.
Field view:
Single tap on the caption of the focused field -> VKey FK51 which executes the command Barcode through which the scan barcode camera opens.
Theme
New theme android_touch with bigger font size.

Keyboard always opens parameter
In Field Views each time a field takes focus software keyboard automatically opens.
Captions only parameter
In status bar the command text of the view acitons is displayed.
E.g. F12:Login is displayed as Login.
This parameter affects pop up with the available actions invoked through the more button «…».
Camera Barcode scanning
Activated through the Command with Url="RF:CameraScan".
When this command runs the camera opens in barcode/QR code call

When the cross focus on any of the identified barcodes (colored)

Returns to the next screen
Returns as user input the barcode value
Insert enter after camera scan parameter
If the barcode has «\n» as a suffix or if the specific parameter is enabled,
- removes suffix before value input
- executes the Enter keycode so that the use does not press Enter.
Attention
The aforementioned functionality requires activated camera permissions as well as play services installed in the device.
The barcode identification is made through the google vision library, which is part of the play services.
Αν δεν βρει την βιβλιοθήκη η συσκευή θα κατεβάσει επί τόπου silently (χωρίς κανενός είδους ενημέρωση) την βιβλιοθήκη από το internet.
You may need to connect to the internet the first time the functionality is used.
If the device has not installed play services a relevant message occurs, while scanning is prohibited.
=
B. Device settings =

Import settings
In the menu items of the settings screen the import settings choice is available.
You need to input the Json file.
It can be done with copy paste or with QR code reading (with embedded scanner or with the new camera scan functionality) which the export settings view also has.
Save the settings with the relevant button on the up right.
After saving, the user returns back to the settings view.
A malformed json file check is available, which invokes a relevant exception message if identified
The CAMERA SCAN button is not shown if there is no camera on the device.
The system checks whether there is a camera installed as well as the camera permissions and invokes relevant exception messages to the user.

Export settings:
In the menu items of the device setting, the export settings option is available.
The QR code are the application setting in QR form (after converting toJson).
You can send the json file with email (icon on the up right).
For consistency reasons, the user is forced to save all the settings modifications before moving to the export settings view.
Appendix – Print per resource and location
The following paragraphs describe the required configuration for the ES Print functionality, used in Entersoft WMS Mobile and Touch applications to automatically print reports per storage location and/or resource.
Printers
Define and set-up the printers used in the installation in the following path: Configuration > Organization parameters > Printers and reports > Printers.
You need to assign the Printer ID, optionally a description and the company branch.

Make sure you define correctly the Printer Host (for network printers, define the name of the network computer) and Printer Name – use the Check printer button to validate the provided data.
Property set should be mandatorily assigned. If you have more than one property sets valid for the same printer, you need to create as many printer records as the derived property set variations.
Property sets are defined in Configuration > Organization parameters > Printers and reports > Printing property set. Examples of printing property sets are color vs black & white printing, paper size, etc.
Reports
Define the necessary reports called from WMS Mobile or Touch applications in the Configuration > Organization parameters > Printers and reports > Reports.

Assign a Report code and description
Define the ESFilter area in the View space field
Define the View name
Define the Table name of the view – this is the Master table alias of the view:

Define the parameter names in a comma-separated list; the parameter names depend on the use case. Use the Parameter Codes (not the Parameter Names) of the view. The required parameters are described in the relevant printing use case sections of the User Guide.

Define the report name (full name and type of file) as found in the view’s folder path.
Define the type of file (eal or crystal) and the property set.


Assign printers to locations and/or resources
Once you have defined the active installation printers you can assign them to one or more storage locations and/or resources.
Select Menu > Layout > Location management to assign or manage allocated printers for selected storage locations.

You can also assign more than one printers per location and define the priority in the Storage Location form:

Select Menu > Resources > Resources, open the Resource form and assign the appropriate printer in the relevant section of the form:

Associate printing reports with action types
Associate the defined printing reports per action type in the relevant section of the Action Type form:

- Define the order (series) of the report if more than one reports are associated with the action type
- Define the depositor (mandatory)
- Define the application – three choices are available: WMS Mobile, Packing Station (or C2C), Receipt from Production Station.
- Define the operation type: mandatory or optional. If “optional” is selected, the user is prompted to choose whether to print or not.
- If the selected application is either the Packing Station or Receipt from Production Station you need also to define the Context of the report (multiple choice is available):
- On close – enabled when the container is “closed” with the relevant button on the Packing Station and Production Station forms.
- On demand – it refers to the “Printing progress report” functionality of the Packing Station/Production station forms.
- Multiprint – concerns the mass printing of the total containers generated in the context of a specific Work Package. The functionality presupposes the “ALLOW_MULTI_PRINT” ESKiosk.exe parameter to be enabled.
- Define the number of copies printed per call
- Assign the Report
- You can optionally assign a script to describe the report printing conditions.
Examples
A typical example of a conditional printing script is to print only specific trade accounts. Use the ESWMActionItemISUD for printing scripts purposes.


- = Enable printing logs =
Printing logs are available in the Settings > Users > Event log as long as the following CSConfig\WMS.xml parameter is set to “1”:
|
|
PrintingLogging |
|---|---|
| WMS.xml parameter |

The log reports the user, the date and the workstation for which the following events happened:
- The starting point of the report printing (the specific report file is logged)
- The execution of the printing view
- The number of rows returned
- The connection with the printer (the specific printer is logged)
- Whether printing has finished successfully or not
|
|
Attention |
|---|---|
| Another printing related WMS.xml parameter is the PrintingAsync parameter. If the value is set to 1 then the .eal print files are printed a-synchronically, which is beneficial to the overall performance. However, this parameter should be enabled with caution and only after technical guidance. |
Appendix – Interfacing with other ERPs
A. Introduction
The following paragraphs describe the basic templates required for interfacing Entersoft WMS® with 3rd party ERP systems. Various data interchange methods can be used (file transfer, web services, views) based on the implementation requirements.
The recommended approach for interfacing is to import the document order data used in the Activation to WMS processes and export the target document data produced from the Update-to-ERP processes. Note that all integration processes (including Invoicing process) can run as scheduled jobs.
Use the following recommended templates as a guide and adjust as appropriate according to the complexities derived from the solution design.
“To WMS” templates:
- Items
- Customers
- Suppliers
- Receipt Orders
- Shipment Orders
“From WMS” templates:
- Receipts
- Shipments
B. “From” ERP “to” WMS data
B1. Master data – Item
| Seq No | Field name | Type | Size | Mandatory |
|---|---|---|---|---|
| 1 | Item code | VARCHAR | 20 | YES |
| 2 | EAN Code | VARCHAR | 32 | |
| 3 | Description | VARCHAR | 64 | YES |
| 4 | Analytical description | VARCHAR | 64 | |
| 5 | Short description | VARCHAR | 32 | |
| 6 | Main Measurement Unit | VARCHAR | 5 | YES |
| 7 | Alternative Measurement Unit | VARCHAR | 5 | |
| 8 | Main/Alt relation | NUMBER | 20 | |
| 9 | Supplier code | VARCHAR | 10 | |
| 10 | Supplier Item code | VARCHAR | 20 | |
| 11 | Supplier item barcode | VARCHAR | 32 | |
| 12 | Length | NUMBER | 20,6 | |
| 13 | Width | NUMBER | 20,6 | |
| 14 | Height | NUMBER | 20,6 | |
| 15 | Weight | NUMBER | 20,6 | |
| 16 | Volume | NUMBER | 20,6 | |
| 17 | Dimension MU | VARCHAR | 5 | |
| 18 | Weight MU | VARCHAR | 5 | |
| 19 | Volume MU | VARCHAR | 5 | |
| 20 | Active (0) / Inactive (1) | 1/0 | YES | |
| 21 | Lot monitoring | 1/0 | ||
| 22 | Serial number monitoring | 1/0 |
B2. Master data – Supplier
| Seq No | Field name | Type | Size | Mandatory |
|---|---|---|---|---|
| 1 | Supplier code | VARCHAR | 10 | YES |
| 2 | Supplier name | VARCHAR | 50 | YES |
| 3 | Address | VARCHAR | 80 | |
| 4 | Geo area | VARCHAR | 80 | |
| 5 | City | VARCHAR | 50 | |
| 6 | PO Box | VARCHAR | 20 | |
| 7 | Fax | VARCHAR | 20 | |
| 8 | VARCHAR | 30 | ||
| 9 | Telephone | VARCHAR | 20 |
B3. Master data – Customer
| Seq No | Field name | Type | Size | Mandatory |
|---|---|---|---|---|
| 1 | Customer code | VARCHAR | 10 | YES |
| 2 | Customer name | VARCHAR | 50 | YES |
| 3 | Address | VARCHAR | 80 | |
| 4 | Geo area | VARCHAR | 80 | |
| 5 | City | VARCHAR | 50 | |
| 6 | PO Box | VARCHAR | 20 | |
| 7 | Fax | VARCHAR | 20 | |
| 8 | VARCHAR | 30 | ||
| 9 | Telephone | VARCHAR | 20 |
B4. Data - Shipment Order Header
| Seq No | Field name | Type | Size | Mandatory |
|---|---|---|---|---|
| 1 | Order code | VARCHAR | 20 | YES |
| 2 | Customer code | VARCHAR | 20 | YES |
| 3 | Order type | VARCHAR | 10 | |
| 4 | Delivery date | Date | YYYYMMdd | |
| 5 | Notes | VARCHAR | 255 |
B5. Data - Shipment Order Lines
| Seq No | Field name | Type | Size | Mandatory |
|---|---|---|---|---|
| 1 | Order code | VARCHAR | 20 | YES |
| 2 | Item code | VARCHAR | 20 | YES |
| 3 | Quantity | NUMBER | 10 | YES |
| 4 | Measurement unit | VARCHAR | 10 | YES |
| 5 | Lot | VARCHAR | 20 | |
| 6 | Serial number | VARCHAR | 20 |
B6. Data - Receipt Order Header
| Seq No | Field name | Type | Size | Mandatory |
|---|---|---|---|---|
| 1 | Expected receipt order code | VARCHAR | 25 | YES |
| 2 | Supplier code | VARCHAR | 20 | YES |
| 3 | Order type | VARCHAR | 10 | |
| 4 | Expected receipt date | Date | YYYYMMdd | |
| 5 | Notes | VARCHAR | 255 |
B7. Data - Receipt Order Lines
| Seq No | Field name | Type | Size | Mandatory |
|---|---|---|---|---|
| 1 | Expected receipt order code | VARCHAR | 20 | YES |
| 2 | Item code | VARCHAR | 20 | YES |
| 3 | Quantity | NUMBER | 10 | YES |
| 4 | Measurement unit | VARCHAR | 10 | YES |
| 5 | Lot | VARCHAR | 20 |
C. “From” WMS “to” ERP data
C1. Shipment Order header
| Seq No | Field name | Type | Size | Mandatory |
|---|---|---|---|---|
| 1 | Order code | VARCHAR | 20 | YES |
| 2 | Shipment date | Date | YYYYMMdd |
C2. Shipment Order lines
| Seq No | Field name | Type | Size | Mandatory |
|---|---|---|---|---|
| 1 | Order code | VARCHAR | 20 | YES |
| 2 | Item code | VARCHAR | 20 | YES |
| 3 | Shipped quantity | NUMBER | 10 | YES |
| 4 | Measurement unit | VARCHAR | 10 | YES |
| 5 | Lot | VARCHAR | 20 | |
| 6 | Serial number | VARCHAR | 20 |
C3. Receipt Order header
| Seq No | Field name | Type | Size | Mandatory |
|---|---|---|---|---|
| 1 | Expected receipt order code | VARCHAR | 25 | YES |
| 2 | Receipt date | Date | YYYYMMdd |
C4. Receipt Order lines
| Seq No | Field name | Type | Size | Mandatory |
|---|---|---|---|---|
| 1 | Expected receipt order code | VARCHAR | 20 | YES |
| 2 | Item code | VARCHAR | 20 | YES |
| 3 | Receipt Quantity | NUMBER | 10 | YES |
| 4 | Measurement unit | VARCHAR | 10 | YES |
| 5 | Lot | VARCHAR | 20 | |
| 6 | Serial number | VARCHAR | 20 |
Appendix – Interfacing with Warehouse Automations
A. Integration with VNA forklifts
 The VNA (Very Narrow Aisle) forklifts are used in very high warehouse buildings (or storage areas). The required aisle width is only 1.7 – 1.8 meters long. The forklifts move their forks vertically to the aisle axis and have the ability to turn 1800 in order to put or pick pallets from both sides of the shelf. VNAs are replenished with pallets placed at the beginning of the aisle (buffer locations).
The VNA driver starts the forklift, which is then travels in a semi-automatic way towards its destination. The machine communicates with the WMS through the Logistics Interface. There are various channels of exchanging data between WMS and Logistics Interface (TCP/IP, Telnet, Webservice with WSDL, etc.). Entersoft WMS supports data interchange through File Transfer.
The forklifts are typically equipped with a tablet device. Entersoft WMS RF win emulator can be installed as is with native windows embedded soft keyboard.
A1. Interfacing with File Transfer
In the ESConfig application folder, define the folder and the name of the integration file with Logistics interface in the VNA.xml file. The content of the information is determined with the use of ESGOScript. In VNA.xml file, define the Script Code in the parameter <add key="ScriptCode" value="" />.
|
|
SCRIPT CODE |
|---|---|
| ESConfig VNA.xml |
Once the parameters are set, save the VNA.xml file in the CSConfig application folder.
The following script is provided as an example of integration with Jungheinrich VNAs that should execute putaway and replenishment actions. Note that the Script should be of Type VB.net and the Definition Type should be set to Function.
The Logistics Interface of the specific forklift requires the information in the following format:
B;A1-12-8
Where:
Β: the order type (map with action type, configurable)
A: the storage location aisle code (fAisleCode)
1 the side type of the aisle – left or right (AisleSideType)
12 the location column (LocColumn)
8 the height (LocLevel)
Example
Dim requestTypeCode As String = CStr(args("requestTypeCode"))
Dim orderType As String = " "
If requestTypeCode = "pRPLSH" Then
orderType = "A"
Else
orderType = "B"
End If
Dim aisleCode = args("AisleCode")
Dim aisleSideType =args("AisleSideType")
Dim locColumn = args("LocColumn")
Dim locLevel = args("LocLevel")
Dim result As String = String.Format("{0};{1}{2}-{3}-{4}", orderType,aisleCode,aisleSideType,locColumn,locLevel)
Return result
A2. VNA Tasks – ESRF Workflow
The typical workflows executed from a VNA forklift are putaway, replenishment, stock movements and pallet picking. Entersoft WMS supports replenishment (shipment context) and putaway workflows.
The functionality is by default enabled in the following ESRF Config parameter:
|
|
ENABLE_VNA_COMMUNICATION |
|---|---|
| VNA Tasks |
The workflow is executed through ESRF Menu > 2. STOCK > 11. VNA TASKS.
You can select a Sector Code, Aisle Code and one of the Replenishment or Putaway task types to filter the request items to execute.

The ESPublicQueries\ESWMMobile\ESWMGetVNAReqItems is executed, returning the open replenishment and putaway requests (if no specific task type is selected) sorted alternately by request type, with putaway request type first. By default the query excludes request items with no stock availability. Only 1st step replenishment requests are considered. The alternate sorting is determined by the system and not by the query (no customization is permitted).
You may need to adjust as appropriate the following ESRF config parameter, which defines the Request Type in use for replenishment:
|
|
REQUEST_TYPE_REPLENISHMENT |
|---|---|
| EBS Configuration |
Once you confirm the Execution of the selected request item from the “from location”, while the Logistics interface file is created in the CSConfig\VNAfolder path:

You should then confirm the Execution to the destination location, to generate the relevant action item.
You may also define a different replenishment location from the system’s proposed location, by enabling the following ESRF config parameter:
|
|
VNA_SCAN_RPL_LOCATION |
|---|---|
| RF Config.xaml\VNA |
Note that this flow can be executed without the use of VNA forklift (for example system is down). In such case it is recommended to disable the ENABLE_VNA_COMMUNICATION ESRF Config parameter so as not to generate Logistics Interface files.
Appendix – Integration with ES Service module
In implementations where Entersoft WMS® and Entersoft CRM® Service module are used, the following configuration should be set regarding the Shipments Invoicing process, so as to take full advantage of the Service task documents issuing functionality.
WMS updates the actual quantities that have been executed against a service order through the Shipment Routing documents invoicing process.
The service order (e.g. an SRC document) generates an SHO, which is then executed in various steps based on the implementation requirements until it is invoiced.
The target document type that should be generated for each service order depends on the service context policies.
The shipment routing document invoicing process also generates a target document per service order. However, in this case the generated document is an intermediate document before the final document which will be generated from the service task documents issuing functionality. One intermediate document is generated per SHO, no grouping functionality is provided in this case.
The shipment order document invoicing process should also handle the service request state, which should be turned to “completed” when WMS invoicing takes place in order to the Service Task invoicing process to consider it as pending.
To use the functionality, select the Shipment Document Orders to invoice in ERP Menu > Sales > Order Routing/Invoicing > Shipment orders invoicing and press run the Oder documents for invoicing process with the Activate service parameter enabled.

The invoicing process differentiates the selected document orders to be invoiced through the service transition rule (provided in the parameter of the automation) from document orders that should be invoiced with the selected transition rule.
The service transition rule is set in the invoicing automation hidden parameter: Service Transition.
As far as document type configuration is concerned:
Create a new trade document type – recommended code is “SHS” and description “Shipment routing document for Service operations”.
The document type should be created by copy of the SHO or of the SLN document type, depending on whether you wish to update ERP balances after WMS invoicing process or not.
Create a new transition rule from SRC (if this is the service shipment order document type) to SHS.
You should this by copy of the SRC to SHO transition rule if you do not wish to update balances or by copy of the SRC to SLN. This is the service rule transition that should be applied in the Shipment routing invoicing automation parameter.
